Sovereign of The Seas 1637 - Heavily modified Mantua kit

Well, the reconstruction of the build log photos is now finished and I can relax and enjoy Thanksgiving Dinner later today. I know it is tedious, but the photos add so much to this forum. I hope everyone who was affected will find the time to restore their photos as well.

Regards,
Bill
 
Bill,

I am most impressed by your research and your dedication to creating as historically accurate a model as current information will allow! I have been looking at this kit for awhile and you have inspired me to do something about that desire as soon as I finish my Heller Le Soleil Royal (equally researched and modified). Very well done, indeed!

Bill Morrison
 
Bill,

I have one question; do you have any photos of the original Mantua stern? I would greatly appreciate a comparison view if possible.

Thanks!

Bill
 
The Mantua stern is not even close to what the ship stern was like. i had to modify it a lot to even get it to approach something I could accept. I used a lot of stuff that was available from the old Amati kit of the Soverign. I bought some other items from other manufactures That I could modify.
 
WilliamMorrison post_id=23472 time=1507560235 user_id=4847 said:
Bill,

I have one question; do you have any photos of the original Mantua stern? I would greatly appreciate a comparison view if possible.

Thanks!

Bill

Hi Bill,

If you look on page 6 of my build log you will see a Mantua Sergal stern photo as provided in the kit compared to the Peter Lely stern and my representation.

Regards,
Bill
 
Wow! There are considerable differences! Looks like an opportunity for an after-market detail product, should anyone feel up to the challenge.

Bill Morrison
 
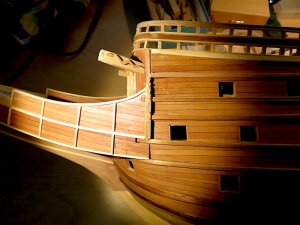
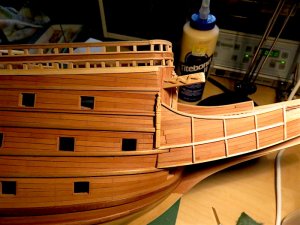
This photo shows the completed carving mounted on the hull. It serves as an ending to the wales etc. The vertical grooves in the base of the carving were carved and then finish filed with a rifler file.

SoS100.JPG

More to follow...............
 
Last edited:
Hi Bill,
just stumbled across your build log and amazed at the beautiful workmanship.
I know you have probably mentioned it in an earlier post, but what timber have you planked the ship with ? Superb.
 
Brian077 post_id=23624 time=1508019339 user_id=4000 said:
Hi Bill,
just stumbled across your build log and amazed at the beautiful workmanship.
I know you have probably mentioned it in an earlier post, but what timber have you planked the ship with ? Superb.

Thanks for your comments Brian. The hull is planked with Basswood strips and overplanked with strips of Swiss Pear which has been treated with a light coat of tung oil and immediately wiped with a soft cloth. The decks are planked with strips of American Holly with no finishing treatment.

Regards,
Bill
 
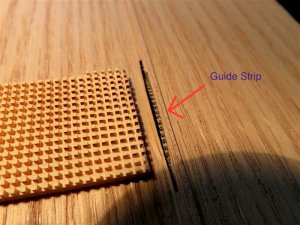
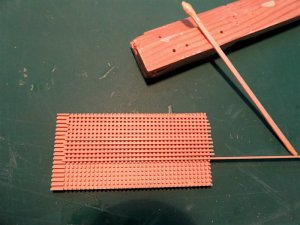
As a diversion from carving, I moved to making grates for the deck openings. The first photo shows a jig for cutting the openings in a piece of boxwood. The imbedded strip in the plywood is the same thickness as the saw blade, 3/32" which relates to 2 1/2 " at 1"78 scale. The saw blade protrudes through the plywood jig. The depth of the cut is slightly deeper than 3/32". You start by making a cut with the block of wood against the guide strip as if it was a fence. Then saddle the strip with the first cut and make the second. Continue until you have cut all grooves required. Then rotate the piece 90 degrees and repeat the process. This creates a grid of tiny square protrusions.

This photo shows the jig with a block of boxwood in process.

SoS102.JPG

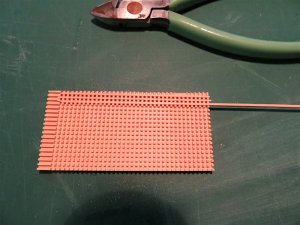
After creating the grid, I cut strips 3/32" wide and a little larger in height which will complete the grid formation. I lightly glued the bottom of the strip and layed it in the groove across the piece. Continue for all remaining groves. This is a very delicate operation as the tiny square protrusions are easily broken off if you are not careful.


The piece with most of the strips in place.

SoS103.JPG

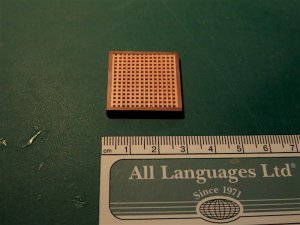
As the piece is thicker than the depth of the holes, it creates the illusion of holes going right through when the light hits it. All that remains is to sand down the top surface to the level of the protrusions and trim the edges.

SoS104.JPG

More to follow................
 
Last edited:
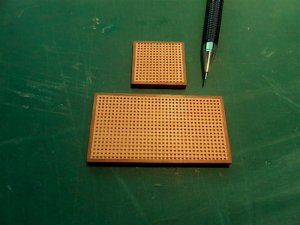
The next grate is now completed after edging and sanding. This is the grate shown being fabricated above and is to be located on the Mizzen deck. The sanding must be done across or at 90 degrees to the inlaid strips to prevent the tiny square protrusions from breaking off. There is one protrusion that broke in the larger grate that I had to glue back in place. Being 1/32" square, it was not easy to get it back. I rubbed a very light coat of tung oil on the grate being careful not to let the oil get into the holes. It darkens the grate slightly.

SoS106.JPG

More to follow..........
 
Last edited:
Back
Top