-

Win a Free Custom Engraved Brass Coin!!!
As a way to introduce our brass coins to the community, we will raffle off a free coin during the month of August. Follow link ABOVE for instructions for entering.
-

PRE-ORDER SHIPS IN SCALE TODAY!
The beloved Ships in Scale Magazine is back and charting a new course for 2026!
Discover new skills, new techniques, and new inspirations in every issue.
NOTE THAT OUR FIRST ISSUE WILL BE JAN/FEB 2026
You are using an out of date browser. It may not display this or other websites correctly.
You should upgrade or use an alternative browser.
You should upgrade or use an alternative browser.
Sovereign of The Seas 1637 - Heavily modified Mantua kit
- Thread starter modelshipwright
- Start date
- Watchers 35
Great work. This area is hard to get right and look clean.
Thank you Gary and Janos for your comments and for visiting my log.
Bill
Bill
Wow! That is some most impressive work!
Bill
Bill
Thanks for your comments Bill, they are very much appreciated.
Bill
Bill
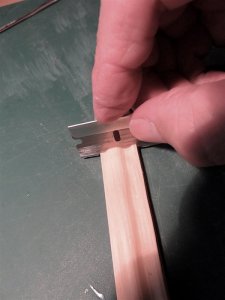
Next I decided to prepare a strip of boxwood to form the profile of sculptures on the sides of the hull separating sections that will contain more carvings. The profile is created by using a single edged razor blade and creating the desired profile in the blade so that when it is scraped along the boxwood strip, eventually you get the desired result.
This photo shows the blade on the strip so you can see the profile being scraped into it.
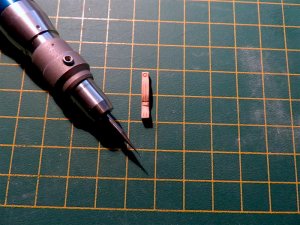
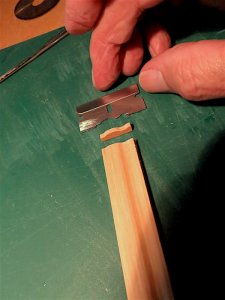
This shows one of the sculptures cut off on my table saw. Further finishing will be done to enhance the look of these pieces.
More to follow...........
This photo shows the blade on the strip so you can see the profile being scraped into it.

This shows one of the sculptures cut off on my table saw. Further finishing will be done to enhance the look of these pieces.

More to follow...........
Last edited:
Your planking is exceptional!
Bill
Bill
WilliamMorrison post_id=24032 time=1509385084 user_id=4847 said:Your planking is exceptional!
Bill
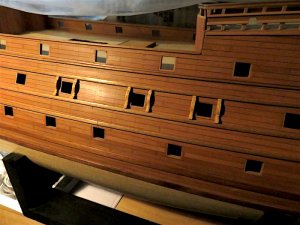
Thanks for your comments Bill. I scaled the planks for 1:78 scale and used a charcoal pencil to blacken the sides of the planks to simulate tar. The planking has a coat of tung oil applied. The planks are made of Pearwood.
Regards,
Bill
Hi Bill. You say you use a charcoal pencil to define the edges of the planks. It looks great, but have you tried other methods, e.g. a soft lead pencil or a permanent marker and found the charcoal pencil to give the best results? I am looking to do something on my next build and would be interested in your views. Cheers.
The reason I used charcoal is that it is a natural substance and will not change over time. Black paper can fade with exposure to light, marker pen can run with the grain and permeate the plank where you don’t want it and ordinary graphite pencil was not dark enough for me. If you look back in my log to photos of the holly decks, you can see the same effect using the charcoal artists pencil. Hope that helps but it is all down to personal taste.
Regards,
Bill
Regards,
Bill
Lovely ! Thanks for the demo on the blade and the carving tool.
Donnie
Donnie
Donnie post_id=24098 time=1509674635 user_id=5 said:Lovely ! Thanks for the demo on the blade and the carving tool.
Donnie
Thanks Donnie, I appreciate the comments.
Bill
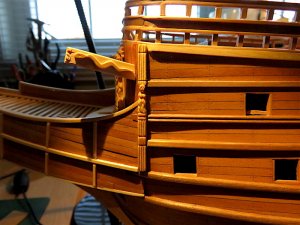
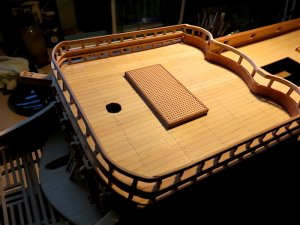
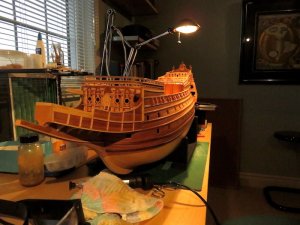
Well, I have temporarily given up on gratings while I await the arrival of my new Byrnes Table Saw. I think I will make a new fixture using the new saw when it arrives to fabricate the remaining gratings. Meanwhile I have been cutting off pieces from the strip I scraped in an earlier post and finishing them with decorative additions. The following photo shows them assembled to the port side upper gun deck gun ports. I had shown a few of them on the hull in a previous photo on the gun deck below this one. I was in error on that as these decorations are only on the upper gun deck.
More to follow...............

More to follow...............
Last edited:
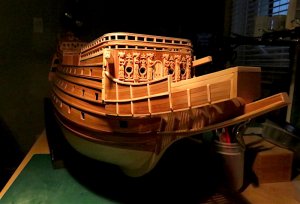
The next port side divider carving is underway. Boxwood is the wood of choice.
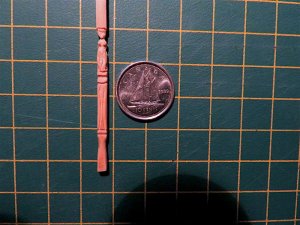
At this scale, it is hard to get the detail necessary to replicate the form but at viewing distance, about 3 feet, the brain accepts the image just like when a painting is viewed at a distance. Up close you see imperfections.
More to follow...................

At this scale, it is hard to get the detail necessary to replicate the form but at viewing distance, about 3 feet, the brain accepts the image just like when a painting is viewed at a distance. Up close you see imperfections.
More to follow...................
Last edited:


