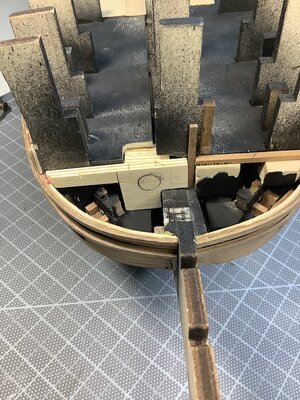
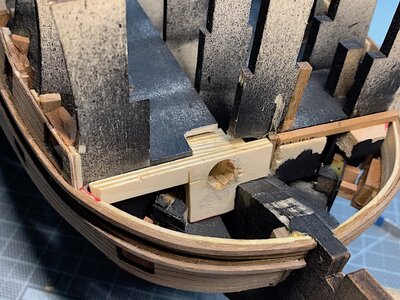
Sovereign of the Seas - Sergal 1:78 (with hopefully many added details)

Joined
Jun 8, 2020
Messages
465
Points
323

Location
West Coast
Hi Everyone,
I have wanted to build this kit for a longtime; I will “attempt” to super detail this project beyond the “out of the box” kit – as excellent as it is. I have the McKay book (filled with excellent line drawings and images; it will be an excellent guide, along with stunning museum examples; One of which was built by Ed Marple, and is on permanent display at the Channel Islands Maritime Museum, Oxnard CA.

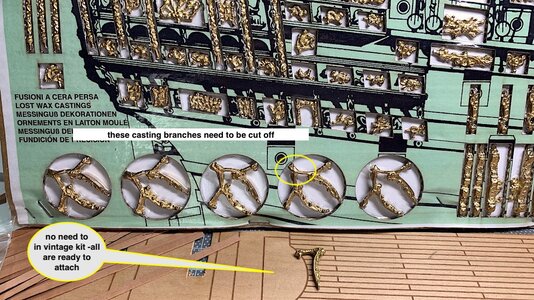
I recently acquired a 1980s “new in box” Sergal kit. That specific vintage product was of interest to me because the 650+ included decorative bits were all cast in solid bronze (that number includes cannons). The current kit is supplied with 650+ white metal/bronze bits that have been electroplated, and apparently, from what I’ve been told, result in loss of casting details?? (TBD) – though many other advantages are certainly in the current kit’s box as well, and not part of the 1980s box contents.

Given that this ship’s beauty, for-all-intent-and-purposes, is because of its 600+ ornamentations I got intrigued with the idea of solid bronze castings; luckily found a vintage kit.

That said, instructions were really non-existent, included lumber still looked very good, other included kit’s amenities were, well from three decades ago. Bronze sculptures were, for me, the prize….as well as the 1:1 plan sheets, and the included many solid wood fittings (nice).

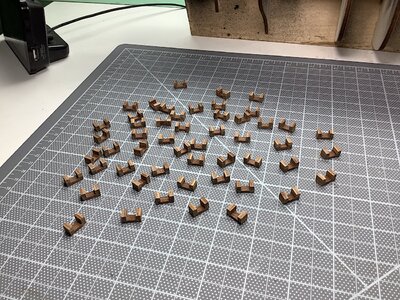
The vintage kit I received did not have a single super tiny missing bronze ornament – all were mixed up in fifteen or so zip lock baggies – took hours to go through them all –haha.

Moving forward two weeks – a large heavy UPS box arrived at my door hmm? – Turns out that I was gifted, for Father’s Day, with the current Sergal #787. So best of both kits will be blended into this single project. My family did not know that I had already purchased the much earlier discontinued edition.

I will balance this log with some, occasional, comparisons between the old and new kit – No criticisms of either just comparisons. That said, this log will focus on the build as it goes forward. I am lucky to have the best of both available.

So first log entry with some notes. – l will also keep the writing to a minimum going forward. Thanks for looking in, and if you are interested - welcome to the shipyard.

Regards,


1.jpg2.jpg3.jpg4.jpg5.jpg6.jpeg8.jpg9.jpg10.jpeg11.jpg12.jpeg13.jpg15.jpeg16.jpg
 
Hello, Oldflyier! Great start, even though, as you said the first steps are all the same way...but it is yours, and seems you well prepared for the journey. I Will watch as your build progresses. But don't keep us waiting for a long time...
 
Jim,
Thanks for your welcoming post. And thanks for the likes....
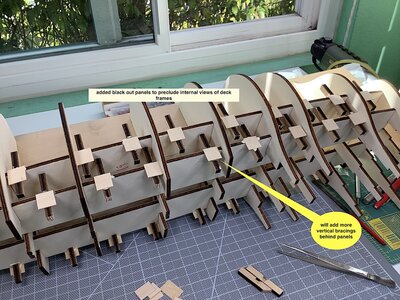
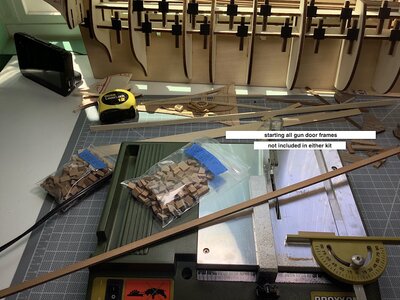
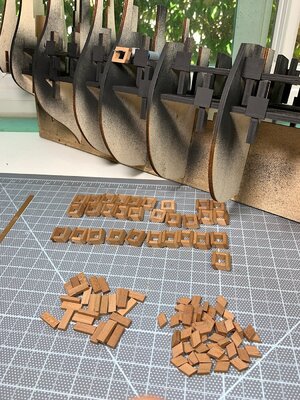
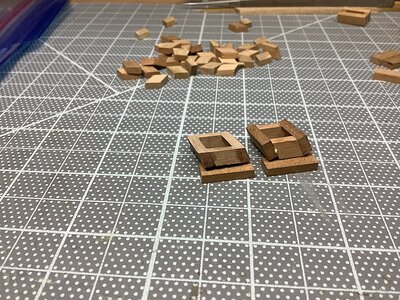
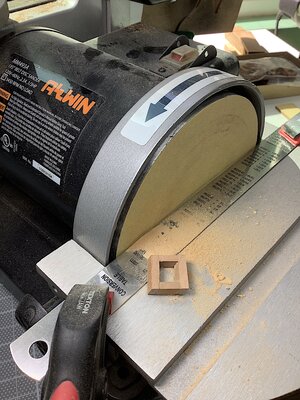
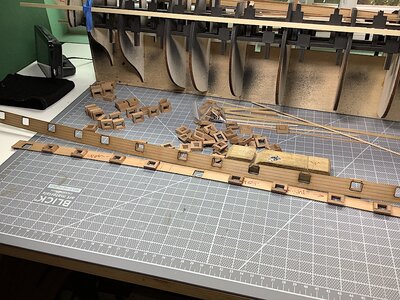
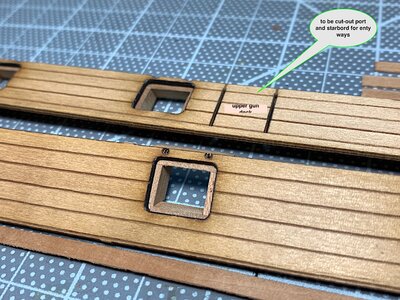
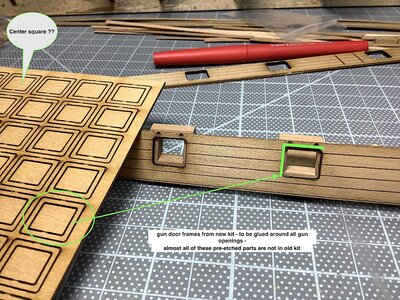
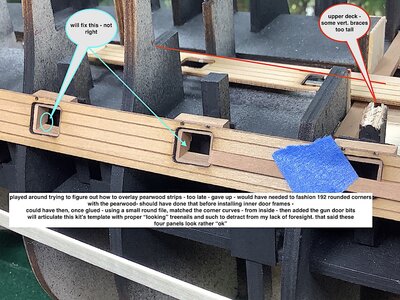
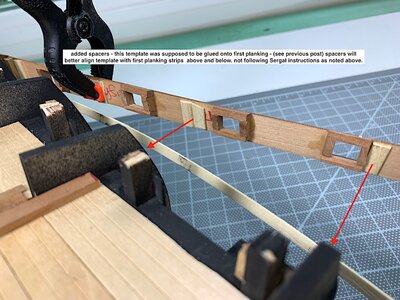
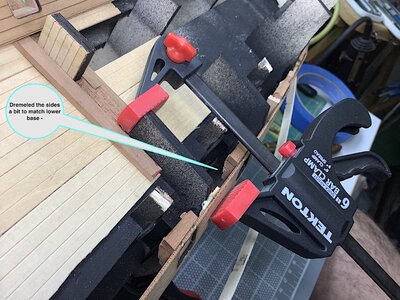
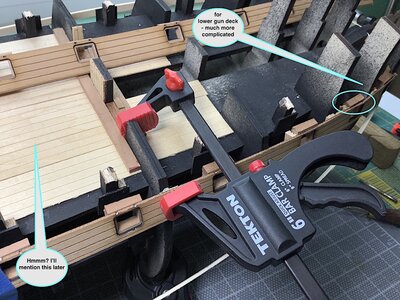
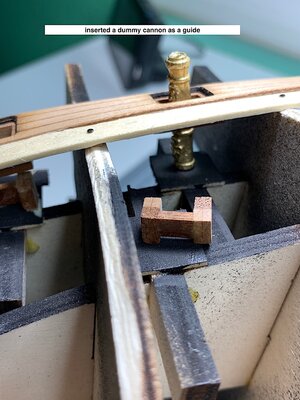
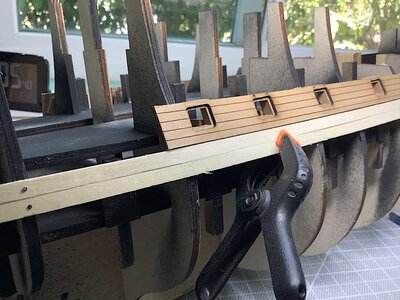
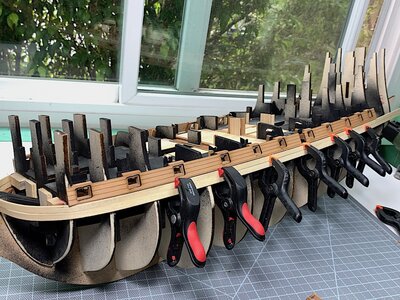
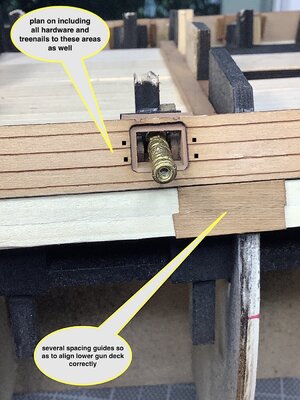
Added a bit of work – started the installs for the cannon door frames, as well as attaching one upper gun row. Experimental at this point – will learn, from this, for the other three gun templates.
Already missed the chance to overlay the template with pear wood strips – hindsight always 20/20 or (6/6) for the rest of the planet (We are the only county on this planet not using the – so smart – decimal scale hmmm? (Except for aviation altitude worldwide standardized using feet/flight levels also in feet)

PS: Will just stay on ship topic here on out Thumbsup


Regards,

1.jpg2.jpg3.jpeg4.jpg5.jpeg6.jpg
 
I have the feeling, that this building log will get very interesting.
not only the feeling - I know it.....
Many Thanks for sharing with us your project
 
Hi John, nice mix of old and new and also kit and scratch.... do you happen to know when Sergal stopped using the bronze castings? I have a 1990’s vintage kit and am wondering if it has the bronze castings as well, is there a way to tell? Thanks for any info....
 
Brian: much appreciated welcome aboard as well thanks

Stargazer:
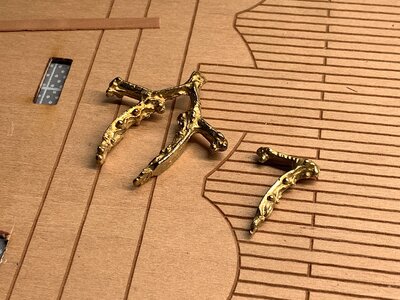
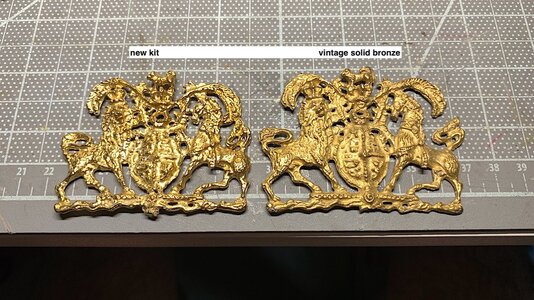
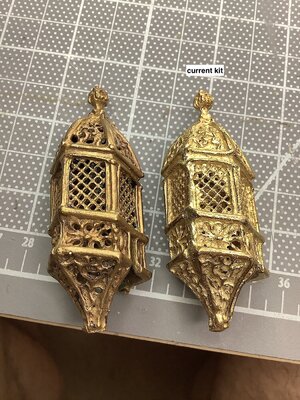
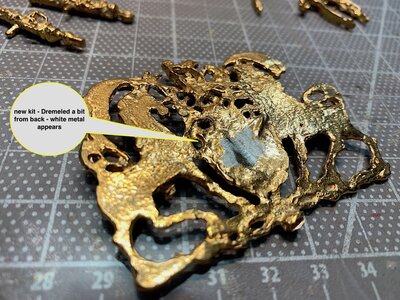
Your question got me interested - I had put all of the decorative blister packs away and ignored them - for now. Taking a look it appears as if the only casting difference is in the first two images below. All other 650+ bits are the same. That said, I got interested in possible casting differences from the vintage to the current issue. PS: The vintage kit had a black box )not the current green), no pre-printed main deck,

With some preliminary observations It indeed appears as if the electroplating will scrape off revealing a whitish metal below. I did the same for a vintage bit and the bronze stayed 'Bronze"

The bronze does not have the sheen of the new bits. They have been in a box for 30 years. I will clean them, polish them (I think) then clear-coat them.
Here are some other images FYI.


1.jpeg2.jpeg2a.jpeg3.jpeg7.jpgIMG_1847 copy.jpg
 
Thanks John! Based on your comparison I definitely have the solid bronze set, they have the same detail and color of your vintage examples - not shiny at all, and more yellow/brownish. When I first got the kit I was a little disappointed at the casting detail but seeing the newer ones you are posting they are at least 100% better than those! I like your gunport treatment, I may steal that technique but use 1/16 ply - sort of like gunport patterns on the newer kits... and add the port framing and carriage detail.... keep paving the way!!
 
What a difference......
.... you can really see the small (and bigger) damages the molds got over the years
Many thanks for the comparison - so everybody should search for the vintage kit
 
Hi, What a very professional, well laid out build log, interesting and easy to follow. I’ll be on board for this one. Like yourself I prefer the quality of some of the older kits, my Amerigo Vespucci that I am currently building here is from the same era as yours and the quality is so much better than the newer offerings from the Mantua group. Good luck with her.

ken
 
Stargazer: “mystery” solved :) . Also glad that one of my postings will be useful during your build. We certainly learn and get ideas from each other.

Uwek: no doubt that the bronze bits are very superior castings. But, the “upgraded” current kit has much to recommend it as well – just not the castings – unfortunate in that the beauty of this ship are its hundreds of castings. Everything else (wood) is a walk-around.

Ken: Thanks – welcome aboard –The Amerigo Vespucci is way beyond my skill set - a beautiful ship indeed -
There have been many postings on ship modeling sites in regard to your quality point. I will look for your log

==========================

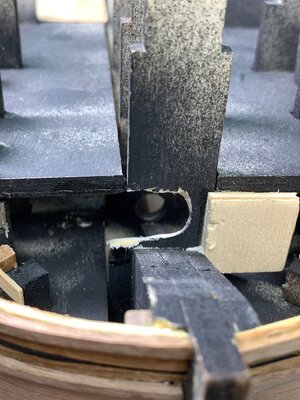
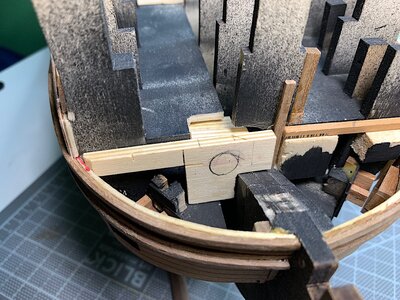
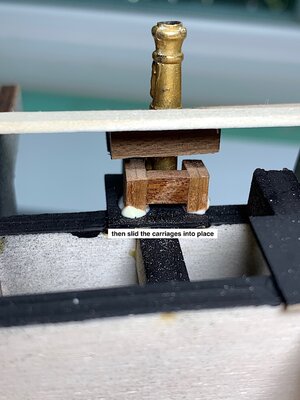
Moving a bit forward – starting to add dummy carriages within upper and lower gun decks (48). Needed to do this for upper gun deck before installing the lower gun deck templates – this allows room to work from under. That done; Now, I can install the two lower gun deck templates, pre-drill the cannon holes then add carriages.

Still not following Sergal’s build sequence at all so far, except, of course, for the frames. PS: I have made a very foolish mistake that I’m working on resolving. I’ll share as it seems easy to make -Hmmm

Thanks for dropping by, comments, and thanks so much for your interest in following along this new log.

Regards,

1.jpeg2.jpeg3.jpeg4.jpeg5.jpeg6.jpg7.jpg8.jpg9.jpg. Enjoy – yes,
 
Maarten - thanks appreciate your interest - Yes the infamous rounded tuck will be an issue for me. I don't trust my skills to get it perfectly right - And don't want to ruin the look of the hull. Those planking curves are too - out of my league - There is probably no doubt that McKay got this wrong. And certainly extending hull plankings to the false keel was even more of an error on his part. That aside the book is brilliant!

But will, instead, re-adjust the stern section to accommodate the extra details that I also want to add. hope to use this superbly built SoS as an example. (Don't know whom to credit for this build - found with a Google search)
Feel much more comfortable replicating something like this - More than arguably incorrect, but in my life absolutely no one in my life but you all at SoS, and me - would even know the difference haha...Oh, strictly as a point of personal esthetics I prefer the "look" of the non round tucked sterns -- however inefficient it would make use of the rudder.


stern correct 2 copy.jpg
 
One personal "issue" moderators if you happen to see this - could you send me a link on how to overlay my signature link for this log with just the
name of the ship - thanks in advance for your help
 
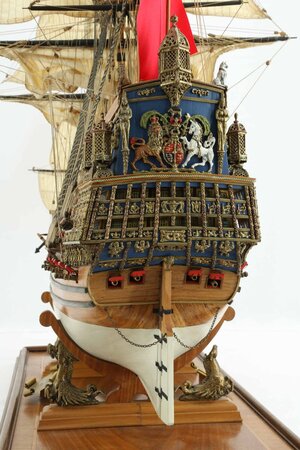
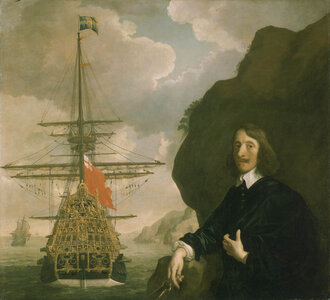
If you place filler blocks between the last two bulkheads just forward of the rudder, you can sand and reshape the entire lower stern before you start planking. Below is an example of a Mantua kit with a modified stern. My theory is that the shape of the tuck is actually between the square tuck in the model you showed above, and the well rounded one below. I believe the Sovereign of the Seas had a demi-round tuck, a hybrid between the two shapes. The Pett painting below shows a hard fold line in the hull where the side meets the transom, but that fold angle becomes less acute the farther you go down below the water, until the angle is blended flat near the bottom, where the transition from the bottom to the transom is round. I think the Dutch ship Batavia also had a demi-tuck. I know I'm not the first one to come up with this theory. It's the only way I can reconcile the Pett painting with the Payne and Lely drawings. It is known that the Royal Sovereign, which this ship and the Mantua model better represents, was the result of many changes from HMS Sovereign of the Seas as she was originally built, and had a round tuck. You have to choose whether you want the features of the ship in its early life or after major reconstruction around 1650. The Mantua decorations suggest that they made the model based on the ship after reconstruction.

Mantua Model SotS.jpg

Portrait of Peter Pett 1645-1450 High res.jpg
 
Hi, John. As I mentioned to you in my log I have a 50 year old kit of this model which is my next project. As you were discussing old versus new castings I thought that you might be interested in these from my kit. There must be at least 300-400 castings from various metals with different finishes, they are so good that they look like a display from a jewellers shop window and remember that these are from a 50 year old kit.

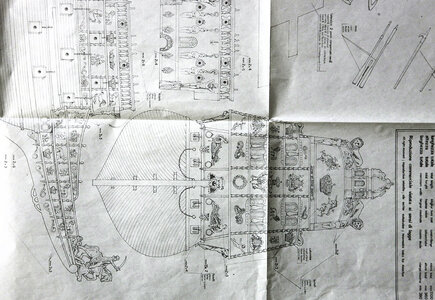
I have also shown sections of the plans, a note from the manufacturer says they were made from the original ships drawings, they are amongst the best, most detailed plans that I have seen, they were obviously made up for the ability to use for scratch building.

Mantua is not renown for having the best plans out there, especially for the rigging so if you need help with plans just ask and I can photograph sections of mine and post them here when needed.

Ken

fittings.jpg

plan 1.jpg

plan 2.jpg

plan 3.jpg
 
Darivs: Thanks for your very informative comments. Much appreciate your thoughts and time. Your points are all well taken. I located Nigel’s SoS log where much of the same discussion from several very knowledgeable members is also located. Indeed this ship has had “resurrections” from the waterline upwards. It does appear that Sergal’s decorative bits are from a later reconstruction, but their instructions indicate a rounded tuck early example.
I have seen three other images of the completed Sergal Sos that you posted -- Arguably the best Sergal example anywhere. After seeing this work I have been tempted to also paint the decorative bits hmm? Yes the modified stern could be the answer.

The mental issue that I have is not with the work as you initially suggest – certainly up to it. But, after when needing to lay the second planking (Pear) how to historically join all the planks into a correct seamless curved tuck is where I doubt myself. A square tuck would, obviously, preclude any of those fears.

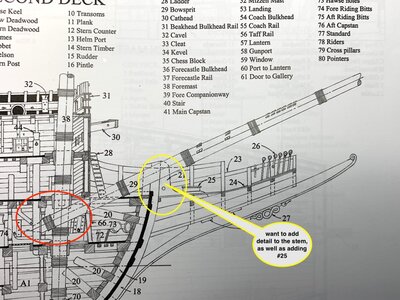
In any case after I install the lower gun decks templates – plan on doing some work at the bow area. Want to scratch build the beakhead’s deck as well as offsetting the bowsprit mast – as it should be. So lots of thinking will be devoted to those tasks – will visit the stern later. Thanks again for your very kind post.

Sergal instruction images are not close as what the tuck should look like IMO -


IMG_2085.jpg

Ken: Woa!! Now those bits are super impressive – yours is an example that I never knew existed. The metal decorative pieces are so excellent SUPERB indeed, and different from the two kits that I am familiar with. Yes the drawings, rigging sheets are certainly a huge improvement from the old and new kits as well.


Per your current build log – this SoS of yours is bound to be a superbly articulated project. Good for you – and thanks for your offer ---- may bother you later for some rigging images – I do have a several good rigging books. One of which is R.C. Anderson's The rigging of Ships…..
As is discussed on Nigels’ SoS log the Sergal rigging plans need to be tossed. Hmm.

Zoly: thanks - on my list
 
Darivs: Thanks for your very informative comments. Much appreciate your thoughts and time. Your points are all well taken. I located Nigel’s SoS log where much of the same discussion from several very knowledgeable members is also located. Indeed this ship has had “resurrections” from the waterline upwards. It does appear that Sergal’s decorative bits are from a later reconstruction, but their instructions indicate a rounded tuck early example.
I have seen three other images of the completed Sergal Sos that you posted -- Arguably the best Sergal example anywhere. After seeing this work I have been tempted to also paint the decorative bits hmm? Yes the modified stern could be the answer.

The mental issue that I have is not with the work as you initially suggest – certainly up to it. But, after when needing to lay the second planking (Pear) how to historically join all the planks into a correct seamless curved tuck is where I doubt myself. A square tuck would, obviously, preclude any of those fears.

In any case after I install the lower gun decks templates – plan on doing some work at the bow area. Want to scratch build the beakhead’s deck as well as offsetting the bowsprit mast – as it should be. So lots of thinking will be devoted to those tasks – will visit the stern later. Thanks again for your very kind post.
Remember, King Charles I insisted that the only colors on HMS Sovereign of the Seas be ONLY BLACK and GOLD. There's a reason why the Dutch called her the Golden Devil. It is very tempting to add color, like that red line between the wales just above the waterline on the DeAgostini model, because it can improve the appearance. But if you want the ship to be accurate, listen to what the sources say (like the Peter Pett Painting) and follow them, not the artists conceptions of model ship companies, ESPECIALLY Mantua (Sergal).
 
Last edited:
Kurt,
Noted - yes, I do plan on painting/staining all outer upper timbers in black. As I continue I will also add to as much historical accuracy as I am capable of - based on data that are available. First attempt.
Wanted to offset the bowsprit mast, as it was in this ship. The very forward located foremast did not allow for the traditional centering of bowsprit mast. This should work – I hope.
PS: Last image - Brilliant example built by Mr. Henry Culver and Mr. Paul Chalfin between 1918 and 1920
Thanks for the likes, dropping by and helpful comments.


00.jpeg1.jpg2.jpeg3.jpeg4.jpeg5.jpg6.jpeg7.jpeg8.jpg
 
Back
Top