-

Win a Free Custom Engraved Brass Coin!!!
As a way to introduce our brass coins to the community, we will raffle off a free coin during the month of August. Follow link ABOVE for instructions for entering.
-

PRE-ORDER SHIPS IN SCALE TODAY!
The beloved Ships in Scale Magazine is back and charting a new course for 2026!
Discover new skills, new techniques, and new inspirations in every issue.
NOTE THAT OUR FIRST ISSUE WILL BE JAN/FEB 2026
You are using an out of date browser. It may not display this or other websites correctly.
You should upgrade or use an alternative browser.
You should upgrade or use an alternative browser.
Staghound...Extreme clipper 1850 by rwiederrich 1/96
- Thread starter rwiederrich
- Start date
- Watchers 30
- Joined
- Jun 19, 2013
- Messages
- 968
- Points
- 393

Yeah...her bowsprit/jibbooms together were over 85ft long. Not entirely unheard of for that early clipper design. Part of the extreme clipper idea was to set a ridiculous amount of canvas....to capture as much wind as possible...to speed them along. As mentioned in other places, the flying jib was used on earlier packets and frigates. McKay, most likely incorporated this feature in his design of Staghound. From what I gather, it wasn't till Lightning was built, (four years later), that McKay re-introduced the flying jibboom again...in a more modified form.Hey Rob,
wow, very nice work again. But I'm really amazed that she had such a long jib boom. The madness..... op work, as always ...
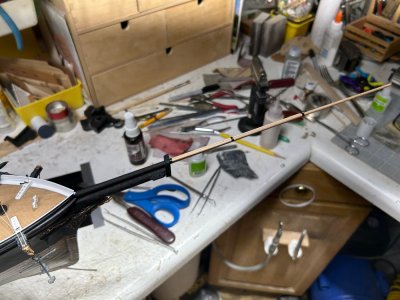
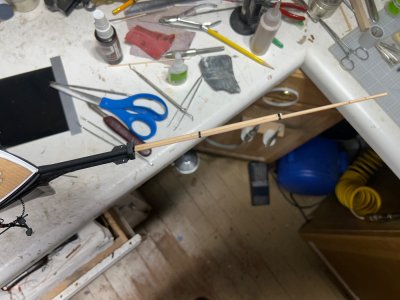
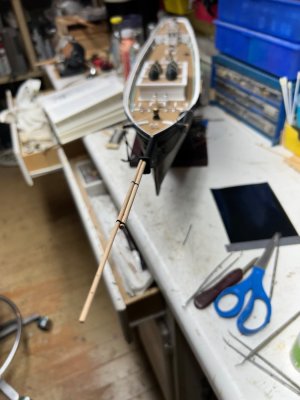
Thanks for the fine compliments. I will be remaking the flying jibboom to mimic a more robust and extended doubling design. One McKay most likely used on her.
Pics will follow.
Rob
Last edited:
- Joined
- Jun 19, 2013
- Messages
- 968
- Points
- 393

So true Rich. And we can also deduce from this, that McKay drew heavily from the rigging practices of the time...and as they quickly evolved...his designs followed suite. Flying jibbooms were popular in some rigging designs and not so with others. Proof....that the aim was to achieve the fastest combination of hull and sail plan. Resulting in many examples of *try this with that* mentality. To go faster, hulls shapes evolved....Rigging evolved, sail plans evolved. We can see clearly, that the first of the California clippers drew from earlier successes, laid down many years earlier......but became obsolete in the wake of rapidly developing new and efficient ideas.Rob,
If we didn't have rock-solid documentation from multiple sources about the full length of the bowsprit it would appear that we're being excessive. In this case, relocating Cornelius McKay's small sail plan is a godsend as it confirms the spars of Stag Hound.
Rob
- Joined
- Jun 19, 2013
- Messages
- 968
- Points
- 393

- Joined
- Jun 19, 2013
- Messages
- 968
- Points
- 393

- Joined
- Jun 19, 2013
- Messages
- 968
- Points
- 393

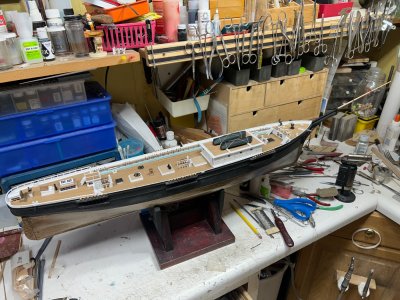
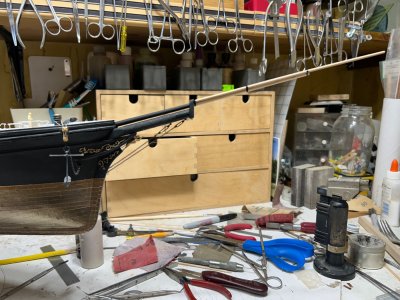
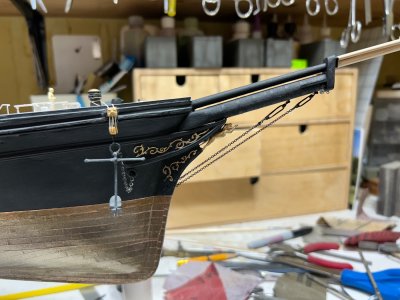
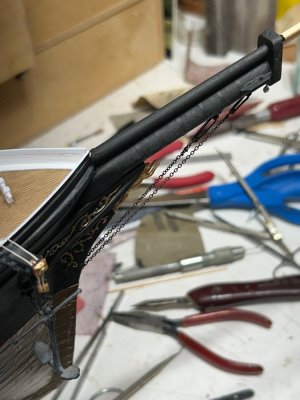
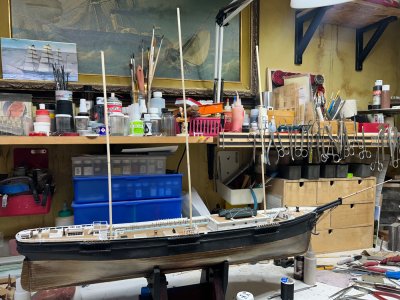
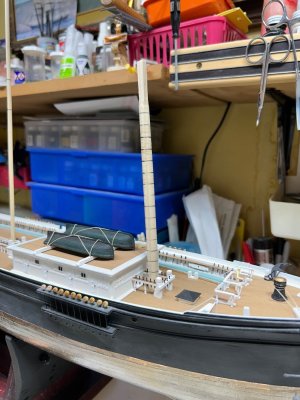
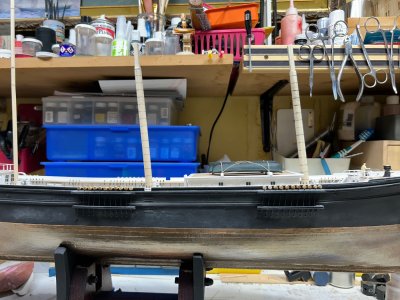
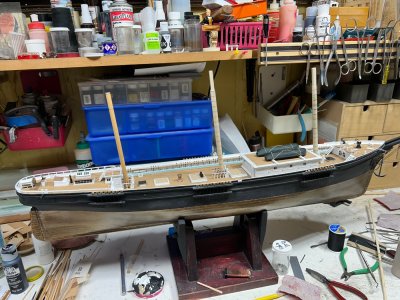
I remade the flying jibboom.
Rob
View attachment 543603
View attachment 543604
View attachment 543605
View attachment 543606
A impressive jibboom, Rob. And the bobstays give her some elegant lines. And the impression of the masts ……. She is great!
Regards, Peter
- Joined
- May 21, 2023
- Messages
- 470
- Points
- 238

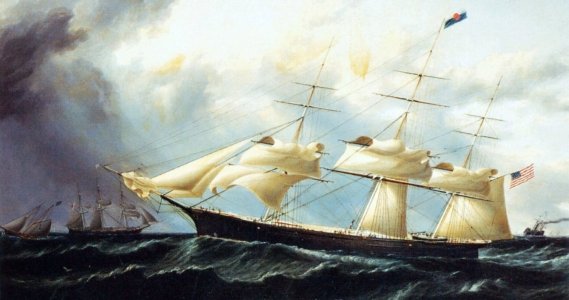
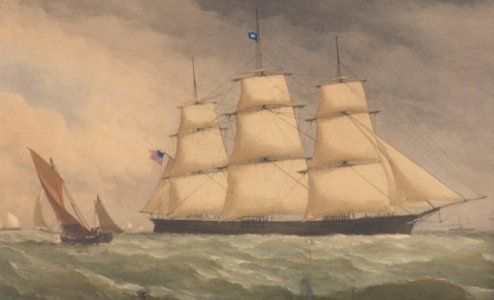
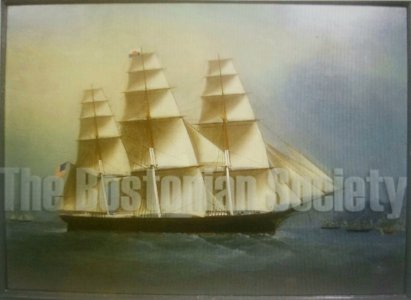
Rob, what's also apparent from the few contemporary pieces of art we have of her is that this 22' flying jibboom extension was soon ditched after her launch, since they depict a shorter bowsprit. The one concern I would have of a such a long spar would be the chance of burying it in the massive seas of Cape Horn... in such a case it could lead to bringing down the top hamper of her foremast.So true Rich. And we can also deduce from this, that McKay drew heavily from the rigging practices of the time...and as they quickly evolved...his designs followed suite. Flying jibbooms were popular in some rigging designs and not so with others. Proof....that the aim was to achieve the fastest combination of hull and sail plan. Resulting in many examples of *try this with that* mentality. To go faster, hulls shapes evolved....Rigging evolved, sail plans evolved. We can see clearly, that the first of the California clippers drew from earlier successes, laid down many years earlier......but became obsolete in the wake of rapidly developing new and efficient ideas.
Rob
Rob, your reworked flying jibboom looks more sensible and far more secure as I'm sure there would have been a recessed area in the cap to secure it too. Crazy how long this is. Even with multiple sources of confirmation it just looks so lengthy compared to what we're familiar with.I remade the flying jibboom.
Rob
View attachment 543603
View attachment 543604
View attachment 543605
View attachment 543606
- Joined
- Jun 19, 2013
- Messages
- 968
- Points
- 393

Indeed. It was nearly routine for alterations to be made to original rig designs. Like I mentioned earlier and as you yourself mentioned just now. Driving an overly extended jibboom into a raging wave caused many dismasting of clippers.
The McKay drawing of her sail plan, clearly shows her vary long flying jib……as she was most likely originally designed. That is how she will be represented here.
Rob
The McKay drawing of her sail plan, clearly shows her vary long flying jib……as she was most likely originally designed. That is how she will be represented here.
Rob
Last edited:
- Joined
- May 21, 2023
- Messages
- 470
- Points
- 238

Rob, by the time she's fully rigged with her very lofty masts and very long bowsprit combined with her 40" at half-floor body, people will finally see what an extreme clipper was.Indeed. It was nearly routine for alterations to be made to original rig designs. Like I mentioned earlier and as you yourself mentioned just now. Driving an overly extended jibboom into a raging wave caused many dismasting of clippers.
The McKay drawing of her sail plan, clearly shows her vary long flying jib……as she was most likely originally designed. That is how she will be represented here.
Rob
- Joined
- Dec 5, 2022
- Messages
- 1,119
- Points
- 443

I think I can already see what an incredible ship this was. But I also recognise how Rob builds it wonderfully here in the build report with the greatest care and love. Simply world class! Respect!!!Rob, by the time she's fully rigged with her very lofty masts and very long bowsprit combined with her 40" at half-floor body, people will finally see what an extreme clipper was.

- Joined
- Jun 19, 2013
- Messages
- 968
- Points
- 393

Thanks Gentlemen. I try to do my best. And I've surely made my share of mistakes and taken many shortcuts to get to where I am currently with this build.
I apologies for not being so active as of late. I have been helping my daughter and son-n-law move across town. I hope to be spending more time in the shipyard and finishing up some minor details as I prepare for the making of the lower masts.
I'll probably make all the masts ....before I begin with the mizzen first(as is my habit), to rig the yards and then move forward. One full mast at a time.
Rob
- Joined
- Jun 19, 2013
- Messages
- 968
- Points
- 393

- Joined
- Jun 17, 2021
- Messages
- 3,200
- Points
- 588

I'm exhausted just thinking about it. I'm in spar mode myself on Flying Cloud. Talk about tedious and repetitive!
At the rate I'm going it'll be a long time between posts. You can be sure I'll have a close eye on yours for how-to tips!
At the rate I'm going it'll be a long time between posts. You can be sure I'll have a close eye on yours for how-to tips!
- Joined
- Jun 19, 2013
- Messages
- 968
- Points
- 393

One reason Peter, why I tackle one mast(with yards afixed) at a time, when rigging. I break each mast (with its yards) down as a single project. NOT 3. for some reason in my mind, it makes it feel as if I'm actually accomplishing something, without it all feeling like it will never end. I will make each mast first. then set the main and fore masts aside and focus entirely on the mizzen. When I finish all its rigging...running then standing, I'll glue it in place, THEN finish adding the lower shrouds/ratlines. Once the lower shrouds are added, I can safely add the crossjack yard. Secure all the rigging to appropriate belay points....add the backstays......then move forward to the main mast.....etc.I'm exhausted just thinking about it. I'm in spar mode myself on Flying Cloud. Talk about tedious and repetitive!
At the rate I'm going it'll be a long time between posts. You can be sure I'll have a close eye on yours for how-to tips!
This process works well for me. Taking it and breaking it all down into smaller bite size pieces. You can see my process on my Glory of the Seas build log.
Breakdown:
1. built mast
2. build each yard(with furled sails, and their rigging)
3. affix each yard to mast, beginning with the skysail, down. TIP: Do not add the lower yards at this point, wait to add the shrouds and ratlines first, so as not to damage the yard during install. Also, provides much needed room to work)
Do all of this OFF model
4. secure mast to hull
5. run and belay all haulyards, lifts, sheets
6. rig, remaining lower shrouds/ratlines. THEN, run through shroud fairleads, the bunts, clews....belay
7. now add, the lowest yard
8. rig booms
9. add backstays
Repeat on main mast. Once done...THEN I add the stays for the mizzen. so forth and so on. Always moving forward and from inside to out.
Before you know it, (probably a year or two down the road), you'll be done.
As far as I'm concerned about rigging......*Go big or go home*. Your mileage may vary.
Rob
- Joined
- Jun 17, 2021
- Messages
- 3,200
- Points
- 588

Thanks, Rob. Very helpful and very timely. I'm making each spar as its' own little project. None of the masts and their three parts (also called spars) are as yet permanently affixed, so I can assemble and disassemble as needs be as I progress. So, I can and will follow your instructions. I don't know if I'll be adding sails (furled or otherwise) but that door is still wide open. Once I get all that done and the necessary blocks, eyebolts, etc. in place then I'll move on as you instruct. Planning ahead and proceeding without getting in my own way is, as always, in this (or any) endeavor the key to success. Thanks so much for your universally applicable process for sticks and strings. 

Maybe you could post these instructions as a downloadable discreet set to print out and keep with our model building archives. Definitely a plus!
I've made a note of Staghound post#615.
Pete

Maybe you could post these instructions as a downloadable discreet set to print out and keep with our model building archives. Definitely a plus!
I've made a note of Staghound post#615.
Pete
Last edited:
- Joined
- Jun 19, 2013
- Messages
- 968
- Points
- 393

Thanks Allan. Belaying pins at this scale are typically around 3/16" Keeping things to scale is very important to me....since it Identifies a model from a nice mantle piece to a museum quality model. I also prefer to lightly weather my models...depicting a real world feel.This may be a repeat comment but it is so nice to see belaying pins made to scale compared to the pins that look more like bowling pins we see too often.
Nicely done!!!
Allan
Rob
- Joined
- Jun 19, 2013
- Messages
- 968
- Points
- 393

If you've perused my Glory of the Seas log. you will see, how I built each yard to its full detail, separately. Then, I began adding them to the mast proper, starting at the Sky orThanks, Rob. Very helpful and very timely. I'm making each spar as its' own little project. None of the masts and their three parts (also called spars) are as yet permanently affixed, so I can assemble and disassemble as needs be as I progress. So, I can and will follow your instructions.
Royal sail and working down. With the mast and yards being off hull.....it made the build so much easier. I could rotate and add details without fetter, or interference from the other masts and their rigging. Once done, I simply glue the entire finished mast/yard section in place. Then proceed as I have outlined earlier.
Rob
- Joined
- May 21, 2023
- Messages
- 470
- Points
- 238

Peter,
Sometime soon my second Glory of the Seas installment will be published in an upcoming Nautical Research Journal magazine. It covers in great detail the masting and rigging process Rob just described with a great deal of in process pictures to refer to. If you like, I can share a copy of the word document with you. Please don't share with anyone else as I'm expecting it to be included in an NRJ issue soon and I wouldn't want to upset them.
Sometime soon my second Glory of the Seas installment will be published in an upcoming Nautical Research Journal magazine. It covers in great detail the masting and rigging process Rob just described with a great deal of in process pictures to refer to. If you like, I can share a copy of the word document with you. Please don't share with anyone else as I'm expecting it to be included in an NRJ issue soon and I wouldn't want to upset them.

