• Win a Free Custom Engraved Brass Coin!!!
    As a way to introduce our brass coins to the community, we will raffle off a free coin during the month of August. Follow link ABOVE for instructions for entering.

thickness sanders

Dave Stevens (Lumberyard)

Sponsor: dlumberyard
Sponsor
Joined
Dec 1, 2016
Messages
6,313
Points
728

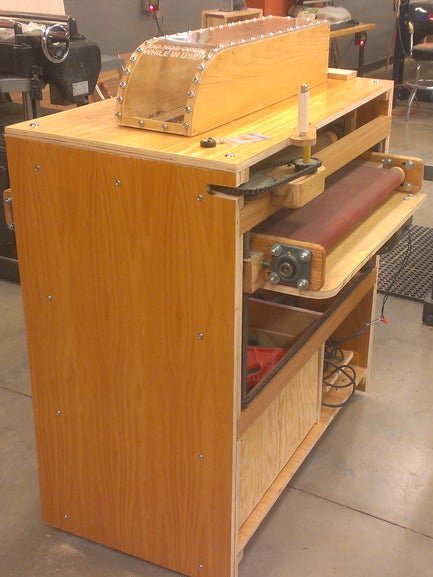
Kit builders would have little to no use for a thickness sander planking material is always provided in the kit. But kits often provide just one size plank width for hull planking which to do a proper planking on a hull different widths of planking are needed for shaping planks, a garboard and bottom planks are wider that top planks. So in the case of kit bashing or scratch building a thickness sander is an essential tool. I have a big double drum thickness sander that 2 men could not pick up, i do not have a small hobby size sander so i cannot comment on any of the machines. This is just what is available plus the fact you can make a thickness sander yourself. There are also mid-size machines but unless you're into mass production of milling wood or general woodworking they are not needed for building model ships

what are your comments


If you intend on doing your own dimensioning and finishing doing it by hand is a labor intensive process, so you might want to consider one of those hobby size thickness sanders OR build one it is not that hard to do.
all these hobby sanders are hand fed they do not have power feed. It is going to take a little practice before you can achieve results and here is why.

if you hesitate even the slightest you will grind in a trench because the wood stopped moving but the sanding drum did not.
the wood has to be fed (pushed) into the sanding drum then pulled out from under the drum the results of shifting from push to pull creates a stop moment.
the green arrow is the stop point and will leave a mark, the red arrow is the slight change from push to pull and all it takes is a fraction of a second to leave a mark and the blue arrow is where you start the pull.

wa19.jpg

Feed rate changes the thickness if you start feeding slow and as you reach the end you pull a little faster and the wood is slightly thicker. These small machines are designed to take off a few thousandths at a time and not used to hog off a lot from rough lumber. So your best results are to take light passes at a time.
 
The mid-size machines are around $1,000.00 and your either using it in general wood working and model building or it is a bit overkill for just hobby level model ship building.
After a while these machines loosen up to a + or - of 10 to 20 thousandths which is no big deal down to 1/4 inch but when you down to planking size of 1/16 thick 20 thousandths that might make a difference to some builders.

380381-01d.jpgg0716-667d0cba1aa526868281ba3ed0d4ee41.jpg
 
The Byrnes sander is hands down the best option for ship modelers. I have two problems with it, however. First, it does not have a power feed, you have to push/pull the wood through using your own strength. And Second, the table the wood rests on is very short, I would prefer it be long enough to feed a 14-16" strip through while supporting it the whole way. That said, you will not find a better machine for durability, reliability, and long term accuracy.
 
i cannot honestly say which machine is the best because i have never used any of them. But if i were to rate the machines i would need each one in my shop and compare performance one to the other over a period of time. This one does this or that better than the others. If i DIY and built one then bought a commercially made one then compared them side by side i can then either see how to improve my DIY version or come to a conclusion that home made was 100 bucks and the commercially made was 5 times more and only marginally better.
A friend of mine was a machinist by trade and a model builder he could just look at a machine and tell you it is either junk or good enough or overkill. But Bill was a second generation machinist and had many, many years of experience so his advice is well respected.
 
I build one for myself and even sold it. Have to build a new one when needed. It works perfect, just find a motor that's strong enough. That is the problem with the marks on the wood. It is a sander, take your time not to sand to much wood (to deep) at once. When you adjust to strong, then you have to pull hard, but when you adjust smal the feed is much easier and no marks in the wood.

Just look here for my machine https://shipsofscale.com/sosforums/threads/drum-sander-thickness-sander-diy-with-plans.10325/ there are a lot of people who build it with the plans. And I didn't get any complains. Feel free to use the plans.

Like I said, I need to build a new one, already got a big motor for it.
 
I wanted to thin the deck planking for my current build so I am in the process of building my own. Scrap wood, DC motor ripped out of a cordless drill and a laptop power supply. PWM, pulleys, and timing belt ordered from a certain cheap Chinese shopping site, and a bit of hardware from the local DIY store.

Still TBD whether this Frankensander actually works, but it’s been an interesting study in problem’solving.
 
i watched a bunch of You tube videos on homemade thickness sanders. some were too big for model work, but the ideas are the same.

Still TBD whether this Frankensander actually works, but it’s been an interesting study in problem-solving.

i like to tinker with things and from what i saw on You Tube and online a thickness sander is not that difficult to build.

here are some DYI builds you can get the concept and scale the projects down. Don't just jump in the deep end of the tool pool, start simple, maybe cheaper or even DIY then as you get deeper into the hobby or woodworking in general then over time as your skills improve upgrade your tools. You may take the step into scratch building and realize it is not for you and you decide to go bak to kits.


Last edited:
As @Dave Stevens (Lumberyard) stated above, making a DIY thickness sander is not difficult. I used plans found on the internet.
IMG_0274.pngIMG_0275.pngIMG_0276.pngIMG_0277.png

This was my version 1.0 of those plans
IMG_8605.jpeg IMG_8609.jpeg

I then revised the drum drive to it’s own drive motor and dust hood for version 2.0
IMG_8610.jpeg IMG_8611.jpeg

Spent virtually nothing to build it and it gets excellent results.
IMG_8613.jpeg

That doesn’t mean I won’t keep tinkering with improvements because that’s just what I do! :oops:ROTF
 
Some comments:

Unless I had a very old “junker” lathe I wouldn’t subject one of these precision machines to drum sander duty. I would be concerned about wear and tear and sawdust of and in the bearings.

I built a thickness sander years ago from plans bought from the NRG. It sort of works. There are several problematic areas when making your own.

1. This is supposed to be a precision machine. The drum needs to be round and parallel to the carrier surface. The drum can be turned with an ordinary chisel and rotating the rough block in the bearings. A strip of wood acts as a tool rest. The turned drum without its sandpaper should then be trued by rotating it against sandpaper fastened to the carrier surface.

2. Affixing sandpaper to the drum. First of all, buy cloth backed abrasive. Nothing else will hold up. I glue this to the drum with contact cement; messy! Better machines have some sort of mechanical clamp.

3. Power. Like most machines, you can’t have enough. The drill driven machines must be for very light sanding. Mine is belt driven from a fractional HP motor. Hi torque, slow speed. High speed burns the wood.

4. Feed. Without a power feed, one must be something of a gymnast to first push the board into the machine and then pull it out the back. A recent post indicates that this is even a problem with the Byrnes Machine.

My machine is badly in need of a tune up. Fortunately I have no need to use it at the moment. If I were 20 years younger with several models ahead of me, I would look seriously at one of the power feed machines.

Roger
 
As @Dave Stevens (Lumberyard) stated above, making a DIY thickness sander is not difficult. I used plans found on the internet.
View attachment 556715View attachment 556716View attachment 556717View attachment 556718

This was my version 1.0 of those plans
View attachment 556719 View attachment 556723

I then revised the drum drive to it’s own drive motor and dust hood for version 2.0
View attachment 556720 View attachment 556721

Spent virtually nothing to build it and it gets excellent results.
View attachment 556722

That doesn’t mean I won’t keep tinkering with improvements because that’s just what I do! :oops:ROTF
Mine is very similar to your 2.0, except it will be belt-driven rather than direct drive. Also a bit smaller since I am very limited on shop space and I don’t anticipate doing anything very large on it. Fortunately, I have access to a shop with full-sized tools to complement my hobby-sized tool collection.
 
I did discover that the little 24V motor was underpowered for sanding so, I built version 3.0 using an old corded drill I had.
IMG_9049.jpeg
 
3. Power. Like most machines, you can’t have enough. The drill driven machines must be for very light sanding. Mine is belt driven from a fractional HP motor. Hi torque, slow speed. High speed burns the wood.
I agree, I changed my DC 48 volt motor for a AC 220 V high torque 1400 rpm.

4. Feed. Without a power feed, one must be something of a gymnast to first push the board into the machine and then pull it out the back. A recent post indicates that this is even a problem with the Byrnes Machine.
When I designed mine I know about that problem I use the slide construction. One turn on the wheel is just 0,1 mm. So I can take small amounts out of the wood. That makes it easier to handle.
 
hobby size thickness sanders are light duty machines that is to say you are sanding only a few thousandths at a time.


i have read comments buying machines you will save so much from buying pre milled wood. Whoever did the math needs refresher lessons or forgot about the machines needed to prep wood to thickness sand. Yes you need either a bandsaw or table saw to resaw larger stock into smaller stock.
let's take the GRACIE S for the hull and deck planking if you were to buy milled wood the cost is between $80.00 to $100.00
just a thickness sanders start at about $450.00 and up to if you buy one and much less if you build one. or get a super deal

if you do not have the machines to do the resawing you need to add another $1,200.00 or more depending on what you buy, this will add to the cost of the thickness sander.

now your around $2,000.00 for the machines let's do the math you can plank 20 ship models with hulls from 24 to 30 inches at a cost of about $100.00 per ship. Question to ask yourself do i plan on building 20 ship models because that is the breaking even point if i invest in the machines.
_0005.jpg
 
 
This probably isn't for everyone, however. I prefer Japanese 'Kanna' hand planes for precision thicknessing of woods. They are simple and amazing tools! Cut your lumber close to thickness on your saw, then use the Kanna's to take it down to proper thickness. If your blades are properly sharpened and your Kanna's are set up properly you'll mill your lumber very quickly and with little effort. Once your wide plank is properly thicknessed, run it back through the saw to create the proper width of planks. It almost takes longer to explain it than it takes to do it! ;) There are also many uses for the pristine shavings produced by a sharp Kanna... micro trim and moldings, etc.
 
Last edited:
What are your comments?

My name is Bob and I'm a scratch-builder. (Support Group responds: "Hi, Bob!") I mill my own wood and have all three of the Byrnes machines as well as a full complement of full-size stationary power tools. My comments are as follow:

So in the case of kit bashing or scratch building a thickness sander is an essential tool.

I've not found this to be the case at all. In fact, my Byrnes thickness sander, while handy on occasion, is the least used of all my power woodworking tools. (I purchased all of my Byrnes machines used but in nearly new condition for a $600 package deal. The nut cases who are posting Byrnes machines for sale on eBay for thousands of dollars are no indication of what they would actually cost, particularly now that production has ramped back up. I usually cut my plank stock from the edge of a plank or billet on my Byrnes table saw, which limits kerf waste when milling valuable species. It is extremely accurate and will cut strips up to almost 1" wide (or greater with a 4" blade) or almost 2" if you don't mind flipping your source stock over and cutting from both sides. That's plenty for scale planking stock. With the fine toothed blade, the strip wood needs no sanding at all.

While Byrnes is the "gold standard," those with other mini-table saws should be able to accomplish the same, depending upon their machinery. As did Harold Hahn, those with standard 8" or 10" table saws can obtain fine-toothed, thin-kerfed blades and mill even wider planking stock, up to the depth of cut limits of their blades, although with the added cost of greater kerf waste. Widths of as much as six inches are obtainable by flipping the source stock and cutting from both sides. Any inaccuracy in the double cut can be removed using a scraper.

In summary, there's no reason one should ever need a thickness sander to get out planking stock. A thickness sander is handy where there is a need for a uniform thickness over a relatively wide area, such as the thickness of sound boards in stringed instruments, but, as it is particularly in the case of planking, usually any minor size discrepancies are removed in the course of finish sanding after assenbly. Much of the work done by a thickness sander can be done by a good plane, of course, and where possible, should be because the plane iron leaves a superior "sheared" or "shaved" cut surface as opposed to a rough, abraded one produced by sandpaper.

Sanding abrasive material is primarily designed for the relatively light finishing of surfaces, not for hogging off any sort of substantial thickness. Sandpaper is usually the most overworked and over-used "tool" in workshops today. Sandpaper is a finishing tool, not a shaping tool. Sanding should be the last resort when shaping wood! A clean cut is far more to be preferred than shaping wood by abrasion. (A blade also produces chips and shavings that are easily cleaned up and do not pollute the shop and everything in it with micro-fine particles of sawdust.)

For those who want to spend a few bucks on a much less expensive option than a thickness sander for producing strip wood of uniform thickness, they might want to take a look at Bridge City Toolworks HP8 mini block plane. This is a small modelmaker's block plane with "depth of cut skids" that attach to either side, making it possible to accurately plane stock, like planking strips, to any thickness desired. It looks to be another particularly fine piece of woodworking "jewelry" for this outfit which makes high quality "aspirational tools" for accountants and orthodontists who like to fancy themselves great woodworkers and believe they need very expensive tools to convince others they are. (I'd forgotten about this little gem until now. It was too rich for my blood when I first saw it, but I might just treat myself to an early Christmas present now since it's on sale for only $79.00 USD! Do I need it? No. Do I want it? Yes!)


See:https://bridgecitytools.com/products/hp-8-mini-block-plane
1763163385956.png


Byrnes Model Machines - Thickness Sander

Byrnes Model Machines produces precision-engineered miniature Table Saws and Thickness Sanders for Ship Modelers, Dollhouse Makers and Model Railroad Builders; every machine has an accuracy measured in thousandths of an inch.
byrnesmodelmachines.com


While this is perhaps more useful for a luthier (and Byrnes makes a "luthier's model" with specific features for them, as well,) if you want a min thickness sander, Byrnes is "finestkind." Note that it has a 1/3 HP motor. Like most, it's hand fed, but one can easily use a sacrificial piece of stock as a "push stick" to push stock through without running into "push/pull" unevenness issues. Also, the drum comes "stock' with two 3" bars that are screwed into a trough in the drum which secures the abrasive sheet. This accommodates two grit sizes so stock can be sanded with heavy grit on one side of the drum and finer grit on the other, without having to change abrasive sheets all the time. They also sell an accessory 6" bar if one wants to more easily secure only a single 6" wide abrasive sheet. Be sure to get the 6" bar, as well. You'll want it if you are going to sand anything wider than 3". ($8.00 IIRC)

Luthiers Friend: small precision model thickness sander

Thickness and pattern sander which fits on a drill press and is designed to meet the needs of musical instrument makers and serious modelers.
www.luthiersfriend.com


At $275.00 USD with shipping for this turkey, walk the other way! First, for anybody so inclined, you can make your own with your eyes closed with a sanding drum, some scrap plywood, and a couple of C-clamps. I've never used one, but I'm guessing the vacuum attachment isn't going to turn this into a "dustless" machine by a long shot. More importantly, drill press quill bearings are NOT designed to handle horizontal loading. Using them with drum sanders places stress and wear on the quill bearings which those bearings were never designed to handle. This creates the risk of damaging wear on the quill bearings and (increasing) runout on the quill's accuracy. This design also presents a serious SAFETY ISSUE: Most drill press chucks are held in place by a friction-fit taper post and socket. (Often a Jacobs taper post on the chuck.) Morse or Jacobs tapers aren't designed for side loads, but rather they are only intended to carry loads in line with the taper post. In the case of a drill press, a continual side load on the chuck will cause the taper post's friction fit to let go and, consequently, the chuck and post, spinning at high speed, will abrubtly fall from the taper socket on the quill, dropping to the workpiece. The standard drill press motor rotates at 1,725 to 3,450 RPM. Obviously, anything rotating at anywhere near that fast that lets go is going to have the capacity to cause some serious damage. (Don't ask me how I know this. :rolleyes: (If you must use a sanding drum on a drill press, you should use a supplemental plank with a hole the diameter of the drum cut in it secured to the table. The bottom end of the drum should fit into the hole cut in the plank which is secured to the table. The table should be raised so the drum's axle fits into the drill chuck and the bottom of the drum is inside the hole cut in the plank. In that way, when (probably not "if,") the chuck comes loose, the taper post will spin inside the taper socket, and the drum bottom will be captured in the hole it's in. Everything will go wack-a-doodle if it falls out of the quill socket, but the chuck and drum shouldn't go flying.) Additionally, this unit makes no guarantees on accuracy. You'll have to set it up using some sort of spacing "master" and keep making runs past the drum and measuring until you get to where you want it to be... on each piece of stock.

MicroLux® Drum Thickness Sander - www.microscopicmodelshop.com

Drum Thickness Sander Turns Your Shop into a Portable Lumber Mill Sands wood up to ½ inch thick and 5 inches wide 1/3 hp with drum speed at 5800 rpm with power and precision Works with sheets or strips of wood A Micro-Mark Exclusive Reduces hardwood down to 1/64 of an inch Sands wood up […]
www.microscopicmodelshop.com


On the surface, this looks like it might be a decent bit of kit, but why has the price been cut from $399.95 USD to $79.99 USD? I note that it is limited to a thickness range between 1/2" and 1/64". It's up to you whether that's a concern to you. Also, the Byrnes sander will handle up to 1 and 5/16" thick by 6" wide stock, while this one will only handle up to 1/2" thick by 5" wide stock. Other than that, it looks like a pretty good machine, although I haven't had my hands on it. I is apparently no longer made by anybody nor sold by MicroMark. The link provided doesn't match up to that vendor's catalog, either. I think it's probably not to be found anywhere other than used on eBay.

THE HOG THICKNESS SANDER

The folks at Vanda Lay Industries are some of my favorite vendors. Their products are well made and creatively designed. Their customer service is personal and excellent. Their prices are fair and reasonable. That said, their strongest point is that they produce good stuff for folks who can't afford "the high-priced spread." Their thickness sander isn't junk by a long shot, but it has its limitations in some respects.

Their basic thickness sander without a motor runs $219.00 USD including shipping. You have to provide your own separate motor or use a drill motor that will be underpowered (and likely burn up in short order.) Or you can buy their sander and motor package, which will run you $684.95 plus shipping and handling, which will surely bring it up over $700.00 USD. Now, I am sure that with a 1/3 HP motor as Vanda Lay provides, their thickness sander will definitely hog a lot of sawdust off of a piece of stock and work pretty well. But I know that the Byrnes thickness sander will do that as well, and while I don't know the current retail price of a new Byrnes thickness sander at the moment, I've got a sneaking suspicion based on previous prices that it's going to be less than $700 USD, and the Byrnes machine will sand 6" wide stock while the Vanda Lay machine can only sand 3" wide stock! I'm afraid that there's no contest here between the Byrnes machine and the Vanda Lay machine. Now, if you are in the market for a light duty model making drill press and milling machine with a woodturning lathe option and a very nice XY table for an amazingly reasonable price, Vanda Lay's your man. I'd take a pass on their thickness sander, though.

___________________________________________________________________________________________________________________________________________________________________________

As for problems with "snipe," the technical term for uneven thickness resulting from uneven travel through a thickness sander or planer, as pointed out in the previous posts, it's all about moving the material smoothly and evenly through the sander or planer without lifting it at either end. For small stuff, it is often worth the little time it takes to fashion a larger "sled" to carry the material through the machine. This can be as simple as a flat piece of plywood that you can "tack" your workpiece onto with a "dab" or two of hot melt glue from a glue gun at either end. You then have a longer, wider, and stiffer piece to push through the machine and can keep the ends level at the beginning and end of the travel by getting the extra support at either end from the "sled." The only contact with the sanding drum will be with the workpiece standing proud on the "sled."
________________________________________________________________________________________________________________________________________________________

Now, if I didn't have a thickness planer or any other power tools, and I were going to build a plank on frame hull, I'd cut my planks out of sheet material. I'd use a 3" or 4" sheet of the desired thickness and lay out my individual planks on those sheets in a way that minimized the waste material. I'd cut the planks out with a craft or utility knife and shape them to fit with a modelmaker's plane or spokeshave or even just a craft knife. I would not be thinking in terms of quarter inch wide "strip wood." Planks are never perfectly rectangular in shape. (Kit manufacturers convince people this is the only way to plank a hull because uniform strip wood is cheaper, not because it's better!) If I were on a tight budget, I'd use basswood and I'd get it from the hardware or craft store's Midwest Products basswood rack or order it online in a bulk package. (See: https://midwest-products.myshopify....4-basswood-sheet-sku-4402?variant=11840459011)

If I wanted to use a higher quality wood, I would get in touch with Dave at The Lumberyard and get his advice on what species would be best for my purposes (he's got a wide selection of "the good stuff") and have him mill it up custom for me and use that. (See: https://www.dlumberyard.com/) Actually, even if I had to minimize costs, I'd check with Dave first before paying retail for the Midwest Products basswood because Dave might be able to cut a deal that made buying a better grade of wood affordable if not even less expensive than the retail packaged Midwest Products stuff.

Of course, if I were going to build anything other than a stylized un-planked-below-the-water-line replica or imitation of an Admiralty Board model, I wouldn't build a plank on frame hull at all. I'd built the hull using the "lift" or "bread and butter" method, but that's a story for another night, I suppose.

If one is so inclined, there's no reason not to build your own thickness planer. Go for it but realize that while collecting a lot of nice stationary power tools is a lot of fun and actually do-able if you take your time and snag a deal here or there on good used tools over the decades, it isn't really necessary. There's always a work-around for every challenge in scratch-building without spending an arm and a leg. In fact, that's the whole point of scratch building. You're doing it all yourself!

Now, the more I think about it, the more it seems that little Bridge City Tool modelmaker's plane with the "thickness planing" feature would save me a lot of trouble setting up my Byrnes thickness planer just to trim a smidgen off a little strip of wood here or there along the way. ;)
 
I’m also a scratch builder and like Bob have both full sized and miniature power tools. I also have a large stash of lumber including a lot of pear cut from a tree being removed.

I have built one plank on frame model using the classic woods available from my stash; Boxwood (Bruxis), Pear and Holly. As I have more wood than I will ever use, waste is not a problem. When I built the model I did not own a thickness sander nor my Byrnes Saw. All woods were cut on an 8” Sears table saw rescued on its way to a dump. I fitted the saw with a Sears Kromedge thin rip veneer blade. Model sized lumber cut in this way was ready for use. I have since replaced the table saw with an also used 10” model.

I have scratch built 5 more models since then and am working on the sixth; a very long term project. Although the POF model was enjoyable and not that difficult the subjects that interested me since and my artistic vision for them did not require or lend themselves to this building approach so were sculpted from solid blocks or laminated lifts.

My three essential shop tools used for model building are all full sized: 10” table saw, drill press jointer. My Byrnes saw is a distant 4th.

Roger
 
Back
Top