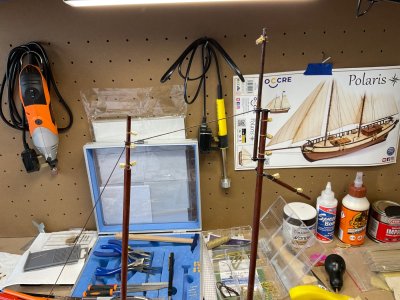
Threading Rigging through the blocks

That's the best solution. It' works perfectly.
Albert Mary, thanks, it means a lot.
Love the fact that you have Prada as your pic. I loved the Americas cup last year, it was brilliant television. The Kiwi’s still have a bit of an advantage unfortunately
 
Before installation, I pass all the rigging threads through melted wax with a small addition of turpentine/for better impregnation.This gives the thread rigidity and further protects against changes in humidity. This is the method I use in model restorations
 
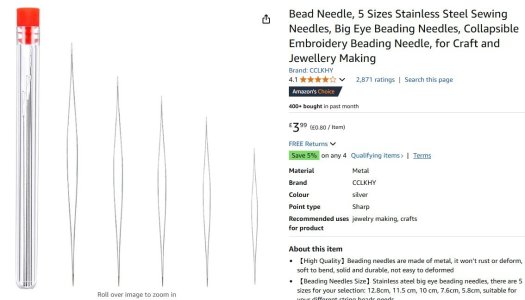
Thank you very much, I have just ordered a couple from eBay, I will see how I get on with that plus its going to be difficult enlarging the holes on most of the blocks as I have already fitted them to the ship and the masts. It will try my patience but I am sure there are bigger challenges in future models.
Thanks
You can get the threaders on Amazon I got about 100 for like 5 dollars.
 
Hi Dennis, as is the norm in SoS, you've received many possible solutions to the challenge, so not much for me to add in that area. I will say however, you've built a very clean model, whether your first or fifth. Very nice work.
 
Another technique is to use beeswax instead of CA glue. It doesn't stick to your fingers so easily (!) but gives you a stiff but sliding surfce for threading. Your Polaris looks good; welcome to the hobby. Although OcCre is good for beginning their instructions are not of the clearest and you might wnt to read this website for suggestions of other (better) kit manufacturers as you progress
 
I've tried threaders of every kind (all the ones shown above) and have broken both the threaders and the blocks in using them. I've tried needles with resulting broken blocks. The ONLY method I've found that works reliably, with correctly sized thread and block holes, is super gluing the end of the thread and cutting it at a clean angle.

Think about the threading methods: what you end up with is a single thread going through a slightly larger hole. But to use threaders, you have to pull 2 (TWO) pieces of thread through along with the steel portion of the threader or needle. This usually requires an oversize hole.

I will also mention that the blocks and thread you have are not of the best quality, but rather what is included in most kits. I'm not saying you have to buy better blocks and thread, but at some point you will want to consider it. What would help you now is a set of small (0.5mm-1mm) drills and hand drill. You can drill out the holes a bit larger to help get the thread through. I use a small battery-powered pencil drill for this and consider it a great investment. I used to think that I shouldn't even have to drill out holes in blocks. I now realize that the time drilling if required, as well as the money spent for quality blocks, is nothing compared to the time and energy spent to achieve a high quality model.
 
I put out a little puddle of Slo-Zap manufactured by ZAP. It's a slo cure thick CA so you can drag multiple thread ends at one sitting to create the thread point. I also drag the entire thread through bees wax which makes the threads easier to handle and also results in a less fuzzy look to threads when viewing close up.
 
I can relate to this problem especially if your working in a smaller scale. I take a dab of Testors plastic model glue (any glue will work) and put it on the end of the thread. I roll it back and forth between my thumb and first finger to get a pointy end. I set it aside to dry for a bit and then drill out the block hole (larger) to make sure the hole goes all the way through. (some of them don't or are blocked with saw dust) Then I put on my strongest glasses, hold the block with a pair of surgical clamps, pictured above, and guide the thread through the block with a pair of tweezers. Make sure you have the block going in the direction of the rope pull so it's facing correctly. Otherwise you'll have it on backwards. Very tedious work to say the least.
 
Thanks guys for the suggestions, I will try ALL your suggestions. I have also written to OcCre nut they have one of those awful systems where you reply to the website and not an email address. Which means I cannot send a picture showing the problem. The blocks are so SMALL its a job to pick one up except with tweezers.
Just imagine what it's like to use 2mm blocks, as per Caldercraft Victory, Dennis Exclamation-Mark :rolleyes: I have that to look forward to - one day! I'll probably end up using 3mm. Those needle threaders are a few pence for dozens on the 'bay', you do need a few as they fall apart after a while.
 
Lots of suggestions, but of course, if you use threader, or even a needle, you are trying to fit two thicknesses of rope where one is meant to go, plus the thickness of the threader or needle.

Real blocks won't accommodate that, so why expect the modelled version to do so.

The answer, of course, is to run a drill through all holes first - even a tiny shard of timber will interfere with the thread, and to 'always' treat the model rope with a stiffener.
For myself, I like shellac, available as painters knotting (old school) or in various forms for French polishing and finishing. It is quick, reversible, and the worst it can do to you is make you drunk (don't ask!)

A few shellac flakes dissolved in alcohol (methylated spirit) does the job - also available in black and rope colours as a bonus


J
 
I have found that sewing thread works wonders for those pesky tiny blocks
 
Hi Dennis, as is the norm in SoS, you've received many possible solutions to the challenge, so not much for me to add in that area. I will say however, you've built a very clean model, whether your first or fifth. Very nice work.
Hi Hoss, Thanks for your comments, I made lots of errors with the first planking and showed my mistakes on here, many helpful comments were made and I had to undo some of my work in order to progress. But it was worth it. It is my first model and I am thinking about my next purchase which obviously be a bit more difficult.
It’s been a long time since I saw the Cartwright family on the television, I think you have to be a certain age to remember that program
 
Just imagine what it's like to use 2mm blocks, as per Caldercraft Victory, Dennis Exclamation-Mark :rolleyes: I have that to look forward to - one day! I'll probably end up using 3mm. Those needle threaders are a few pence for dozens on the 'bay', you do need a few as they fall apart after a while.
It’s bad enough working with 4/5 mm blocks let alone 2mm.
I think I need a few more builds under my belt before I tackle HMS Victory
 
Another technique is to use beeswax instead of CA glue. It doesn't stick to your fingers so easily (!) but gives you a stiff but sliding surfce for threading. Your Polaris looks good; welcome to the hobby. Although OcCre is good for beginning their instructions are not of the clearest and you might wnt to read this website for suggestions of other (better) kit manufacturers as you progress
Hi Leonard, Thanks for your comments, I agree with your comment re OcCre instructions, what manufacturer would you suggest. What are Artesania Latina like as I was thinking about building their HMS Supply and their Sopwith Camel biplane. Yes I know a Sopwith Camel is not a ship but I would like to build both at the same time.
So Artesania Latinas instructions any good ?

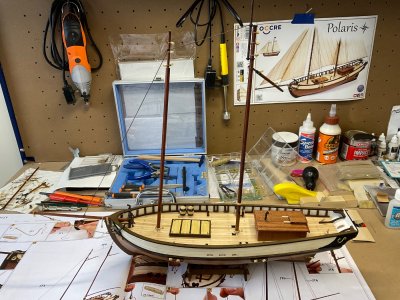
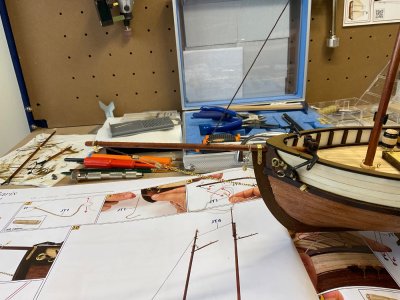
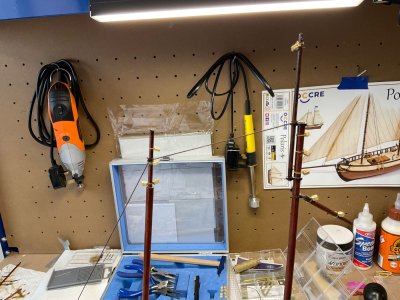
Oh a couple more pics of the build so far.

IMG_0220.jpeg

IMG_0221.jpeg

IMG_0222.jpeg

IMG_0223.jpeg
 
Before installation, I pass all the rigging threads through melted wax with a small addition of turpentine/for better impregnation.This gives the thread rigidity and further protects against changes in humidity. This is the method I use in model restorations
This is a good practice--also gets any fuzz off the lines.

BTW, definitely try one of those needle threaders people have mentioned. You will be amazed how well they work.
 
Back
Top