Timber from logs

Maarten

Staff member
Forum Moderator
Joined
Sep 10, 2017
Messages
3,911
Points
678

Location
The Netherlands
For my future project I am collecting timber. Recently I was already able to buy some pear, boxwood and also old ebony piano keys, all via internet.
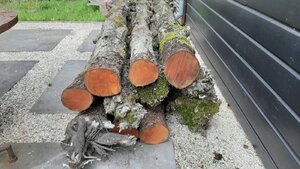
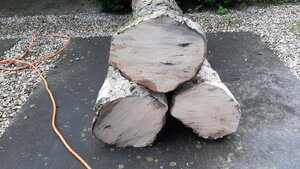
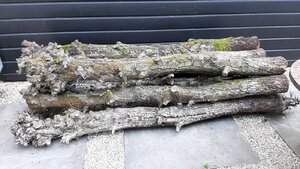
Last weekend I got in contact with somebody who harvested a part of his pear orchard where he removed 200 trees and he sold the logs of 220 cm x 15 -20 cm for only €3,- per log. You understand my hobby hart could not refuse this so I bought 11 pieces. Unfortunately my small trailer could not take more.
These are the 11 logs harvested last winter.
20200707_111355.jpg
20200707_111345.jpg

In this blog I will transfer my log step by steep to usable timer. I am certainly not a timber expert but we all learn by just doing it. More to come.
 
Last edited:
Will be watching with interest. I have a small chainsaw mill, table saw, band saw, jointer, 12" planer, several sanders. All came from my business before I retired.
I just ordered a mini table saw and am building a mini thickness sander for the last two steps in making "Model Ship size" lumber. I have a process in mind, but will be watching your system, looking for ideas if you don't mind.

Seems that Boxwood, lime wood, pear wood, etc, all run about 20¢ to 40¢ per foot or more. That's assuming you can find the wood you want to use for your build. To build a 19" canoe, it seems about 30 24" pieces are required just to plank the hull. That's about 60 feet. At 30¢ a foot is $20.00. Plus wood for the ribs and trim. $50.00 is quite reasonable for purchasing the material for a small boat build like the canoe.

If we do it ourselves, and especially can find the wood free, the cost is just our time, and the cost of the machinery to do it. In my case, I already have all the machines except the mini table saw for ripping the strips from blanks, and the thickness sander I'm building. I figure that will cost me maybe $50.00 for parts because I have some of the material and a motor already.

I live in an area of fruit growers. These orchards cut down old trees and re plant new on a rotating basis, so I have access to Pear (US) (I don't know if that is different from European Pear), cherry - black and sour, peach, plus locally available black walnut, elm, poplar, oak - both red and white, hard and soft maple, white and yellow pine, spruce, cottonwood, red cedar, Sugar maple, red maple, hemlock, basswood and yellow birch are the most common trees in Michigan's northern hardwood (NH) forest. Typical secondary species are beech, quaking aspen and white ash and a few others that grow in the national forest areas near here

Plus, the satisfaction of knowing you made your own lumber. I believe that's the ultimate in scratchbuilding.

EJ
 
Hi EJ,
Sounds like you also have a nice project in the near future.
Till recent I bought al my wood via our local wood specialist, they can supply everything you need but offcourse at a price.
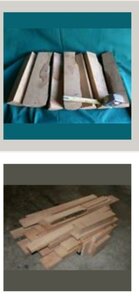
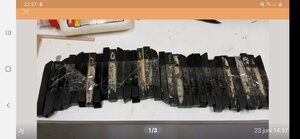
Then I started to put a search command in a Dutch version of ebay for the woods I am looking for and via this I already purchased a stash of boxwood, pear and my ebony piano keys, all for just a fraction of the regular prices, but ofcourse you need a table saw, band saw, thicknesser to work it.
Boxwood and pear
20200707_223826.jpg
Ebony
Screenshot_20200707-223706_Marktplaats.jpg
So there are other sources for cheaper wood.

But now my pile of pear.
As mentioned I do have the equipment but it are small proxxon tools. My band saw can work 8 cm max and my largest logs are 20 cm round.
I also have a chainsaw but this will cost me a lot of wood on a 15 to 20 cm log.
So to split the logs I ordered a recipro saw which is able to cut up to 24 cm.
I think I modify it slightly to be able to cut the logs in a straight line. But more on that later.

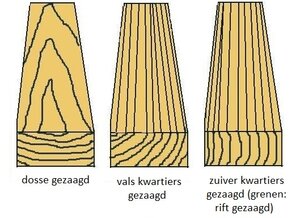
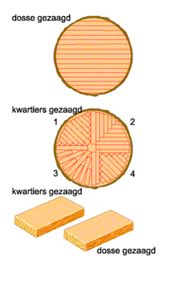
I think I will quarter saw the logs to get a wood with a straight as possible grain.
hout_14_dosse_kwartiers_rift_gezaagd_www_gitaarnet_nl.jpg
zagen.png
According to methode 2.

From Dave Stevens blog about wood I read he is just cutting his logs in half and then let them dry for a year. I am still thinking to do that or directly saw them quarterly in billets of 1-2 cm.

Any ideas welcome.
 
Those logs look great. After cutting do you air dry or kiln dry to try to avoid splitting and checking. Is this orchard pearwood the same as Swiss Pearwood or is that an entirely different tree. Most Swiss Pearwood is steamed to bring out and enhance color; any plans to do the same or just let it dry and use as is?
 
In large lumber operations they indeed steam the pear but this is to reduce splitting and warping an effect of this is the pear will become more red/pink in color. This is all to speed up the process thats also why kilns are used for drying.
I do have time and as a modeller we don't need very large pieces.
I will saw billets of 60 cm of it, then I quarter saw small billets of them and just air dry for 1 or two years before use.
By quarter sawing hopefully the warping and splitting wil be avoided as much as possible.
Today I am sawing the trunks into 60 cm pieces, I will add pictures later today or tomorrow.
 
Bonjour tout le monde,

I know that we are just building models, but for your "culture générale" and for those who doesn't know Louis Sauzadde, may I advise you some videos about the choice and the good way to cut timbers:
And also
and

Sincerely yours
Bob
 
Today was a day of sawdust.
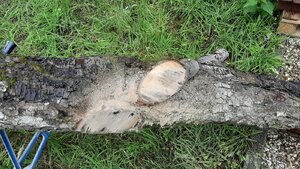
First I cut of the stumps of the old branches to get a nice clean trunk.
20200711_141313.jpg
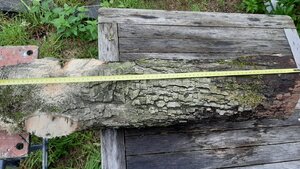
Followed by cutting the trunks into 60 cm logs.
From every trunk I get three logs of 60 cm.
20200711_141642.jpg
20200711_142205.jpg
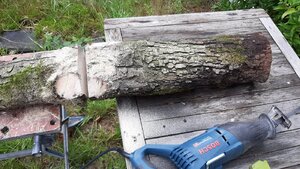
The reciprosaw gives nice flat cuts.
20200711_143835.jpg
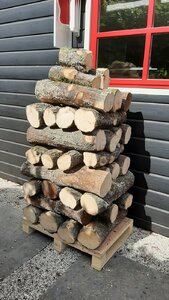
Resulting after some 7 hours in a pile of 33 logs.
20200712_165242.jpg
Next is cutting up the logs.
 
Ok, now I have all logs cut up into 60 cm pieces I have to cut them into quarter sawn pieces to avoid cracking and warping during the drying process.
It already starts drying as I see some minor cracks in some of the logs.
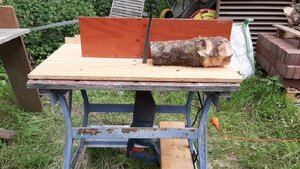
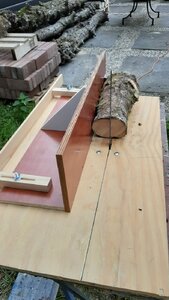
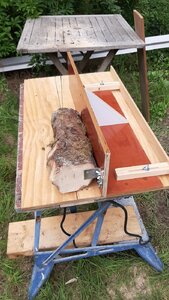
I had the idea to do this with my recipro saw and build a small saw table for it.
20200711_154129.jpg
20200711_154105.jpg
20200711_154115.jpg

In my idea this should be working great, did it? Well no it didn't as the saw pushed the log from the table and was moving like tigger from Winnie the Pooh.
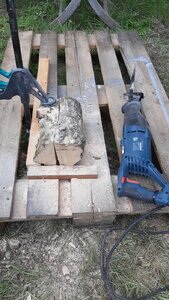
For some saw testing I cut a log by putting it on two layers of pallets, that worked. But not if you need to saw 33 logs and still want to count 10 fingers and 10 toes.
20200712_174101.jpg
20200711_164310.jpg

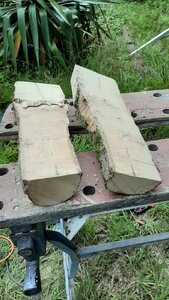
After cutting it in half I could saw it into smaller pieces on my proxxon bandsaw, just as a test what the wood would be like when sawn.
20200711_170030.jpg
20200711_170722.jpg
20200712_110957.jpg

I am quite happy with the quality of the wood so to finish the task of cutting it I decided to invest in a proper tool which I can use for decades to come and not risk my fingers.
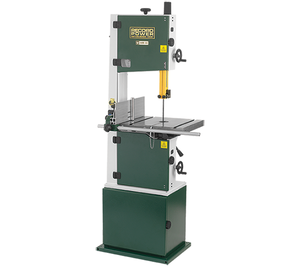
After reading a lot of tests etc I ordered a Record Power Sabre 350 14" band saw which seemed the best deal for the money with the specs I was looking for. A very good hobby machine and with this I can cut logs up to 280 mm in diameter into nice handy billets. So this Saturday will be billet time.
prod_001046_asset_0_1504538110.png

More on this to come.
 
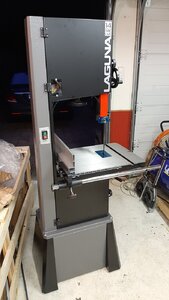
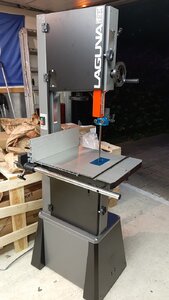
As the record power shipments was delayed I could get an intetesting upgrade to the Laguna 1412 as this was in stock. Picked it up on Friday and build it up Friday evening. Laguna is an American company but their bandsaws are produced in South Korea. They design and deliver premium quality bandsaws.

The Laguna 1412 is capable of sawing 12 to 13" or 33 cm, again 5 cm more then the Sabre 350. Furtermore it has a ceramic blade guidence enabling more precise cuts.
20200717_221350.jpg


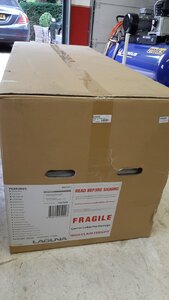
It comes in a large of 140 kg.
20200717_194955.jpg

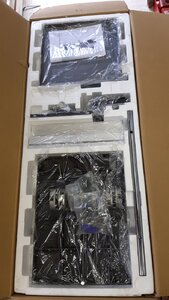
When opening it is nicely packed with all the tiny bits in top like the table, side panels of the stand, the fence etc.
20200717_195203.jpg

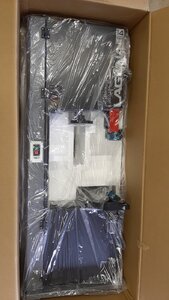
After removing the the top layer the main part of the machine is in the second layer of foam.
20200717_195633.jpg

To get it out I put it up straight up and pulled it out of the box, in this manner it can be done by 1 person.

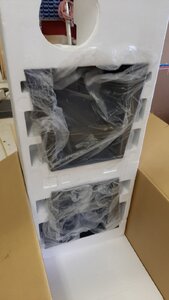
The lower layer of foam contains the forward and aft panels are in the back of the lowest foam layer.
20200717_200012.jpg

To set up the machine is rather simple and Laguna provides an extensive youtube series of videos how to do it but every model builder should be able to do it easily.

After three hours of hobbying my bandsaw is setup to make its first cuts, but that will be next.
20200717_221341.jpg
20200717_221404.jpg
 
First cut.
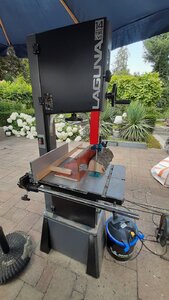
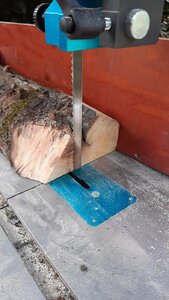
After adjusting and trimming the saw it is time for the first cuts, starting with one of the smaller logs.

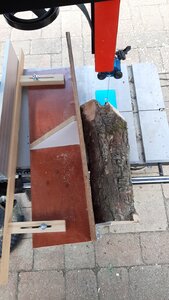
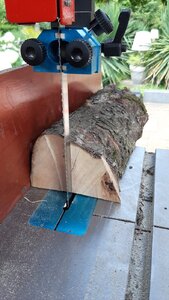
First I determine the core of the log on both sides and mark them with a pencil. For quarter sawing the logs I have to saw straight through the center.

So important to center the core precise before the saw blade and again on the end of the log the same.
20200718_144356.jpg20200718_144455.jpg20200718_144407.jpg

To saw it through the hart of the log you see on top that you don cut paralel to the fence.
20200718_144505.jpg

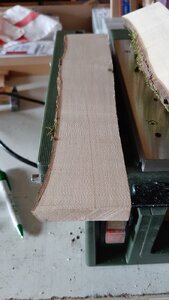
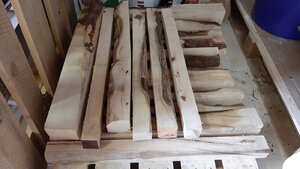
Then I saw the quarters to square billets.
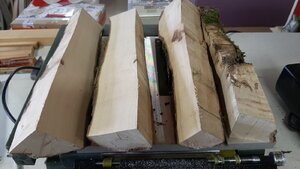
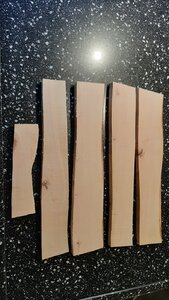
These are an example of the billets I saw, all different in sizes to get the maximum out of the logs.
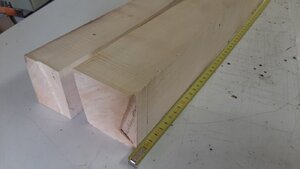
20200719_105255.jpg

After removing the bark I have nice clean pieces of wood ready for drying 1 or 2 years before using them and cut them to size when needed.
20200719_105554.jpg

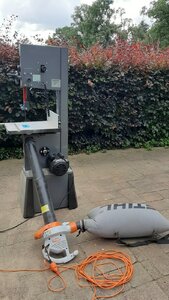
The saw machine is doing very well, it cuts like a warm knive through butter.
For the dust extraction I use our garden leaf blower, works great.
20200720_115527.jpg

In the future when I have more experience in finer work with the bandsaw I will post an update.
 
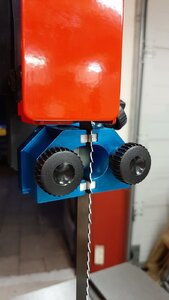
blade guide needs to be as close to the material as possible to prevent the blade from wandering.
The problem with this is on the larger bandsaw the fence is sometimes taller than the wood we are cutting down. The blade guide can only go as low as the top of the fence. If this makes sense. A smaller fence is needed!! Here is a quick picture of my Admiral's giant old rig. Sorry for the messy shop... This is HER shop and not mine!! LOL

IMG_0354.jpg
 
Back
Top