Tricks of the trade

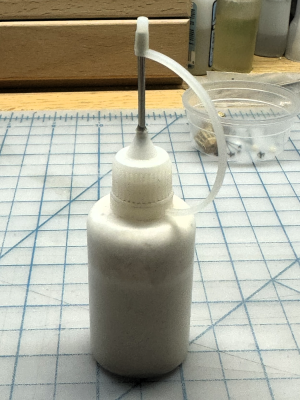
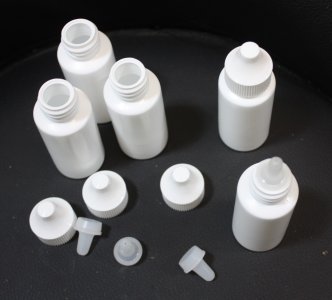
Wow I did not realize there were still 35mm rolls of film and plastic containers. I remember having dozens of these when the admiral had a darkroom set up in the garage many years ago. I have a friend that works in a filling and packaging company and he sent me bags of the following 30ml bottles, tips, and caps. Works nicely and very controllable for PVA glues with the dispenser tip.
Allan
1731761993702.jpeg
 
Wow I did not realize there were still 35mm rolls of film and plastic containers. I remember having dozens of these when the admiral had a darkroom set up in the garage many years ago. I have a friend that works in a filling and packaging company and he sent me bags of the following 30ml bottles, tips, and caps. Works nicely and very controllable for PVA glues with the dispenser tip.
Allan
View attachment 484436
You can still buy 35mm film. :)
 
Here is what I've been using for a super-long time. I do have to clean the needle occasionally in the hot water.

View attachment 484484
I've been using the same bottle for four years (I bought a packet of three and use the one of the extras two for water and one for Weldbond). As you say, clear the nozzle in hot water and go again...
 
TREENAILS -
There are multiple ways to make treenails successfully. The things I try to keep in mind:
Subtle color
Scale
Strength
Cost
Time
Tools needed

Regarding diameters the following shows typical diameters needed at different scales. I have never tried to make wooden treenails smaller than 0.016" diameter but if someone has done this with success, I for one would love to see how to do this. Dimensions are in inches.

--------------------------- Full size ------------1:98------------------ 1:72----------------1:64--------------- 1:48

Hull--------------------------1.5-2--------- 0.016 - 0.02---------0.02 -0.028 ------ 0.023-0.031------ 0.031-0.04

Deck nail covers-------------1.5-----------------0.016---------------- 0.02--------------- 0.023------------0.031

Based on information from Peter Goodwins, The Construction and Fitting of the British Man of War, pp 60-61, decks were often spiked, not trennaled but then covered with a 1/2" thick 1.5"diameter round (or diamond shape) wooden cover. For the models trennals no larger than 1.5 inch diameter would have the appearance of the wooden covers. When wooden trennals were used on the decks rather than iron spikes they would have been about 1 inch diameter.

The photos are various methods I have seen used and there are probably more, with their own benefits and flaws. My preference is the last description. If anyone has more methods that they have used with success, it would be great to see these.
Allan

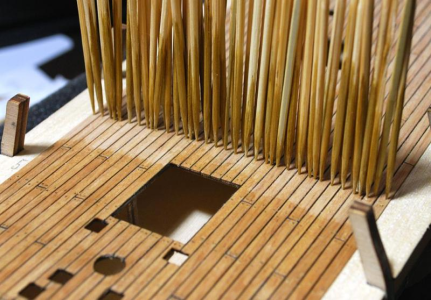
1.) Toothpicks.
1731842351933.png
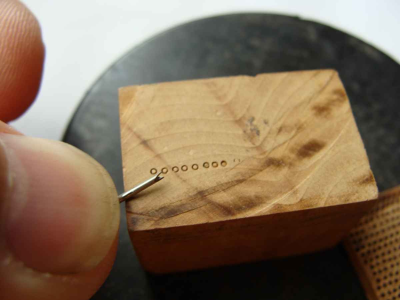
2.) Made with hypodermic needle
1731842882825.png

1731842922753.png
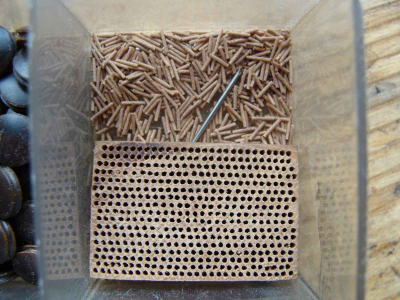
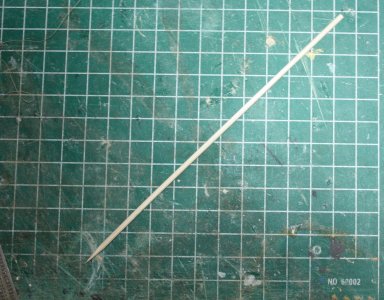
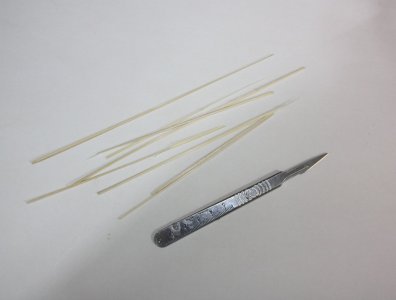
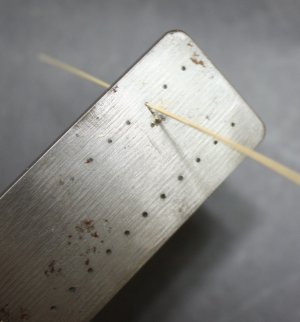
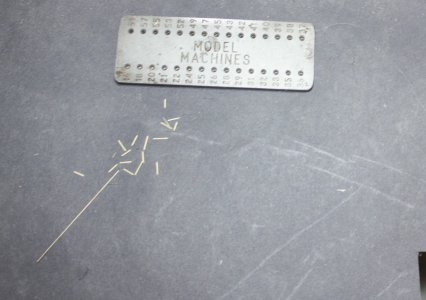
Draw plate with bamboo, my favorite method
Start with any bamboo skewers. They are cheap and go a long way.
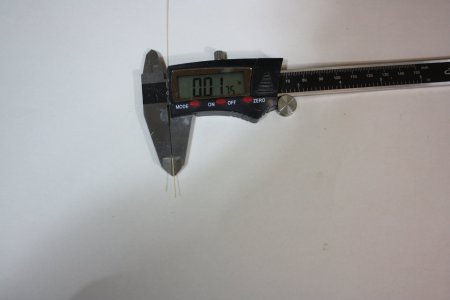
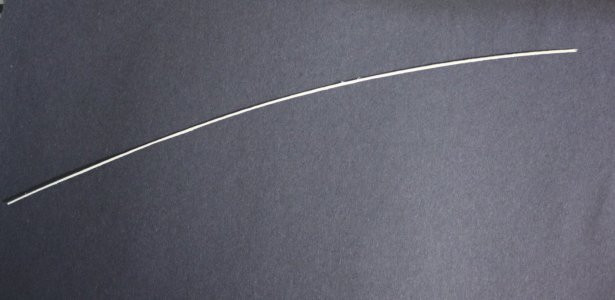
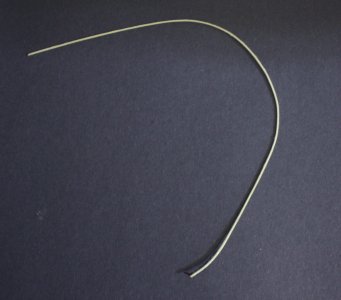
Slit the skewer with a hobby knife such as an Xacto or Swann Morton, et al. I slit these into as many strips as possible as they need to get down to some small diameters and the largest hole on my draw plate is 0,059 inches. When running the piece through the draw plate it is good to pull at a slight angle and the pass it through the same hole two or three times. I cannot speak for the first two methods but I can produce about 200 trennals down to the smallest diameters in about an hour. Large diameters take less time with subsequent increased output.
1731944112579.jpeg
1731944137886.jpeg
1731944178126.jpeg
1731944201654.jpeg
1731944217353.jpeg
--
 
Last edited:
TREENAILS -
There are multiple ways to make treenails successfully. The things I try to keep in mind:
Subtle color
Scale
Strength
Cost
Time
Tools needed

Regarding diameters the following shows typical diameters needed at different scales. I have never tried to make wooden treenails smaller than 0.016" diameter but if someone has done this with success, I for one would love to see how to do this. Dimensions are in inches.

--------------------------- Full size ------------1:98------------------ 1:72----------------1:64--------------- 1:48

Hull--------------------------1.5-2--------- 0.016 - 0.02---------0.02 -0.028 ------ 0.023-0.031------ 0.031-0.04

Deck nail covers-------------1.5-----------------0.016---------------- 0.02--------------- 0.023------------0.031

Based on information from Peter Goodwins, The Construction and Fitting of the British Man of War, pp 60-61, decks were often spiked, not trennaled but then covered with a 1/2" thick 1.5"diameter round (or diamond shape) wooden cover. For the models trennals no larger than 1.5 inch diameter would have the appearance of the wooden covers. When wooden trennals were used on the decks rather than iron spikes they would have been about 1 inch diameter.

The photos are various methods I have seen used and there are probably more, with their own benefits and flaws. My preference is the last description. If anyone has more methods that they have used with success, it would be great to see these.
Allan

1.) Toothpicks.
View attachment 484690
2.) Made with hypodermic needle
View attachment 484691

View attachment 484692
Draw plate with bamboo, my favorite method
Start with any bamboo skewers. They are cheap and go a long way.
Slit the skewer with a hobby knife such as an Xacto or Swann Morton, et al. I slit these into as many strips as possible as they need to get down to some small diameters and the largest hole on my draw plate is 0,059 inches. When running the piece through the draw plate it is good to pull at a slight angle and the pass it through the same hole two or three times. I cannot speak for the first two methods but I can produce about 200 trennals down to the smallest diameters in about an hour. Large diameters take less time with subsequent increased output.
View attachment 484970
View attachment 484971
View attachment 484973
View attachment 484974
View attachment 484975
--
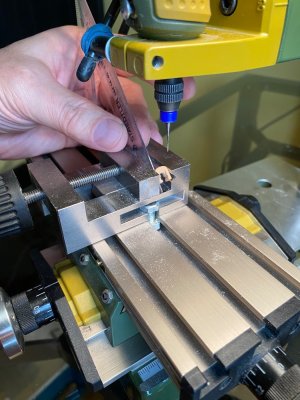
Another option is not pulling them through the drawplate but only make points:
IMG_4275.png
Then you can make smaller points. Twist them into the drilled hole with some glue and the tip will brake of. Them you only have to sand them flat with the surface. 0,31 mm = 0,012”.
Regards, Peter
 
Last edited:
GUN PORTS -sills, and stops/linings
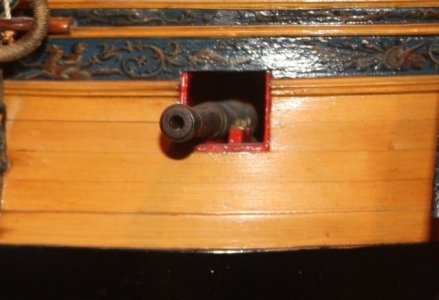
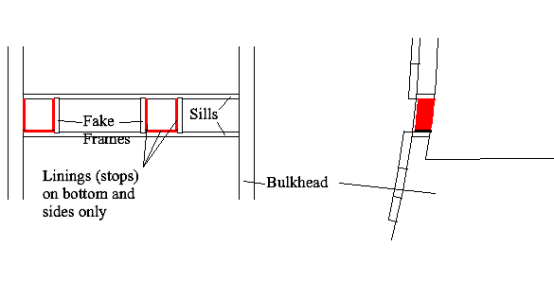
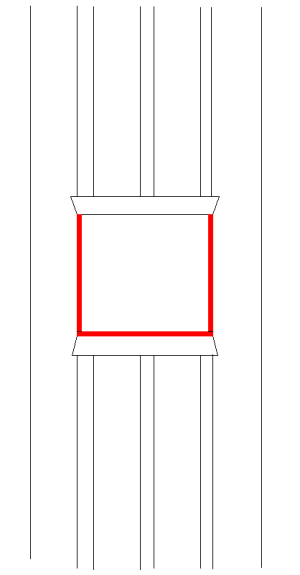
Many kits erroneously have gun port linings/stops on all four sides of the port. In real life there were the frames on the sides and sills on top and bottom. Linings/stops were nailed to the frames on the sides and the top of the bottom sill, not on the bottom of the upper sill. It is not difficult to simulate this on a POB or POF build. As the spacing of the bulkheads/frame on a POB is quite wide an overly long sill can be placed between them then vertical pieces simulating the frames. The port only had linings on the frames on the side and top of the bottom sill for the lid to sit in place when closed. There was no stop on the bottom of the upper sill. The stops were recessed in the port so the lid would close flush with the hull planking and were typically only about 1.5" thick. The below photo shows a contemporary model gun port with the three, not four, stops. The first sketch shows an easy way to construct this on a POB built and the second sketch shows it on a POF build. Note that the lower sill sometimes had a birds beak shape on the ends rather than an angle mortise.
Allan
1732540896154.jpeg

1732540621100.png
1732540663084.png
 
Brass versus copper
There are instances where I find copper superior to brass. An example are metal bands made from sheet stock. Another use ---- If a stiff wire is not needed such as for hooks, copper is also a great substitute as it comes in a nearly infinite number of diameters compared to copper. The big plus for me is that it is very easy to blacken using diluted liquid liver of sulfur which is not expensive. Once the piece cleaned and is in place it can be blackened with the LoS in situ. The LoS will not stain the surrounding wood and it is instantaneous. LoS can be found in solid form to be dissolved in water but I have not tried this as my two ounce bottle of liquid will probably last a life time and then some.
Allan
 
Last edited:
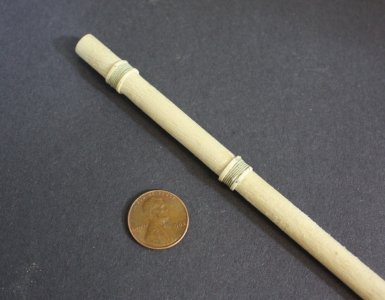
MAST HOOPS, RETAINING RINGS AND WOOLDINGS
The most common methods of making these seems to be thick cardboard such as poster board or card stock, brass, and wood. I have used all three methods depending on the scale and situation. Poster board is easy enough and metal rings, when appropriate, can be made from sheet or by slicing off rings from a brass tube if the diameter is correct for the mast,

Wood was the material used for wooldings and sail hoops and can be made with basic hand tools including a hobby knife and fit to any size needed.

Hoops for sails
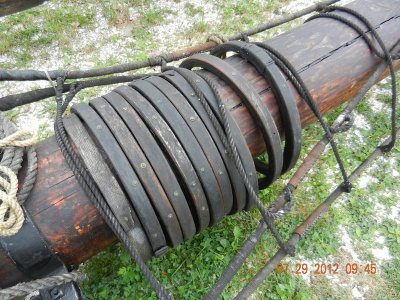
To be clear, the following photo show the hoops I am referring to.
1732794379864.jpeg
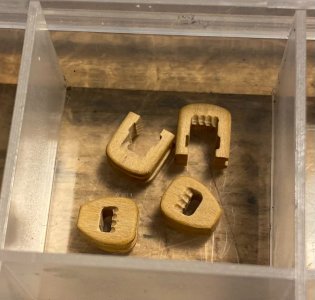
To make these I use a piece of dowel that is about 5% to 10% larger in diameter than the mast. The wood I like best is holly as it is tight grained and easy to shape. Basswood is a good choice as well and poplar is not a bad substitute as it is easy to find.

I first start by cutting strips to size. These strips can be cut using a saw or cut from sheet stock using a hobby knife if a saw is not available. The thickness varied but 1.25" to 1.5 inches for mast hoops and 1" to 1.25" is accurate.

Once the strips are made I soak them in water for an hour or so to make them pliable and so they will not split when bent.

Cut strip
1732794977171.jpeg
Soaked strip
1732794992537.jpeg

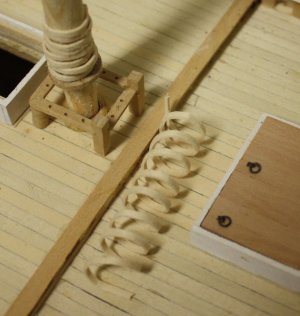
Wet strip wrapped around dowel rod
1732795095228.jpeg
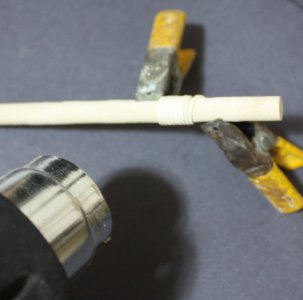
Hoops dried with hot air gun or hair drier
1732795155810.jpeg
Dried and ready to cut into rings
1732795225088.jpeg

Mast hoops
1732795067451.jpeg

Woolding rings
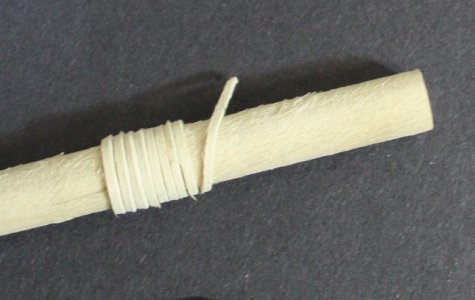
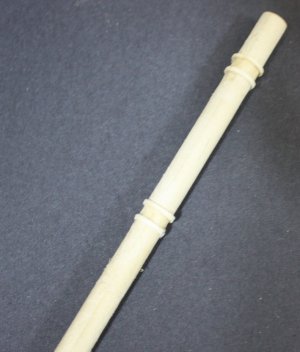
For some unknown reason some kits neglect to show the wooden rings in their drawings and instructions. I do not recall ever seeing contemporary plans or models that have rope wooldings without the wooden rings. If there are cheeks or fish, the wooden rings and rope go over them. When metal rings came into use these went under the fish and cheeks. The rope was nailed in place, but to protect against wear and to help keep them in place, the wooden rings were nailed above and below to protect the rope winding. The size of the wooldings themselves was 0.2 X the main stay in all cases according to Lees in The Masting and Rigging of English Ships of War. I am guessing they would be similar for other nationalities. There were typically twelve wraps of woolding rope. I cannot find anything regarding the sizes of the wooden rings on top and under the rope of the wooldings but estimate these based on contemporary drawings and drawings in Lees.
If the wooden rings are too thick, chuck the mast in a drill or lathe and sand the rings so the thickness is similar to the diameter of the rope.
1732798418531.jpeg


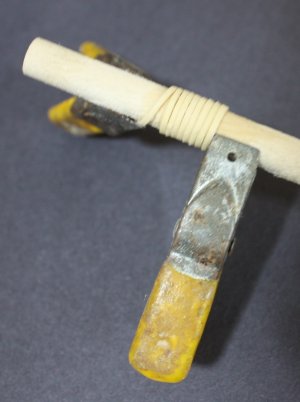
Rope in place. Note that I made these as a sample for this post. In reality there should be about 12 wraps of rope.
1732798497767.jpeg

If anyone has more information on wooldings and rings in general, please add to the information above, or if I got anything wrong, please feel free to point this out.
Allan
 
Last edited:
The wooden hoops are very subtle on wooldings, such that many models omit them for simplicity. Instead of wood, you can use wood filler pressed into the inside angle formed by the woolding line and the mast surface, above and below the woolding. Wipe off the excess with the edge of a tool, and carefully sand any lumps out after it dries, then stain or paint. Add the trenail heads on the bands with a small mechanical pencil or tiny dots of paint. This is much easier than fighting a strip of wood which wants to splinter, especially on small models.
 
This is much easier than fighting a strip of wood which wants to splinter, especially on small models.
Thanks for the idea, it sounds like a really good one!
As to splintering, I have never experienced this if I use a tight grain wood such as holly or basswood, and the smaller the size, the easier it is to work.
No matter, I intend to give your method a try so thanks for the input!!
The wooden hoops are very subtle on wooldings, such that many models omit them for simplicity.
If simplicity is the goal, ship modeling may not be the best choice for a hobby.:)

Hope you had a great Thanksgiving Kurt

Allan
 
Another option is not pulling them through the drawplate but only make points:
View attachment 484988
Then you can make smaller points. Twist them into the drilled hole with some glue and the tip will brake of. Them you only have to sand them flat with the surface. 0,31 mm = 0,012”.
Regards, Peter
Thia idea seems a lot faster. It gives me the idea of sharpening the dowel in a motorized pencil sharpener. Have not tried this but I will. Norgale
 
TREENAILS -
There are multiple ways to make treenails successfully. The things I try to keep in mind:
Subtle color
Scale
Strength
Cost
Time
Tools needed

Regarding diameters the following shows typical diameters needed at different scales. I have never tried to make wooden treenails smaller than 0.016" diameter but if someone has done this with success, I for one would love to see how to do this. Dimensions are in inches.

--------------------------- Full size ------------1:98------------------ 1:72----------------1:64--------------- 1:48

Hull--------------------------1.5-2--------- 0.016 - 0.02---------0.02 -0.028 ------ 0.023-0.031------ 0.031-0.04

Deck nail covers-------------1.5-----------------0.016---------------- 0.02--------------- 0.023------------0.031

Based on information from Peter Goodwins, The Construction and Fitting of the British Man of War, pp 60-61, decks were often spiked, not trennaled but then covered with a 1/2" thick 1.5"diameter round (or diamond shape) wooden cover. For the models trennals no larger than 1.5 inch diameter would have the appearance of the wooden covers. When wooden trennals were used on the decks rather than iron spikes they would have been about 1 inch diameter.

The photos are various methods I have seen used and there are probably more, with their own benefits and flaws. My preference is the last description. If anyone has more methods that they have used with success, it would be great to see these.
Allan

1.) Toothpicks.
View attachment 484690
2.) Made with hypodermic needle
View attachment 484691

View attachment 484692
Draw plate with bamboo, my favorite method
Start with any bamboo skewers. They are cheap and go a long way.
Slit the skewer with a hobby knife such as an Xacto or Swann Morton, et al. I slit these into as many strips as possible as they need to get down to some small diameters and the largest hole on my draw plate is 0,059 inches. When running the piece through the draw plate it is good to pull at a slight angle and the pass it through the same hole two or three times. I cannot speak for the first two methods but I can produce about 200 trennals down to the smallest diameters in about an hour. Large diameters take less time with subsequent increased output.
View attachment 484970
View attachment 484971
View attachment 484973
View attachment 484974
View attachment 484975
--
Draw plate and bamboo splits is my favourite too. I made a lot of these some 30-35 years ago, Ø1mm and Ø1,2mm, cut them down to ~50mm length and still have a lot of them saved. Back then I got the idea from Harold Underhill :-)
 
Back
Top