Trident Model HMS Alert 1777 1:48 POF, built by mstritzl

Little trick as every 2nd rib is smaller than the keel width. Use the pushout ( throwaway) part from the M template for the ribs and peg onto the rib at the slot point. You can then file away till the slot is the same width as the cutout and it will protect you from breaking off the lugs. ( its in my video out shortly). Saves heaps of time and measuring.
Also wood sheet 14 is the same thickness as the keel. so test against the edge of and it it sits on it nicely then all will be good.
 
Waiting patiently for my kit, observing the building logs. Great work!
Although not unexperienced in modeling, my respect for the kit and its builders grows ervery day!
What is the horseshoe-form cutaway at the bow for? Never saw this before!
Christian
 
Waiting patiently for my kit, observing the building logs. Great work!
Although not unexperienced in modeling, my respect for the kit and its builders grows ervery day!
What is the horseshoe-form cutaway at the bow for? Never saw this before!
Christian
Hallo my friend,
the horseshoe was made out of iron, so an iron plate in this form, and was an additional stiffening / reinforcement to keep the wooden parts together (eine Art "aussen liegende Bewehrung")
according the Oxford glossary:
A U-shaped iron plate fastened across the seam of the stem and forefoot to strengthen it.
towards the stern they used sometimes the fishplate
 
Hello Folks,
I am not really lazy, but quite busy at work - preparing our company for the next lockdown - even if it will be not a "full one" this time ... we'll see...

In my little spare time I am still working on the Ribs and Cant-Frames.

My special Thank this time goes to @Maarten for his great pictures and the mentioning of "scratching" - what a wonderfull way to work on the Ribs!! I almost feel like a real Carpenter using his Drawknife ;)

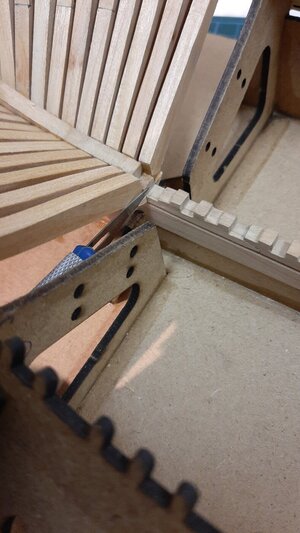
At the moment I'm trying to fit the Cantframes to the Deadwood ...wondering how to cut out the little steps best ...probably with a sharp blade, like Steve showed us once cutting grooves into deckbeams and so ...
How did @Maarten trim the Deadwood for this perfect fit?

Stay safe - but have fun!
I cut into the deadwood with a sharp pointed knive, you can acces it from the sides. The cut has to be nearly parallel to the previous placed frame.
 
Last edited:
well, two blades and 3 bloody fingers later - no, wasn't that bad ;) - I finaly shaped the first step - well, actualy two, both sides... nothing glued, all Ribs are just dry fitted for now. But it realy works, even inside the jig! It is realy robust and nice to turn on every side you need!
IMG_20201026_112336.jpg
IMG_20201026_112501.jpg

2 done, 22 more to come.... but there is a light at the end of the tunnel
Hojotoho! Hojotoho! - hmm, maybe I should stop listening to Wagner and choose something lighter like Listz or Bach ....but the 15 Hours of the "Ring" seemed just right for the Cant-Frames ;)

Have fun! - but stay safe!
 
well, two blades and 3 bloody fingers later - no, wasn't that bad ;) - I finaly shaped the first step - well, actualy two, both sides... nothing glued, all Ribs are just dry fitted for now. But it realy works, even inside the jig! It is realy robust and nice to turn on every side you need!
View attachment 187752
View attachment 187753

2 done, 22 more to come.... but there is a light at the end of the tunnel
Hojotoho! Hojotoho! - hmm, maybe I should stop listening to Wagner and choose something lighter like Listz or Bach ....but the 15 Hours of the "Ring" seemed just right for the Cant-Frames ;)

Have fun! - but stay safe!
Go with Vivaldi and you finish it before the weekend. :)
 
my recommendation would be Barbara Streisand
Oh I love her! I still remember her last Conzert here in Vienna, Schönbrunn, some 15 years ago! I am so happy I had the chance to see her live!
Just like Cher a year ago - the last of the "must see live" Artists on my list!
And since there are no real new ones out there, from now on it will be just repetitions - if they let them perform... Ozzy Osbourne - with Judas Priest - finally got canceled last week, just as the Nigthwish Tour...
a real sad last year :oops:
but still: Have fun! - but stay safe!
Who needs all these popstars and concerts - we have our monthly "come together" with Willi Meischl, or?
BTW: Good progress my friend :cool:
 
Back to work - or better said hobby ;)

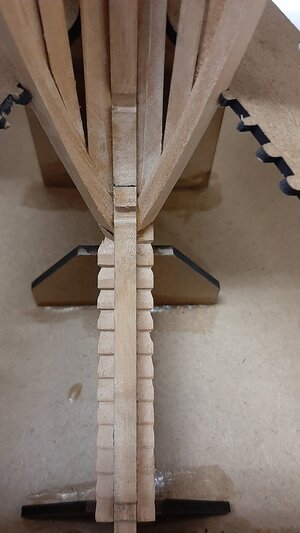
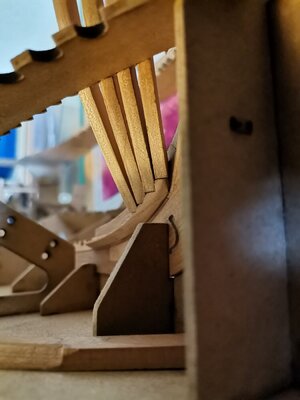
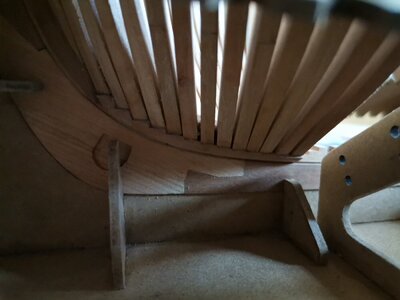
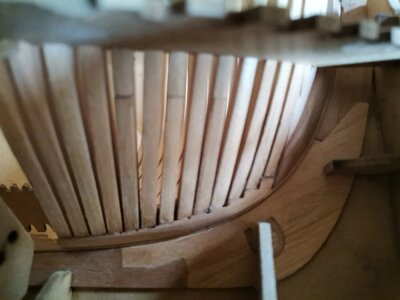
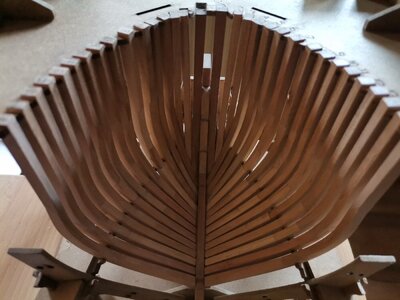
Finally I finished the Cant-Frames of the Bow ... not nearly as accurate as Maarten, but I am quite happy with them:
IMG_20201108_135230.jpg
IMG_20201108_135318.jpg
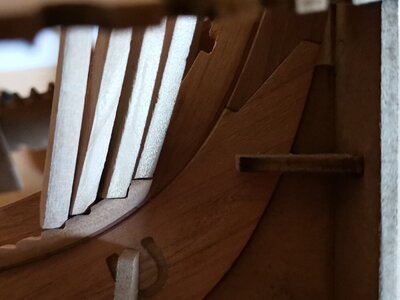
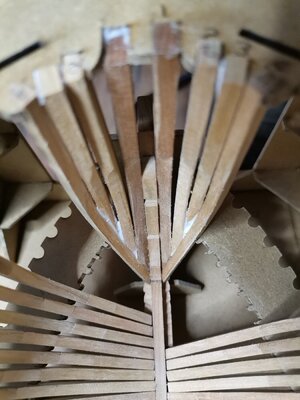
the real "hard" pieces where the Hawse Pieces AL2 & AL3 - AL3 particularly! ... when I started to shape it I wasn't even sure if it will go to port or starboard, had now Idea what plane will adhere tho which of its neighbours :eek: ...but finaly the all fell in place:
IMG_20201107_124958.jpg
IMG_20201108_135421.jpg

You may notice - or not, like I do not :cool: - I opt out on "bolting" ... I really just see them with a magnifyer/makro... and there is so little time for the hobby at the moment, I didn't want to "waste" it on details I'll just "know" I did them ... so I will continue with the Kit as Trident designed it ;)

So lets call the Bow finished, on to the Stern for now!

Have fun! - but stay safe!
 
Back to work - or better said hobby ;)

Finally I finished the Cant-Frames of the Bow ... not nearly as accurate as Maarten, but I am quite happy with them:
View attachment 191845
View attachment 191846
the real "hard" pieces where the Hawse Pieces AL2 & AL3 - AL3 particularly! ... when I started to shape it I wasn't even sure if it will go to port or starboard, had now Idea what plane will adhere tho which of its neighbours :eek: ...but finaly the all fell in place:
View attachment 191851
View attachment 191856

You may notice - or not, like I do not :cool: - I opt out on "bolting" ... I really just see them with a magnifyer/makro... and there is so little time for the hobby at the moment, I didn't want to "waste" it on details I'll just "know" I did them ... so I will continue with the Kit as Trident designed it ;)

So lets call the Bow finished, on to the Stern for now!

Have fun! - but stay safe!
Looks great. Leaving the bolts out saves you a month of work. :)
 
Hi Jimsky,
there is so much work and stress at the moment in my office, when I finish work my eyes are too tired to work on the ship - so no process the last few months ...
next month I hope to get one or two new members in my team, so I hope the work will spread a little more among us - and I am not just tired in the evening to continue on that lovely model ;)
Stay safe all!
best regards, markus
 
Well, since I am participating so much from all of yours help in this great forum, I thought I’d share my bit back to it. I am no great photographer and have quite limited time to build, so this log won’t be a leading guide like others, but maybe my insights are still valuable for someone.

I have started quite some kits over the last few years and put them aside 1/3, 1/2 or nearly finished due to several reasons: I didn’t like the quality of materials (and/or broke something) or instructions – or wasn’t able to follow them…the scale was to small for me to handle… or I simply lost the interest in the model…

But with this kit – and the associated Group-Build – all should be different, I decided to go slow and easy, due to work I have quite some forerunners to sneak peek from ;)

All comments, criticism, suggestions, assistance are very welcome!

This is my first PoF-Kit, I was quite amazed by the amount of wood panels in the box! – it is also my first cnc-milled kit, so I started with the cleaning of the boards. I picked my Dental-Tool and started to scratch out the shavings – and realized I scratch all way through the remainder of the wood, that holds the parts in their panels…the other thing I noticed was the amount of sawdust, that comes out of just one panel – and the time to clean just one of them.
Thinking about a better and “safer” way to clean them, I switched to inventory and labelling the parts. I used a soft pencil (2b) to transfer the numbers from the instructions to the components. I noticed that the layout of my boards 11 and 12 differs from the instructions – some parts where simply arranged different (AL 42, 55, 57), but one of eighter FL96 or 102 was missing.
View attachment 181864
View attachment 181865
Finally I found a small board – that was nowhere mentioned – in my box with “another” 20 of those half rounded parts (page 35, FL92, 94, 96, 98, 100, 102; part of the Gunports I think). I hope the are all the same (or at least easily adjusted).

The Chocks of the Ribs differ a little, so they needed careful labelling. Also the parts of a single rib are spread over several boards … planning to cut just the parts needed at the moment I decided to fill a little worksheet to help me finding them – @paulv1958 was so kind to rework it and put it in the “Build Reference Documents” thread.

Back to cleaning the panels. After trying to hoover them out with my old ShopVac vacuum cleaner – still >1000W, long time forbidden to sell in Europe now ;) – I thought, why not do it the other way around? I took the boards to the workshop in our garden shed, turned on the compressor to blow the chippings out and – they laughed at me :p
Ok, with increased pressure (almost 8bar) and carefully tickling out the chippings with the Dental-Tool all the panels finally got cleaned. I (like others) noted quite some colour differences between some of the panels and wondered if it was the same wood – the chippings from the lighter boards seem to almost “paste” in the grooves, as if the lighter coloured wood was softer, damper, more resinous – or the milling bit was more dull at that time as even the cut edge was rougher. But the parts will get sanded – sorry, polished ;) – later and I liked that all the parts that for example form the Keel can be truly identified. I already knew I would not put and kind of paper/foil to simulate caulking in between them. I’m quite sure in the elder days they also took the wood they got to build their ships and just selected concerning form/function and not looks of it – or painted/coppered over it anyway ;)

Cutting the parts out of the boards was the next adventure … Yes, it’s easily to cut through the thin remaining wood that holds the part, but there where a lot steps and corners I couldn’t get my scalpels in to actually “cut” it … I tried “piercing” it with a very slim blade, even with a needle.
Then I remembered seeing the all the grooves from the backside, when holding the panels against the light while cleaning them.
I got my light-board out on the table, put a glass for protection over it and started to cut the parts of the Keel/Dead Wood from the rear – at least the tiny corners I could not get the scalpel in – nice clean cuts without any splintering.
After I was almost done, I saw Pauls Video-Log where he cuts/breaks the parts out of the boards. What a sissy I was :p
Simple cut along the long edges, mark/scratch a little the tiny ones, that don’t allow the blade in and with a little pressure the part comes out – no splinters, the thin veneer breaks where it should – will safe me a lot time when doing the ribs!
Just remember to cut at the outside of the Groove, it is easy to clean the remaining seam with a sharp knife. I used my (narrow) Stanley/Olaf for cutting and the scalpel (since all my handles are Nr.3 #10 curved and #10A straight/pointed) for cleaning.

Back to the Keel: the notches in the Hog needed quite some work! Most of them didn’t meet the template. But all in the “plus”, so I grabbed my needle files and opened them to meet the jig. When I was pleased with the fit, I started to glue the parts according to the instructions. The little “tenon” at the top of BL19 can/must be removed to fit into the jig, but I think that should be done later … it strengthens the top, where the Wing Transom will be seated later and the groove needs to be adjusted. So at this point it would be better to just turn the jig aground and let this tenon lie over it.
View attachment 181866
View attachment 181867
The “Trick” with the cling film worked very well and all parts where glued only to each other!

While the freshly glued fore part dried inside the jig, I bevelled the aft part of the Keel according to the instructions and, again, with the help of a template.

View attachment 181868
View attachment 181869
Next step was the “bilateral chamfering” of the lower Keel/Stempost section and the upper Rising wood/Apron part. This was done by simply sliding a knife over the edge – as I learned in this forum: in only one direction …and also in the “right” direction of the wood! You will notice, there is one direction the wood is scratched smooth, the other way it tends to ravel out.
Then both parts where glued together – again using the provided jig.

View attachment 181870
After taking the finished module out of the jig and removing the cling film I noticed some glued congested the back/down side of the earlier formed Rabbet …so I picked up my needle files again to clean and also widen the Rabbet a little more. Thanks again for the tip to use a copper brush for cleaning, it didn’t do any harm to the wood!
So that’s where I stand now with the construction:

View attachment 181871
View attachment 181872
View attachment 181873
View attachment 181874
View attachment 181875
Hallo my friend Markus, alias @mstritzl
we wish you all the BEST and a HAPPY BIRTHDAY
Birthday-Cake
Enjoy your special day

Alles Alles Gute zum Geburtstag
 
Back
Top