Coming soon.
-

Win a Free Custom Engraved Brass Coin!!!
As a way to introduce our brass coins to the community, we will raffle off a free coin during the month of August. Follow link ABOVE for instructions for entering.
-

PRE-ORDER SHIPS IN SCALE TODAY!
The beloved Ships in Scale Magazine is back and charting a new course for 2026!
Discover new skills, new techniques, and new inspirations in every issue.
NOTE THAT OUR FIRST ISSUE WILL BE JAN/FEB 2026
You are using an out of date browser. It may not display this or other websites correctly.
You should upgrade or use an alternative browser.
You should upgrade or use an alternative browser.
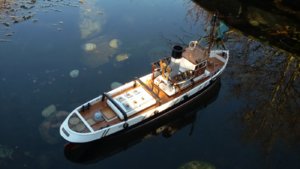
Ulises Steam Tugboat, by Occre Scale 1:30
Coming soon.
G'day Paul I'm looking forward to your new tug build,
best regards john,
Hi all, this will be a warts & all log of everything Tug & RC.
The reason for this build was two fold
1. I need a break from Tall ships and especially 1st Rate.
2. This a major change and the chance to learn lots of other skills:
* Building a Empty Hull from scratch
* Fiberglass & waterproofing a Hull
* Adding engines, Drive systems & Propellers
* Adding servos, & electronic Speed Controls
* Managing battery & power storage and weight control
*Setting Ballast correctly for the proper sit of the hull both Static & moving
*Working out how the RC portion works.
*
AND most importantly....
* being a big Kid again and having a bucket load of fun!
I looked around at several options from the Graupner, Dumas, Robie & Caldercraft range, but kept coming back to the Occre Ulisies due to cost and the fact it was a great looking tug and required building the hull. At 1.30 scale there is a lot of ability to add more details.
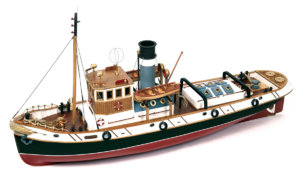
The kit was purchased directly from Occre Spain and cost 187 Euro plus 50 Euro shipped Fedex to AUS. That worked out a $418 AU delivered to my house. I would love to have supported local retailers BUT The cheapest supplier option in Australia was $644 and that was nearly $220 difference. Thats a markup of close to 50%, and way beyond the normal high retails of %30 in Aus.
As I also had no idea on what bits I need to get the boat actually RC, so after trying to reteach engines, transmitters, receivers, speed controls etc etc etc and the rumors of part incompatibility and propriety with parts I purchased a complete kit from Kyosho.
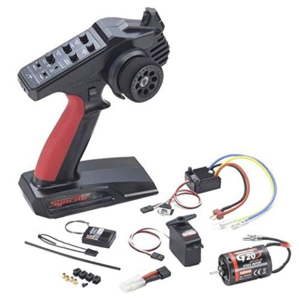
The 82143 EP Starter Pack II contained everything for a RC boat in one package.
( I'll go into detail when it arrives next week.). I may have paid more than i should have as a complete kit, but aleast its guaranteed to all work together.
The Ulises kit is Length : 830 mm. Width : 180 mm. Heigth : 400 mm. Scale : 1/30 when completed. Not to big for my works area or to lug to the local waterway to test(play).
Anyway I am currently ticking off all the parts before i start.
See you at stage 1 shortly
A review of the kit can be found in Kit review section
,
The reason for this build was two fold
1. I need a break from Tall ships and especially 1st Rate.
2. This a major change and the chance to learn lots of other skills:
* Building a Empty Hull from scratch
* Fiberglass & waterproofing a Hull
* Adding engines, Drive systems & Propellers
* Adding servos, & electronic Speed Controls
* Managing battery & power storage and weight control
*Setting Ballast correctly for the proper sit of the hull both Static & moving
*Working out how the RC portion works.
*
AND most importantly....
* being a big Kid again and having a bucket load of fun!
I looked around at several options from the Graupner, Dumas, Robie & Caldercraft range, but kept coming back to the Occre Ulisies due to cost and the fact it was a great looking tug and required building the hull. At 1.30 scale there is a lot of ability to add more details.

The kit was purchased directly from Occre Spain and cost 187 Euro plus 50 Euro shipped Fedex to AUS. That worked out a $418 AU delivered to my house. I would love to have supported local retailers BUT The cheapest supplier option in Australia was $644 and that was nearly $220 difference. Thats a markup of close to 50%, and way beyond the normal high retails of %30 in Aus.
As I also had no idea on what bits I need to get the boat actually RC, so after trying to reteach engines, transmitters, receivers, speed controls etc etc etc and the rumors of part incompatibility and propriety with parts I purchased a complete kit from Kyosho.

The 82143 EP Starter Pack II contained everything for a RC boat in one package.
( I'll go into detail when it arrives next week.). I may have paid more than i should have as a complete kit, but aleast its guaranteed to all work together.
The Ulises kit is Length : 830 mm. Width : 180 mm. Heigth : 400 mm. Scale : 1/30 when completed. Not to big for my works area or to lug to the local waterway to test(play).
Anyway I am currently ticking off all the parts before i start.
See you at stage 1 shortly
A review of the kit can be found in Kit review section
,
A review of the kit can be found in Kit review section
Occre Ulises Tug Boat
The Ulises Tugboat is a kit tugboat made by Occre. It is based on a steam tug of the 1900's and is 1:30 in scale. The web site states 'The Ulises model was an ocean-going tug. During the sixties, maritime traffic was very intense, the coming and going of goods crossing seas and oceans around...
shipsofscale.com
I am reserving seats for me and all who would love to watch this build log! Should be fun to build and even more fun...to sail. Good luck Paul!
Tks Sulaire, looks great
Tks Jim, your welcome to follow the journey. I'll have some to share the coffee with !
OK so I spent the last night checking off the parts list ( only 3 pages) and its all there. The fittings are finished off nicely and will not need much cleaning there is no burn on the play facing and its of good quality.
After cleaning up the workbench and relocating the Santa Ana, it was time to begin.
First of I cut , lined up and mounted the 1:1 reference plans and put to the back of the work area.
As the entire model is on 10 sheets of precut, I put it all the sheets to one side, and sorted and banded the wood striping into a single PVC 5" pipe for ready access.
The box for the kit could then be filed as it was no longer needed to store parts.
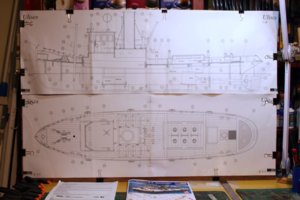
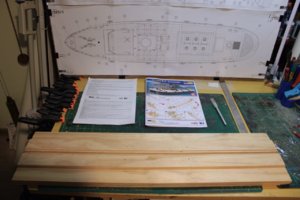
I also dug out mt very first build board and with luck it was the right size
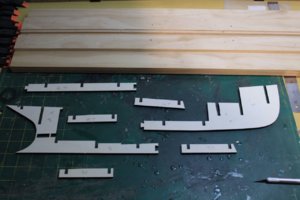
The 5 parts that make up the false keel were removed from the 6mm ply and test fitted. All well so far
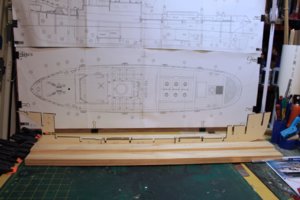
As its now 1130pm, time for the big kid to get some sleep, the clean up and gluing will have to wait till tomorrow. In case anyone is wondering what the T is next to the numbering I got into the habit of marking parts with a top and bottom .
Normally the ply has a cut side that is marked from cuts or burns ( bottom and a clean side). Also standard grade ply has a A & B side with A being the better quality side that supposed to face outwards.
It also allows me to put parts together facing the same direction and for me makes for less mistakes.
Back soon
Tks Jim, your welcome to follow the journey. I'll have some to share the coffee with !
OK so I spent the last night checking off the parts list ( only 3 pages) and its all there. The fittings are finished off nicely and will not need much cleaning there is no burn on the play facing and its of good quality.
After cleaning up the workbench and relocating the Santa Ana, it was time to begin.
First of I cut , lined up and mounted the 1:1 reference plans and put to the back of the work area.
As the entire model is on 10 sheets of precut, I put it all the sheets to one side, and sorted and banded the wood striping into a single PVC 5" pipe for ready access.
The box for the kit could then be filed as it was no longer needed to store parts.

I also dug out mt very first build board and with luck it was the right size

The 5 parts that make up the false keel were removed from the 6mm ply and test fitted. All well so far


As its now 1130pm, time for the big kid to get some sleep, the clean up and gluing will have to wait till tomorrow. In case anyone is wondering what the T is next to the numbering I got into the habit of marking parts with a top and bottom .
Normally the ply has a cut side that is marked from cuts or burns ( bottom and a clean side). Also standard grade ply has a A & B side with A being the better quality side that supposed to face outwards.
It also allows me to put parts together facing the same direction and for me makes for less mistakes.
Back soon
And the process continues
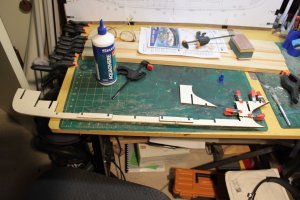
Gluing up the false keel
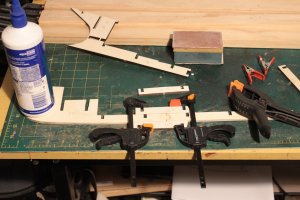
The strenthening bars on the join were first used to join the keep keep parts straight and when dry used to strenthen the joins
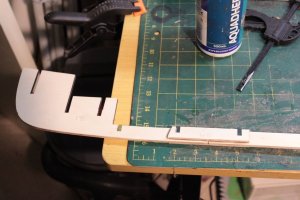
The tail piece which is quite fragile due to the number of cuts is widened to 18mm by adding two side strengtheners. These additionally cover the partially cut drive shaft slot which makes the drilling for the shaft at a later stage much simpler as the drill is guided along the pre-cut slot and only has to go through the hull planking & two small sections. Note I did say fragile ( see above clamp near slot). Strengtheners good choice!
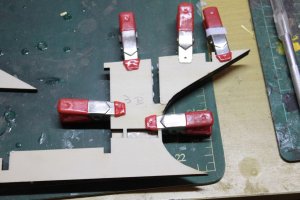
The complete Keel
Next 19 Bulkheads ( well you could call them frames as the planking is on them) were set out and cleaned up
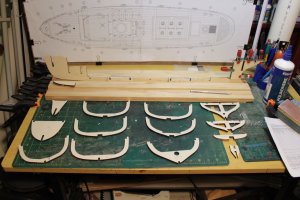
The fulkheads ( hmm not sure about that , lets call them Brames) were test fitted.
They were a little tight, but will need some sanding and persuasion to fit correctly ( A job for tomorrow)
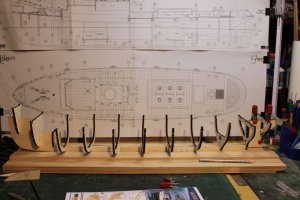
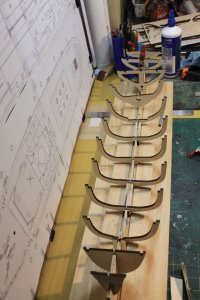
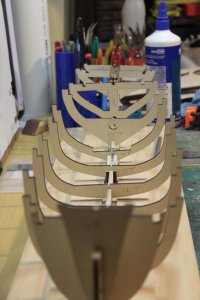
We will be back after this short break....
Gluing up the false keel

The strenthening bars on the join were first used to join the keep keep parts straight and when dry used to strenthen the joins

The tail piece which is quite fragile due to the number of cuts is widened to 18mm by adding two side strengtheners. These additionally cover the partially cut drive shaft slot which makes the drilling for the shaft at a later stage much simpler as the drill is guided along the pre-cut slot and only has to go through the hull planking & two small sections. Note I did say fragile ( see above clamp near slot). Strengtheners good choice!

The complete Keel

Next 19 Bulkheads ( well you could call them frames as the planking is on them) were set out and cleaned up

The fulkheads ( hmm not sure about that , lets call them Brames) were test fitted.
They were a little tight, but will need some sanding and persuasion to fit correctly ( A job for tomorrow)


We will be back after this short break....
Could you call this a “Frame Up”? 
Jan
Jan
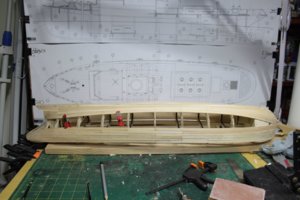
Next was to glue in the frames. The keel is VERY flimsy and bends easily at this stage I started at the rear and added the first three frames. This both strengthened the rear and positioned driveshaft hole over the keel hole.
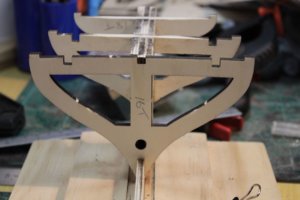
The instructions do not suggest drilling out the hole larger until later, however I decided for ease to do it to almost the correct size and insert a fiberglass rod. This would not only provide a guide to plank around, but being just slightly smaller in diameter ( 1mm) it would allow me to easily sand out the pathway to fit the shaft cover later.
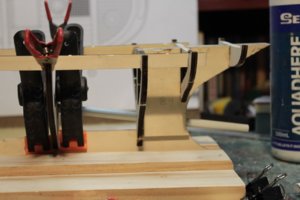
The instructions now suggest adding the rest of the frames completely, then adding a cross beam and finally longitudinal braces.
I chsoe to add the frames one at at time with the cross brace. then loosely place the londitudinal braces overt then to lock into the correct position for drying.
This made the install of the frames much simpler.
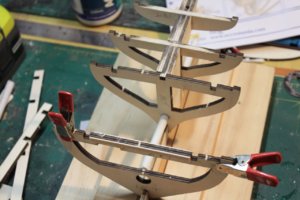
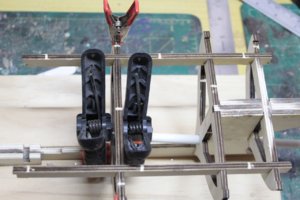
As the longitudinal braces only went 1 one third, I completed the back frams, then the front frames, and finally the center frames. Once these where dry the whole structure was clamped and pulled into place
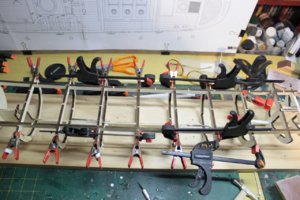
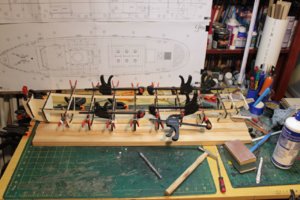

The instructions do not suggest drilling out the hole larger until later, however I decided for ease to do it to almost the correct size and insert a fiberglass rod. This would not only provide a guide to plank around, but being just slightly smaller in diameter ( 1mm) it would allow me to easily sand out the pathway to fit the shaft cover later.

The instructions now suggest adding the rest of the frames completely, then adding a cross beam and finally longitudinal braces.
I chsoe to add the frames one at at time with the cross brace. then loosely place the londitudinal braces overt then to lock into the correct position for drying.
This made the install of the frames much simpler.


As the longitudinal braces only went 1 one third, I completed the back frams, then the front frames, and finally the center frames. Once these where dry the whole structure was clamped and pulled into place


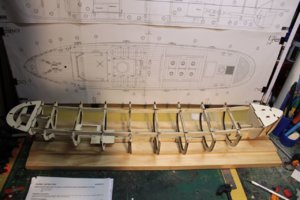
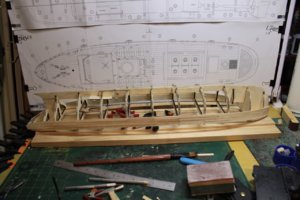
After overhight the hull was cured and now rigid enough to sand off the laser char. Additionally the motor & servo mount were added to the frames.
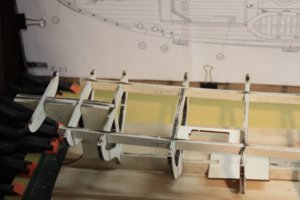
Next the rear deck & bracing were added
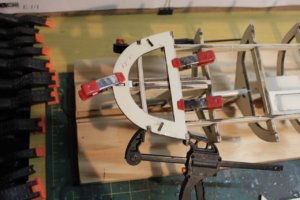
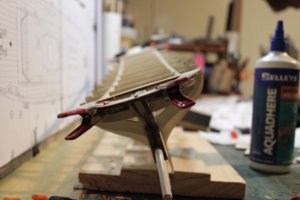
The bow deck was added next
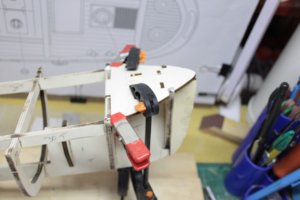
The hull skeleton is now complete and ready for faring & planking to begin.
So far all the parts have fitted snugly and required no modification.
The frame now feels as solid as it can be ( but not like a full keel) so faring will be a delicate process.
There is a decent curve to the main deck.
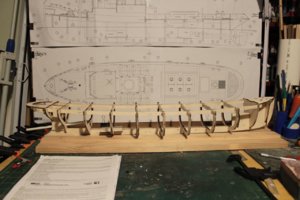

Next the rear deck & bracing were added


The bow deck was added next

The hull skeleton is now complete and ready for faring & planking to begin.
So far all the parts have fitted snugly and required no modification.
The frame now feels as solid as it can be ( but not like a full keel) so faring will be a delicate process.
There is a decent curve to the main deck.


G'day Paul, she is looking good, I just love Tugs, looking forward to the rest of your build,
best regards John,
best regards John,
Was there any difficulty in adding the longitudinal braces? I had a wee bit of fiddling to do to add the cross braces on my Seguin Tug.
Jan
Jan
Hi Jan
Yes there was a little but as it came in three sections, I gued each independantly and when dry pulled them together ( hence the mishmash of clamps) . The end gaps were over two of the frames, but were only 2-3 mm so pulled together easily with only a little pressure.
Hi John
Its a lot of fun and very relaxing compared to the SOTL kits. This is my first, but I want to do the Wattle from plans.
Definitely could become compulsive. with the Cov situation ( no im not a recipient yet), I could be motoring around in the old backyard Spa ( hot tub to our US brethren!).
Tks all.
Last edited:
Hi Jan
Yes there was a little but as it came in three sections, I gued each independantly and when dry pulled them together ( hence the mishmash of clamps) . The end gaps were over two of the frames, but were only 2-3 mm so pulled together easily with only a little pressure.
Hi John
Its a lot of fun and very relaxing compared to the SOTL kits. This is my first, but I want to do the Wattle from plans.
Definitely could become compulsive. with the Cov situation ( no im not a recipient yet), I could be motoring around in the old backyard Spa ( hot tub to our US brethren!).
Tks all.
The stringer on the Seguin was all one piece and ran mid ships from the stem to the last frame/bulkhead. It took a bit of fiddling and diddling to get it right.
Jan
The Seguin is a nice looking tug!
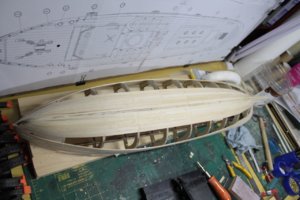
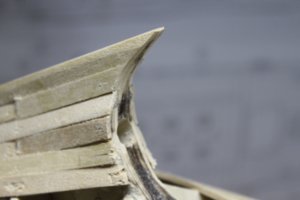
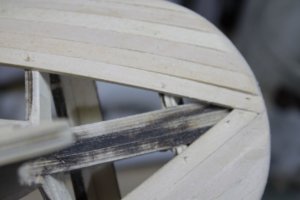
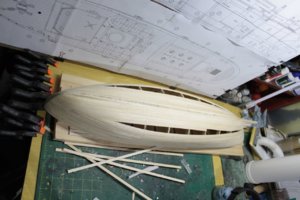
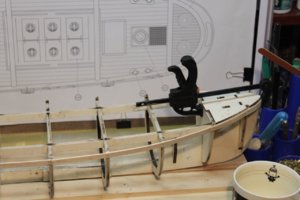
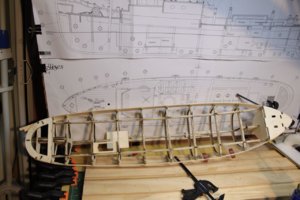
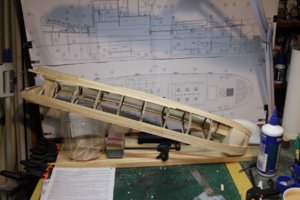
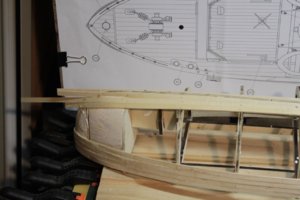
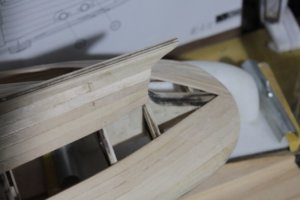
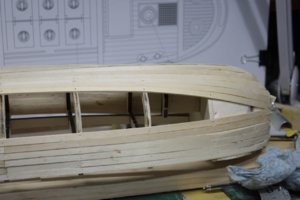
Hi Its been a while, but it was just a slow process of adding the hull planking.
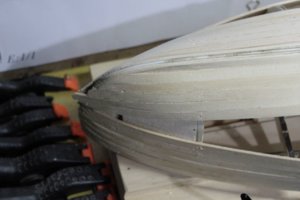
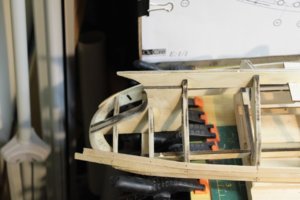
The hardest plank to fit was the first as it had to be a specific distance from the top of the frames to allow the upper plywood former's to be added.
It was also very delicate at this stage.
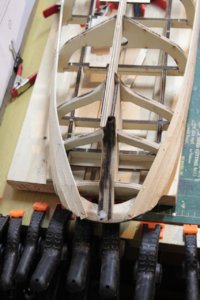
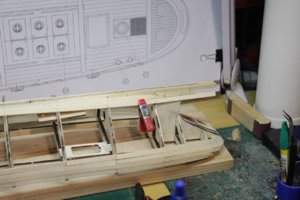
The series of photos go from start to completion. With the planks being so wide ( 6mm) this was a fun challenge.)
No filler has been added yet at only minor sanding has been applied. There are lots of small gaps between the planks but these will be filled later and covered in fiber glass.


