• Ships of Scale has incorportated an extra level of security when you log In. Please follow on-screen prompts to acknowledge that you are not a robot via a "Check Box" or a "Pictorial Check Box Puzzle". This is needed due to higher level of AI Activity Security.
  • SUBSCRIBE TO SHIPS IN SCALE TODAY!

    The beloved Ships in Scale Magazine is back and charting a new course for 2026!
    Discover new skills, new techniques, and new inspirations in every issue.

    NOTE THAT OUR NEXT ISSUE WILL BE July/August 2026
  • Win a Free Custom Engraved Brass Coin!!!
    As a way to introduce our brass coins to the community, we will raffle off a free coin during the month of August. Follow link ABOVE for instructions for entering.

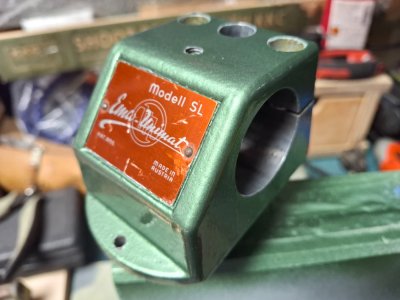
Unimat Hobby Lathe Restoration

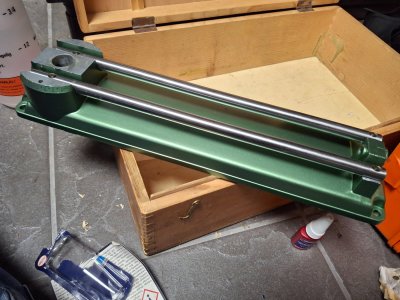
Soaked the ways in Evapo-Rust for 24h, they were a bit pitted where they interface with the bed itself. I chucked them in my drill and polished them using 600 grit and then 1200 grit. Came out ok. Hid the worst pitting against the bed. Massaged a light coat of oil into them before assembly. Freshed up the screw threads using a M6 die, and applied mild Loc-Tite before assembly:
20260811_202535.jpg
 
I was given a Unimat SL by my father as an 18th birthday present, which I supplemented later with the table saw and fretsaw attachments. These were used for the deck planks and hull frames respectively for my Elsie Grand Banks schooner 50 years ago but boxed up since then in various dry centrally heated environments so generally in good condition. But I'll be looking at servicing the bearings, checking the motor and generally greasing before using again. So this thread is very useful. Thank you.

I changed the original belts to a set sold on Ebay (from a seller based in Poland) as like-for-like replacements. They fit and the lathe runs but I have yet to see how durable they are.

I also found the following website which may be of interest if you are not already familiar: https://www.unimat-vintage-lathe.com

Ken
Some time ago I had to replace the belts on my Unimat. I took the whole unit , with speed reduction, into Miller Bearings in Fort Myers, and bought O-rings the right fit for the main and idler pullys. worked great.
 
Soaked the ways in Evapo-Rust for 24h, they were a bit pitted where they interface with the bed itself. I chucked them in my drill and polished them using 600 grit and then 1200 grit. Came out ok. Hid the worst pitting against the bed. Massaged a light coat of oil into them before assembly. Freshed up the screw threads using a M6 die, and applied mild Loc-Tite before assembly:
View attachment 625968
Looks much better than the original finish.
Are you doing the same with the other green parts?
 
Some time ago I had to replace the belts on my Unimat. I took the whole unit , with speed reduction, into Miller Bearings in Fort Myers, and bought O-rings the right fit for the main and idler pullys. worked great.
Did you make a note of the 'O' ring specs?
 
Looks much better than the original finish.
Are you doing the same with the other green parts?
Have stripped the head stock as we speak, and primed it. Using the same green paint. Not much original paint on any of the parts. I think I'll leave the motor though, paint is fairly decent on it.
 
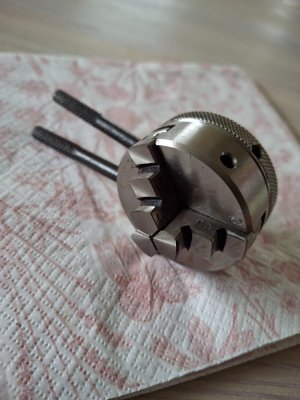
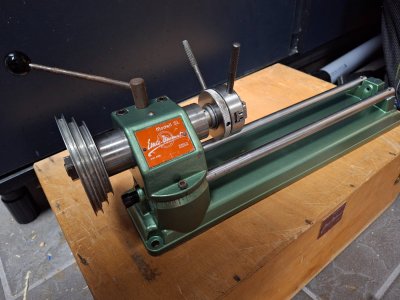
Lathe only had a drill type chuck, and I wanted a 3 jaw. Originals are expensive, but I bought this copy from India. Seems ok, hardened steel and cast iron, but I'll have to check run out once I've assembled the lathe:
20260812_191139.jpg
 
Did you make a note of the 'O' ring specs?
The receipt was with the lathe when Ian swept through the shop, all gone. Just put the machine on the counter on a slow morning; people become fascinated with Unimats (but you already know that).
 
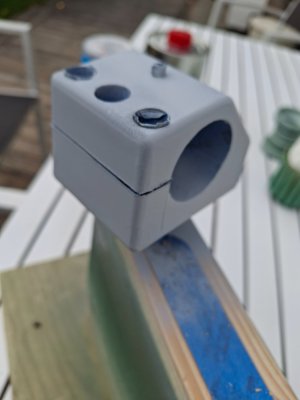
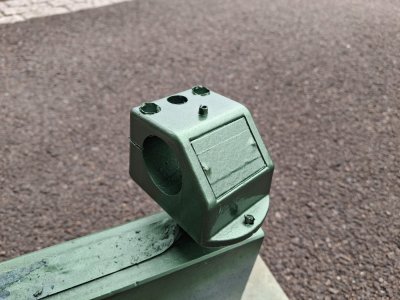
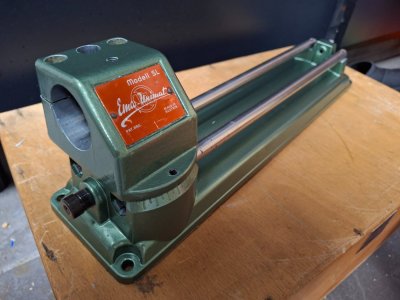
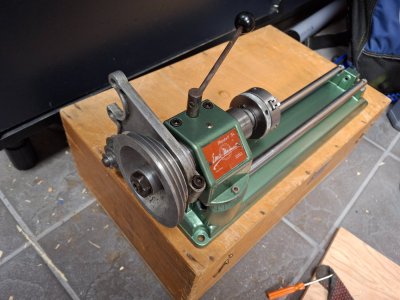
Masking off, hard to get nice transitions between paint and bare metal, did an atrempt with 600 grit paper. Good enough I think, it is a tool after all, wife's never having it on display in the living room anyway :
20260814_120635.jpg
 
Last edited:
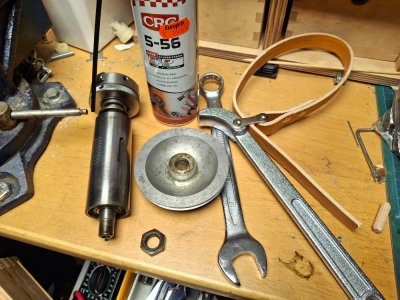
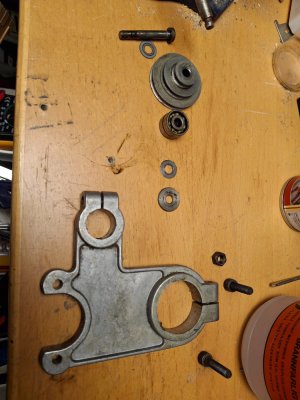
Using penetrating oil, patience, oilfilter wrench and a vice, I was able to remove the pulley from the spindle. Would have worked anyway, but being able to dissassemble everything for cleaning and greasing the bearings made me wanne do this before mounting it to the head stock: 20260822_173752.jpg
 
Last edited:
i mounted mine on a cookie bake sheet and put up a back splash for oil drip n chip catch. when done playing i use a cheap paint brush to clean her down n just take it off the bake sheet to dispose the shavings.

id like to get bigger knobs and find a way to get rid of the backlash in the lead screws so i can accurately make adjustments. im looking into some improvements i found in you tubes. but im getting use to using it as is.


using surface n dial gages requires some craftey mounting... im working on it.
 
Last edited:
@pugwash...

i know you have extensive experiance with the unimat lathe. i have a question about tools n cutting... particularly yellow brass for now. i chucked up a piece of 3/4 brass water pipe as an experiment. i dont have any other stock to try first chips.

i have several steel 1/4" tools that came with my unimat. they seem very sharp, also have a couple carbide, also sharp. i suspect they've never been used.

my test pipe is running true in the 3 jaw chuck. its nice n tight. the tool transport is very solid too, i went over it to take any slack out of the lead screws using the tension slugs. it doesnt have any movement x or y.

when cutting, i can only get dust and alot of chatter. i cant exert too much preasure or it would jam... unlike the monster holbrook i leaned on, that actually cut ribbons of material and is virtually unstoppable. ok its a mini lathe, i get it.

i tried cutting at the slowest speed 320, and at the next speed up, 650. i get a better cut at slower speed than the higher. but either speed still has alot of chatter. oh btw i did check how my tools line up to center n seem good. one cutter is ever so slightly below center, the other is dead center.

is this normal for the unimat or am i using the wrong tools or material?

 
@pugwash...

i know you have extensive experiance with the unimat lathe. i have a question about tools n cutting... particularly yellow brass for now. i chucked up a piece of 3/4 brass water pipe as an experiment. i dont have any other stock to try first chips.

i have several steel 1/4" tools that came with my unimat. they seem very sharp, also have a couple carbide, also sharp. i suspect they've never been used.

my test pipe is running true in the 3 jaw chuck. its nice n tight. the tool transport is very solid too, i went over it to take any slack out of the lead screws using the tension slugs. it doesnt have any movement x or y.

when cutting, i can only get dust and alot of chatter. i cant exert too much preasure or it would jam... unlike the monster holbrook i leaned on, that actually cut ribbons of material and is virtually unstoppable. ok its a mini lathe, i get it.

i tried cutting at the slowest speed 320, and at the next speed up, 650. i get a better cut at slower speed than the higher. but either speed still has alot of chatter. oh btw i did check how my tools line up to center n seem good. one cutter is ever so slightly below center, the other is dead center.

is this normal for the unimat or am i using the wrong tools or material?

Paul, hi.

Thanks for the flattery, but let me clarify... though I have some experience restoring 3 Unimats I have little experience using one.

First thing is to make sure the cutting tip height is set dead centre and sharp.
This seems to be ok with what you've said.

Both the headstock and tool post should be firmly locked.

Cutting brass is really what this lathe copes with best, so the stock is ok.
Is the lathe bed sitting squarely on a solid surface?

Cutting non ferrous stock requires tool tip angles different to those used for cutting steel.
Grab/chatter cutting brass/aluminium are indications these may need modification.

I have a bunch of the 1/4'' tools that came with my lathes (like you) and had no trouble cutting 3/4'', down to 2.5mm brass, producing fine chips or fine shaving swarf.

May I suggest finding a youtube tutorial on the subject?
A good video is worth more than endless words.

This fellow is a good start...
 
Last edited:
yes that fellow has good videos but not on actual cutting and tools. the unimat videos are more about restoring them instead of using them. id like to see more about projects on the mini lathes.

i played with it some more today and this time i fed slower at slow speed. the shavings are very fine and its giving me a better cut. im getting a fine wire chaff and dust. i guess im starting to develope a delicate touch on the machine. im not use to feeding so slowly.

btw im using one of these as a tool bed stop. i clamp it on the rail to prevent the tool from crashing into the chuck.

 
Last edited:
Back
Top