
-

SUBSCRIBE TO SHIPS IN SCALE TODAY!
The beloved Ships in Scale Magazine is back and charting a new course for 2026!
Discover new skills, new techniques, and new inspirations in every issue.
NOTE THAT OUR NEXT ISSUE WILL BE July/August 2026 -

Win a Free Custom Engraved Brass Coin!!!
As a way to introduce our brass coins to the community, we will raffle off a free coin during the month of August. Follow link ABOVE for instructions for entering.


You are using an out of date browser. It may not display this or other websites correctly.
You should upgrade or use an alternative browser.
You should upgrade or use an alternative browser.
USS Constitution 1:70 Scratch
- Thread starter mtbediz1
- Start date
- Watchers 80
-
- Tags
- constitution


To quote part of a song from the '60s,
slow down, you move too fast,
you got to make the moment last.
You are certainly off to the races, Mustafa. I'm certain you'll cross the finish line by Christmas. Fabulous work as always.
slow down, you move too fast,
you got to make the moment last.
You are certainly off to the races, Mustafa. I'm certain you'll cross the finish line by Christmas. Fabulous work as always.

- Joined
- Oct 9, 2020
- Messages
- 2,687
- Points
- 538

which song is that?To quote part of a song from the '60s,
slow down, you move too fast,
you got to make the moment last.
You are certainly off to the races, Mustafa. I'm certain you'll cross the finish line by Christmas. Fabulous work as always.
Neil DIamond?
Feeling groovy, Simon and Garfunkel. They used the word "morning", I substituted the word "moment".which song is that?
Neil DIamond?
As always, excellent workmanship - and an excellent tutorial for those of us following behind you in our own builds.
But now I'm wondering if you're going to skip the bow scrollwork. It seems to me that with the rigging in place, you're going to have a heck of a time painting that on, which is what I believe you said your were going to do. Are you sill planning to paint? Have you opted to skip this detail? Or do you have a plan C?
Curious minds need to know...

- Joined
- Jan 26, 2017
- Messages
- 1,426
- Points
- 493

Thanks, Peter. I haven’t given up on making the scrollwork. I’ll draw it separately on a piece of veneer, paper or cardboard off the ship, and then glue it in place.As always, excellent workmanship - and an excellent tutorial for those of us following behind you in our own builds.
But now I'm wondering if you're going to skip the bow scrollwork. It seems to me that with the rigging in place, you're going to have a heck of a time painting that on, which is what I believe you said your were going to do. Are you sill planning to paint? Have you opted to skip this detail? Or do you have a plan C?
Curious minds need to know...
- Joined
- Jan 26, 2017
- Messages
- 1,426
- Points
- 493
We’ve found our rhythm, so we’re keeping up the same pace!
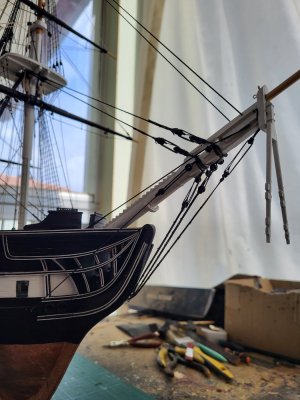
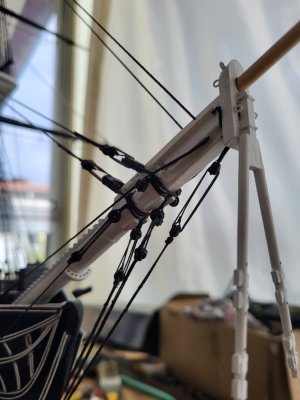
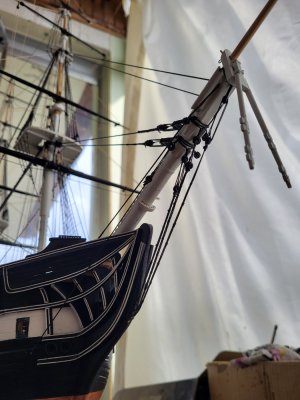
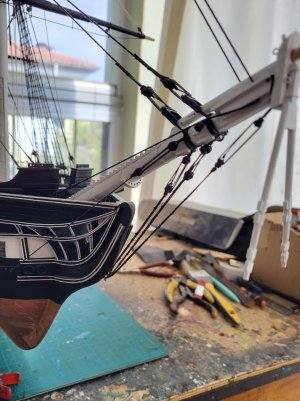
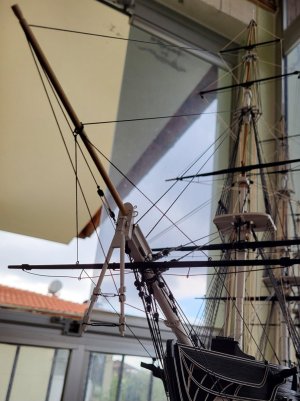
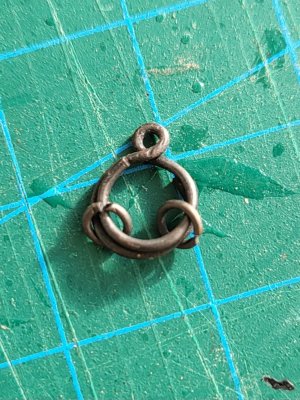
I made the spritsail yard and installed it in place. Rather than following the plans and dealing with soldering, I made the traveler ring by bending a single piece of brass wire into shape. I also added two small rings to attach the traveling guys.
I then completed the rigging for both the jib stay and the outer jib stay.
The jib stay is secured to the top of the fore topmast using a mouse. From there, it passes through the traveler ring and then through the sheave at the end of the jib boom. Its tackle consists of a double block and a single block with a hook, which is hooked to an eyebolt previously installed on the bowsprit cap. The hauling end passes through the fairlead and is belayed to a pin on the bow rail.
The traveling guys are attached to the two small rings on either side of the traveler ring. They then pass through the eyebolts on the spritsail yard and are secured by tackles hooked to the eyebolts on the catheads.
The outer jib stay, also known as the fore topgallant stay, is secured to the top of the fore topgallant mast with an eye splice. It then passes through the hole at the end of the jib boom, through the port-side hole in the dolphin striker, and through the fairlead before being secured to an eyebolt at the bow.
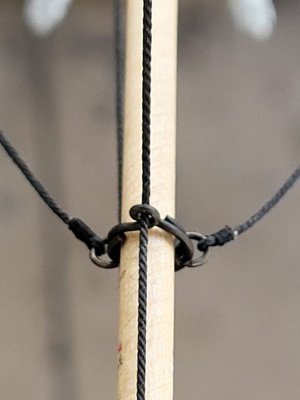
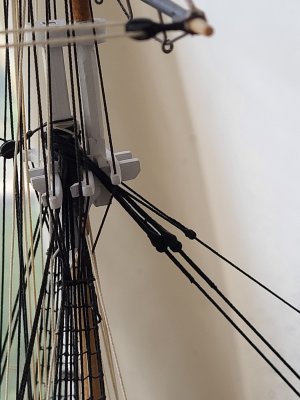
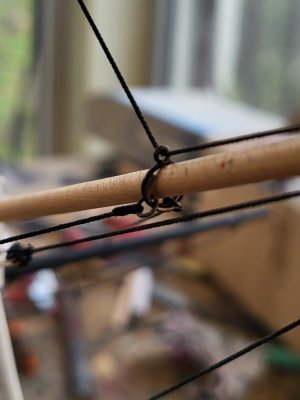
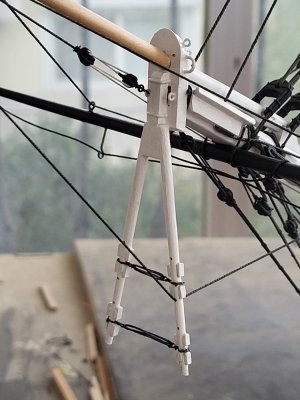
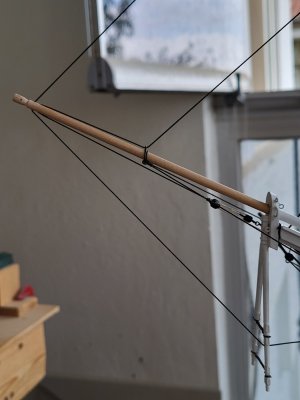
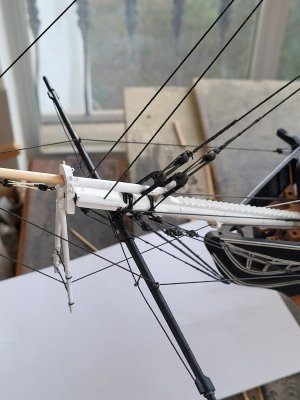
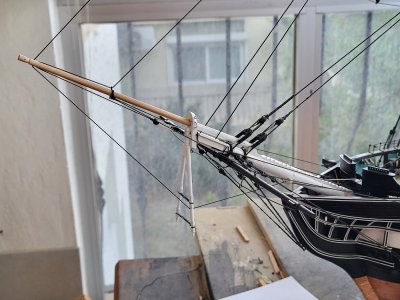
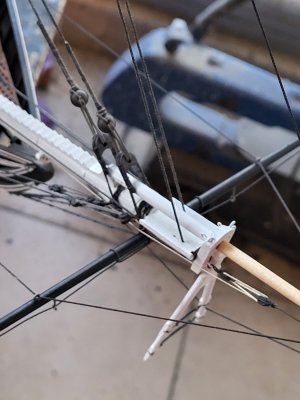
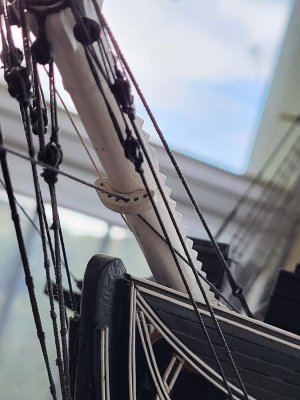
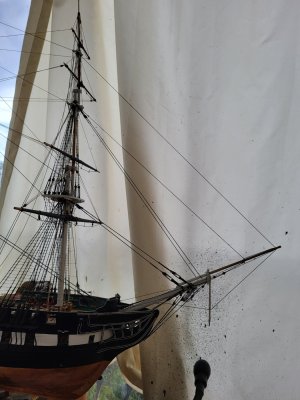
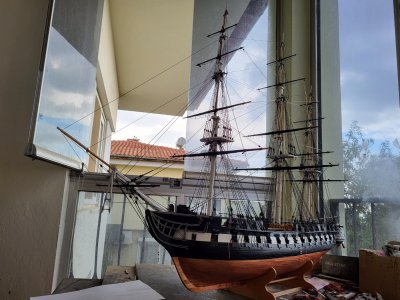
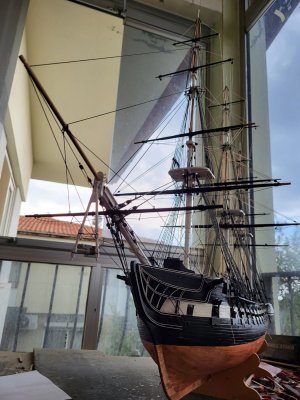
I made the spritsail yard and installed it in place. Rather than following the plans and dealing with soldering, I made the traveler ring by bending a single piece of brass wire into shape. I also added two small rings to attach the traveling guys.
I then completed the rigging for both the jib stay and the outer jib stay.
The jib stay is secured to the top of the fore topmast using a mouse. From there, it passes through the traveler ring and then through the sheave at the end of the jib boom. Its tackle consists of a double block and a single block with a hook, which is hooked to an eyebolt previously installed on the bowsprit cap. The hauling end passes through the fairlead and is belayed to a pin on the bow rail.
The traveling guys are attached to the two small rings on either side of the traveler ring. They then pass through the eyebolts on the spritsail yard and are secured by tackles hooked to the eyebolts on the catheads.
The outer jib stay, also known as the fore topgallant stay, is secured to the top of the fore topgallant mast with an eye splice. It then passes through the hole at the end of the jib boom, through the port-side hole in the dolphin striker, and through the fairlead before being secured to an eyebolt at the bow.
Last edited:


Looks great, Mustafa! So much detail!
How did you twist the wire and keep it in a perfect circular shape? Did you wrap around a drill bit or something similar?
How did you twist the wire and keep it in a perfect circular shape? Did you wrap around a drill bit or something similar?
- Joined
- Jan 26, 2017
- Messages
- 1,426
- Points
- 493
Yes Greg, this is a 0.7 mm brass wire. First, I wrapped it around a 1.5 mm drill bit to form the small loop. Then I took the two free ends and wrapped them in the opposite direction around a 5 mm drill bit to create the larger loop. For the small rings, I used 0.5 mm brass wire wrapped around a 2 mm drill bit, and then inserted them into the larger ring.Looks great, Mustafa! So much detail!
How did you twist the wire and keep it in a perfect circular shape? Did you wrap around a drill bit or something similar?
Last edited:
- Joined
- Jan 26, 2017
- Messages
- 1,426
- Points
- 493
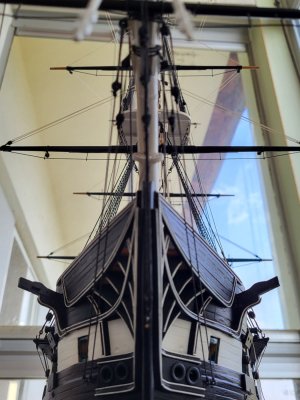
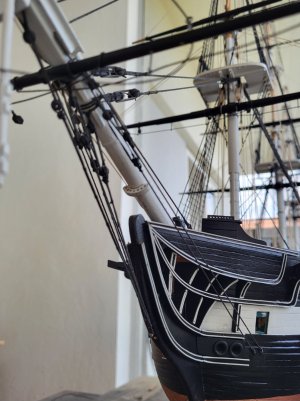
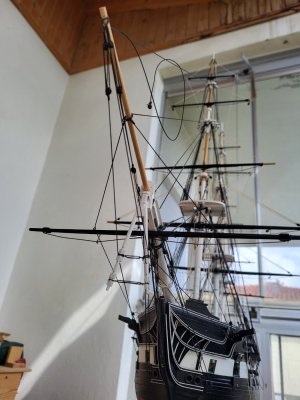
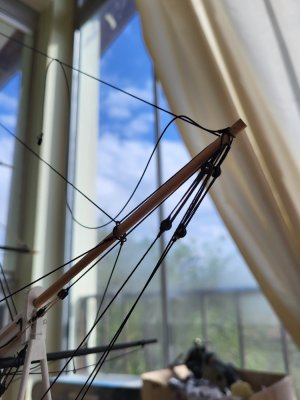
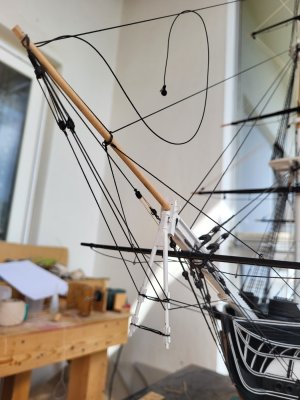
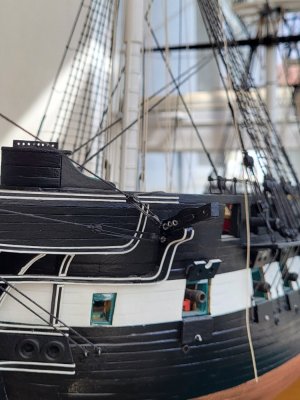
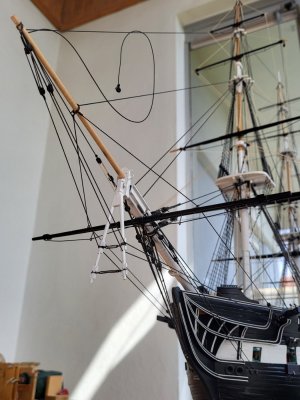
The port and starboard inner martingale stays are now complete. Each stay is secured at one end to the end of the jibboom and at the other to the cathead, using a pair of bullseyes at each connection. Before reaching the catheads, the stays are passed once around the upper cleats on the dolphin striker.
- Joined
- Jan 26, 2017
- Messages
- 1,426
- Points
- 493
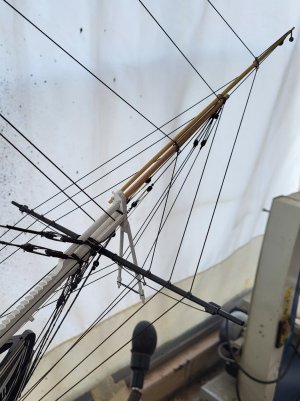
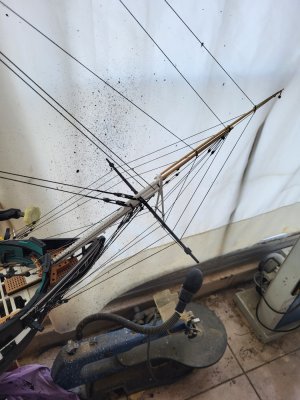
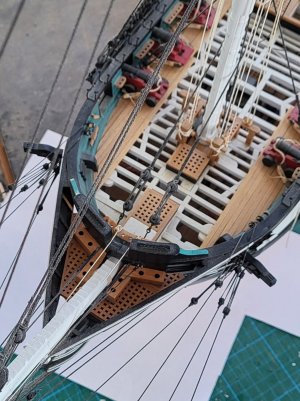
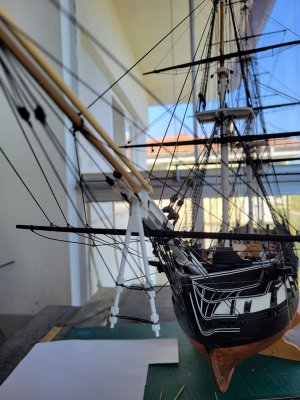
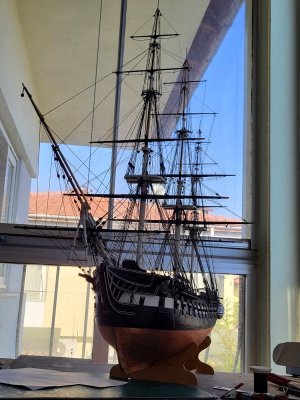
I completed the jibboom fixed guys and installed the flying jibboom in place. As with the previous one, I made the traveler ring by bending a single piece of brass wire rather than soldering it. I then rigged the flying jib stay, using the same attachment method as for the jib stay. Finally, I completed the flying jibboom traveling guys.
- Joined
- Jan 26, 2017
- Messages
- 1,426
- Points
- 493
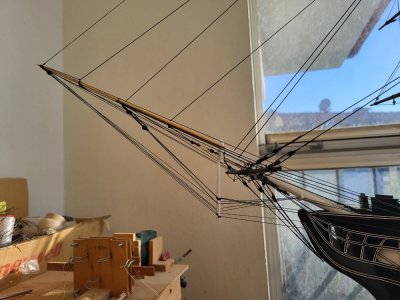
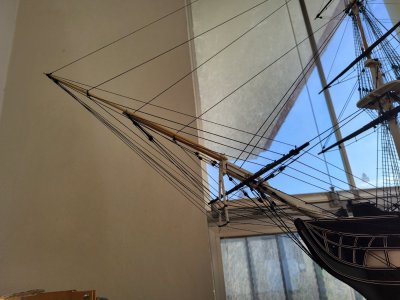
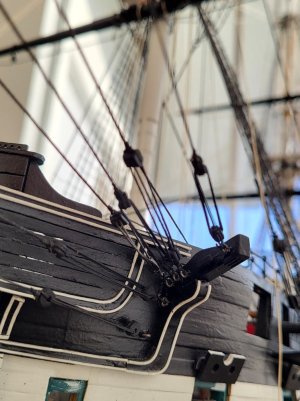
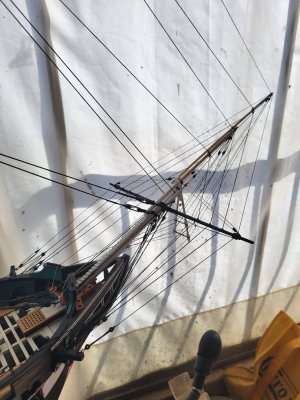
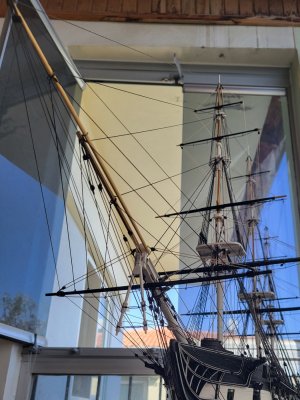
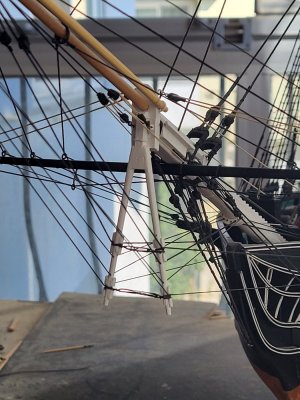
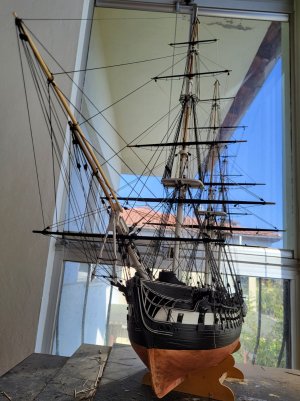
The rigging of the bowsprit assembly is now complete. Although it may look like a rather complicated arrangement, it is quite manageable if you carefully follow the instructions provided in the Model Shipways plans.
There is one important point worth mentioning, though: six lines are attached to each cathead, so I strongly recommend installing all the corresponding eyebolts before starting the rigging (even before mounting the cathead in its place). Having them in place beforehand will make the whole process much easier.
There is one important point worth mentioning, though: six lines are attached to each cathead, so I strongly recommend installing all the corresponding eyebolts before starting the rigging (even before mounting the cathead in its place). Having them in place beforehand will make the whole process much easier.
Last edited:


Perfection, Mustafa. Bravo!
- Joined
- Jan 26, 2017
- Messages
- 1,426
- Points
- 493
Thank you so much Paul!Perfection, Mustafa. Bravo!

Good afternoon Mustafa. Wow, Just brilliant- Kudos. Cheers Grant
Thank you for this piece of advice, Mustafa! Your rigging looks awesome, sir! One question that I have been wanting to ask you or Jon, or one of the guys that have already finished their Constitution... how many total eyebolts do you think you have placed on the ship? With all of the gun rigging, standing rigging, whatever running rigging you have placed. If I am remembering correctly, at one time Jon thought he had used (or will eventually be using) some 300+ eyebolts for all the necessary rigging. What's your projected number?There is one important point worth mentioning, though: six lines are attached to each cathead, so I strongly recommend installing all the corresponding eyebolts before starting the rigging. Having them in place beforehand will make the whole process much easier.
You made the complicated bowsprit look both beautiful and fully functional!!
Great job and wonderful pictures...thanks for sharing.
Great job and wonderful pictures...thanks for sharing.


- Joined
- Jan 26, 2017
- Messages
- 1,426
- Points
- 493
Thank you so much Grant!Good afternoon Mustafa. Wow, Just brilliant- Kudos. Cheers Grant