• SUBSCRIBE TO SHIPS IN SCALE TODAY!

    The beloved Ships in Scale Magazine is back and charting a new course for 2026!
    Discover new skills, new techniques, and new inspirations in every issue.

    NOTE THAT OUR NEXT ISSUE WILL BE July/August 2026
  • Win a Free Custom Engraved Brass Coin!!!
    As a way to introduce our brass coins to the community, we will raffle off a free coin during the month of August. Follow link ABOVE for instructions for entering.

USS Constitution - Model Shipways

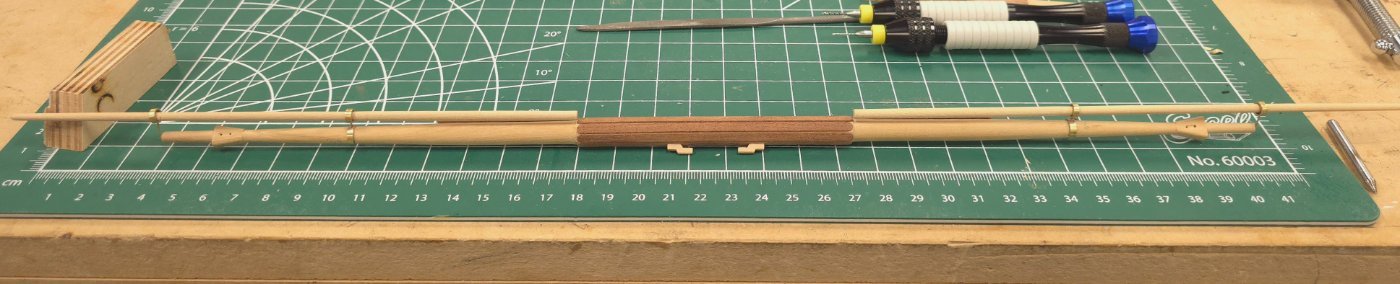
This is the setup I used to do the soldering for the above.
View attachment 619503

Nice little jig, Peter! I especially like the "notes" you write down directly on the jig board. Many times, I'll look at something I created like this a few months down the road and wonder "what did I use this for?!?"

...I have always used a toothbrush for this purpose but it doesn`t really remove everything.

That doesn't leave a funny taste in your mouth the next morning?!? <shrug> ROTF
 
July 17 Next up, the main topsail yard.

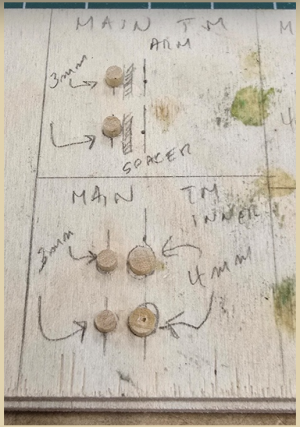
I prepared another fixture for soldering the inner and outer irons (right). This time I doubled up the setup. I didn’t like working with the second of each pair on a charred jig.
1784383193669.png


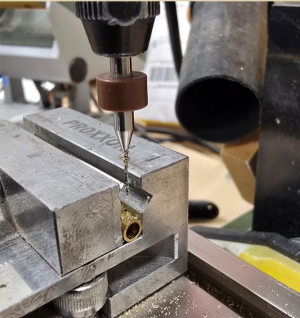
Then I got to work on the brass cylinders for the irons. Perhaps I’m overdoing it providing too much detail here, but I wanted to show how I set up reproducible machining steps.

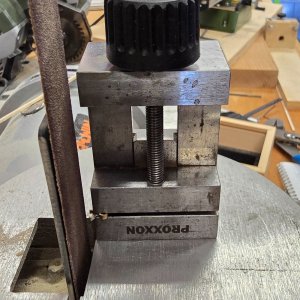
First, I clamped the brass tubing into the Proxxon vise flush with the end. Then carefully located the drill to center the hole in what will be a 2mm wide band. Of course, the hole needed to be centered side to side as well (left). This was eyeballed.
1784383250402.png

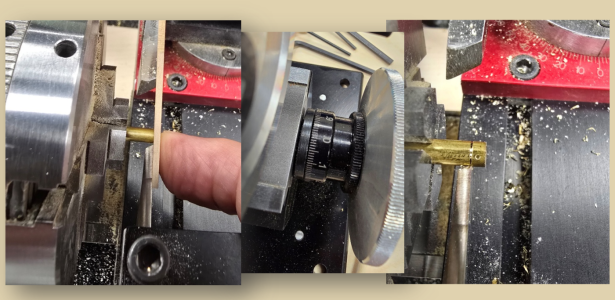
To set up the cut to net me a 2mm thick cylinder, I positioned the cut-off tool flush with the end of the brass tube. Then I set the dial on the carriage wheel to zero and moved the carriage exactly 2mm to the left. This process produced virtually identical parts.
1784383345915.png

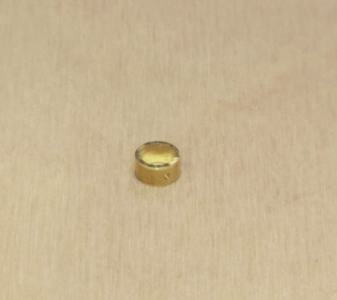
Here’s the first, hot off the assembly line
1784383399615.png

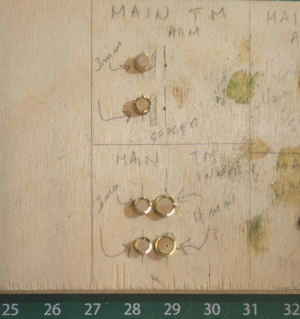
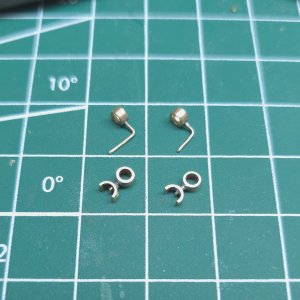
and the entire batch ready to be soldered
1784383431555.png
 
No such thing as "too much" detail... Nice brass work, Peter!
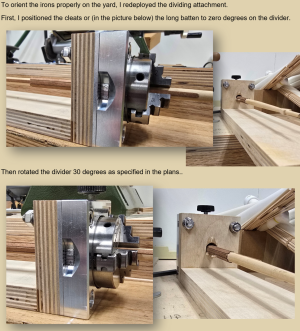
If you saw my update at the other site, you will have noticed that I'm missing some of that "detail" above. I showed how I positioned the holes in the yards for the irons using the dividing attachment. Only after updating the other post, did I realize I missed providing the detail here.

1784388457259.png

I had a senior moment here. For some reason, I freaked out and thought I had the irons in the wrong place on the yard. After checking Ken's build log, I confirmed that my original orientation was correct. So, I updated my personal build log and swapped out the photo below. The irons are correctly located - after all...
1784473272561.png
 
Last edited:
Geez, SoS has some of the same issues as MSW when it comes to what you see when you're working on a computer versus what you see when you're looking at a build log with the phone.

When I was working on my computer at home, the font for text in the post matched the size of the font in the images from the screen shots of my off line log.

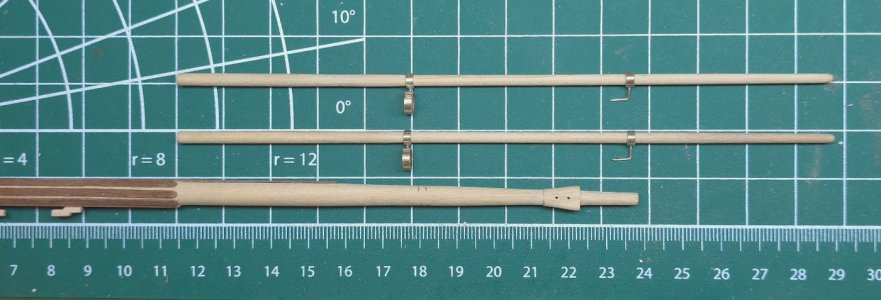
I'm going to attach a photo here, to show the irons for the foremast yard. Two more yards to go after that. Man, oh man, this is the most grueling part of the build yet. I have to solder the inner irons to a pin and keep the solder from running rampant over either ring. The solder doesn't always get where it needs to go, and I've had to repeat the process about a third of the time. This is probably the most frustrating task I've endured in the entire build, and I thought the galleries and bow scroll work were a PITA!

Anyway, this is slow going but I hope to have the irons fabricated and affixed to the yards in a couple of days.

20260723_154510.jpg

20260722_121540.jpg

20260722_123300.jpg

To those of you following this build log, which do you use more often to check other people's progress? Your phone? or your desktop?
 
Last edited:
Geez, SoS has some of the same issues as MSW when it comes to what you see when you're working on a computer versus what you see when you're looking at a build log with the phone.

When I was working on my computer at home, the font for text in the post matched the size of the font in the images from the screen shots of my off line log.

I'm going to attach a photo here, but come back later tonight to post more photos and commentary.

This shows the irons for the foremast yard. Two more yards to go after that. Man, oh man, this is the most gruling part of the build yet.

View attachment 621195

To those of you following this build log, which do you use more often to check other people's progress? Your phone? or your desktop?
I do both because details are better on a PC, but I use the phone more because of the convenience.
 
July 17 Next up, the main topsail yard.

I prepared another fixture for soldering the inner and outer irons (right). This time I doubled up the setup. I didn’t like working with the second of each pair on a charred jig.
View attachment 619879


Then I got to work on the brass cylinders for the irons. Perhaps I’m overdoing it providing too much detail here, but I wanted to show how I set up reproducible machining steps.

First, I clamped the brass tubing into the Proxxon vise flush with the end. Then carefully located the drill to center the hole in what will be a 2mm wide band. Of course, the hole needed to be centered side to side as well (left). This was eyeballed.
View attachment 619880

To set up the cut to net me a 2mm thick cylinder, I positioned the cut-off tool flush with the end of the brass tube. Then I set the dial on the carriage wheel to zero and moved the carriage exactly 2mm to the left. This process produced virtually identical parts.
View attachment 619882

Here’s the first, hot off the assembly line
View attachment 619883

and the entire batch ready to be soldered
View attachment 619884

Amazing, every time I see you use the Proxxon mill, i understand how much i have to learn to use all its potential
 
Amazing, every time I see you use the Proxxon mill, i understand how much i have to learn to use all its potential
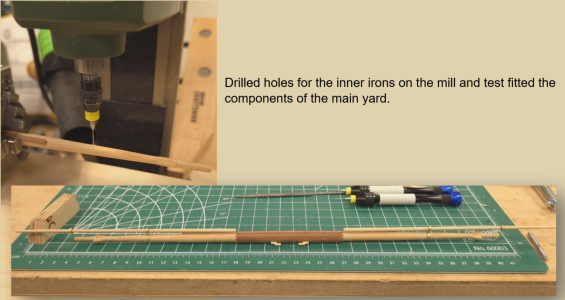
In that post, I only used the Proxxon mill to drill the holes into the brass rod (and the yard). The other two tools that are nearly indispensable in that post are the Proxxon dividing attachment (even if I put it to different uses than it was probably designed for) and the Sherline lathe. I had no clue when I purchased that lathe that I'd be using it nearly every single day. Given that I have another 8 irons to manufacture, I'll be turning dowels for the soldering fixtures, returning studding booms (to fit the brass rings, where the ones I have are close in diameter but slightly too small - as they were for the ones I just made), and cutting brass rod to length, for at least another few days.

I'm fortunate that I can afford all these wonderful tools, and frankly have a hard time imagining building any model ships without them. My hat's off to the true "old school" artisans who are fabricating all these parts with hand tools. I would go bonkers!
 
Back
Top