• Win a Free Custom Engraved Brass Coin!!!
    As a way to introduce our brass coins to the community, we will raffle off a free coin during the month of August. Follow link ABOVE for instructions for entering.

USS Enterprise CV-6 1/200 Trumpeter

  • Thread starter Thread starter savas
  • Start date Start date
  • Watchers Watchers 17
the ship's props should be counter-clockwise on portside & clockwise on starboard side.
Dear savas! On ships with 4 propellers there is the following rule: the propellers of one side rotate only in one direction. In your case, the propellers of one side rotate in different directions, which would lead to destructive loads.
In addition, the propellers on different sides must rotate only in opposite directions.
Rule: Both starboard propellers should rotate to the right when the ship is moving forward, and both port propellers should rotate to the left.

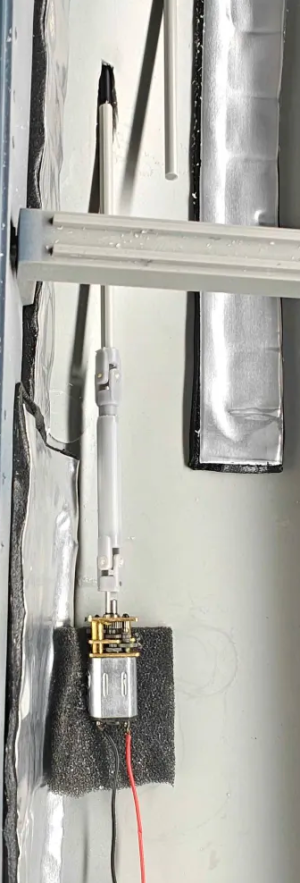
thank you, yes I already know that they are wrong, they were installed temporarily, I need to paint them that's why the furthest one is not all the way in :) I actually was wondering should I install motors for them to spin, but that would require a lot more work so I am not sure yet... I also am thinking of installing a smoke machine for the chimneys...
 
Big thanks to Davidp for additional infomation on the arment. So I post quite rarely, but the build is moving forward, so here are the updates for now:

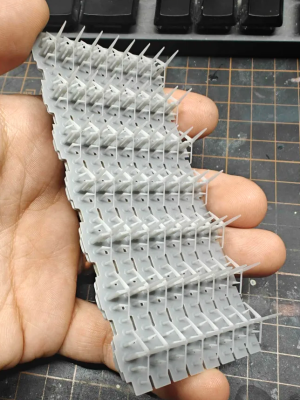
I went digging on some photos for the structure in the middle. I am not trying to be super accurate (that's actually impossible on the ships design but I really wanted something more for the middle of the ship so I started making some beams from photos that I found
View attachment 544194View attachment 544195

also I started doing some stuff for the lifts, Trumpeter offers no details for them what so ever, no beams, no bottom structure... So Little by little I will do something with them.
View attachment 544196
the center section where the props are held is really different from what I have, so that made me sad a bit, but it is what it is, I will make some adjustments for it later, but any modification takes a hell lot of time that I don't really have...
View attachment 544197View attachment 544198

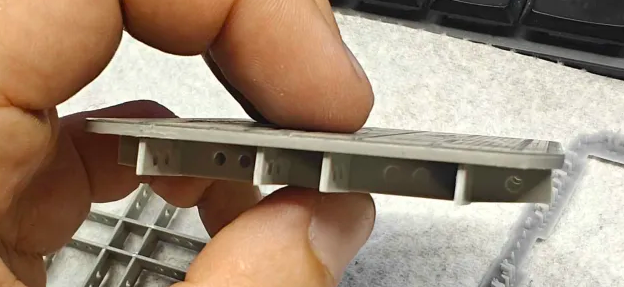
First test prints for the beams look like this:
View attachment 544199View attachment 544200
View attachment 544201View attachment 544204

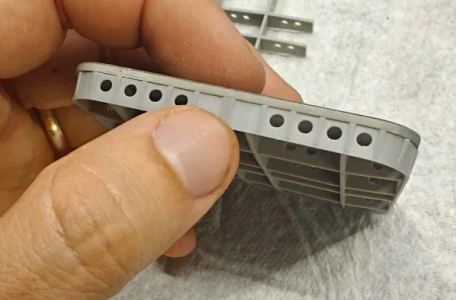
covering the holes...
View attachment 544202View attachment 544203

I am getting closer

View attachment 544205
View attachment 544206

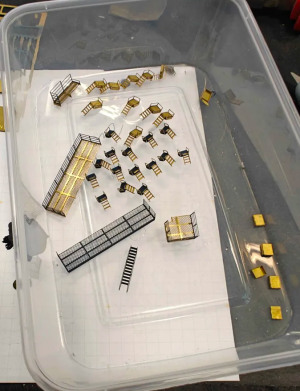
and I also done some metal work...
View attachment 544207View attachment 544208

that's all for now...
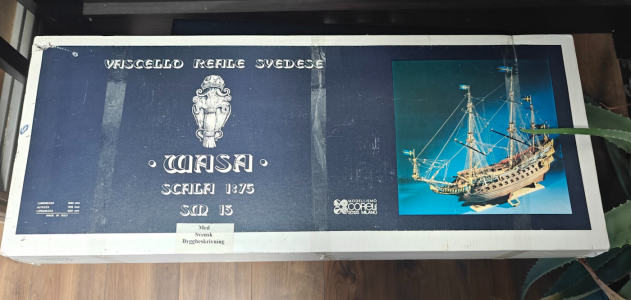
It continues to baffle me how one gets from a 2-D drawing pr a photo to a 3-D product. I wish the university and community college here had classes in 3-D printing. What software do you use? I have a 3-D printer and two software packages. I bought a book on Fusion written by the software's author but the book was written for a different version (older or newer??) than the one I downloaded. I am getting ready to resume my build of the VASA and would like to be able to create more figures for it as it requires more than Corel included. Any suggestions would be greatly welcomed.
 
It continues to baffle me how one gets from a 2-D drawing pr a photo to a 3-D product. I wish the university and community college here had classes in 3-D printing. What software do you use? I have a 3-D printer and two software packages. I bought a book on Fusion written by the software's author but the book was written for a different version (older or newer??) than the one I downloaded. I am getting ready to resume my build of the VASA and would like to be able to create more figures for it as it requires more than Corel included. Any suggestions would be greatly welcomed.

Oh god, where to start about 3D modeling AND 3D printing... completely different things in a way :) I had some classes when I was a student on 3 modeling using autocad MAYA, but it is a paid software that for my use is just too darn expensive. Now Fusion 3D and youtube is probably your best bet... I almost forgot all I knew in that and now I am using www.tinkercad.com this is a WEB app, that is VERY basic, but also really easy to use for simple things (like my beams). I Actually recently got myself a Corel VASA myself, and was wondering if I want to start learning again on modeling the heads on the VASA. 3D takes time... but it is completely learnable using Youtube, get the basics, it will be frustrating, and then try to make stuff, find problems, search for solutions and you will 99% find the answer on youtube...

Now 3D printing is a different animal... I've been printing for years now and I still find stuff to learn about (not to mention I can barely keep up with the new tech) 3D printing is a painful process to master, but if you like to tinker, you will get there eventually, quality machine for printing is KEY, other that that the orientation of the print, the supports that you need to add to the model for printing, the resin (assuming you will use SLA printer) is the other bigger half of the journey...

But in general, books for these thing are already too old... new features, that simplify the job, new Layout of programs... yeah...
 
Thanks!!! I have Tinker. I'll start looking for videos to see what I can pick up from them. As to your VASA, read a lot (!!!) before you start. The instruction "manual" is poorly translated, weak and the rigging descriptions leave quite a lot to be desired. I suggest downloading the DeAgostini VASA instructions (12 or so) from its web site for help. There are several build logs here as well. If you can get a copy of the book VASA I, you will learn a lot about the ship from both a historical side and a construction side. That edition also has 7 or 8 sheets of plans of each deck and rigging.

Thanks again for the response.
there are a LOT of modeling softwares, one of them is freeCAD (i think) it is open source, but most of them do the same things.
As for my VASA, I got a bargain, (like 300euro if I remember) but I have the OLD version of it (blue wood) so yeah... It is a FAR future project, and I am interested in the VASA I book, but that's for later date, thank you :)
1757941782660.png
 
Definition of insanity is doing the same thing over and over again... So will I go insane? :)
Some progress....
1759825748205.png

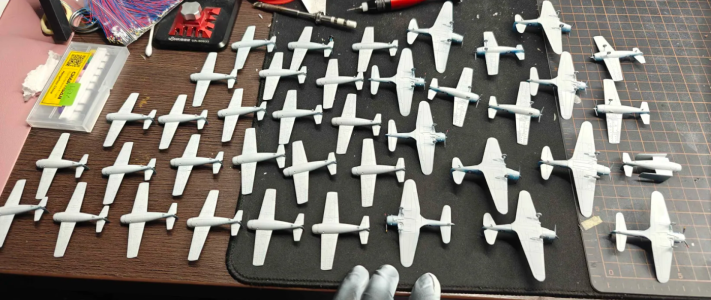
the sad part about the planes is that this is only a bit less than half of what should be in the ship...

1759825775799.png

Some props for the interior...
1759825828882.png

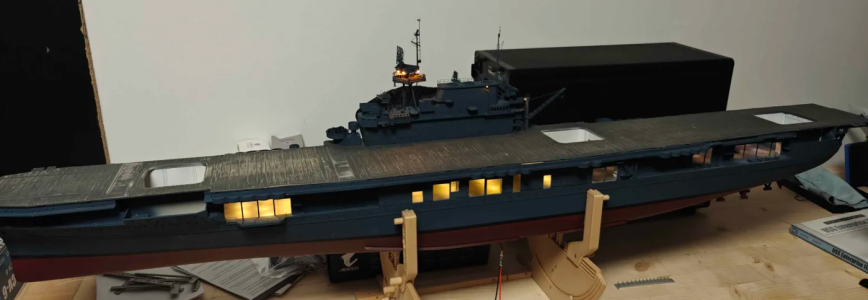
and now for the pretty part - almost all the LEDs are in :) this is how it should look
1759826024777.png
1759826042328.png


I found some time to do the lifts mini detail ups, I think I'm happy:
1759826097985.png1759826109942.png

thats is it for now, I've uploaded the files for this ship here:
 
Definition of insanity is doing the same thing over and over again... So will I go insane? :)
Some progress....
View attachment 548703

the sad part about the planes is that this is only a bit less than half of what should be in the ship...

View attachment 548707

Some props for the interior...
View attachment 548708

and now for the pretty part - almost all the LEDs are in :) this is how it should look
View attachment 548709
View attachment 548710


I found some time to do the lifts mini detail ups, I think I'm happy:
View attachment 548711View attachment 548712

thats is it for now, I've uploaded the files for this ship here:
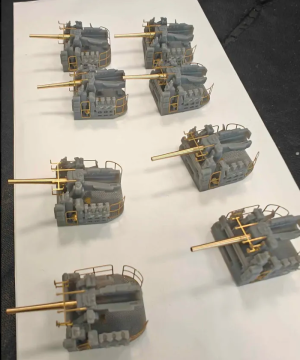
Looking good I like the elevator detail and the 5 inch guns.
 
So it has been a while, but I decided that showing more progress is more fun :) so here goes...

I really dislike the idea of drilling holes in models and also I really wanted to test out the induction method for power up the ship
View attachment 538571

Then I continued on with the metal for the ship, more to show than to tell :)
View attachment 538572
View attachment 538573

Other nic nacs are also being done
View attachment 538574

and ofcourse a ton of test fits
View attachment 538575

Now trumpeter is being a bit of an a*hole, they made doors, and some of them are interfering with the inside structures... and some are a dead end to begin with so it had to be closed or partially closed. That is no biggie now because I found pictures that the gates were often not opened to full, so I will cut the gates to cover the inside structure and leave the inside open.
View attachment 538576

Also I got a addon for the planes, I will try to "hang" then as they were but for that I need to cut the plane wings. I know I can buy the KA models that have folded wing option but they are too darn expensive :)
View attachment 538577

The snakes nest of wires are being done
View attachment 538578

another test fit
View attachment 538579

I started the deck, it was quite tricky at first, but the tricky part was to peel off the double sided tape and not destroy the deck in doing so.
View attachment 538580

Then came the metal parts for the deck, this took soo much time...
View attachment 538581

Some lights inside
View attachment 538582
View attachment 538583

I painted the deck. I really liked the natural wood color, but well I can't have that can I :)
View attachment 538584

Another snakes nest (the final one from the kit) Everything is fine here, but I am missing a LOT in the plastic that is in the center, I will probably have to make some structure parts with my 3D printer to add light to the center...

Anyone have any pictures of the center part of the ship ceiling for some references?
View attachment 538585

View attachment 538586

And I came back to do some antenas
View attachment 538587
View attachment 538588

That's all for now, more to come
This looks amazing!
 
Back
Top