USS Texas (1892) Predreadnought

Joined
May 10, 2021
Messages
110
Points
88

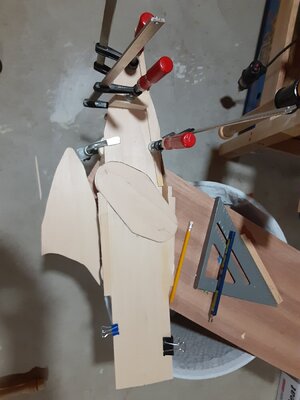
I just began what I call my "relaxer model" after a very intense build completion of my Potemkin. This ship (USS Texas) has a pretty simple layout, although I am finding it has many more bumps (sponsons) than I expected. These are tedious to construct. However, once I get the hull down, it is a simpler deck layout (I think) than most predreadnoughts.

This relaxer model will prep me for my next more ambitious ship, a "floating hotel" French predreadnought. The uglier and more steampunk the better, but an extremely complicated model to get right. A challenge!

20210512_152947.jpg20210512_154315.jpg20210512_154739.jpg

Stay tuned for more on the Texas...
 
20210516_130123.jpg20210516_130056.jpg

I started with 1 in. thick basswood for the hull, but it milled to 7/8 in. so I looked around for scrap wood to make up the other 1/2 in. thickness I needed. I found some teak pieces and when that ran out, a bit of pine. You can see the darker teak in the picture.

I built ribs to support a slightly canted deck, then started milling these down with my Dremel to just above deck level. It will be a very slight cant.

I found the teak is more brittle to work with than I would like, and it's fairly hard, so I wouldn't recommend it for modelbuilding except maybe for deck houses and deck furniture.

Here the sponsons are roughed in. More on them later...
One of my favorite types of battleships. I am on the viewer's list. What scale is your Texas?
The scale of Texas is 1:160. This is my second predreadnought (see my Potemkin on this site) and I want to be able to visualize relative sizes between them, so they will all be 1:160. May be an odd scale, I dont know...I like it because the models are neither too large nor too small (for a regular house).
 
To continue...

Over the past couple of days I made some really nice sponsons (those can-like projections that jut out to support the massive weight of the guns). I was using my plan to get them exactly right...I thought. Something was rattling around in the back of my mind though that they weren't right. Like they weren't imposing enough, too refined, not clunky and assertive enough. I went back and checked a couple of historical photos of the ship. Then I realized I had misinterpreted the geometry of the plans. So...I went back and ripped them all off and began again.

One thing I have learned in model making, and life in general, is to pay attention to that inner voice that is saying something isn't right. I was a little dense this time, but caught it. The trick..keep going back to the reference material.

I'll attach some photos on my Sponson 101 lesson (before/after)Texas photo 3.jpeg.20210516_130106.jpg20210516_133234.jpg
 
Last edited:
The decking material came in the mail today...

Meanwhile, I continued smoothing the hull and its protruding features. The oblong flat shape in the center is the 20210518_000731.jpgarmored redoubt, and on the real ship this was 12 in. thick. The turret machinery was protected by this redoubt, but not the area between the redoubt and the top of the armor belt. My plans show some added armor in that intermediate area, however.
 
I am very happy to see your new building log and I will follow with highest interest....
and BTW: I can not wait until you start with the french one - these pre-dreadnought battleships had extreme curved hulls and were full superstructures
So extreme, like the Bouvet, Carnot, Charles martel, Massena and others - Great :cool:
BTW2: Great and interesting start of your log !!!
 
I jumped the gun (a 12-inch naval gun, of course) and decided to install the deck. A bit premature, but I was getting tired of just working the hull. I would like to rough out some of the deck furniture, masts, guns, etc, so the ship looks less like a canoe and more like a battleship. And so the deck is needed.

A little white paint won't hurt at this stage either, but the armor belt at the waterline still needs to be added.

20210518_224748.jpg20210519_235503.jpg20210519_235816.jpg
 

Attachments

  • 20210519_001509.jpg
    20210519_001509.jpg
    134 KB · Views: 10
For a change of pace, worked on the guns and superstructure. The guns were behemoths at 12 in. and so projected quite far out of the turrets. I had to do a bit of improvising to get the brass tubes to nest within each other. Solder holds them together, and the turrets swivel nicely.

For the rivets, I experimented by soaking gray drawing paper in water and then molding the rivets by pushing the paper down into some holes I created on a wood jig using a round-tipped tool. After drying, I cut the rivets out in a thin strip. I then glued them on the turret and added an access door. I like the way the rivets turned out. We will see how they look after painting.

I started roughing out the funnel. It was oval in cross-section.

20210521_174457.jpg20210521_171351.jpg20210521_174631.jpg20210521_174558.jpg20210521_171051.jpg
 
This design concept of the early battleships with the offset turrets is interesting. I see you soldered brass and copper for the barrels and assume you don't own a lathe. May I suggest chucking the barrels in an electric drill to make cleanup easier. I once used my Dremel as a lathe but that was with an older, better built Dremel.
 
Yes, I wondered about the seaworthiness of those offset turrets myself. I would think it could make the boat hard to steer.

I owned a small Dremel lathe but gave it away last year during a move. It operated at too high rpm for my taste, and the regulating power supply burned up so I could not control the speed. I figured I would buy a cheap Chinese import hobby lathe to replace it.

Good suggestion on the cleanup with the drill.
 
Yes they can be a little speedy. Makeshift I hook up a dimmer switch to a receptacle in an electrical box. Works well at slowing down the speed of my Dremel.
 
Working on the conning tower and flying bridge, plus building masts. The plans are a little fuzzy how all of this is arranged, so the fun part is reasoning it all out spatially. Very pleased so far with how my problem solving has gone. I figure the most important thing is that the final layout match as close as possible the impression given by the photographs and paintings. For example, the bases of the turrets are a wee bit too large, so some of the other adjoining elements had to be cut down a little. And yet, without knowing this a person would observe essentially what he was expecting to see.

With progress being made, still the fates jumped in and my bandsaw blade broke. Luckily I have a spare, but the 1/8 in. blades are precious because they are fragile. I could go to 3/8 in., but then it would be hard to do tight turns. If any of you have tips on blade maintenance for the thin blades, I would love to hear it. Maybe I am not checking the tracking enough, or not recognize sizing sounds of blade instability.

20210524_124449.jpg
 
Playing around with paint. Made brass anchors. I haven't put the smaller brass masts up yet. I figured I would wait since if I put them in I have to put wine corks on them so I don't poke my eyes out by accident.

I think I will tone down that yellow to get more ocher. Gives an idea for now though. Maybe add some burnt umber and a dash of orange or vermilion.
20210529_171941.jpg20210529_172003.jpg
 
Back
Top