Looking good Daniel! Re-do's are never fun but often worth the effort. I've been there more often than I would have wanted myself. Kudo's!
You are using an out of date browser. It may not display this or other websites correctly.
You should upgrade or use an alternative browser.
You should upgrade or use an alternative browser.
VASA 490 Build Log - Billing Boats, 1:75 [Completed Build]
- Thread starter Daniel20
- Start date
- Watchers 64
-
- Tags
- billing boats vasa
Nice outcome, I didn't know that the grates had to be aligned in that direction. Funny how a 50-50 chance always goes the wrong way.
Thanks Paul,Looking good Daniel! Re-do's are never fun but often worth the effort. I've been there more often than I would have wanted myself. Kudo's!
I relied heavily on your hatch covers as a resource.
So true Tony. I love the saying the odds of a buttered piece of bread falling butter side down is directly proportional to the cost of the carpet.Nice outcome, I didn't know that the grates had to be aligned in that direction. Funny how a 50-50 chance always goes the wrong way.
Ha. Mine were accidently done correctly - no knowledge or skill employed by me whatsoever. In fact, the first thing I did when Alexander pointed out the error was pull up my build log and see what I had done!Thanks Paul,
I relied heavily on your hatch covers as a resource.
Dodged that one...run over by many others...
Yes I looked at my HMS Fly and the gratings are wrong on it also. At least I was consistent (without knowing it) and am not going to redo it. Too much rigging in the way.Ha. Mine were accidently done correctly - no knowledge or skill employed by me whatsoever. In fact, the first thing I did when Alexander pointed out the error was pull up my build log and see what I had done!
Dodged that one...run over by many others...
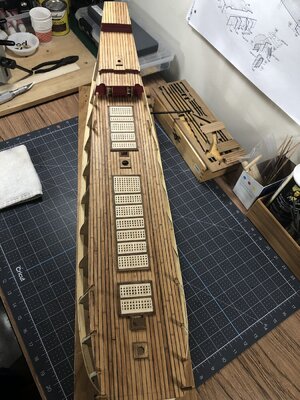
Very nice Daniel!Yes Dean I was so relieved when I could see how they were coming out. I must admit placing a frame around the grating itself and running the solid member longitudinal looks way better. Lesson learned! Here's a couple as built shots. I will try to finish tomorrow and resume my hull planking. View attachment 231728View attachment 231729
Last edited:
Congratulations Daniel. This was clearly worrying you, so to get such a simple solution is great (where there’s a will....).
Will you make the frames in the same timber? I assume so. It will take a little time to complete as there are quite a few gratings but it will be worth the effort.
Great job!!
Will you make the frames in the same timber? I assume so. It will take a little time to complete as there are quite a few gratings but it will be worth the effort.
Great job!!
Hi Peter,Congratulations Daniel. This was clearly worrying you, so to get such a simple solution is great (where there’s a will....).
Will you make the frames in the same timber? I assume so. It will take a little time to complete as there are quite a few gratings but it will be worth the effort.
Great job!!
I have an outer frame already which is 2x2mm boxwood that I stained a walnut color. Each grating section has its own frame as well which sits inside the walnut stained frame. I may just leave the grating its natural color as I like the contrasting color effect. I'll make some sample frames and try a couple finishes, I don't want to make them dark looking however.
Даниэль, это конечно лучше и правильнее. Я рад, что вы решили переделать эти полоски. Вам нравится результат?
Hi Alexander, Thank you I was hoping to get your approval. Yes the result is way better than before. I have just finiseh the port and starboard lower cannon port supports. From here its time to get busy and plank out the rest of the hull.Danielle, it's certainly better and right. I'm glad you decided to remake those stripes. Do you like the result?
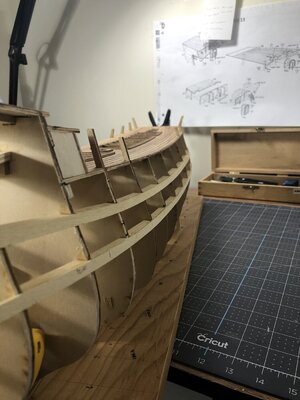
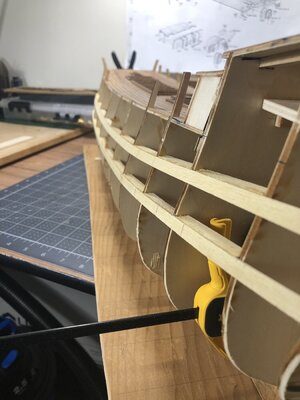
Hello all.
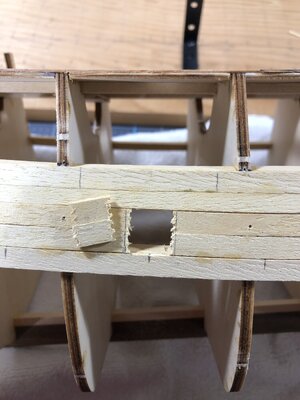
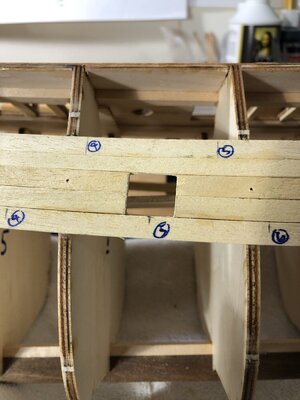
I'm finally into hull planking and I'm concentrating on the area of the cannon ports lower deck first. So far my method is working real well, the planks happen to be 7mm wide so the lower deck row is 28 mm below the upper row and the plans call for 31mm. Close enough for me so now with just a bit of exaggeration I can cut all the gun ports in only having to cut 2 planks vertically and the top and bottom planks I can use there factory edge. Now the same will not be true when I have to cut through the walnut veneer as its dims are 5mm wide.
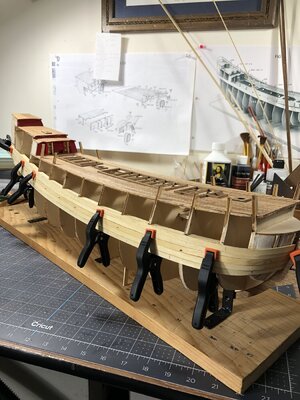
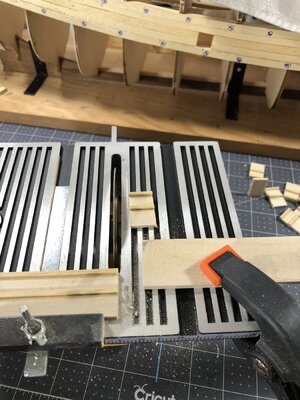
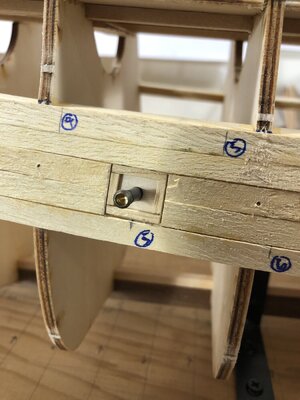
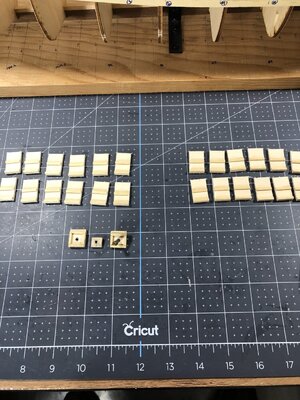
Next I'm in the process of fabricating the faux cannon fronts which will pop in quite nicely sitting on their shelfs and kept by the 2mm lip I left on top which contacts the back side of the upper plank. Where a bulkhead is in the way I just need to mill out enough of it to accommodate the insert. The insert itself has a centering piece I made to drill the hole for the cannon and I will epoxy those in at a latter date. The insert will be painted black and have about a 4mm offset from the outer walnut planking. This seems better than just having the backing almost flush with the outer planking. I guess I should say the major portion of the hull planking will be done after setting the cannon inserts because I can still get my fingers behind the inserts if required.
I sure thank all of you following this build, there are so many awsome builds builds one could follow I'm truly humbled at your interest in mine.
As always Happy Modeling and happy Mothers Day to all you moms out there!
I'm finally into hull planking and I'm concentrating on the area of the cannon ports lower deck first. So far my method is working real well, the planks happen to be 7mm wide so the lower deck row is 28 mm below the upper row and the plans call for 31mm. Close enough for me so now with just a bit of exaggeration I can cut all the gun ports in only having to cut 2 planks vertically and the top and bottom planks I can use there factory edge. Now the same will not be true when I have to cut through the walnut veneer as its dims are 5mm wide.


Next I'm in the process of fabricating the faux cannon fronts which will pop in quite nicely sitting on their shelfs and kept by the 2mm lip I left on top which contacts the back side of the upper plank. Where a bulkhead is in the way I just need to mill out enough of it to accommodate the insert. The insert itself has a centering piece I made to drill the hole for the cannon and I will epoxy those in at a latter date. The insert will be painted black and have about a 4mm offset from the outer walnut planking. This seems better than just having the backing almost flush with the outer planking. I guess I should say the major portion of the hull planking will be done after setting the cannon inserts because I can still get my fingers behind the inserts if required.


I sure thank all of you following this build, there are so many awsome builds builds one could follow I'm truly humbled at your interest in mine.
As always Happy Modeling and happy Mothers Day to all you moms out there!
Tidy bit of work Daniel! Keep it up! I'm enjoying this build very much.
It's starting to take shape, I like the way your doing the gunports how many more are there to do?
Hi Tony,It's starting to take shape, I like the way your doing the gunports how many more are there to do?
There are 52 lower level ports to do 2 of which are located on the stern face. There are 16 more main and upper deck cannons as well but their gun port holes are precut into the bulwarks.
Just a word of caution too Daniel, if you look in the BB cannons packaging (and your kit is the same as mine I think), there are two sizes of cannon barrel stubs. My interpretation of this was that the smaller barrels go on the mid-deck (Orlop deck ?), and the larger barrels on the lower deck facing the gun ports. Of course the full cannon barrels supplied have to go topsides with carriages (a whole new world of adventure!!)
PeterG
PeterG
Thanks for the heads up PeterG. I agree with your interpretation, after a careful counting I actually have 4 extra of the 14 mm (F552) but the rest of the sizes have the exact amount. On the 14 mm cannons Contents Table shows 28pcs., I counted 28pcs., but from what I see on the plans only 24pcs. are required???Just a word of caution too Daniel, if you look in the BB cannons packaging (and your kit is the same as mine I think), there are two sizes of cannon barrel stubs. My interpretation of this was that the smaller barrels go on the mid-deck (Orlop deck ?), and the larger barrels on the lower deck facing the gun ports. Of course the full cannon barrels supplied have to go topsides with carriages (a whole new world of adventure!!)
PeterG
From memory I had the exact number of each size. I assume these parts are packed by hand so a couple of extra is not surprising.
Can you imagine waking up to think ‘What am I doing today? Oh yeah, I’m packing 38 Vasa kits...’.
They can have that job!!
PeterG
Can you imagine waking up to think ‘What am I doing today? Oh yeah, I’m packing 38 Vasa kits...’.
They can have that job!!
PeterG
Good morning everyone!
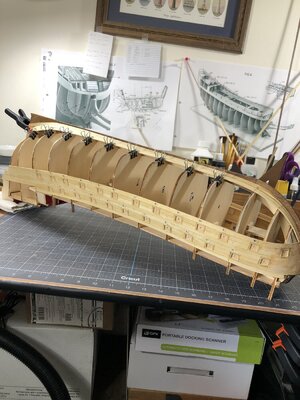
It has been over two weeks since I've posted so I do have some progress to show. I've managed to sub plank and cut in the 50 faux gun ports along their given arcs. I had about 30% of the inserts glued in when a thought hit me like a ton of bricks! When I glue on the walnut veneer, do I want to "cut out" the gun ports or cut strips to go in between each port!!! Well I may be in tears when finished but I decided that to be able to sand the insert frames smooth with the first planking was a better option.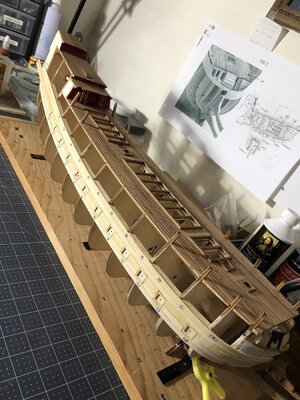
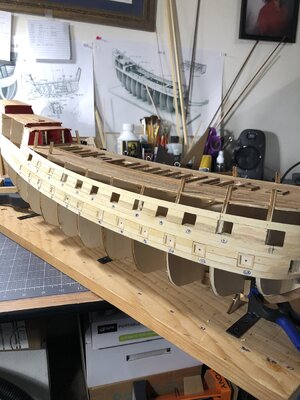
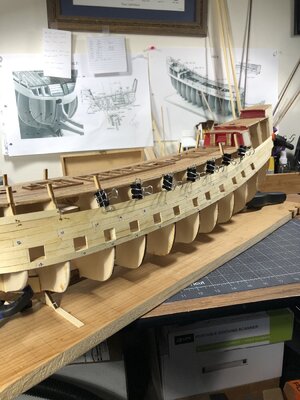
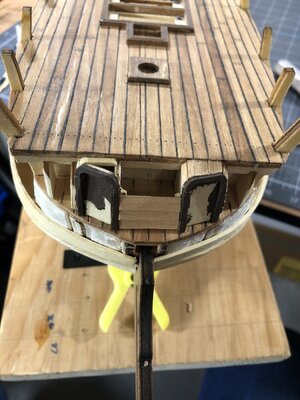
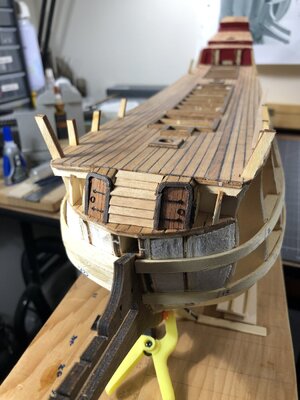
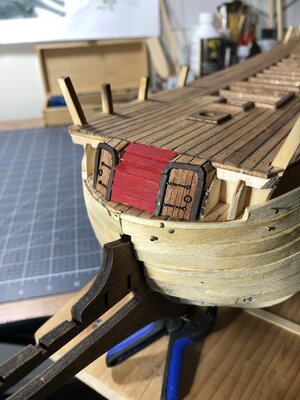
While I have good access I built in the two doors on the bow section then when I complete the lower first planking I'll add the prefab bulwarks and continue on.
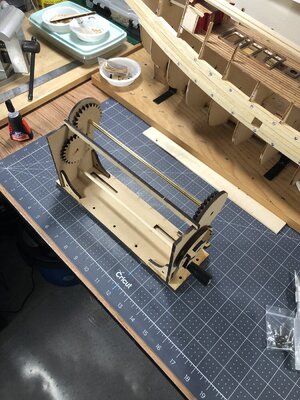
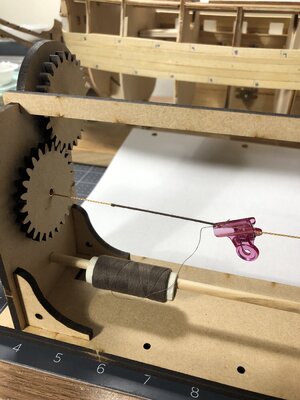
In the rigging department I'm excited to have received my rope server. I can see I have several hours of practice in front of me (or months) but I must start somewhere.
That's all I have for now. Thank you for visiting.
Until next time Happy Modeling!!
It has been over two weeks since I've posted so I do have some progress to show. I've managed to sub plank and cut in the 50 faux gun ports along their given arcs. I had about 30% of the inserts glued in when a thought hit me like a ton of bricks! When I glue on the walnut veneer, do I want to "cut out" the gun ports or cut strips to go in between each port!!! Well I may be in tears when finished but I decided that to be able to sand the insert frames smooth with the first planking was a better option.


While I have good access I built in the two doors on the bow section then when I complete the lower first planking I'll add the prefab bulwarks and continue on.


In the rigging department I'm excited to have received my rope server. I can see I have several hours of practice in front of me (or months) but I must start somewhere.


That's all I have for now. Thank you for visiting.
Until next time Happy Modeling!!
Very tidy bit of work Daniel!


