Victor H.M.S. Enterprize Build Log

Joined
Oct 14, 2020
Messages
275
Points
323

Hello guys, this is Victor from Modelship Dockyard.

This is a new build log for the 1/48 HMS Enterprize. Unlike my previous posts, this thread represents more of a personal work rather than representing our brand. Therefore, unlike prior pilot builds , I will be building this model using the released kit, just like all other modellers.

Throughout the process, I will capture as many high-quality photos as possible. On one hand, this will showcase the appeal of the kit to more modellers, and on the other, it will assist modellers currently working on the project and addressing potential obstacles. I’ll also share insights from the build, ideas for enhancing details, and possibly include research knowledge content about historical or technical aspects. Later I will also develop the rigging section based on this model.

Compared to many previous kits of ours, the 1/48 scale HMS Enterprize is undoubtedly a challenging project. I’m delighted to embark on this journey with you all, and I hope we can all create outstanding works of craftsmanship.


I will let this post empty for photos just for now, and adding a little bit of unboxing images here.
You can find a unboxing made by Zoly here:
 
Platform.

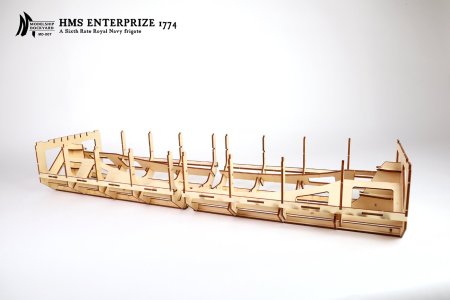
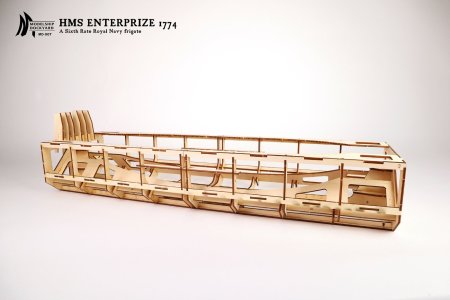
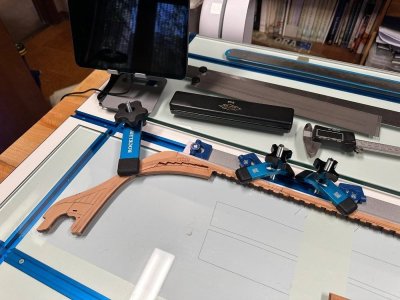
So firstly I have built the platform/jig, it's pretty straight forward.
Modellers can choose to glue the parts or using small nails to fix them.
Some parts may find a bit hard to fix, but it won't be a big issue after a slight sanding, but don't over-sand it or it may become loose.
You can choose not to glue (or apply less glue) the parts on the top surface, A-15 and B-16. So that the hull can be easier to removed from the platform.

1.jpg2.jpg3.jpg4.jpg5.jpg6.jpg7.jpg
 
Last edited:
The cut water.

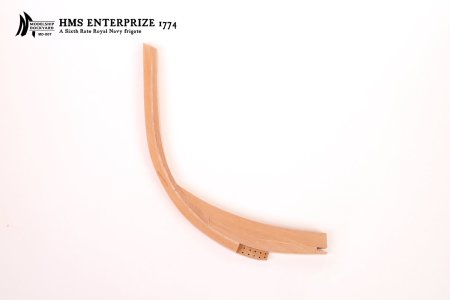
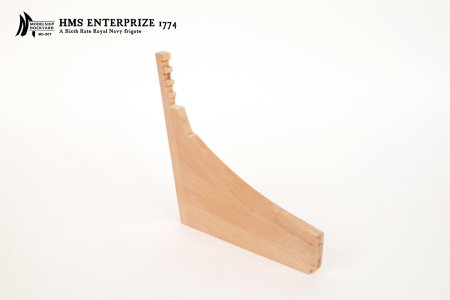
The gammoning knee (A-1) can be sand to 2-3mm thinner, if you wish to do so, you can choose to glue that part later to accommodate the narrowing of the cutwater, as the front of the gammoning knee also requies some narrowing. I have later removed the gammoning knee to adjust it's thickness, but it's not required.

It is optional to narrow the cut water at this stage or later on, I have chosen to do it later but there's no difference.

8.jpg
 
Last edited:
Stem and apron.

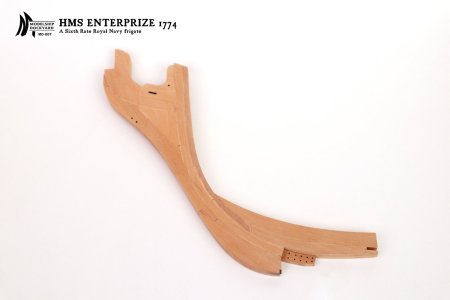
I have done things a bit wrong here, back end of the upper part for the deadwood (E2-24), should be a bit afterward than the back end of the lower part of the deadwood. The demonstration on the instructions and drawings are correct, but I was a bit to over-confidented so I didn't look the drawing when I make this section. A bad example telling us to check the drawing lol, but luckily the issue was not huge to I can make up for it later on.

Create a V shape groove or slope on the inside of the stem according to the reference line, this allows the planks to be accommodated so that they can be attached to the keel.

I have intruduced a way of making this section with a bit variation, please check the latest instruction (version 1.01), both versions are good.
You can always download the latest instruction at: https://drive.google.com/drive/folders/1eR4Vn3enU20PPyAL91djXDg_G1-pH3dk?usp=sharing
Please let me know if there are issues accessing it


9.jpg10.jpg11.jpg
 
Stem and apron.

I have done things a bit wrong here, back end of the upper part for the deadwood (E2-24), should be a bit afterward than the back end of the lower part of the deadwood. The demonstration on the instructions and drawings are correct, but I was a bit to over-confidented so I didn't look the drawing when I make this section. A bad example telling us to check the drawing lol, but luckily the issue was not huge to I can make up for it later on.

Create a V shape groove or slope on the inside of the stem according to the reference line, this allows the planks to be accommodated so that they can be attached to the keel.

I have intruduced a way of making this section with a bit variation, please check the latest instruction (version 1.01), both versions are good.
You can always download the latest instruction at: https://drive.google.com/drive/folders/1eR4Vn3enU20PPyAL91djXDg_G1-pH3dk?usp=sharing
Please let me know if there are issues accessing it


View attachment 511704View attachment 511705View attachment 511706
Victor,
Here you cut the rabbet groove all the way up the stem without interruption. I'm not sure, but I recall that the groove was NOT CUT in the area where the wales meet the stem deadwood. I was planning of laying the composite stem piece (like yours above) on top of the plan that shows where the wales meet the stem deadwood to mark the area and not cut the rabbet groove in the area. What do you think ? I'll ask Allan, who is very knowledgeable in this area.
AR
e
Hi Alex, According to my research, normally the rabbet should be at the position that I have made. On some of the ships, there could be slight variations, but I believe this pattern is generally correct. You can also do some research and we can discuss it.
 
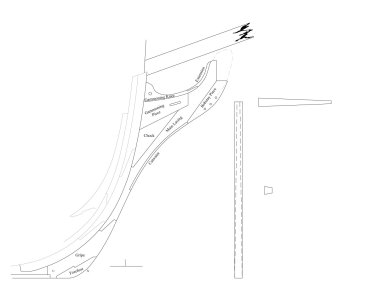
Victor, How far down do I carry the narrowing of the cutwater ? I stopped at the junction off the knee of the head and the gripe, but I could narrow the front all the way to the boxing, where the gripe ends. ....I'm enclosing picture for nomenclature purposes.
What do you think ?

AR
View attachment 511870
@Alex R I also stopped mine at the gripe.
@Modelship Dockyard Victor, I'm glad you are building this with us. :)
 
Great that you're doing this..contemplating this build or the AL Victory Anatomy..any comments? I know they are different..I'm more of an Admiralty style builder these days, althoughI am building the 1/30 ZHL Royal Caroline kit with pearwood.. would really like the LeFleuron or Monahesa in 1/48 !
 
For 28 gun British ships of that era the siding of the knee of the head goes from 11.75" at the top at the stem and tapered down to 10" at the bottom so it matches the width of the keel which was 10" at the fore end for Enterprise. The make-up of the knee of the head may be different than that shown in The Anatomy of Nelson's Ships for a 28 gun ship.
Allan
The following is the general construction from David Steel


1744031041987.jpeg

Variation that may be more appropriate
1744031391718.png
 
Victor, How far down do I carry the narrowing of the cutwater ? I stopped at the junction off the knee of the head and the gripe, but I could narrow the front all the way to the boxing, where the gripe ends. ....I'm enclosing picture for nomenclature purposes.
What do you think ?

AR
View attachment 511870
Alex, you shall narrow it from the bottom of the gripe to the top of the lacing, as the instruction noted. In some reserach, there was also indication of narrowing the cutwater only to the junction where you have stopped. I'm more tend to the first way, which is why I put it on the instruction, but it could be arguable that the second method may also be correct.

Also like Allan mentioned, there should also be a slight downward narroing for the stem, sadly this is hard to make on the kit, so we have omitted that. The overall result won't have big differences.
 
Great that you're doing this..contemplating this build or the AL Victory Anatomy..any comments? I know they are different..I'm more of an Admiralty style builder these days, althoughI am building the 1/30 ZHL Royal Caroline kit with pearwood.. would really like the LeFleuron or Monahesa in 1/48 !
I am VERY happy with the 1/48 Enterprise ! Parts fit is great (although I'm not very far into the kit). Instructions are good. As you can see, we are getting support. Strongly recommended. :)
 
Stem and apron.

I have done things a bit wrong here, back end of the upper part for the deadwood (E2-24), should be a bit afterward than the back end of the lower part of the deadwood. The demonstration on the instructions and drawings are correct, but I was a bit to over-confidented so I didn't look the drawing when I make this section. A bad example telling us to check the drawing lol, but luckily the issue was not huge to I can make up for it later on.

Create a V shape groove or slope on the inside of the stem according to the reference line, this allows the planks to be accommodated so that they can be attached to the keel.

I have intruduced a way of making this section with a bit variation, please check the latest instruction (version 1.01), both versions are good.
You can always download the latest instruction at: https://drive.google.com/drive/folders/1eR4Vn3enU20PPyAL91djXDg_G1-pH3dk?usp=sharing
Please let me know if there are issues accessing it


View attachment 511704View attachment 511705View attachment 511706
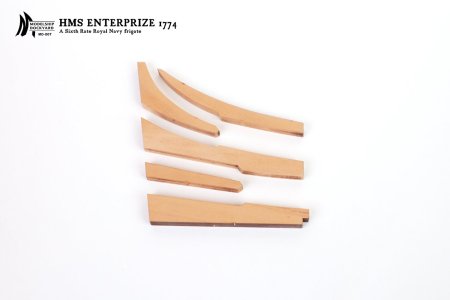
Hi Victor. Such a lovely idea this build log of yours. May I ask how did you determine this chock (or cheek) three parts pattern? Thanks in advance for your kind answer. Regards.
 
Last edited:
For 28 gun British ships of that era the siding of the knee of the head goes from 11.75" at the top at the stem and tapered down to 10" at the bottom so it matches the width of the keel which was 10" at the fore end for Enterprise. The make-up of the knee of the head may be different than that shown in The Anatomy of Nelson's Ships for a 28 gun ship.
Allan
The following is the general construction from David Steel


View attachment 512029

Variation that may be more appropriate
View attachment 512031
Allan, and Victor
Thanks from all in the group. I knew you would research this, with diagrams, and bring light into the matter ! I'll sand my gripe down..
Yesterday's pictures below.
Today, I{ll be putting together after part of keel, then working on sternpost and deadwood, tapering, etc.
IMG_1555.jpegIMG_1552.jpeg
First part of keel glued in, working on completing keel. The T - table is great help keeping the pieces flat, straight, and squared.
Alex R
 
Great that you're doing this..contemplating this build or the AL Victory Anatomy..any comments? I know they are different..I'm more of an Admiralty style builder these days, althoughI am building the 1/30 ZHL Royal Caroline kit with pearwood.. would really like the LeFleuron or Monahesa in 1/48 !
Hi Manning 16. The AL Victory build looks to be a super nice kit, with lots of detail. It is a bigger ship. It also looks like they spent a lot of time and effort in then design. The instructions may all be video. Should take a look. I don't think you can go wrong. n There may be some kits Stateside already, I would check, and no Orange man Tariff. The Dockyards kits are made in China.. They are shipped directly from China (very quickly I might add). So there may be a tariff. The Dockyards' 1:48 Emntrerprize, so far, is the best kit ever ! The wood (pear) is the best I have seen, the instructions are comprehensive, and clear. Victor, the kit designer, is also building one with this group. The manufacturing is first class. AND, this is a really nice build group ! Come and join the guys...

PS: I think Victor is developing a Le Fleuron in 1:48 scale, fully framed, full interior. It should be amazing...I don't know when the kit will be ready

Alex R
 
contemplating this build or the AL Victory Anatomy..any comments?
It depends on what is important to you. It is a hobby for most so whatever makes you happy is the most important. Good instructions, easy to follow drawings, quality materials, historical accuracy, etc. are items many folks take into consideration. It would be interesting if a detailed list of criteria was made up by which any given kit could be judged by those that have built it, thus helping those who are contemplating getting a particular kit will be better informed.
Allan
 
Hi Victor. Such a lovely idea this build log of yours. May I ask how did you determine this chock's (or cheek) three parts pattern? Thanks in advance for your kind answer. Regards.
Hi Albert,
There were indication of such pattern from several sources, which some indicates three pieces of chocks while some indicates four pieces
 
Back
Top