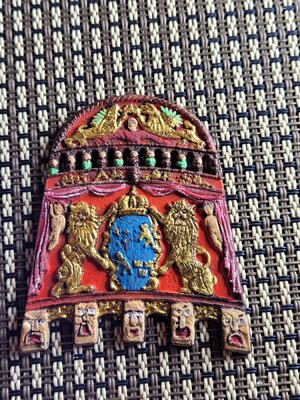
A bit further refinement on the back and almost there.

 |
The beloved Ships in Scale Magazine is back and charting a new course for 2026! Discover new skills, new techniques, and new inspirations in every issue. NOTE THAT OUR NEXT ISSUE WILL BE July/August 2026 |
|
 |
As a way to introduce our brass coins to the community, we will raffle off a free coin during the month of August. Follow link ABOVE for instructions for entering. |
|


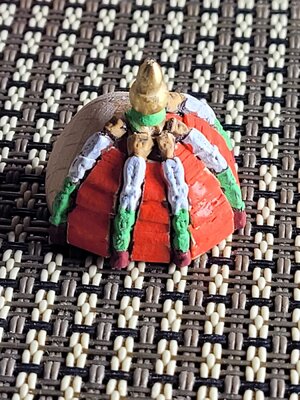
I am thinking it may. I'm finding that as you heat up some flatten or twist as well. I am using a 100 watt Weller soldering iron to bend mine and seems to work. There is a point that they go from hard to soft and no time in between. I also think they will be easier to paint in place as a unit when assembled.Yes sir mgovey, I shall watch your progress with much interest as my next build will be the Billings WASA 490 (Purchased 2020). I think this kit is from 2007 but not real sure.
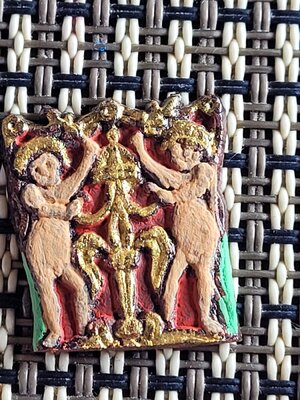
I have the plastic figures as well and will need to heat them up a little to bend them to position. I was wanting to paint them first while still on the molding frame but do not think this possible as heating and bending would probably destroy the paint work??


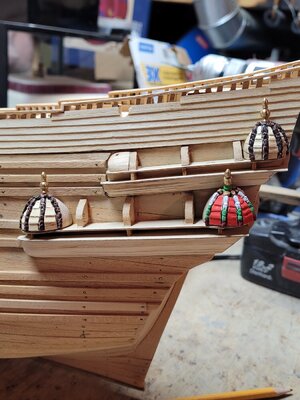
The worse part is this ship was mainly put together in the early 90s when I was younger and very little was available on this ship that I am now fighting with some of the mistakes I made in my youth lol.She looks fantastic! I appreciate how well you have executed the bulwarks - this is a shortcoming for my rendition.
Ah. Mistakes in our youth. Not just a ship model problem...The worse part is this ship was mainly put together in the early 90s when I was younger and very little was available on this ship that I am now fighting with some of the mistakes I made in my youth lol.
I did take a look at your model and only thing that you may be able to do if not too far along is to add a board at the bottom of the Bullard but would involve cutting all the installed rails.Ah. Mistakes in our youth. Not just a ship model problem...