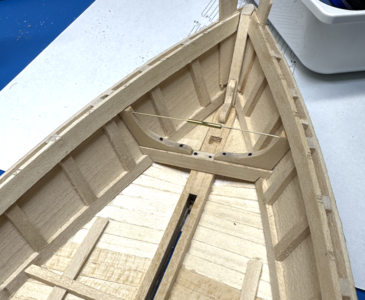
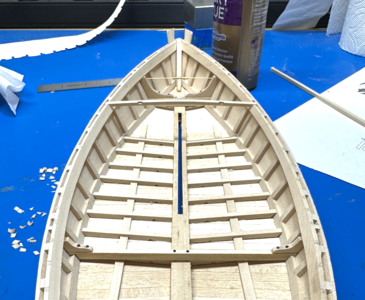
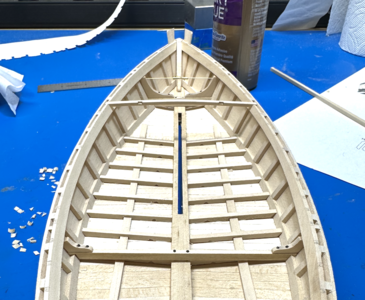
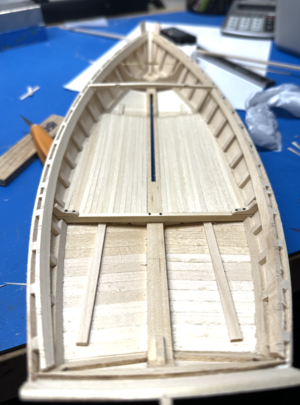
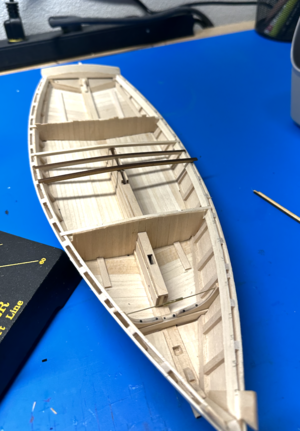
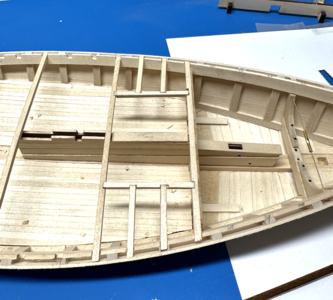
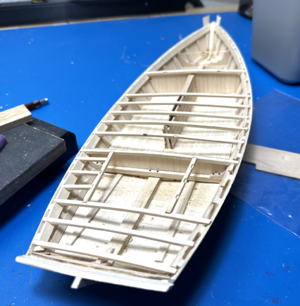
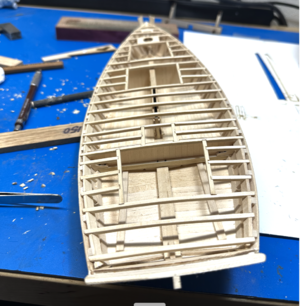
Willie Bennett Skipjack circa '30s build log- warts and all

WART!
The centerboard was a total disaster! I did my best, even laser cut the posts that run up from the slot for the centerboard in the keelson. The detail in the instructions and plan are pretty crappy. You can't see everything in the plans because the centerboard drawing covers a bunch of critical shaping. At least the centerboard drawing made it easy to cut a very nice centerboard.

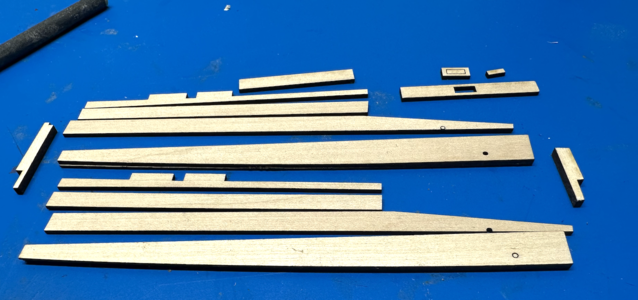
Getting the shaping on the parts was just very difficult and looked like poop, and not the deck. I drew it up in Illustrator, tracing the plans and making a few guesses. Then I cut it, here are the parts.
1686321041127.png
Centerboard casing parts laser cut. It made it easy to measure and cut hole and cover for fishing in the centerboard.

I had cut the keelson with the plans as well and so was able to use the previous cut to get the bottom right, which is obscured by the centerboard. The bottom board fits like a glove. I had to cheat a little though. I didn't have 3/32" stock so I cut everything 1/16" and cut the bottom pieces in 1/32" and laminated. It looks pretty good in the end.

I put together the first two board and the posts. I was able to test fit the posts into the keelson after gluing onto the first board and tweaking the very tacky glue until it was nice and snug. Then I let it dry and got the next 3 pieces on. Since it is off model, I could check the alignment of the holes and sand off the little bit of the forward post that stuck out and would have thrown off the cap with the hole.
1686321829048.png
Bottom portion of the centerboard case assembled off model after the posts are positioned using the model

I don't think it's shipbuilding practice to do that this way, but it is a bit more reassuring for a very vaguely described portion of the build. I'm going to keep it off model like this until I lay the floor battens and ceiling for the hold. It should look a bit cleaner and be a bit easier that way. Then I'll install it, build the bulkhead to cap off the front of the casing, and add the rest of the pieces.
 
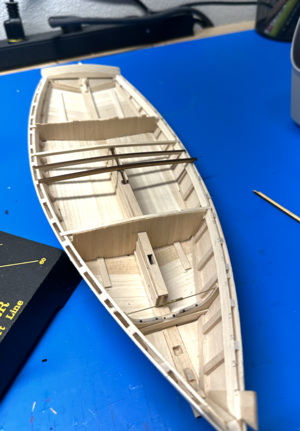
Installed the tie rod today. Did the best I could with what I had on hand (0.5 mm brass rod, 1mm brass tubing). I didn't feel like paying and waiting for more brass that was going to sit under the deck, just wanted the experience of getting it right.

I drilled holed from the inside and then inserted the rod, and bent a little to get the other side in. I might use a small sharp punch on the outside to represent the plug, but I'll be filling and leveling so maybe not.
1686322323809.png

Potential improvements might have been filing the turnbuckle middle a bit more to give and open look to two separate rods. I could have soldered it easily as well, just used a drop of CA. Probably good enough though. The rod is a bit skinny, but like I said, I didn't want to go any more nuts than installing the rod.
 
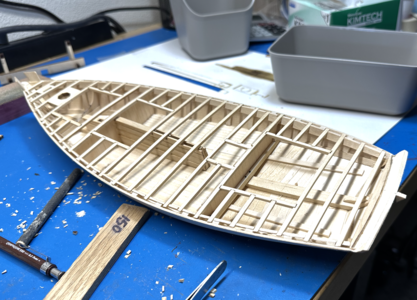
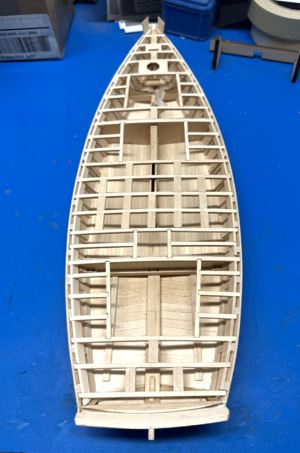
Floor timbers are in. Note the chips and no dust. I did it all with the knife. Good practice and they look sharp, especially for piece you will never see again after the ceiling is added. The instructions are right, this is a great place to practice. Buying extra wood and sheets and practicing with drafting and the laser cutter has taught me a lot already in fabricating parts. Now all I have to do is learn how to build a ship!

1686322634794.png

Sorrry if this is every little move, but I think it might be helpful and looking for helpful tips and tricks.
 
I want to say thanks for all the encouraging likes, comments, tips, offers of help, etc...! It is good to hear, especially when you are relatively new to the hobby. This blog made the weekly Saturday list two weeks ago because you've shown interest. So thanks!
 
Wart: Built the bulkheads, which were fine. But after marking up the clamp for the deck beam locations, it became clear that I hadn't line up the aft strongback with the 7th beam. In fact, I had just eye-balled it, not seeing a good reference. This, I think is just a matter of experience, not sure I would have caught this with the 75th reading of the instructions. I was going to pull off the strongback, but it's got bolts, the floor timbers and ceiling is in. I found that if I fiddled with the location for the 7th beam, i could build the bulkhead fore of the strongback. And so I did. We'll see how i looks.

Sorry, didn't get a good picture of it, but it doesn't look ridiculous.
 
With the precut deck beams, I began notching the clamp one beam at a time. After the strongback alignment issue, i thought it was better to custom fit each. Also, the clamp is curved and would have been hard for me to cut properly without having it on the model. So, I a couple key beams such as the beams with bulkheads and one of the beams over the centerboard to get the alignment right.
In this picture, I am test fitting the next few beams that go over the centerboard. In laser cutting the centerboard pieces, I cut notches at the top as shown in the plan. My beams were a bit high, but well aligned using the notching marks from the template.
1687008761181.png

I learned a great deal in this process. I think the four lessons that were most important, and that I should probably have known already, is measure, learn to mark carefully, measure, and measure. Lots of test fittings too. I got plenty of notches into the deck clamp that were too wide, carling notches that were too wide, some I had to repeat. I had to remake the carlings adjacent to the beam I moved to make the aft bulkhead. And with all the deckbeams on that sheet, I missed one and repeated two instead of the proper part. So I had to clear my workspace several times to burn more parts. Still fun though.
Here's a few installed, section at a time, nothing glued down.

1687009090999.png
1687009125331.png

And then I finally got everything cut. I see models with all the deck beams cut and they are always amazing. I made a bunch of ugly cuts, but sure I could do better the next time. I don't think I'll take a second go at this model, have to finish it at some point.
1687009244004.png
1687009301156.png
This took a bit over a week. It feels good to finish something like this and think "I did something that always looks so cool on Ships of Scale and it didn't turn out half bad."

1687009036162.png
 
Hi Glenn:
Deja Vu! Several weeks ago I posted some completed photos of my Willie J. Bennett Skipjack effort on this website. It was an excellent 6 month long building effort that dramatically improved my modeling skill level in several different areas. In making the brass dredge baskets, the "A" frame over the winch, the yawl boat davit over and aft of the transom, and a few of the brass fittings for the rigging, I learned that you need to do it with
silver solder, silver flux and a small hand held butane torch in order to control the delicate soldering process. An electric soldering iron and the more typical and less expensive plumbers acid core solder is NOT the way to go! But you've got plenty of time before you get to this phase of what is in my opinion an excellent first step up and into an "Intermediate" level modeling effort. Another challenge for me was the less than complex amount of rigging. If I can make one other helpful suggestion, I would highly recommend not only reading and re-reading the 56 page instruction manual, but also studying and re-studying the excellent plans that are provided with the Model Shipways kit that has been on the market sine 1981. What is not written in the instruction book can clearly be discovered on the plans, and vice versa, if you just take the time to carefully look, read and study!
I used to live in St. Michaels, MD (1985--1990) and enjoyed seeing several in-water examples of a variety of workboats at the Chesapeake Bay Maritime Museum including a Skipjack. I started out building a Chesapeake Bay "Buyboat", and a "Hooper Island Draketail", which were good entry level models to begin the hobby with. Good luck with your Skipjack building effort, as I think you'll find it to be a very satisfying effort. If you have any questions that I can possibly help you with please let me know.
WORKBOATS--Bert Shoemaker Aiken, SC


View attachment 376515

View attachment 376516

View attachment 376517
Hey Bert,
I do have a question. I'm up to the planksheers now. I've scoured the plans but can't figure out how thick they are meant to be maximally. There are no dimensions on the log above either to pick out wood or figure out what the carving into the plank sheer should be. Do you have any info that I missed or did you eyeball it? If you eyeballed it, can you pass along what you got? Yours looks great and happy to have your measurements as a jumping off point.
Finally, did you cut the planksheer as one piece and then carve? Any advice you could give is appreciated.
Thanks,
Glenn
 
Had serious family stuff (happy stuff) going on for the last two months and I got myself caught up on another build, the new Nonesuch 30 kit. I hit a snag with Willie Bennett. The angles on the deck didn't look fair after a lot of sanding and the deckbeams and carlings I meticulously laid out and cut were getting thin. The problem might have been the camber lines on the plan, but more likely was the "custom" fit of each deck beam into the clamp. At different heights, there was a lot to sand away in certain places.. I suspect I might have needed to fair better before I started with the beams or maybe even the clamps, but maybe not. Anyway, I don't think I could have cut the clamps in advance accurately like some but there could have been some standardization of the depth and width of the cut. WART!
 
This is with all the beams, carlings, blocks (two extra blocks, where's Waldo?), and faired, ready for next steps.
1689953006876.png

I am working on fabricating the planksheers, logs above that, and the guard. The planksheer is all laid out in Illustrator and ready for the laser cutter, joints included. If anyone knows how thick that planksheer is supposed to be, please speak up. It could be a very ugly guess from the instruction manual diagram on my part I think I can install the simulated wales and then cut the guard with the laser. Again, I'm working on another build now, so progress might be slow. Nonesuch30 is getting planked this weekend as well.
 
Back
Top