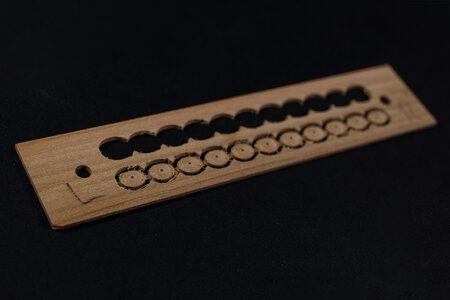
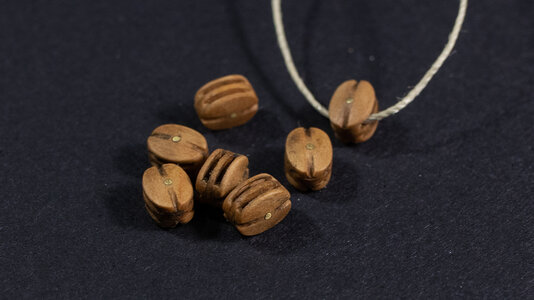
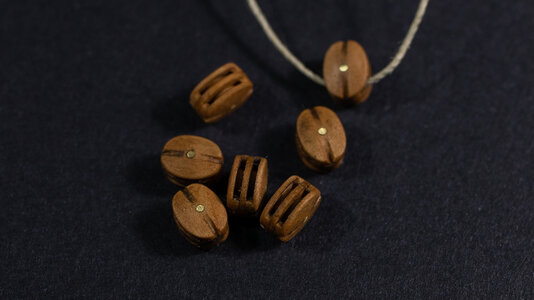
Wooden blocks - CNC machined - first try

While your block design is good, are you sure it's accurate to the period for your Santa Maria? They look more modern to me.

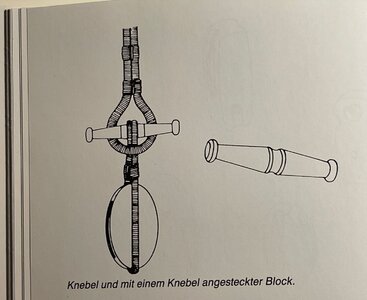
In the instructions to my Ragusian Carrack are many illustrations used by MarisStella for their Santa Maria model, and their model ship school, which builds the Santa Maria. I won't compare your wonderful build work and design with any kit, but the illustration below shows block designs intended for their Santa Maria model and, I think, possibly more appropriate design for yours as well:
View attachment 391509
The 14th century design would appear both more accurate (to me) and easier to manufacture for you.

Well, @Signet ,no worries! :)

I've established this thread specifically for sharing ideas, proposals, and criticism. While I may not currently possess the knowledge on how to create blocks, my "don't know" translates to "won't give up." Instead, it means "I'll figure out how." As a result, I'm open to any suggestions or thoughts you might have on this matter!


Maybe you are right.
And thank you for sharing this Marisstella paper. I think it may be useful.
In my "researches" so far I referred to Zu Mondfeld and X. Pastor.
I share them here - maybe it will be useful for someone.

here is what Zu Mondfeld proposes in his book about Santa Maria:
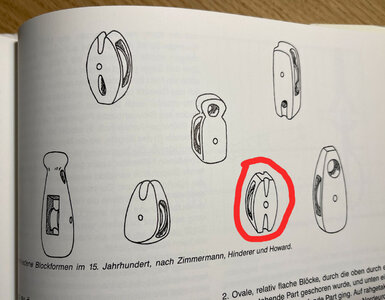
12.jpgИзображение WhatsApp 2023-08-26 в 17.50.15.jpg

In red is something, I try to come close to in my experiments now...

And here is what Pastor offers:
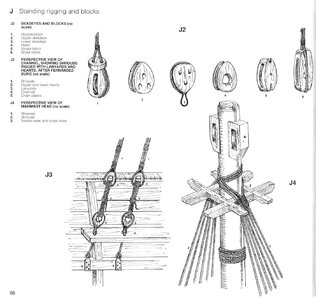
13.jpg

Here position 5 is close to what I plan to make.

And with regard to historical realism, I recommend everyone to watch the latest video of Dr. Kroum Batchvarov (it's just about Olga's and MarisStella's Carrack and S. Maria) ;)
 
Last edited:
Got ya. Your original post didn't specify "wooden", you just asked "how do we make blocks", so that is what I answered.

Your CNC technique to create wooden blocks looks excellent. Nicely done.
Thank you anyway! I will correct the post (thread named "Wooden blocks...") ;) .
And, although now I work with wood, you do marvelous work. Thank you for your input and info, indeed!
 
Oh, well. This is all VERY interesting, fascinating, really. (NO, REALLY!)Thumbsup
But at 77 with no visible means of support beyond my wife's pension and a shop full of mostly hand and a few rudimentary power tools I'm afraid I'm SOL when it comes to the magical technology demonstrated here. So brilliantly and exquisitely illustrated. Okay

In an article in the Washingtonian Magazine a few years back a question was put to a traditional furniture-joiner craftsman.
"How can a traditional craftsman make a living?"
To which he replied "Marry well...":rolleyes:
If you want to go for a ride in a Rolls- Royce, it pays to have a friend who owns one.
I am constantly confronted with the question "How do I make one of these?" To which I am required to answer myself "Look around the shop. Whattaya got?"
I must confess, I have cultivated some friends who have had the Rollses. But mostly they've moved away. Time and Tide...Time and Tide...Ship-1
Your post is, nonetheless, wonderful! A marvel to behold! :D

Wistfully yours, Pete
(aka Eeyore)
 
Last edited:
Well, I've made some slight adjustments to the model, giving it a more "rounded" and "authentic" appearance.

Now it undergoes double-sided processing, (stock flip). Although there are a few imperfections - the part shifted slightly off-center during the flip - while noticeable on individual components, it doesn't become apparent when the block is assembled.

On the whole, I'm content and can observe that the technology aligns with my expectations for repeatability and the capacity to produce numerous identical parts.

However, moving forward, I'll keep in mind refining the indexing to prevent shifting during flipping.

Here are some pictures of the process:

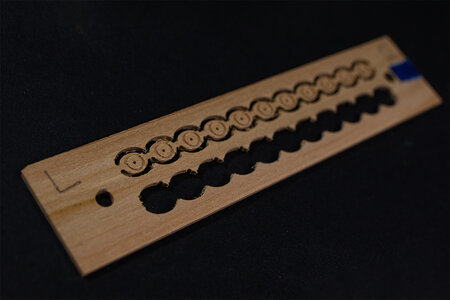
1. The stock right after the milling. Some chips remain, indicating that manual processing is still necessary.

MVV_7327.jpg

MVV_7328.jpg

2. The two halves have been glued together, with brass rods inserted. The parts are now ready for manual sanding. In the future, it might be beneficial to consider creating a device for barrel burnishing/sanding.

MVV_7329.jpg

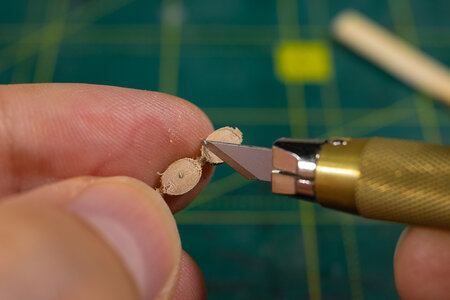
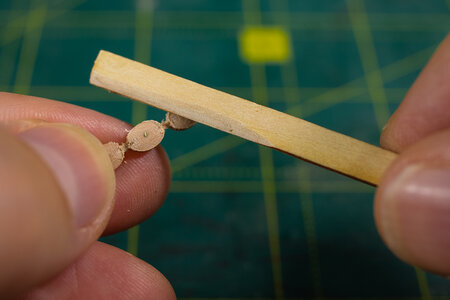
3. Performing some manual processing. This could be streamlined when handling a larger batch of parts.

MVV_7332.jpg

Mini file with sanding paper.
MVV_7331.jpg

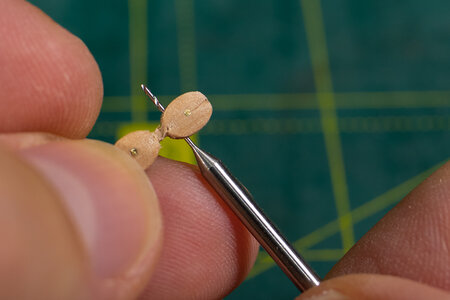
I've found it useful to inspect all the holes with a drill bit (0.5 mm), which helps eliminate any remnants of CA glue and makes the rigging process smoother.
MVV_7333.jpg

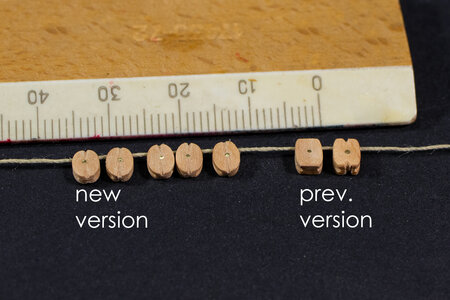
4. Comparison with the previous version.

MVV_7335.jpg

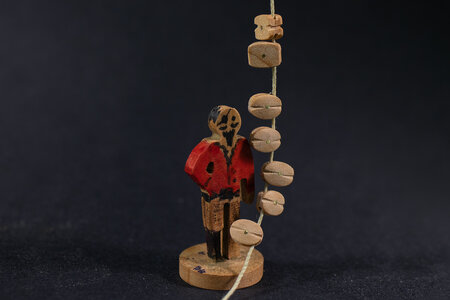
5. Scale-wise, I believe this size should be approximately suitable for sail rigging components like lifts, braces, etc., in 1/65 scale. What are your thoughts? The figure represents a 1/65 scale man.

MVV_7338.jpg

That concludes today's progress. Now I'll be contemplating multi-sheave blocks with various shapes.

At least I'm now aware that I'm capable of producing scaled wooden blocks of satisfactory quality :)

And, as usual, your comments and criticism are welcomed!

Have a good time of the day.
 
Last edited:
Brilliant!!!
The final version is perfection. When do you go into production? (Still a lot of hand finishing for that). But these are totally successful. I can't wait to see what you come up with for multiple sheeve and fiddle blocks, etc.
Seriously, have you thought about making special orders in the future?
I know you could get some orders from the USNA museum workshop. There is definitely a need there for custom made blocks like yours for museum restoration projects.
This second iteration is very nice. I'm sure you will improve upon your finished products markedly as you perfect your process. Okay Thumbsup:D

Pete
 
Very good result - these blocks are very realistic
Maybe to consider an investment into a special needle file - just remembered the yesterdays post by Johann alias @archjofo in his building log. Maybe you take a look
 
Very good result - these blocks are very realistic
Maybe to consider an investment into a special needle file - just remembered the yesterdays post by Johann alias @archjofo in his building log. Maybe you take a look
Uwe, thank you.
The file looks extremely useful!
 
Hi everyone!

Today, I'd like to share my latest discoveries.
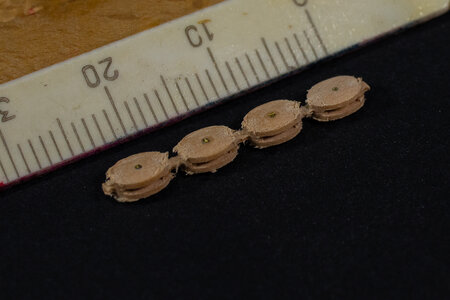
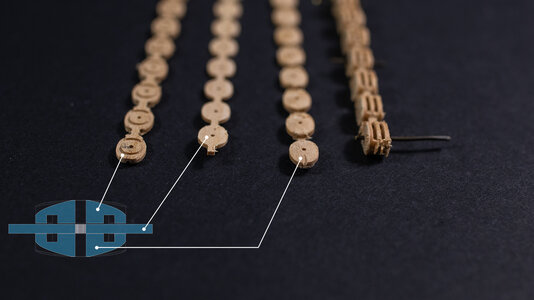
I've successfully machined two-sheave blocks. Once again, I made slight improvements to the design. The piece now consists of three layers. The remaining steps are more or less the same as for a one-sheave block: a 180° flip for the "top" and "bottom" layers. The middle layer is flat and with just drilling and contour cutting.

Unfortunately, with this current architecture, increasing the number of sheaves further (e.g. creating a 3-sheave block) will be challenging. While there won't be an issue CNC-machining the middle layers, it will be difficult to remove them from the table without risking damage to the thin elements. Therefore, an alternative method of stock fixing and flipping will be necessary. We'll see...

Here are some pictures of what I managed to achieve:

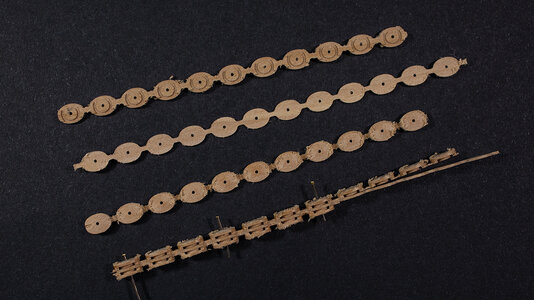
1. Layers right after the machine and preliminary joined together:
MVV_7347.jpg

2. The section of the pie:
MVV_7349.jpg

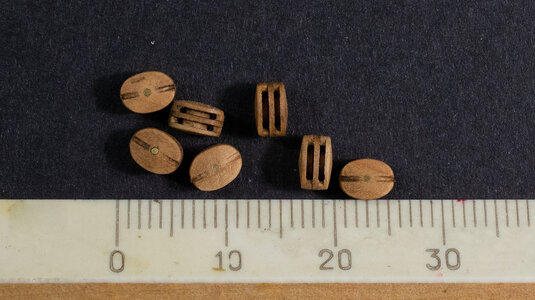
3. Ready blocks - with a minimum of manual sanding and tinting:
MVV_7361.jpg

MVV_7358.jpg

MVV_7351.jpg

Have a nice time of the day!
 
There is some wonderful work being done here. Great job @ShipmodelIdeas!
The question I have is, will these be available to purchase, say as a kit?
That way the cost is way down and each person can spend as much time as needed to make them look great.

@Peter Gutterman, @Allegheny,


"Thank you for the idea.

I was actually considering that. However, initially, I wanted to confirm if this approach to making blocks is practical. Now I see that it is. I hope you find it useful, whether for production or as inspiration ;)

For now, it's still a bit early for me to dive into mass production or to take orders. I have some time constraints and technology issues to address. Nevertheless, once these factors are resolved at a later stage, I believe it will be entirely possible. I might even venture into creating custom designs.
 
Last edited:
Back
Top