• LUCZORAMA SHIPWRECK SCAVENGER HUNT GIVEAWAY. 4 Weeks of Fun • 1 Legendary Prize ((OcCre’s Fram Ship)) • Global Crew Welcome!
    **VIEW THREAD HERE**

Wooldings on mast 17th century ship

Joined
Aug 8, 2019
Messages
5,206
Points
738

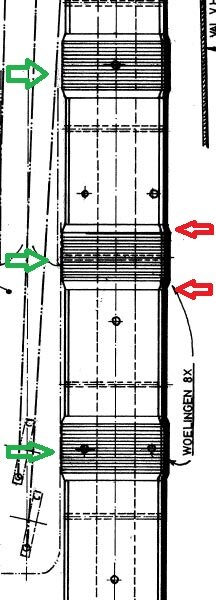
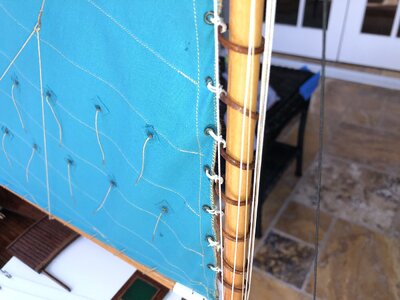
Hi, I have a question about the wood above and below the wooldings on a mast.

wooldings.jpg

The red arrows are the wood pieces.
Is there some kind of a trick to create these things?
The size is about 1,0 x 0,5 mm and the diameter of the mast is 12 mm.
I tried veneer from swamp walnut (0,6 mm thick)

But that was no success in making
Tips are welcome.
 
Hello, Steef66

Hello Vic and all
* Wooldings (Wuhhings; Rousture)

Ropes bound tightly around the mast were known as wooldings; they were intended to help strengthen the lower mast. Their number on the mast differed according to the ship's size. Steel recommended eleven on the mainmast for large ships and nine for Frigates. Other sources speak of between six and nine.
Steele also specified that each woolding should consist of thirteen tightly wound turns, with each turn nailed to the mast. To prevent them from cutting into the woolding, the nail heads were underlaid with pieces of leather.
Timber hoops1/1.2 in wide were usually fitted above and below the woolding, nailed to the mast, and slightly greater in thickness than the woolding rope. Mizzen masts were fitted with wooldings after 1730, normally two fewer than on the foremast, but the mizzen mats of small ships remained without wooldings or iron hoops until the end of the century. Some large ships may have been fitted with mizzen mast wooldings by 1700 or even earlier.
Strong iron hoops were driven on to strengthen the mast structure. These Iron hoops came in to use mainly in the second half of the century, at first together with mast wooldings. After 1800 wooldings were no longer used.
During the first half of the Century, iron hoops were only used on the masthead, and the mast itself was strengthened by wooldings. Some models of the large ships from before 1750, however, provide evidence of some use of iron hoops on the masts as well, either in place of or together with wooldings.
 
@Jimsky thanks for the explanation of the use of wooldings. But I want to create these timber hoops on my model. I like these little things to complete a model. But only if I find a way it will look nice. Have you ever made these on a model and what was you're way to construct them?
 
Thank you, if you have a lathe, you can turn them from a dowel of suitable diameter. Drill the inside hole diameter a bit smaller than your mast. Using the fresh knife blade #11, while the lathe is ON slice the rings. This is the same way, I am doing the mast rings.
 
I'm just guessing here, never have made these wooden rings that support the edges of the woolding wraps, but perhaps you could get some copper tubing, cut a ring, file the chamfer on the outer surface, and stretch the ring on a mandrel so they have a slight press fit on your mast. You could blacken them if you need iron hoops or paint them. These wooden hoops are so small that on a model you could even form them from putty at the edges of your woolding and paint over or stain them. Any logical solution would look good. Just keep in mind how small these hoops really are. To add them to a model is a very tiny detail in practice. If you like details like I do, it would be worth pursuing as long as it is close to scale, not like those fat belaying pins found in kits that, in scale, would be 1' diameter baseball bats.
 
It will be in mm somewhere between 0,5-1,0 mm woensdag in scala. Putty is a great idea. Polymer clay is still soft when it comes out the oven. I made the steel rings on the wheels of the cannons also of clay. Thanks for the tips. I will show the result.
 
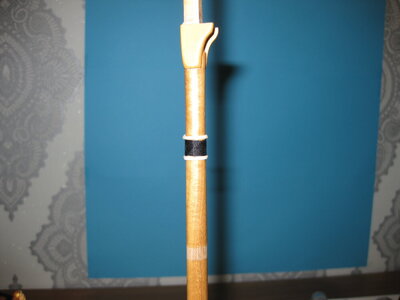
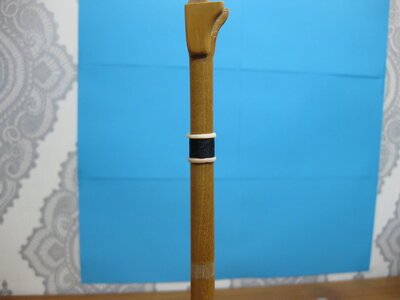
First try with Fimo clay (polymer clay)
I wrapped it aroud the mast right away out of the oven and let it cool down.
Then I shaped it a little and put it in place (dry fit)

it only needs a color, but that is for later concern.

IMG_1313.JPGIMG_1314.JPG

The rope is 0,4 mm, the thickness of the hoop is 1 mm
Maybe when it is in place I sand a little down of it. (tape the rope for dust)

It's difficult because the mast is already in place.
 
Update:

I wasn't satisfy about the result with the polymer clay. So I started to experiment with different kind of things. And then I got this idea.
I have a different kind of polymer clay that I bought by a store named Action. It is more soft than Fimo. And more colours.
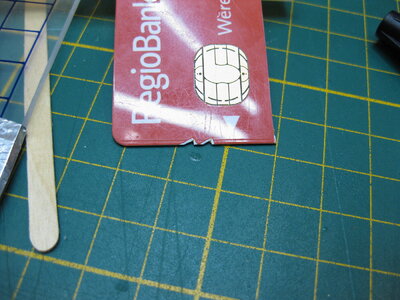
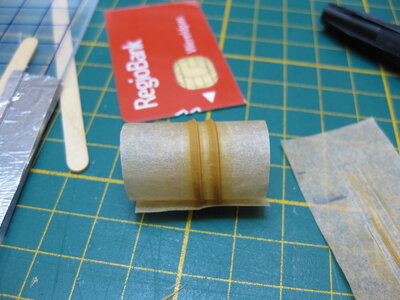
I took a piece of a credit card that I cut in shape and I scrape the clay on baking paper. Till I get the clay in the form I want. Then bake and curl it. This is the result.
Maybe only a little paint to finish it.

IMG_1317.JPGIMG_1318.JPGIMG_1315.JPGIMG_1316.JPG

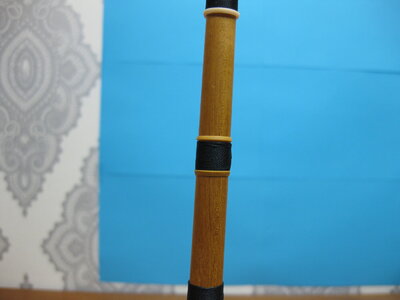
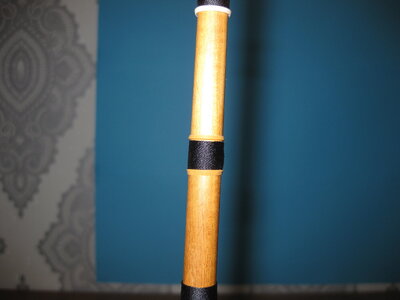
This way I will do it. Thanks for al the advice and hints. Sometimes a suggestion is the only thing you need to get the result.
 
Thank you Hubac, one mast is ready at this time.
Here is the end result post #16
 
I would just use strips of paper to simulate the bands.

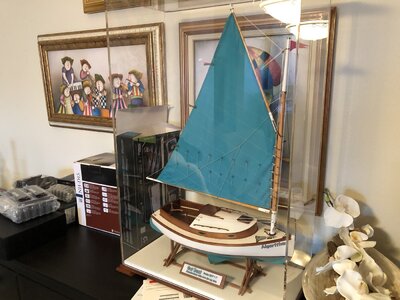
This is a method I used to make the mast hoops for my Catboat.
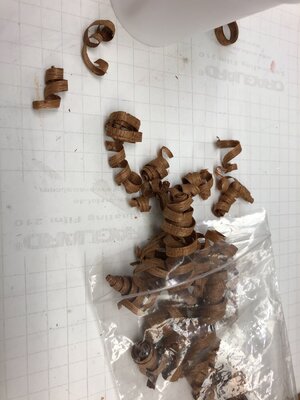
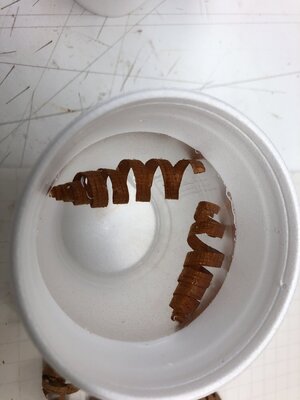
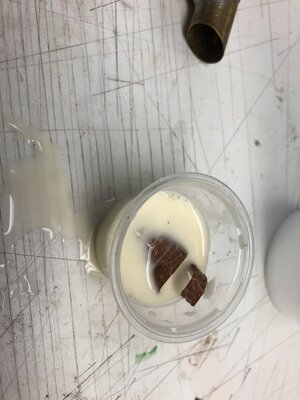
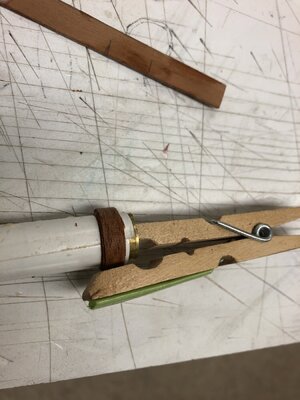
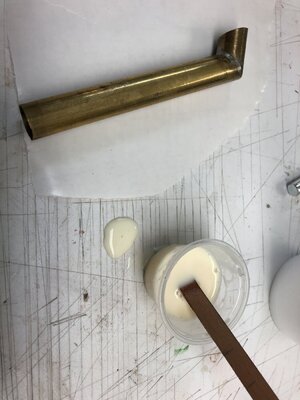
I created some mahogany shavings, soak them in water for one hour, take a piece of brass of your needed diameter, wrap a few turns with wax paper, take out the shavings and deep then in glue, carefully (the savings are very brittle) wrap them a few turns over the tube and hold in place for another hour.
After dry, pull them out from the tube, you could take a piece of sand paper, lay out on a flat surface and sand it to shape.
This is my old ways method since I don’t have a lathe and don’t know how to use one neither.
Don’t know if it will work for the smaller version you need.
CC64F859-188E-4936-9A57-15838BAA0FAE.jpegB060D325-755A-49C0-99F1-6CA649E9F8A1.jpegE54219D7-D31A-4FF3-8BAC-929DD8AE1B49.jpeg8C63F8AE-6086-406D-A8AC-2CC45CB9EFE3.jpeg0539E4B8-8783-46E4-9248-9E5610FCCF50.jpeg5C8119AA-941B-4875-A601-527E9390A7AB.jpegE7AA4876-5A24-4661-8320-EBD5ECA15D23.jpeg
 
At scale the trick is to make one thing look like another. All of the ideas put forth can work...some being easier to work than others. I have used the paper strips idea a lot...I use the colored construction paper you can get in art and craft stores...it is thicker. Another idea is to use styrene plastic strips. Styrene plastic is available in a large number of scale shapes to include quarter round. The styrene is very bendable...if stubborn use a bit of hot air heat. Use a quarter round strip, cut piece to length, carefully wrap around mast, ca in place, paint. I suggest using CA gel...use very sparingly as too much CA can dissolve the styrene. Styrene plastic is used a lot in model railroad structures. It is fantastic for ship models especially for moldings and constructing quarter gallery windows, etc. Just another option to add to the kit...I keep and use a large assortment of styrene shapes on hand...

One online source for styrene plastic shapes is Evergreen Scale Models at https://evergreenscalemodels.com/
 
Last edited:
I used several layers of masking tape cut to size. Wrap one layer then the next etc. To how thick you want it then paint it whatever pattern you want!
 
Make a tube out of colored paper and PVA glue (wrap it around a wood dowel of proper dimensions) . Saw off 'rings' of whatever width you want. Shape the rings as necessary using sandpaper, knives,etc. Color the paper with a 'wash' of water color before rolling. You can make any woolding of any color, width, thickness, diameter, etc, that you want. You can make hundreds, store them and never have to do the process twice. This entire process was described in an article in the NRJ a couple of years ago.
 
Back
Top