-

Win a Free Custom Engraved Brass Coin!!!
As a way to introduce our brass coins to the community, we will raffle off a free coin during the month of August. Follow link ABOVE for instructions for entering.
-

PRE-ORDER SHIPS IN SCALE TODAY!
The beloved Ships in Scale Magazine is back and charting a new course for 2026!
Discover new skills, new techniques, and new inspirations in every issue.
NOTE THAT OUR FIRST ISSUE WILL BE JAN/FEB 2026
- Home
- Forums
- Ships of Scale Build Logs
- Super Detailing Static Models / Other Genres
- Historical Trailways, Guns, Aircraft, and Cars
You are using an out of date browser. It may not display this or other websites correctly.
You should upgrade or use an alternative browser.
You should upgrade or use an alternative browser.
Beautiful model…well done! 
20220324
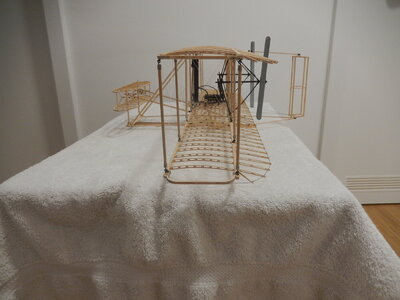
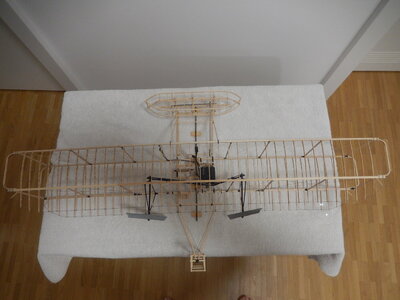
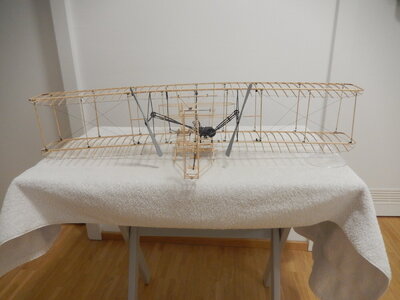
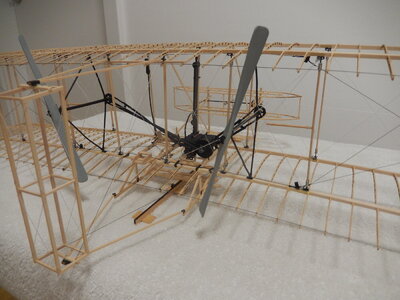
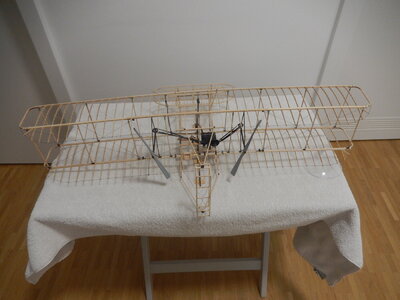
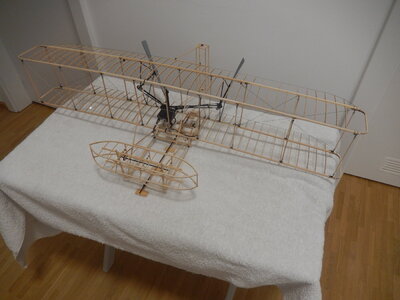
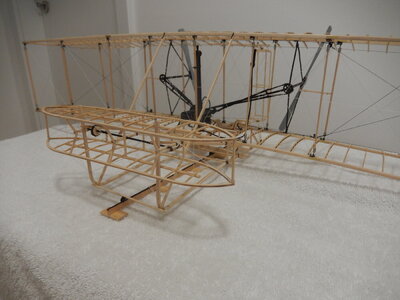
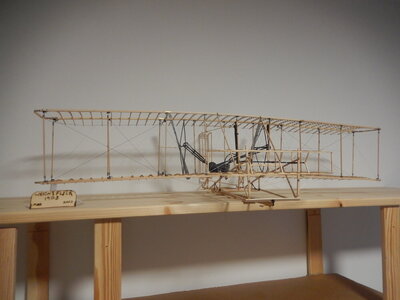
Complete! Final post for this project.
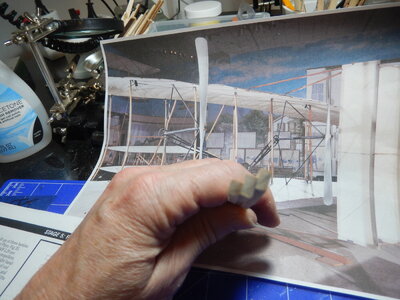
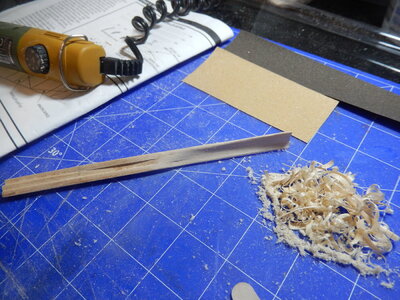
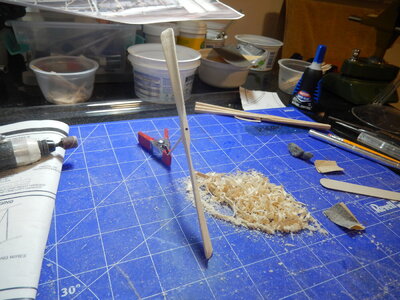
I was a bit worried that I’d foul up the propellers in some fashion but all went well. Drew a profile curve on the end of the glued up blank and then it was carve a little, sand a little, carve a bit more, sand more, use the sanding drum on the Proxxon drill to sand the concave parts, rub with steel wool, use a bit of filler and then final sanding. Two coats of automotive gray primer to seal the wood and then a coat of light gray paint. Go to fit the first propeller to the shaft…dang; it won’t go on. File the mounting hole on the propeller until it is willing to go on but just a wee tight fit, then apply a little petroleum jelly to the shaft and in the mounting hole and gently wiggle the propeller until it is on – no glue used. (Recommend that the mounting hole be checked before gluing the propeller mount to the wings. Would have been a lot easier at that point to get the holes appropriately sized, or the shafts filed down a bit, instead of waiting until it is the last thing to do.)
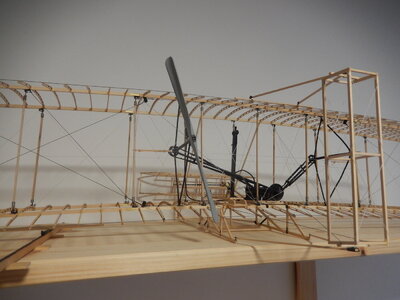
All-in-all a fun, if at times infuriating, model (the fiddly bits). Not having a skin over the ribs means everything that would be hidden is fully exposed. I definitely have a much better appreciation of the Wright’s accomplishment 118+ years ago.
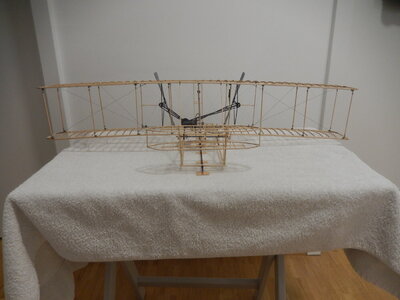
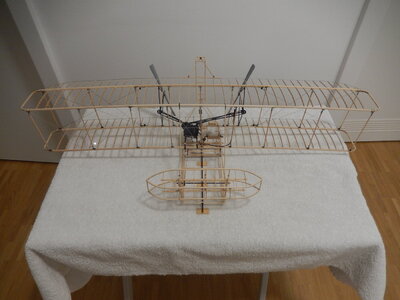
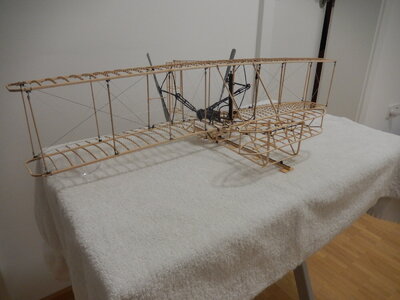
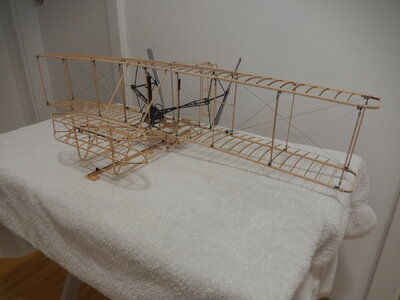


Beautiful…very well done! Congrats!20220324
Complete! Final post for this project.
I was a bit worried that I’d foul up the propellers in some fashion but all went well. Drew a profile curve on the end of the glued up blank and then it was carve a little, sand a little, carve a bit more, sand more, use the sanding drum on the Proxxon drill to sand the concave parts, rub with steel wool, use a bit of filler and then final sanding. Two coats of automotive gray primer to seal the wood and then a coat of light gray paint. Go to fit the first propeller to the shaft…dang; it won’t go on. File the mounting hole on the propeller until it is willing to go on but just a wee tight fit, then apply a little petroleum jelly to the shaft and in the mounting hole and gently wiggle the propeller until it is on – no glue used. (Recommend that the mounting hole be checked before gluing the propeller mount to the wings. Would have been a lot easier at that point to get the holes appropriately sized, or the shafts filed down a bit, instead of waiting until it is the last thing to do.)
All-in-all a fun, if at times infuriating, model (the fiddly bits). Not having a skin over the ribs means everything that would be hidden is fully exposed. I definitely have a much better appreciation of the Wright’s accomplishment 118+ years ago.
View attachment 298462View attachment 298463View attachment 298464View attachment 298465View attachment 298466View attachment 298467View attachment 298468View attachment 298469View attachment 298470View attachment 298471View attachment 298472View attachment 298473View attachment 298474View attachment 298475View attachment 298476View attachment 298477View attachment 298478
Congratulations for finishing this interesting model - and mayn thanks for showing us
Great - and now? what comes next?
Great - and now? what comes next?
Next? A cannon project (a couple of days) and then some vacation.Congratulations for finishing this interesting model - and mayn thanks for showing us
Great - and now? what comes next?


