ZEEHAEN 1639, 1:37.5, Dutch fluit from Dutch Explorer Abel J. Tasman by Marcus

Repaired the bow and added crack filler.
253 Fluit, Zeehaen patching.jpg


254 Fluit, Zeehaen patching.jpg


256 Fluit, Zeehaen sanding.jpg


Did a first sanding of the hull, patched the cracks again and will do a second sanding in the next couple of days.
255 Fluit, Zeehaen sanding.jpg


257 Fluit, Zeehaen sanding.Jpg


After that, will finish the rest of the planking on the sides of the hull. From looking at all the pictures I have from Fluits this area is clinker built. I will continue to study the books.

Marcus
 
Thanks for all the likes and comments.

Installed 2 thin strakes of 5mm wide cherry planks above the upper wale. I am using narrow planks because the contour of this part of the hull curves inwards on the left and right and outwards on the up and down.


Once they are glued on two, 2mm narrow straks (wales) will be installed and from there on clinker built planking wall going all the way up.

Marcus
 
Thanks for all the likes and comments.

Made a minor mistake on the hull planking towards the stern. The strakes on each side of the hull did not meet equally going towards the stern.

142757985_263FluitZeehaensternleft.thumb.jpg.197d4b11a8caf14a86d926775102d5c6.jpg

2007025725_262FluitZeehaensternright.thumb.jpg.21edfbf7c1dfd9360d2fface88e3d694.jpg

2135258988_264FluitZeehaensternonevenplanks.thumb.jpg.b3ce48e333b22efcb766cafc052d12c8.jpg

827081725_265FluitZeehaensternonevenplanks.thumb.jpg.a8ca391e2a6c1614756d437e3004f7f7.jpg

So I removed 4 strakes with a chisel, sanded the rest of the area and reinstalled the first new strake.

1663271306_266FluitZeehaensideplanksrmvd.thumb.jpg.97ed77a8db2f2dab74ab356a59991707.jpg

1615654819_267FluitZeehaennewstrake.thumb.jpg.488923089f74e47725b152aeb5961284.jpg

Marcus
 
Thanks for all the likes and comments.

Started back on the Fluit after lots of garden work, redoing some perennial plant beds. All that is left is harvesting the last of the food and put everything to bed.

After much sanding started on the third layer of the wales. The planks are 2.5mm thick and 6mm wide. There will be a total of 6 on each side. The last one which is towards the top is 2mm x 2mm. There will be two of these side by side


Marcus
 
Very good progress Marcus! It is difficult to believe that this is the same ship as earlier (aanhouer wint!). Just pay attention to the slight indentation on the starboard side - but you are obviously aware of that.
 
Thanks for all the likes and comments.

As I mentioned before the wales are 2.5mm thick and 6mm wide. The planks have been soaking in plain water for about 4 weeks. I soak all my wood a long time especially with building the Fluit.

I made small indentations in tbe stem of the bow and stern.
836509391_280FluitZeehaeninkepingeninboeg.thumb.jpg.364c079028401e08c591b3482d7d12fb.jpg

The plank for the wale will be pushed into it. I than slowly bend the planks by pushing with my fingers to the contour of the hull. At the same time I make small pilot holes and use pushpins to hold the we on the hull.

2114649207_281FluitZeehaen3wales.thumb.jpg.b54d26e584ef43fafc16a836f5491072.jpg

2144889626_282FluitZeehaen4wales.thumb.jpg.8103b597125dd649c034c7d0d789a103.jpg

1502571859_283FluitZeehaen5wide1narrowwale.thumb.jpg.5b82505124479a8cbf3aeddf7701ca62.jpg

649371645_284FluitZeehaenallwales.thumb.jpg.99daa6fd4b4c9e3195a9b78ec161a19c.jpg

1049433284_285FluitZeehaenwalesatbow.thumb.jpg.9ad2035d1f21e1c4b2c604fd69889a86.jpg

514369597_286FluitZeehaenwalesatstern.thumb.jpg.cf7a53b44c7b699bcf50b668824dcacb.jpg

20200911_152631.thumb.jpg.2388ea001c5bee72943eb46e27ba77cd.jpg

Initially I make scarph joints for every plank. Once set, I will add more.

The holes from the pushpins become holes for half round headed black stainless steel pins imitating the heavy nails used to hold the wales on the hull.

Marcus
 
Wales have been glued on and scarph joints have been created.
433018915_287FluitZeehaenwalesinstalled.thumb.jpg.5c5ba0532172740afadfffe70e09e4b0.jpg

1322736744_288FluitZeehaenscarphjointspinready.thumb.jpg.87a72de3ff02d589355daeedc65e2d80.jpg

Made some pilot holes with an awl and will drill them a bit bigger so a black pin will fit into the hole.

Planking the sides above the wales and eventually paint it green.

51274265_289FluitZeehaenabovewale.thumb.jpg.634f38f7dcb2959a4b8cc06418c1b98f.jpg

306554795_290FluitZeehaenabovewale.thumb.jpg.4020aad8ae8b5452d037a75a80c32e43.jpg

All colors for the Fluit will be paints that existed in the 17th century.


When I was sanding the opening where the tiller goes in, the two top wales sprung loose from the hull. Ten cm of that wale was removed and 8 cm of the wale below the top wale was removed. Created 2 new scarph joints and placed 2 new walnut planks in place of where the other wales were removed. Using glue & sawdust combo, bend the wales towards the hull, clamped and pinned the area and let dry overnight.
294 Fluit, Zeehaen rdo stern wale.jpg

295 Fluit, Zeehaen re-do stern wale.jpg
296 Fluit, Zeehaen re-do wale.jpg

297 Fluit, Zeehaen hennegat.jpg

On the inside installed 0.5mm thick planks and most of it will not be visible.
299 Fluit, Zeehaen finished paneling.jpg

The tiller opening the stern area is a bit off. If you look towards the hole and keep the stem as your middle point the left area is a bit bigger than the right side. I'll figure something out to make it more even.
303 Fluit, Zeehaen hennegat done.jpg

Next will be the 4 windows on the rounded stern.

304 Fluit, Zeehaen stern windows.jpg

This is what she looks like so far.
300 Fluit, Zeehaen re-do completed.jpg301 Fluit, Zeehaen sanded.jpg
302 Fluit, Zeehaen sanded.jpg
Marcus
 
Thanks for all the likes and comments


Made a template from the area that is glued on top of the sternpost.

1184061783_5a1FluitZeehaenre-do.thumb.jpg.13eba9cf0ec41e850ace4884302be016.jpg

181773050_5a2FluitZeehaenwatisdename.thumb.jpg.13fe8c1d2c2356ecc7f8d7a45e2d4016.jpg

628020137_5a3FluitZeehaenname.thumb.jpg.f27365b0f91a2c4f88ee928047054748.jpg
Created a 1mm thick veneer by glueing 0.5mm plywood and 0.5mm walnut veneer together. Used the template to create those 2 pieces and glued them to the sternpost. At the same time it will hide the square dowel added to the sternpost.
1375988844_5a4FluitZeehaensternpostversteviging.thumb.jpg.df6ddffa467fa26be16f527f0621a5ae.jpg

20201016_110449.thumb.jpg.72d24df1c6e855d5c4d689a888843dfe.jpg

Now the area where the tiller goes in. In Dutch it's called het "hennegat".

Removed with a x-acto knife and saw the two upper wales on both sides. Then sanded it even.

344270856_4d1FluitZeehaenhennegatredo.thumb.jpg.85fc88cbc4d780c2dbed0b64bf71f935.jpg

Created a template from a round dowel. Both sides of the dowel have the same angle as each of the sides of the Fluit

1605822426_4d6FluitZeehaenhennegatredoplanking.thumb.jpg.c1a4483e4aac1f35e1aed3e7fe5ffea9.jpg

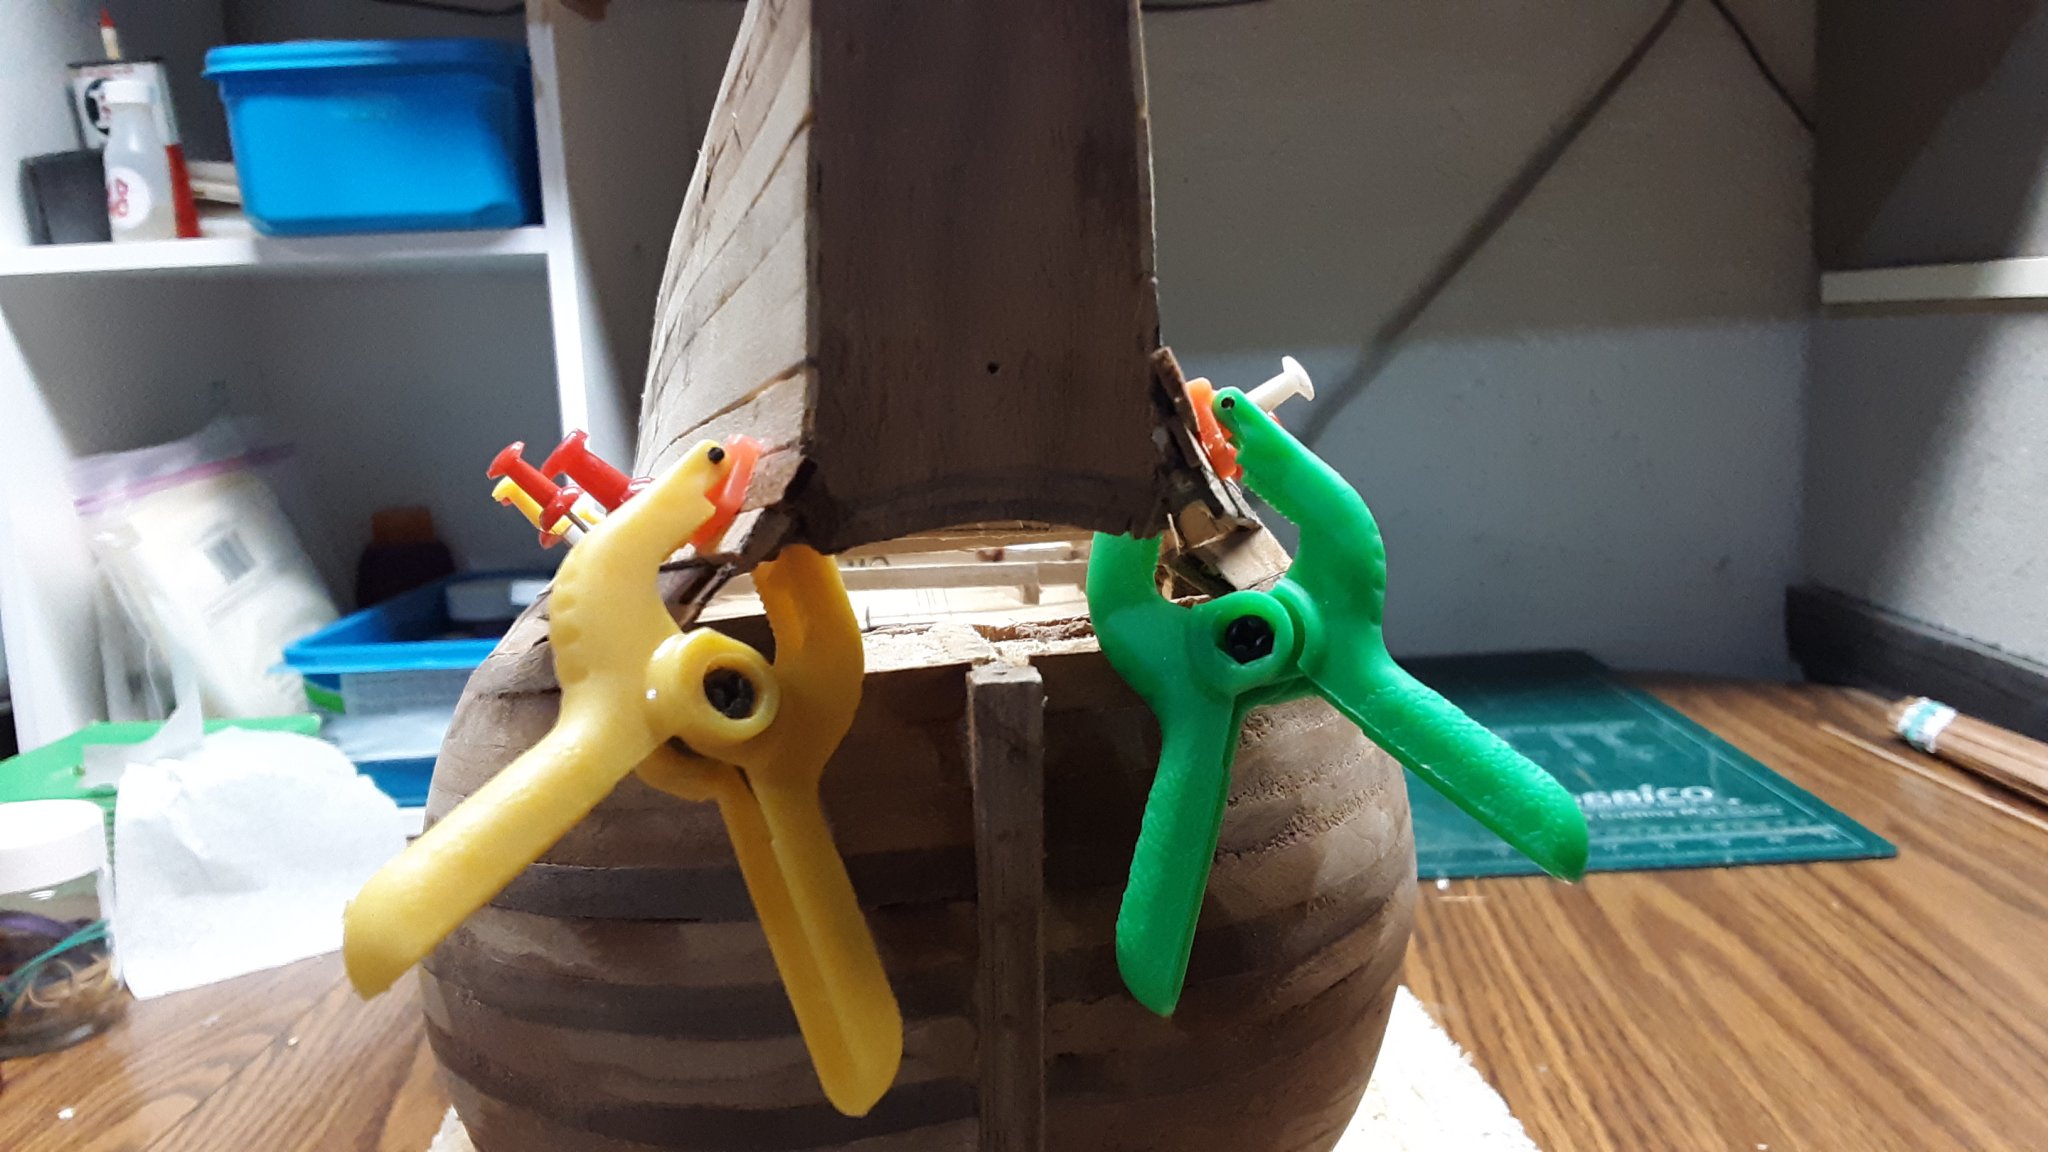
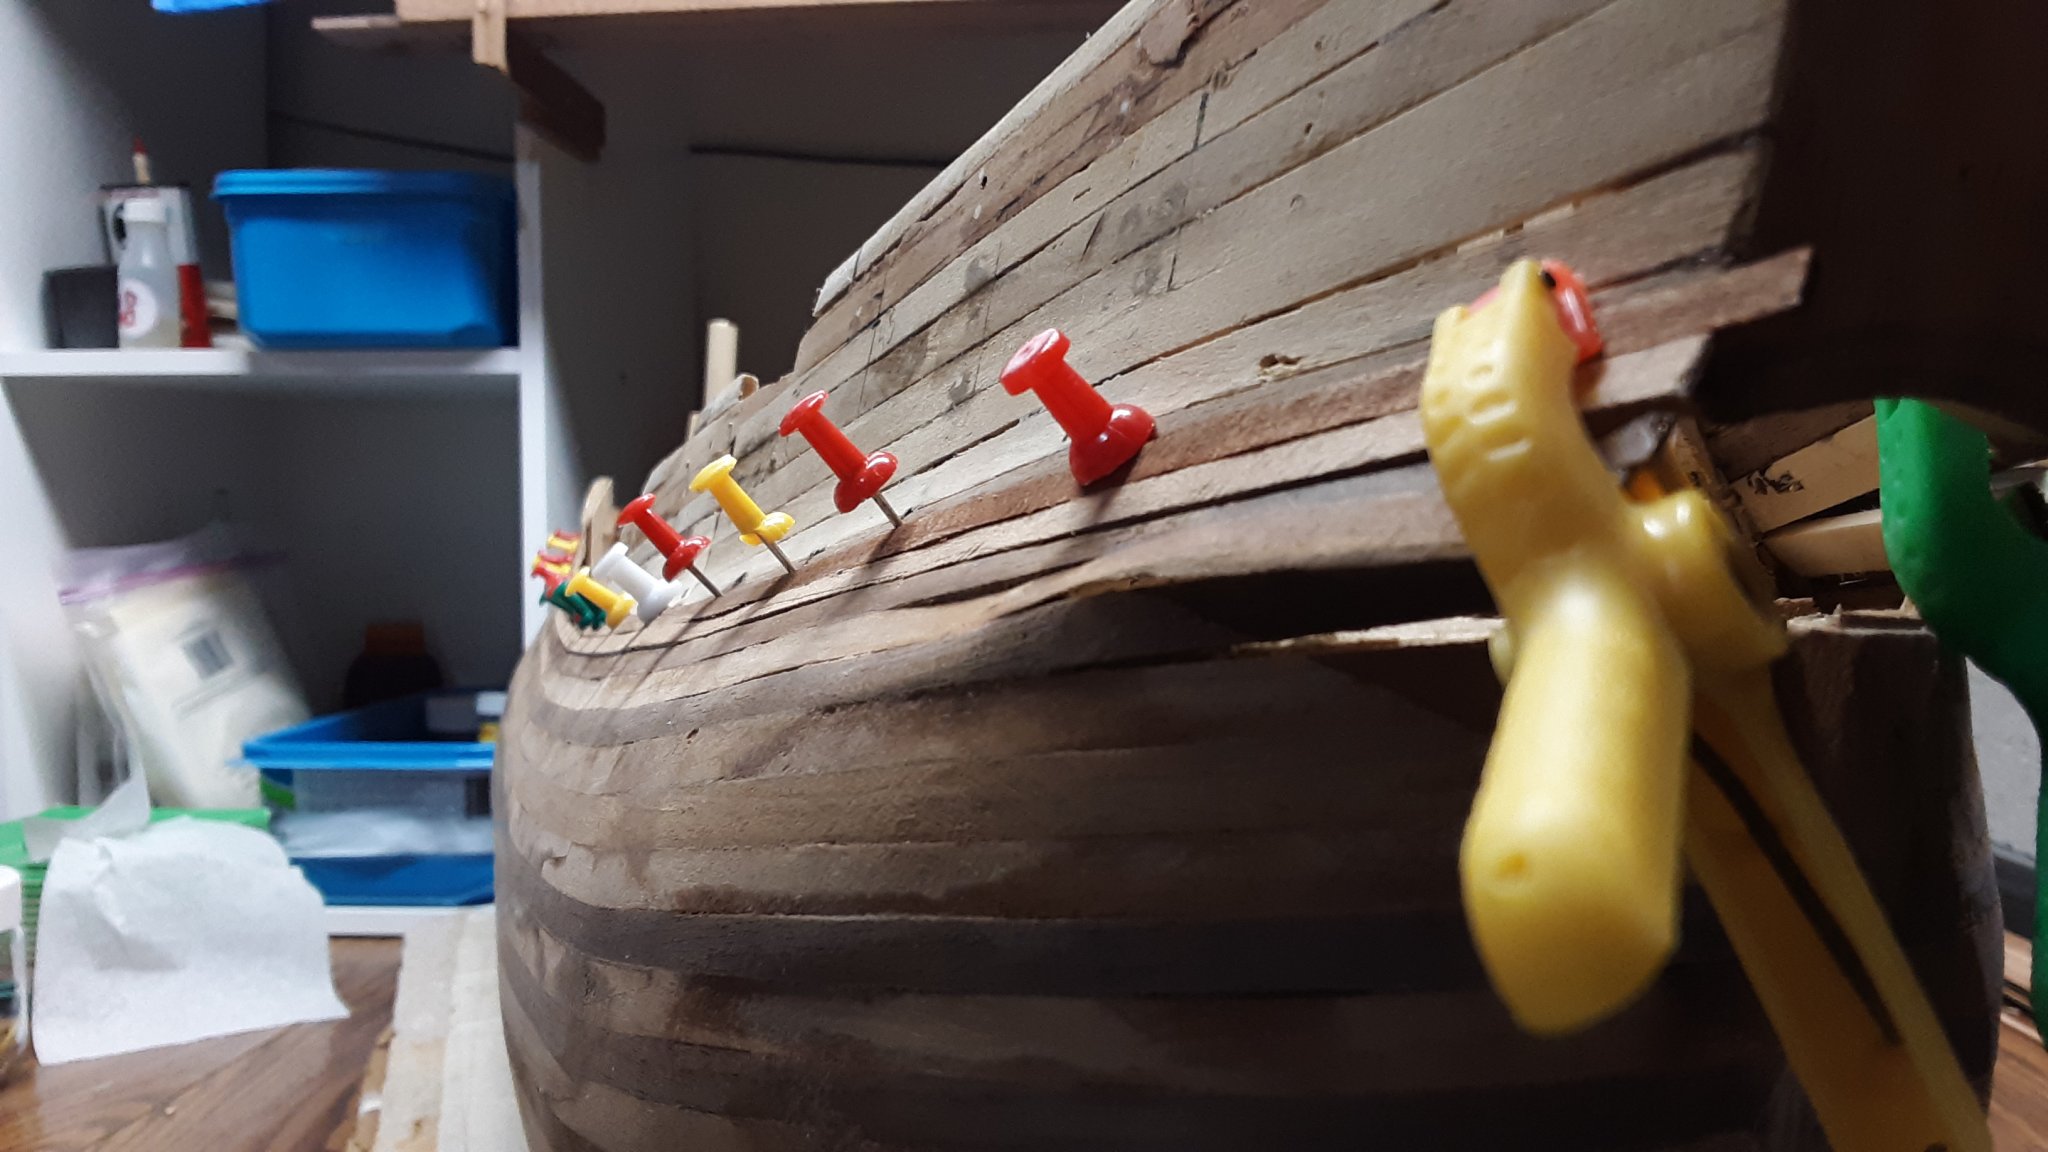
With a combination of glue and sawdust re - installed the upper wales. The glue / sawdust combo was also added to the inside of the planks to create a hard structure.

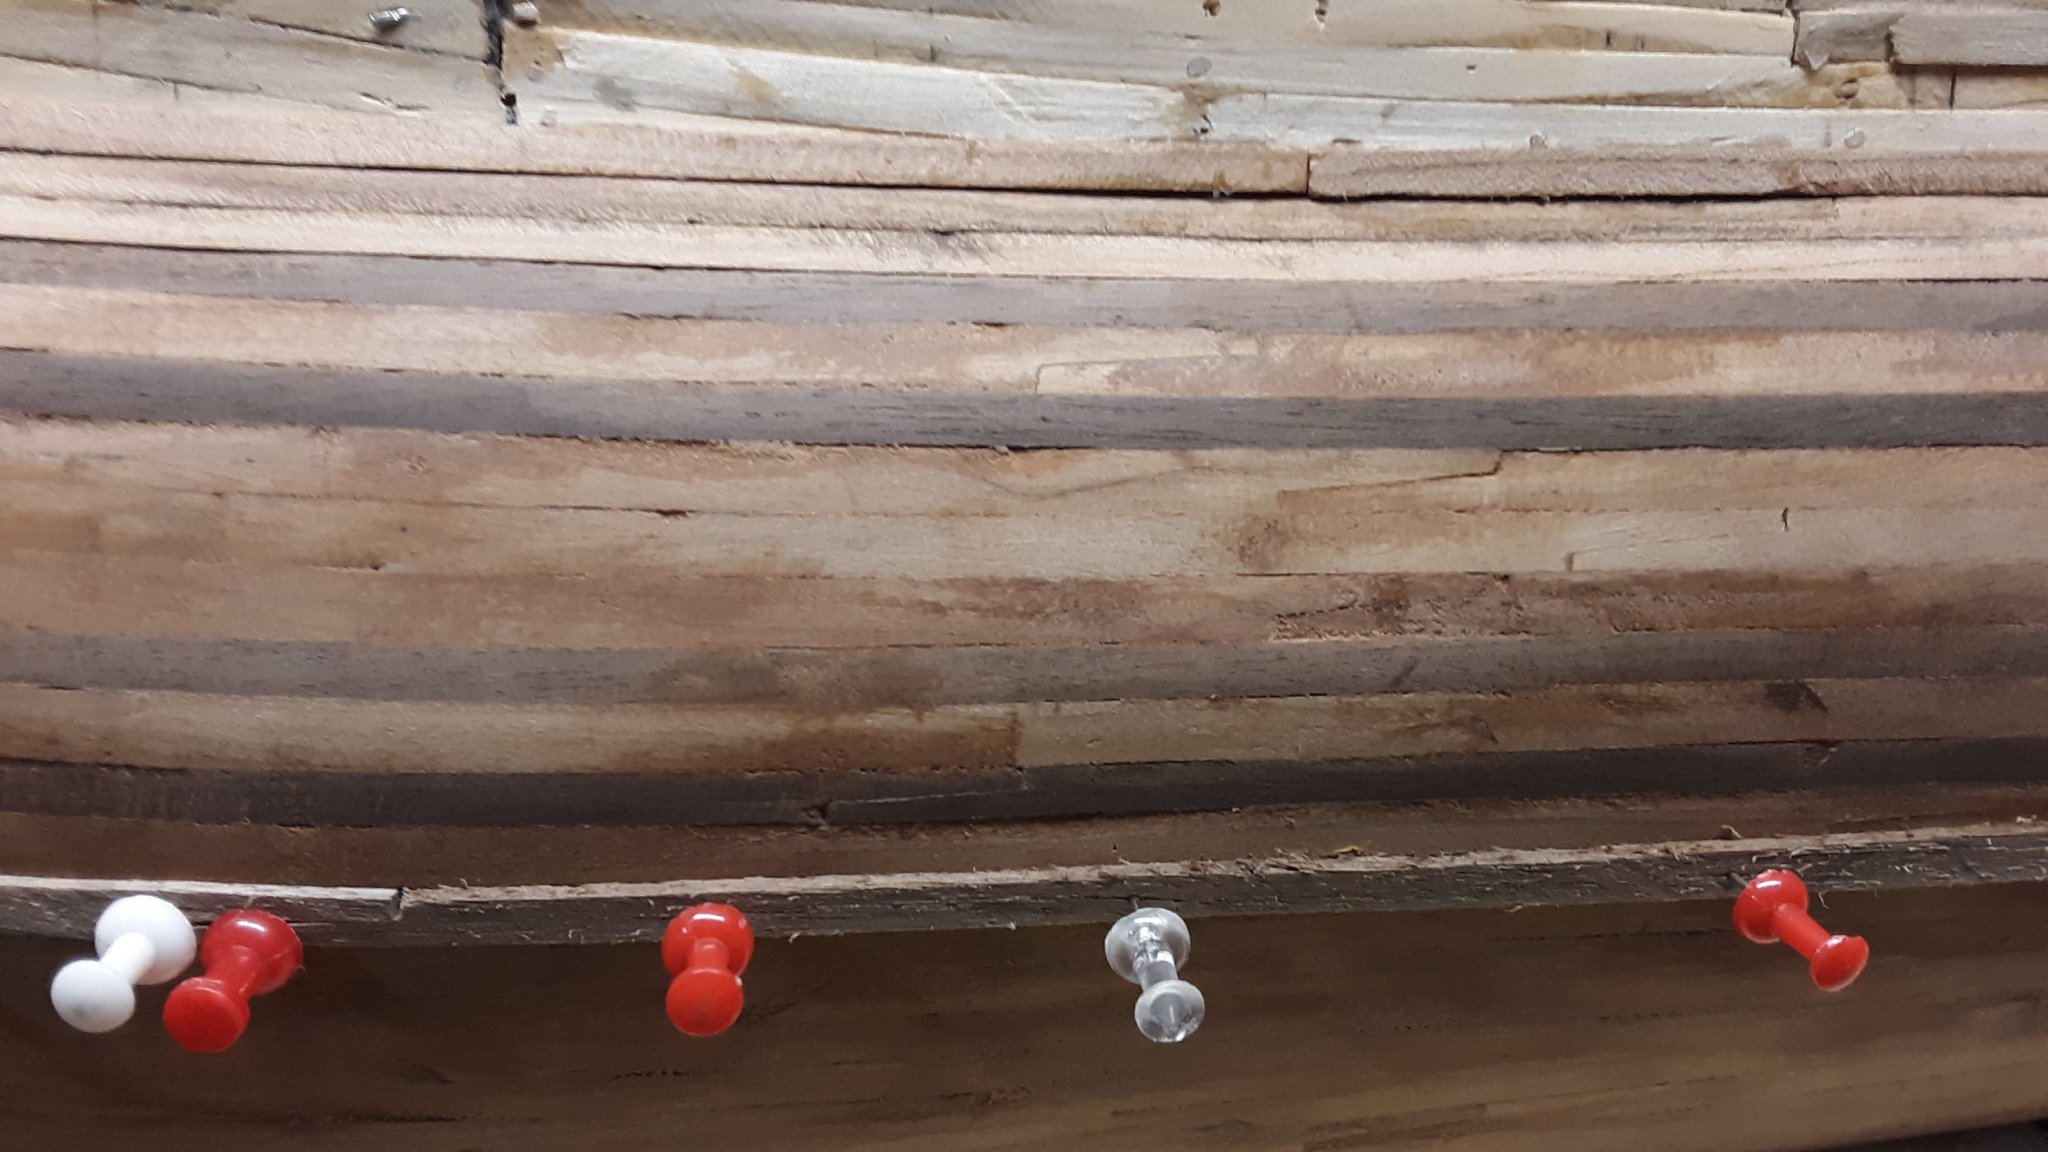
The newly glued on planks were held together with painters tape. The planks are thin as second layer will be installed on the first layer.

1674972367_4d2FluitZeehaenhennegatredoplanking.thumb.jpg.51ef0e493f2818b2e12f89a07b3aed32.jpg

1765068014_4d3FluitZeehaenhennegatredoplank.thumb.jpg.be02cbaa88d50c386a463e4bdc772ab6.jpg

1375365757_4d4FluitZeehaenhennegatre-do.thumb.jpg.94ff846f805b099a9fad572cc21e147e.jpg

0.5mm thick small piece of plywood was soaked for 30 min in water. Shaped it around the round dowel. This piece follows the curve of the area where the tiller goes in.
649417941_4d8FluitZeehaenre-dohennegat.thumb.jpg.76dff7021a7110c86ff949c090321d67.jpg

366231771_4d7FluitZeehaenre-do.thumb.jpg.e853a9243739899642bd6017b951a229.jpg

If this does not work I will go back to the drawing table and figure something else out. Eventually I will find a solution. I refuse to trash this and start over correctly..

The bend 0.5mm thick plywood has been formed and installed where the tiller goes in and filled with the combo glue / sawdust.
80591017_6a2FluitZeehaenhennegat.thumb.jpg.ff379834f91605139c8c178793636ffc.jpg

2123561902_6a3FluitZeehaenhennegat.thumb.jpg.c2a82121c7d181d1a180b99932eca859.jpg
Once this is dried and hardened I can make a rectangular hole wher the tiller goes through. After that I will plank it with walnut planks that are 0.5mm thick by 2mm wide strip wood.
1253505695_6a4FluitZeehaenhennegat.thumb.jpg.a680b28192cbe7944d48c643c512512b.jpg

912838522_6a1FluitZeehaenwalesredone.thumb.jpg.1867c2069dbfb7a138e52ab8b0eb6e28.jpg
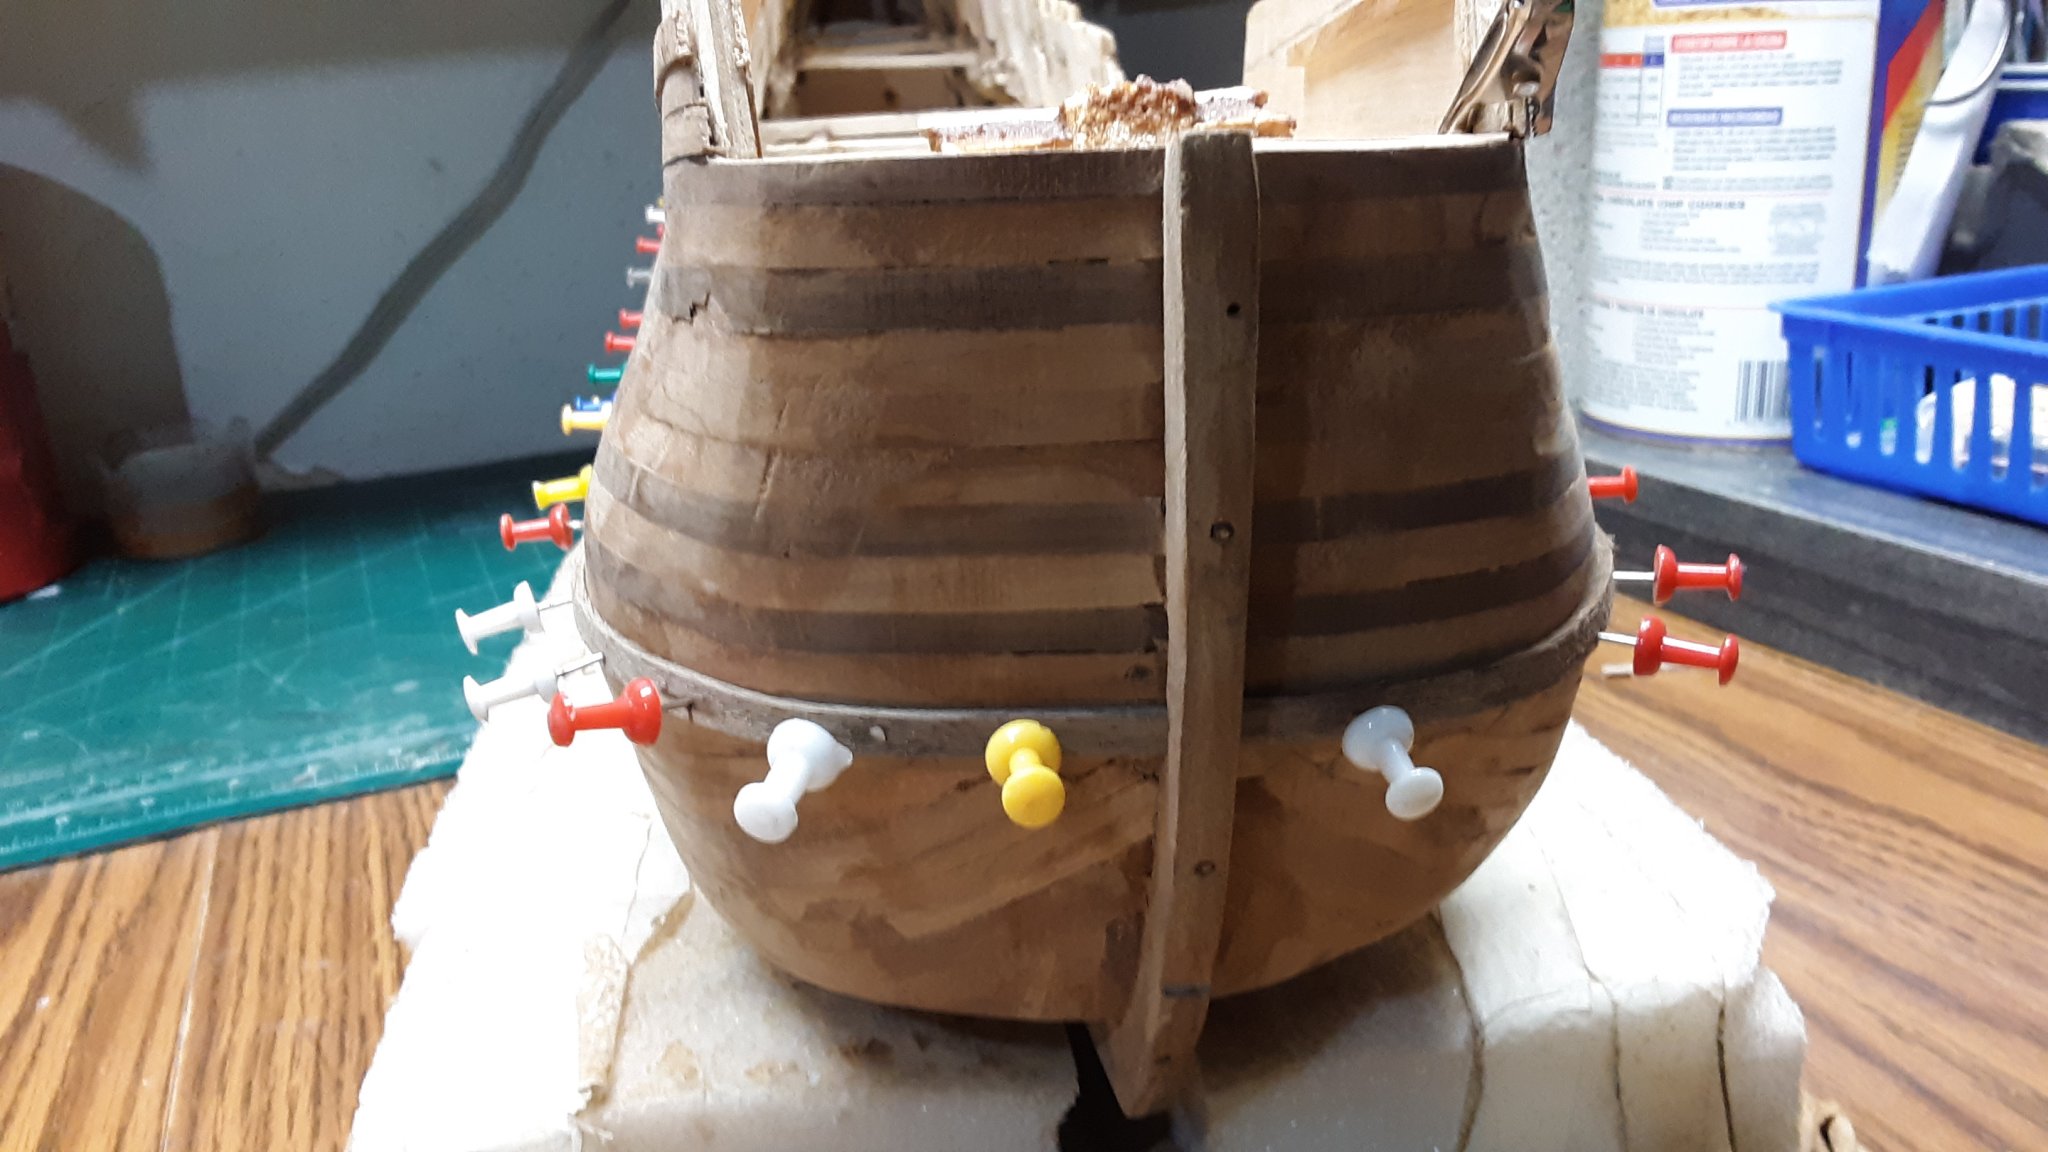
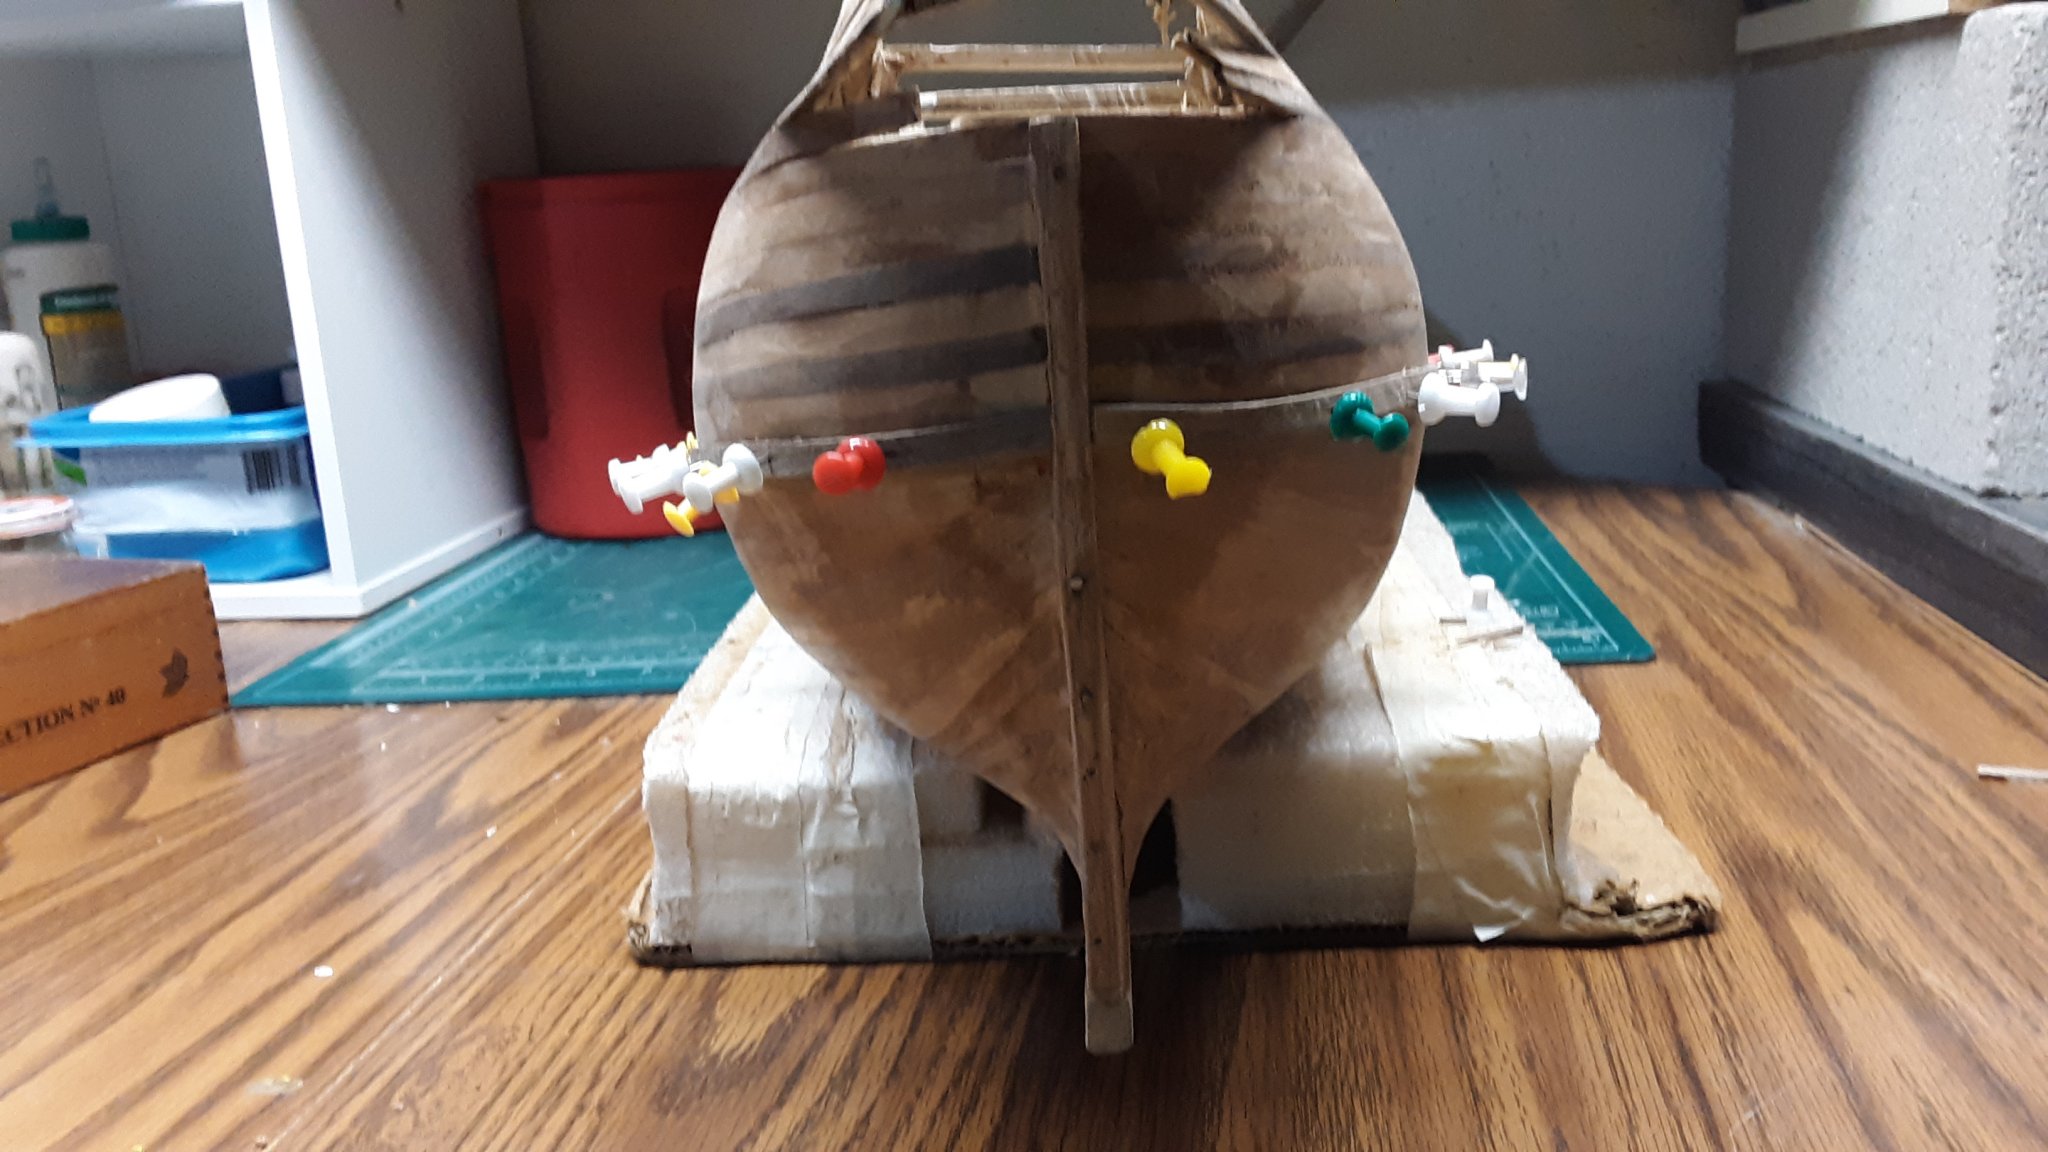
The wales have been redone. Still needs much sanding

Marcus
 
Presently adding a few things to the hull. Created the 4 windows on the stern area and the two in the upper area of the back of the hull.
I am not doing these Itty bitty carvings and instead putting little pieces of wood around the window frames and then painting it Yellow Ochre, a color that existed in the Dutch golden age.
1700561763_312FluitZeehaensternwindows.thumb.jpg.0990452328cd42d540512e592a5e5dea.jpg

1415356144_313FluitZeehaensternwindows.thumb.jpg.172bbeb1d567c92f0b0defde8ac40589.jpg

1828443458_314FluitZeehaensternwindows.thumb.jpg.06a0ae816b15d2fbe718d0d2005b32d7.jpg

158827558_315FluitZeehaensternwindows.thumb.jpg.b8ed590ba542d482c8d37c1caffa74ac.jpg

185721880_316FluitZeehaensternwindows.thumb.jpg.a3f8881e1fff2b2a32f21027562a962f.jpg

403589388_317FluitZeehaensternwindows.thumb.jpg.d53368b1de624247d5cadfda776912d5.jpg


1768782365_318FluitZeehaenblockinhull.thumb.jpg.c1bd29e27297b465129b3bf1b3872457.jpg

1486385616_319FluitZeehaenblockinhull.thumb.jpg.a6c2b22704d21a760b8e39ea6ec75265.jpg

415336236_320FluitZeehaenblockinhull.thumb.jpg.34a84a212264dacd11763f709cb858e7.jpg
Holes are cut into the hull on different areas and single and double blocks are put into them.

Marcus
 
Thanks for all the likes.

Small update.
Painted all the windows yellow ochre.
804410822_324FluitZeehaenwindowspainted.thumb.jpg.fa7f9133fb2116d34ac746f76a6df66d.jpg


Inserted the single and double blocks in upper area of the hull. The area where the single blocks are located will be painted 'An Dyk' green.
1375508787_322FluitZeehaensglblockinhull.thumb.jpg.69e3052b1edd0a7c1b3d9f1efaba2e61.jpg

1927943821_323FluitZeehaendblblokinhull.thumb.jpg.57b84e309cf3dea879fc456b2d8b6a96.jpg


I don't know the name of this but installed a small rectangular piece of wood with a hole for rope in between the upper wales.
1436131446_325FluitZeehaennoidea.thumb.jpg.a54bb64cccf086a0e0984967e5840431.jpg

Marcus
 
Thanks for all the likes and wonderful comments.

Building the bowsprite. I find this part on of the most demanding exercise of building a scratch ship model. I always double or triple the pieces of wood that make up the bowsprite. I always break one or two.

I have glued some of the paper templates to the wood. I will make them out of walnut and cherry.
940453349_326FluitZeehaenbowsprite01.thumb.jpg.65a6b7ce12f876f88fbfa112260ff5c7.jpg

849588282_327FluitZeehaenbowspritecherry02.thumb.jpg.74085b5159ce4892b19f292c25335167.jpg

1157882176_328FluitZeehaenbowspritepear03.thumb.jpg.31ff334e61b9e409d5d25c654e2d3472.jpg


407251386_329FluitZeehaenbowspritetemp04.thumb.jpg.9cd277e6b95d2b256aded490e4528b05.jpg

Marcus
 
Cut out and rough sanded all the cheeks from walnut en some extra pieces from cherry and basswood. I use the basswood and cherry pieces as practice. Once these pieces fit I will take and compare them to the walnut cheeks, fine sanding where needed and glue them together.
I know this is a lot of work but it is my way of getting it right. 20201210_153610.jpg

It has been warm these last two days so all the cutting and rough sanding was done outside.

Marcus
 
Thanks for all the likes and comments.

After all the cheeks were rough sanded, I started to dry fit the bottom cheeks. When everything fit I glued each side in place. The next day I sanded the bottom cheeks and dry fitted the second layer of the cheeks, glued in place and the following day sanded that and did the same for the 3rd, 4th,and fifth cheek layer. This process has taken me 3 weeks.

Also my first attempt a lion from Sculpey, looks more like a monster. I see that it needs work.
334 Fluit, Zeehaen bowsprite pc1.jpg

335 Fluit, Zeehaen bowsprite monster.jpg

336 Fluit, Zeehaen bowsprite monster.jpg

337 Fluit, Zeehaen bowsprite pc2.jpg

338 Fluit, Zeehaen bowsprite pc3.jpg

339 Fluit, Zeehaen bowsprite pc4.jpg


With Christmas did not work much on the Zeehaen. I spent several nice days in December outsie with my newly acquired bandsaw from WEN. Most of the wood I got from my woodworkers club has been sawn in 3, 5, 7 an 10mm planks.

Next will be the grating that is inside the cheeks.

Marcus
 
Back
Top