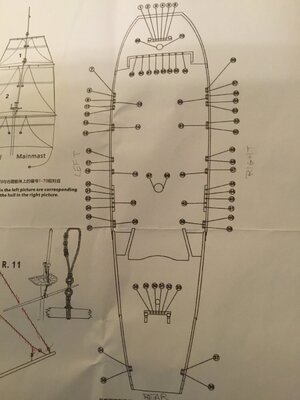
Thanks @Warlight. It appears that is so. But I'm not sure how to bend them in that direction. especially given they are laminated pieces. I'm guessing ZHL realised the problem and corrected it in later versions. Maybe I should try to make my own.
-

Win a Free Custom Engraved Brass Coin!!!
As a way to introduce our brass coins to the community, we will raffle off a free coin during the month of August. Follow link ABOVE for instructions for entering.
-

PRE-ORDER SHIPS IN SCALE TODAY!
The beloved Ships in Scale Magazine is back and charting a new course for 2026!
Discover new skills, new techniques, and new inspirations in every issue.
NOTE THAT OUR FIRST ISSUE WILL BE JAN/FEB 2026
You are using an out of date browser. It may not display this or other websites correctly.
You should upgrade or use an alternative browser.
You should upgrade or use an alternative browser.
ZHL Black Pearl circa 2013 first Model
- Thread starter Soozook
- Start date
- Watchers 12
-
- Tags
- black pearl zhl
You could try e-mailing Max at ZHL. He's been really accommodating to others maybe he would send you some updated ones. It's hard to believe they would actually want you to do a radical bend across the grain with the way the parts are cut. I was wondering if they are long enough even if you could bend them? If not I'd look around and see if there aren't some shorter arched pieces that don't seem to go anywhere else that might make make up the bent end of the part. Maybe they just don't show on the plans. Or as you say, you could just cut some based on your plans.
Thanks MystRacing. These parts would be long enough to bend but as you say actually doing that would be problematic. The model does not have any other pieces that are remotely like what needs to go on the bow of the ship. I may contact Max as you suggested. If he was willing to send updated pieces for a minimum 7 year old model he would be the best proprietor I ever worked withYou could try e-mailing Max at ZHL. He's been really accommodating to others maybe he would send you some updated ones. It's hard to believe they would actually want you to do a radical bend across the grain with the way the parts are cut. I was wondering if they are long enough even if you could bend them? If not I'd look around and see if there aren't some shorter arched pieces that don't seem to go anywhere else that might make make up the bent end of the part. Maybe they just don't show on the plans. Or as you say, you could just cut some based on your plans.
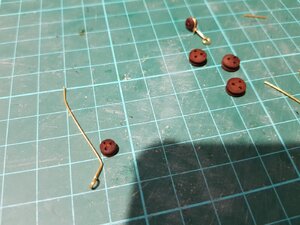
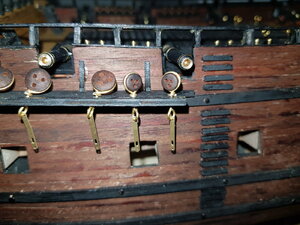
I'm back. firstly I contacted Max at ZHL but due to the age of the model he was not able to help. Though he did provide a file of images showing the complete build of a ship a few years younger which has helped. Anyway I have decided to leave the front of the ship for now until inspiration arrives. Onto my progress the past couple of weeks. To assemble the deadeyes I first created an bend at around 7 to 8mm then using my fingers bent the wire round the deadeye. It was then a simple job to twist the wire around the hook with a pair of pliers.
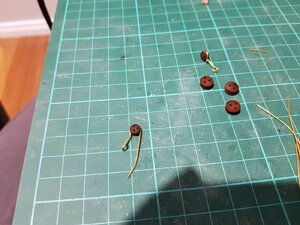
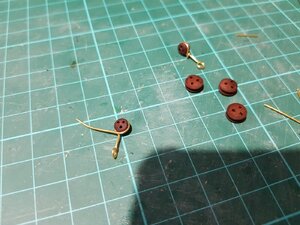
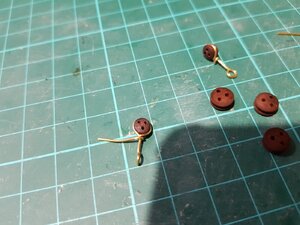
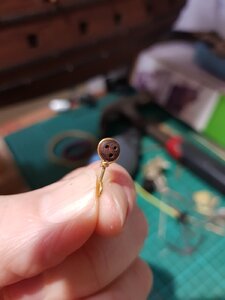
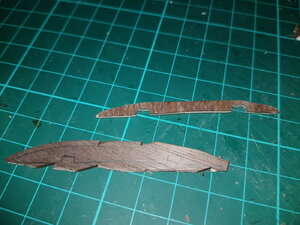
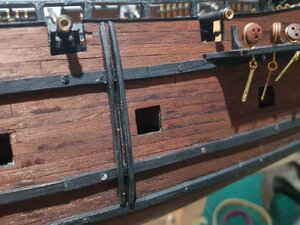
Next up was the slides on the side of the boat. Which I think are for launching rowboats but am probably wrong. For this I shaped a piece of spare panelling until it fit perfectly then used this as a template for the other 3. At the same time I worked on the ladders. Again making use of spare panelling.

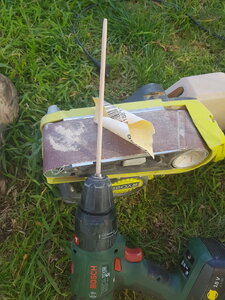
Next up I started on the masts. The dowel supplied is not the straightest but I tried my hand at steaming over a kettle and bending the dowel. it was not perfect but I think they are acceptable. I then got to work sanding them down to fit the brackets at one end. I was thinking it would be great if I had a lathe when a bright idea came to me and I used my drill. This worked great and I soon had them shaped. I later found out this is a common method. Guess I'm not such a genius after all
I also found the dowel supplied for the top of the masts and the ends of the spars was actually to small at 2mm and had to much play in some parts. It's specified in the plans as 2.5mm. I fixed this by getting wooden skewers from the kitchen (don't tell the boss) and sanding them down slightly to fit.
I then began assembly of the masts. Notice the nice clean workspace
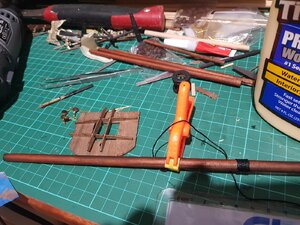
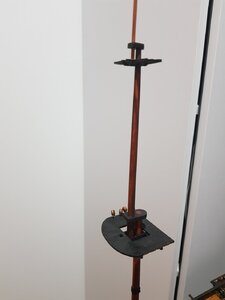
Work on the masts continues.


Next up was the slides on the side of the boat. Which I think are for launching rowboats but am probably wrong. For this I shaped a piece of spare panelling until it fit perfectly then used this as a template for the other 3. At the same time I worked on the ladders. Again making use of spare panelling.


Next up I started on the masts. The dowel supplied is not the straightest but I tried my hand at steaming over a kettle and bending the dowel. it was not perfect but I think they are acceptable. I then got to work sanding them down to fit the brackets at one end. I was thinking it would be great if I had a lathe when a bright idea came to me and I used my drill. This worked great and I soon had them shaped. I later found out this is a common method. Guess I'm not such a genius after all

I also found the dowel supplied for the top of the masts and the ends of the spars was actually to small at 2mm and had to much play in some parts. It's specified in the plans as 2.5mm. I fixed this by getting wooden skewers from the kitchen (don't tell the boss) and sanding them down slightly to fit.
I then began assembly of the masts. Notice the nice clean workspace


Work on the masts continues.
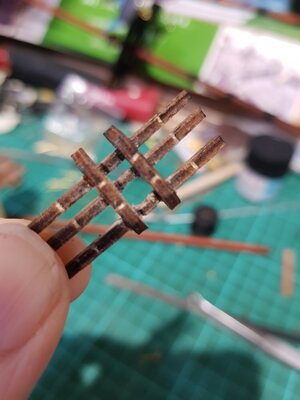
OK I have been very slowly working on the masts. Some of the parts did not go together correctly based on the specified widths of the masts as you can see below.
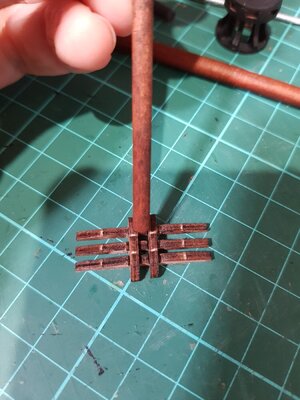
A bit of filing however eventually got things sorted.
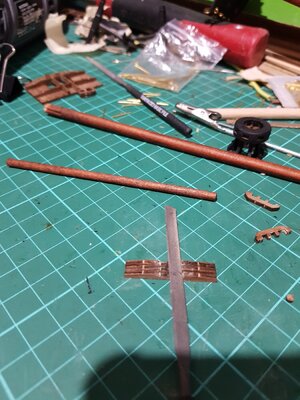
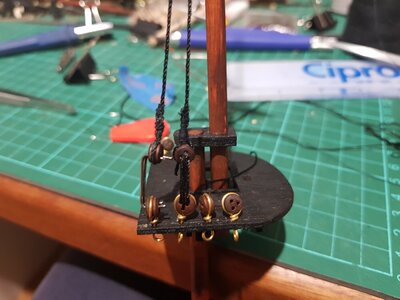
I then got onto the rigging of the shrouds. This proved tricky with the seizing due to lack of experience and tools. however as I go I have been researching and making changes to my approach which has simplified the process a little. I did not serve the lines though maybe on a future build.
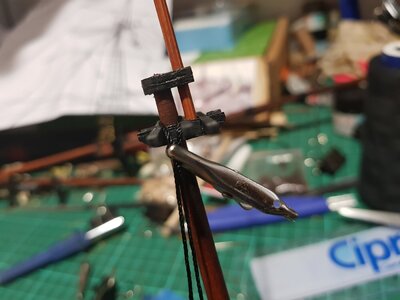
One tool I did manage to steal from the boss though proved invaluable. the old Needle threader.
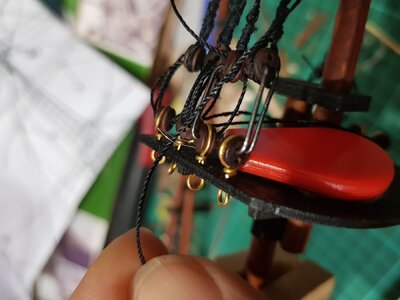
In the end after everything was installed and tightened I have had some hits an misses with the evenness of the deadeyes. Overall though I am happy with the results. First the not quite there
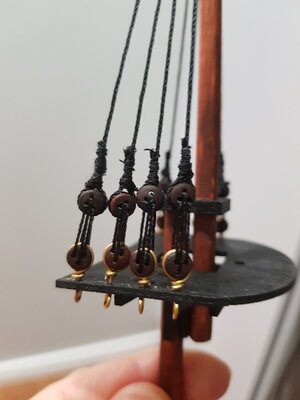
Then the. "I'm pretty proud of that" side
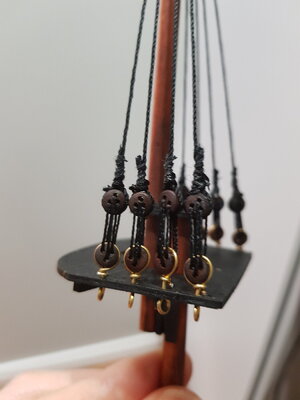
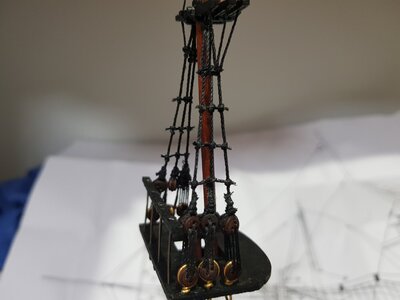
The ratlines actually went well in the most part after I had got the knot correct. My only problem is on a couple of places I forgot to make sure the deadeyes were aligned correctly before fixing the knots and in one case I have even managed to have them totally around the wrong way. rooky mistake but what can you do?
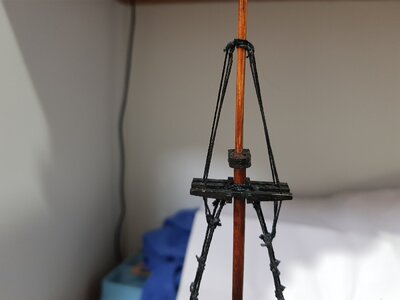
One mistake that does stand out though is below. Somehow I must have not glued the knots fully before putting in the upper rigging. The ratlines got pulled up during tightening but I did not notice until after I had glued the upper rigging. its going to stay that way though as I'm not patient enough to redo everything. Again most people (family ) wouldn't notice anyway.
I have all the masts done to this stage and will start putting the the required blocks. but having some trouble reading the plans. Will put in a few questions below.

A bit of filing however eventually got things sorted.


I then got onto the rigging of the shrouds. This proved tricky with the seizing due to lack of experience and tools. however as I go I have been researching and making changes to my approach which has simplified the process a little. I did not serve the lines though maybe on a future build.


One tool I did manage to steal from the boss though proved invaluable. the old Needle threader.

In the end after everything was installed and tightened I have had some hits an misses with the evenness of the deadeyes. Overall though I am happy with the results. First the not quite there

Then the. "I'm pretty proud of that" side

The ratlines actually went well in the most part after I had got the knot correct. My only problem is on a couple of places I forgot to make sure the deadeyes were aligned correctly before fixing the knots and in one case I have even managed to have them totally around the wrong way. rooky mistake but what can you do?

One mistake that does stand out though is below. Somehow I must have not glued the knots fully before putting in the upper rigging. The ratlines got pulled up during tightening but I did not notice until after I had glued the upper rigging. its going to stay that way though as I'm not patient enough to redo everything. Again most people (family

I have all the masts done to this stage and will start putting the the required blocks. but having some trouble reading the plans. Will put in a few questions below.
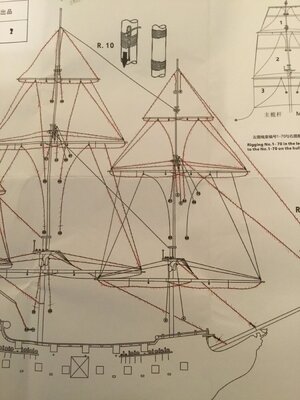
Can someone answer the following for me please.
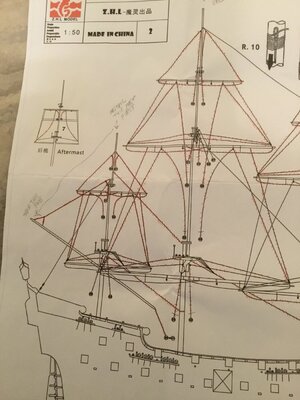
1) for the red circle below does this mean one rope from each side of the spar wraps around the mast and the other goes through a block?
2) should there be one block (ropes from each side of the spar go to one block) or two blocks (each side goes to its own block) here?
3) For the blue circles where do these ropes go? do they go down to the baling pins near the deck? If so do I just choose any pin that seems right?
4) what size thread is used for this rigging? The kit has 1mm and 0.5mm
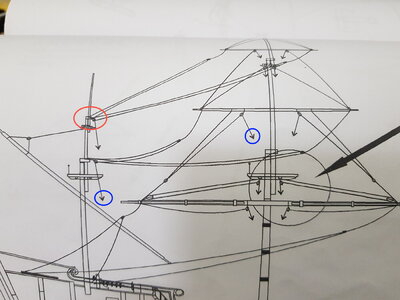

1+2) I guess there should be two double blocks fixed at the mast - for each side you will have a separate blockCan someone answer the following for me please.
1) for the red circle below does this mean one rope from each side of the spar wraps around the mast and the other goes through a block?
2) should there be one block (ropes from each side of the spar go to one block) or two blocks (each side goes to its own block) here?
3) For the blue circles where do these ropes go? do they go down to the baling pins near the deck? If so do I just choose any pin that seems right?
4) what size thread is used for this rigging? The kit has 1mm and 0.5mm
3) Usually you should have a belaying plan on which the different belaying points on the deck are marked!? I do not know, if this kit has one
4) also this information should be written somewhere - check also the content list -> depending also the total quantity / length of the two different sizes you have. Usually the running rigging is the smaller diameter!
My opinion (for what it's worth!)
1) for the red circle below does this mean one rope from each side of the spar wraps around the mast and the other goes through a block?
I would think the rope starts fixed to the mizzen mast, then goes to the block on the yard, back through a single block on the mizzen mast and down to a belay at the mizzen foot.
2) should there be one block (ropes from each side of the spar go to one block) or two blocks (each side goes to its own block) here?
Two single blocks, one each side.
3) For the blue circles where do these ropes go? do they go down to the baling pins near the deck? If so do I just choose any pin that seems right?
yes, down to a pin on the pin racks. Since this is a fantasy ship, you can do whatever you want, there is no 'correct' or 'wrong' pin.
4) what size thread is used for this rigging? The kit has 1mm and 0.5mm
I would guess the smaller size for the running rigging, the larger for shrouds, stays etc.
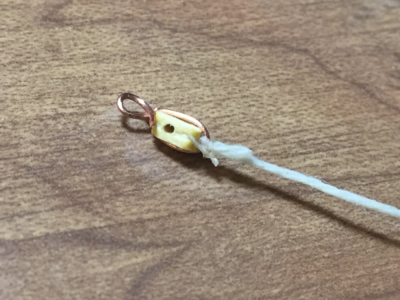
Ditto what @jimmystratos said. You probably will have to strop the block using wire to attach to the mast. You use thin wire to go around the block and then bend the end to a loop. Many suggest to blacken the wire first. My first attempt was not that pretty. I later bought some specialized needle nosed pliers to tighten up the loop a bit.

- Joined
- Dec 27, 2019
- Messages
- 551
- Points
- 308

Interesting solution to fit the trees on the masts. When I was doing mine I thought how the heck are you supposed to do this and I wasn't sure I had the right parts to do it with. I will try to take a picture of my rigging plans for you to see where the rigging attaches to the belaying pins. It is rather hard for me to see the numbers so it might not translate very well in picture form.
Thanks Jimmy that makes sense. As it is a fantasy ship as you say that might be why the plans don't specify particular pins. The plans specify the thread for the shrouds and ratlines but that as it. that's why I wasn't sure.My opinion (for what it's worth!)
1) for the red circle below does this mean one rope from each side of the spar wraps around the mast and the other goes through a block?
I would think the rope starts fixed to the mizzen mast, then goes to the block on the yard, back through a single block on the mizzen mast and down to a belay at the mizzen foot.
2) should there be one block (ropes from each side of the spar go to one block) or two blocks (each side goes to its own block) here?
Two single blocks, one each side.
3) For the blue circles where do these ropes go? do they go down to the baling pins near the deck? If so do I just choose any pin that seems right?
yes, down to a pin on the pin racks. Since this is a fantasy ship, you can do whatever you want, there is no 'correct' or 'wrong' pin.
4) what size thread is used for this rigging? The kit has 1mm and 0.5mm
I would guess the smaller size for the running rigging, the larger for shrouds, stays etc.
Thanks Vfordyce. Could I just use thread. is there a reason to use wire?Ditto what @jimmystratos said. You probably will have to strop the block using wire to attach to the mast. You use thin wire to go around the block and then bend the end to a loop. Many suggest to blacken the wire first. My first attempt was not that pretty. I later bought some specialized needle nosed pliers to tighten up the loop a bit.
That would be great Jay. if it doesn't work out though I should be OKInteresting solution to fit the trees on the masts. When I was doing mine I thought how the heck are you supposed to do this and I wasn't sure I had the right parts to do it with. I will try to take a picture of my rigging plans for you to see where the rigging attaches to the belaying pins. It is rather hard for me to see the numbers so it might not translate very well in picture form.
- Joined
- Apr 20, 2020
- Messages
- 313
- Points
- 278

Thanks Vfordyce. Could I just use thread. is there a reason to use wire?
@Soozook you may want to check out this YouTube video..I found it very helpful in learning how to attach blocks to masts and spars.. makes for a nice clean rigging. With practice, you can even modify and simplify the steps.
Reggie
Apparently there are different types of stropping for different purposes. When a hook or a loop is called for, I’ve used wire. I’m sure more seaworthy lads could explicate the variety of uses for stropping better than I. Now if you ask me the difference between an elevator and an elevon on an aircraft....Thanks Vfordyce. Could I just use thread. is there a reason to use wire?
Thanks everyone. That's all helpful. Jay it looks like the plans have been improved a lot since early versions which is good to see. The rigging has changed a bit but these plans help with most of what I need.
Warrlight I actually came across this one last week. I agree it will be helpful with the blocks on the spars. I'll give it a go.
Warrlight I actually came across this one last week. I agree it will be helpful with the blocks on the spars. I'll give it a go.


