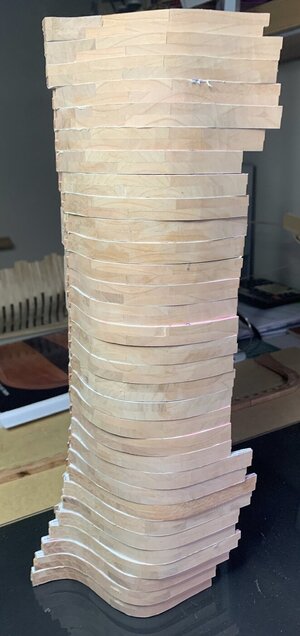
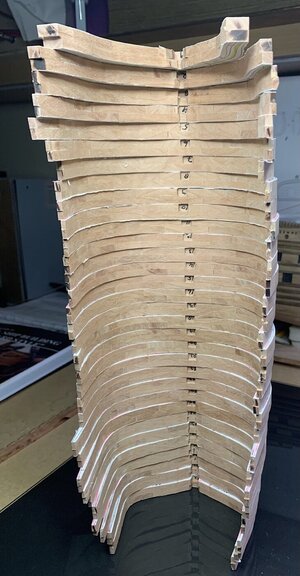
I wanted to try it and to save time also. I built the 9 frames of my Blandford section and remember them well so wasn’t looking forward to all those pieces. Looks good. You can take the corners off slightly before you install your frames or wait, you have to fair the frames in place anyway but if the taper is very big it’ll be easier to do a it a bit now.Thank you Tony, I had never heard of the Hahn method, which is why I chose this method. Maybe I should give this a try in the future. to try it and also to send time.
You are using an out of date browser. It may not display this or other websites correctly.
You should upgrade or use an alternative browser.
You should upgrade or use an alternative browser.
Le Rochefort 1/36 by Splinter
- Thread starter Splinter
- Start date
- Watchers 24
-
- Tags
- 1:36 ancre group build le rochefort
Great progress Splinter! Thanks for the visual on assembly. Like Tony I plan on assembling using a modified Hahn method. I’ll post pictures once I get the keel assembled.Uwe, as promised here is the method as I would do it.
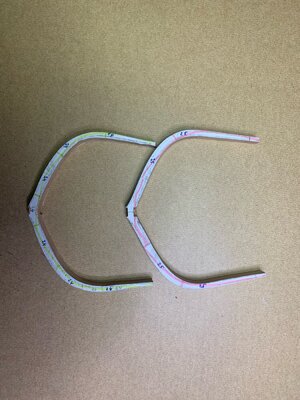
First I milled the necessary cut-outs, then I sanded the ends perfectly square and fitted them to a jig (keel). To glue the parts together I use a glass plate, so the parts lie flat and can be glued properly. When the glue has dried, I will glue the ribs together. To glue these two parts together properly, I will again use the previously mentioned template. When the two ribs glued together are dry then,my next step will be to sand everything to size ( following the indicated lines ).
Next, pieces need to be chamfered, following the dotted lines indicated. However, the question is to do this right away or later when the ribs are in place
Vertaald met DeepL (https://www.deepl.com/app/?utm_source=ios&utm_medium=app&utm_campaign=share-translation
View attachment 351774View attachment 351775View attachment 351776
POF La Palme (L'Amarante) Corvette 1744 1:36 (Ancre Monograph) by Tobias
Dear Tobias happy Birthday :)Birthday-CakeBeerShip-1 wish you all the best , joy, happiness and health.
shipsofscale.com
Sorry that I did not answer yesterday and only briefly with the example of La Palme. The principle is the same. Yesterday, a virus got me hourly more in the grip and since then I have only slept.
- Joined
- Nov 23, 2021
- Messages
- 79
- Points
- 113

Hopefully not the "known" virus. I wish you all the best and that you are back to normal soon.POF La Palme (L'Amarante) Corvette 1744 1:36 (Ancre Monograph) by Tobias
Dear Tobias happy Birthday :)Birthday-CakeBeerShip-1 wish you all the best , joy, happiness and health.shipsofscale.com
Sorry that I did not answer yesterday and only briefly with the example of La Palme. The principle is the same. Yesterday, a virus got me hourly more in the grip and since then I have only slept.
Gute Besserung!
Thanks for your reply, I'm in no rush. I've looked at the way it works and I do it much the same way
- Joined
- Nov 23, 2021
- Messages
- 79
- Points
- 113

Looks good. Great progress.
- Joined
- Nov 23, 2021
- Messages
- 79
- Points
- 113

To avoid the same mistake I made on the first attempt, I would like some advice. On the first try I set out the ribs on the jig and this didn't go well. The error was that the sizes deviated. Well I came up with the following without plotting the sizes on the jig. I want to start rib 15 by placing it perpendicular to the keel beam by means of a right angle made of lego blocks and then placing the rib perpendicular again using lego blocks. If rib 15 is perfectly positioned, then place rib 14 completely equal to rib 15 by means of distance slats. Would this work or are there any other ideas, any ideas are welcome.
first Jig attempt with mistakes
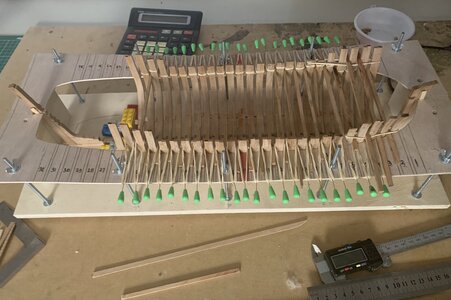
My idea for the new Jig setup
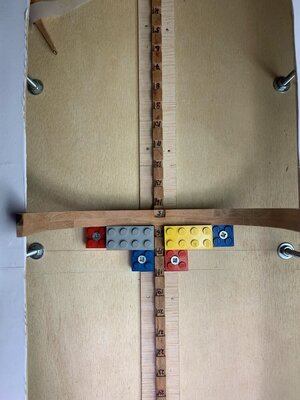
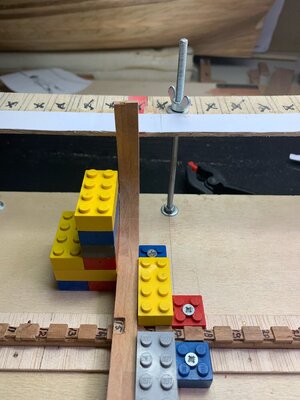
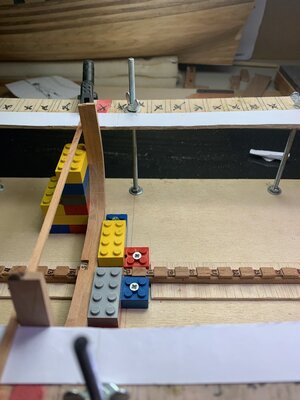
first Jig attempt with mistakes

My idea for the new Jig setup


Hi splitter the prince is simple but effective, whether you use LEGOs or a right angle the result is the same. Good progress.
Pick up two or three squares, you'll need them along the line anyway. Its one of the most important tools. Unless the keel and the jig are exactly the same you'll have problems setting the frames. Since you have the keelson slotted that's what you have to go by.
- Joined
- Nov 23, 2021
- Messages
- 79
- Points
- 113

I am very happy with your response, what you mean exactly is not entirely clear to me, probably because of the translation. But as Tobias said in his response, this way of working is simple but effective.Pick up two or three squares, you'll need them along the line anyway. Its one of the most important tools. Unless the keel and the jig are exactly the same you'll have problems setting the frames. Since you have the keelson slotted that's what you have to go by.
Lego blocks are always square and have no deviation from a square as shown in the photo.
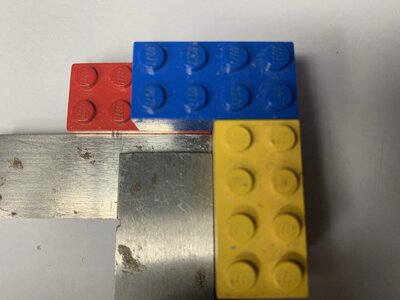
The advantage I see in this is that the first setup (rib 15) must be placed perfectly perpendicular to the keel, but the rib must also be perfectly straight when standing. In my experience if this is all placed correctly, the rest can be set up.
- Joined
- Nov 23, 2021
- Messages
- 79
- Points
- 113

Hello everyon.
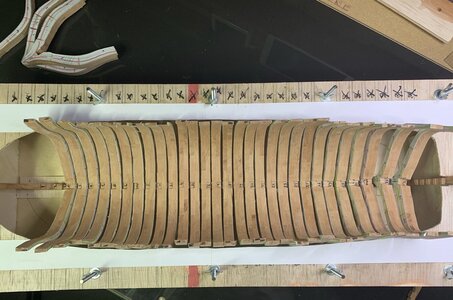
This is the result from my tryout , first rib 15 perfectly aligned and square both horizontally and vertically. On the side of the keel I fixed rib 15 at right angles by means of the lego blocks and on top of the jig rib 15 is fixed on both sides by two spacers. The spacers (colored green) are 3.04mm - 3.06mm. Then I placed the ribs 14 to 4. As the photo shows, rib 4 is also perfectly straight. Everything is dry-fit, all fixed with rubber bands and not yet glued.
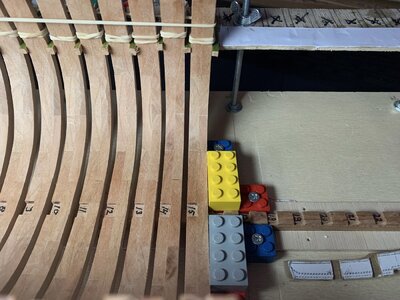
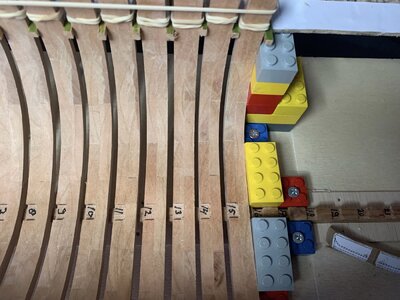
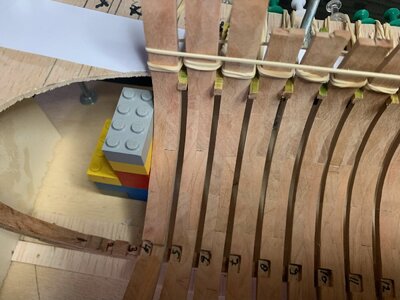
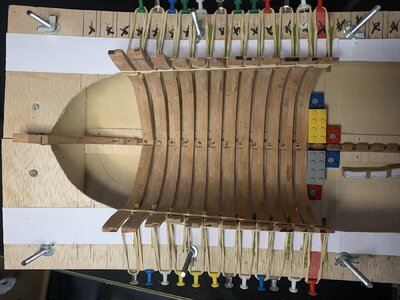
This is the result from my tryout , first rib 15 perfectly aligned and square both horizontally and vertically. On the side of the keel I fixed rib 15 at right angles by means of the lego blocks and on top of the jig rib 15 is fixed on both sides by two spacers. The spacers (colored green) are 3.04mm - 3.06mm. Then I placed the ribs 14 to 4. As the photo shows, rib 4 is also perfectly straight. Everything is dry-fit, all fixed with rubber bands and not yet glued.


Super clean work, I also like the great grain of the wood and its warm color.
Looks great Splinter! I’ll be starting to assemble frames soon and hope mine look as good as yours.
- Joined
- Nov 23, 2021
- Messages
- 79
- Points
- 113

Thank you for the compliment Tobias. I use Black Cherry from FrankSuper clean work, I also like the great grain of the wood and its warm color.
Olivier thank you for your compliments, you will certainly succeedLooks great Splinter! I’ll be starting to assemble frames soon and hope mine look as good as yours.
 It's a lot of work, but take your time for it.
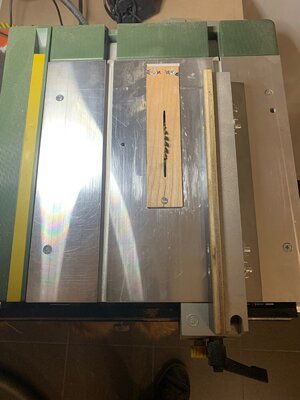
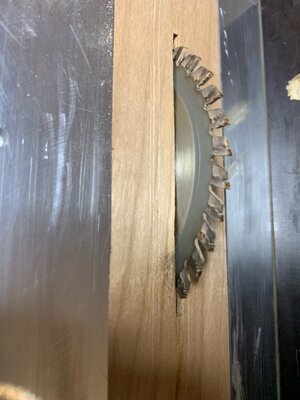
can you take a picture of your saw?I need some help, while sawing I notice that my Proxxon Fet deviates from the set size and the wood burns. I have the impression that the rip fence is not exactly perpendicular. How can I solve this ?.
Hi Splinter,
when I got my FET I completed a few checks.
1. I verified that the blade was true to the miter slots by sliding the miter fence out to the blade tooth (marked the tooth measured to with a sharpie) In the front then manually rotated the blade so the marked tooth was now at the back and slid the miter gauge to measure again. I did not have to do any adjustments as the blade is true to the miter slot.
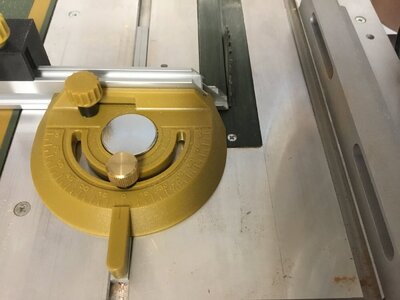
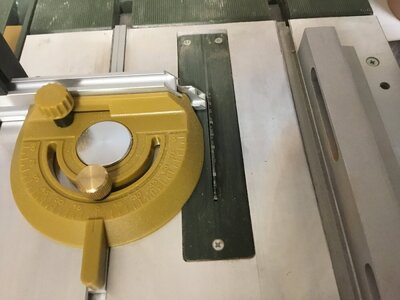
2. I verified that the rip fence was true to the miter slot and the blade. I used the socket nut on the rip fence to align the fence to the miter slot and blade.
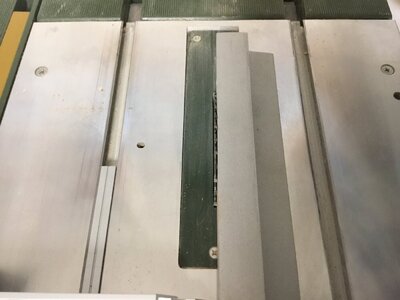
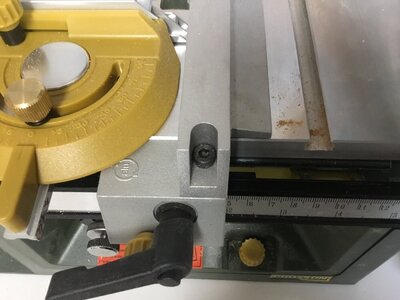
My only other suggestion to you would be to clean your saw blade. Wood sap will make a saw blade appear dull and worn out and cause burning. I use simple green clean solution (but if you prefer there are commercial blade cleaners available). I soak the blade using an appropriate sized yogurt container lid For an hour or so and then brush the blade with a brass brush.
i do the same checks on my 10” cabinet saw and clean my blades as well.
best of luck.
when I got my FET I completed a few checks.
1. I verified that the blade was true to the miter slots by sliding the miter fence out to the blade tooth (marked the tooth measured to with a sharpie) In the front then manually rotated the blade so the marked tooth was now at the back and slid the miter gauge to measure again. I did not have to do any adjustments as the blade is true to the miter slot.


2. I verified that the rip fence was true to the miter slot and the blade. I used the socket nut on the rip fence to align the fence to the miter slot and blade.


My only other suggestion to you would be to clean your saw blade. Wood sap will make a saw blade appear dull and worn out and cause burning. I use simple green clean solution (but if you prefer there are commercial blade cleaners available). I soak the blade using an appropriate sized yogurt container lid For an hour or so and then brush the blade with a brass brush.
i do the same checks on my 10” cabinet saw and clean my blades as well.
best of luck.
Last edited:
Standard tuning procedures! Now, make a crosscut sled...Hi Splinter,
when I got my FET I completed a few checks.
1. I verified that the blade was true to the miter slots by sliding the miter fence out to the blade tooth (marked the tooth measured to with a sharpie) In the front then manually rotated the blade so the marked tooth was now at the back and slid the miter gauge to measure again. I did not have to do any adjustments as the blade is true to the miter slot.
View attachment 354346View attachment 354347
2. I verified that the rip fence was true to the miter slot and the blade. I used the socket nut on the rip fence to align the fence to the miter slot and blade.
View attachment 354348View attachment 354349
My only other suggestion to you would be to clean your saw blade. Wood sap is will make a saw blade appear dull and worn out. I use simple green clean solution (but if you prefer there are commercial blade cleaners available). I soak the blade using an appropriate sized yogurt container lid For an hour or so and then brush the blade with a brass brush.
i do the same checks on my 10” cabinet saw and clean my blades as well.
best of luck.


