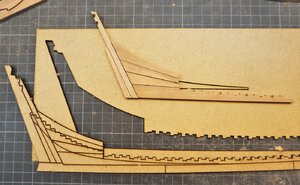
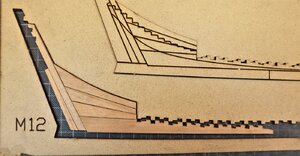
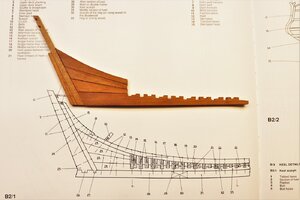
HMS ALERT 1777 cutter POF by Uwek

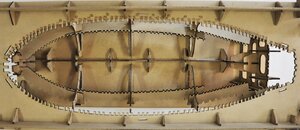
Like building a house; the more attention to detail in the framing the better the outcome. Should result in outstanding alignment of the frames! Are there 77 frames- looking at the numbering in the pictures above?
 
Many Thanks to everybody for your interest in this log, the comments and also the likes - Highly appreciated.

Thanks for the review Uwek. Any chance you could get the image attachments to display full, so we don't have to click the links?
Hallo Eric,
In general I make my photos in building logs like this one in "Full image" size, also here. One exception was in the second post the thumbnails with the overview of the boards, which I posted already in the review and for a better overview. Unfortunately in the area of group builds the width of the forum page is reduced - see the available width shown with the red arrows, comparing group build area and "normal forum"-area

Thumbnails
a1a.JPG
a2a.JPG

Full image
a1a.JPG
a2a.JPG

Because of this limited space the software is reducing the photo to big thumbnails - sorry for this inconvenience
 
Like building a house; the more attention to detail in the framing the better the outcome. Should result in outstanding alignment of the frames! Are there 77 frames- looking at the numbering in the pictures above?
Many thanks for the comment and detailed observation Thumbsup
The 77 is not really showing the total number of frames.
number 1 to appr. 5 are the bow
most of the frames are single frames, but there are all together 10 double frames which are counted also with 2 numbers, like 17/18, 21/22, 25/26 and so on, and we have the stern area starting from number 72.
Sorry I was not checking this in detail, so it is only an overview based on the board.
So the high number of 77 are the total of "vertical wooden structure elements" - something like this .....
IMG_5821a.jpg
 
Hi Uwe,
I think it is a good idea to give the jig a very thin coat of clear vanish, to protect the cherry timber of the model for the soot of the laser.
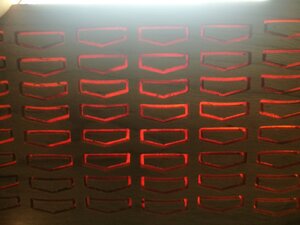
That is a good idea, I was thinking about the same, because the laser char is really black ;)
Maybe @Trident Model has a good tip for this?
 
Yesterday I touched the first time the "permanent" timber, so I started the elements of the keel, deadwood and inner post.
It was the first attempt to get familiar with the cnc cut boards

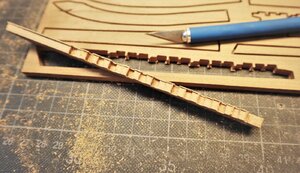
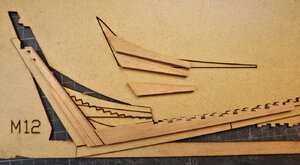
as shown in the kit review the wooden boards are on purpose not cut through the complete thickness - you see this when you hold such a board against the light
IMG_20190310_170314.jpg

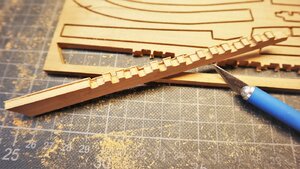
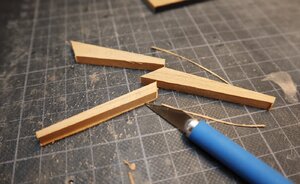
removing the necessary part from the wooden board I used a new sharp blade cutting more or less in the middle of the slot - easy to do, only to take care not to touch the part during the cut. But the slots are wide enough to do so
IMG_5830.JPG

With this way you get the part easily removed from the board
IMG_5831.JPG

IMG_5832.JPG

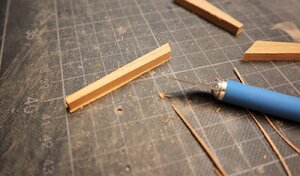
Next step was to follow with the knife the edges to remove the thin left over
IMG_5833.JPG

In an e-mail @Trident Model mentioned to me, that with a curved knife it is even easier to do - maybe you can show such a knife here?
But also with a "normal" sharp knife it is easy to do - afterwards some small a careful moves with a fine rasp or sandpaper and you have a clean prepared wooden part in hand
 
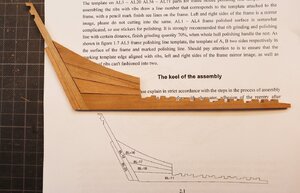
Here you see the first working step of the manual and the necessary parts -

for your info: For this photo I did not finetune the parts, but they fit already extremely good - this seems to be one advantage in comparison with laser - when you want to remove the laser char (and this usually you want to do,) it can happen, that you sand at one spot or area a little bit more than somewhere else. So it can happen, if do not care so much, that the gap between two parts (like here of the deadwood) has over the contact length of the two neighboring parts not the same width

IMG_5834.JPG

Now the next good idea of Trident
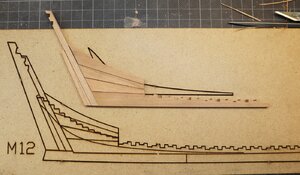
You can see the same parts on top of a jig board - but not for laying on top like on a drawing - No
IMG_5835.JPG

Aha - the jig is for laying the parts inside and not on top
IMG_5837.JPG

IMG_5836.JPG

You can see, that some finetuning is still necessary, in order that the parts will fit very well into the "keel-jig" Thumbsup

In addition you can also see, that the keel is exactly prepared for taking over single frames and double frames - also in different heights of the keel (therefore the different height of the steps) Thumbsup Thumbsup

IMG_5838.JPG

In the last photo I show the parts and compare with the Anatomy of ships series book (drawing in scale 1:64!)
The keel and the framing is prepared correctly - the notches and noses of the inner and outer posts are later not visible, so therefore not necessary to show also in the kit model.
IMG_5839.JPG

I am getting more and more the impression, that the developer did and prepared a lot with these jigs, so that the modeler can make a very accurate and well fitting model

Many Thanks for the interest .... to be continued .....
 
mayby something like this?
View attachment 158458
that's what I used doing plastik kits ...

I'd say something like this?
269E25FC-CDFF-46B9-A8F8-720512BA598D.jpeg
With the curved blade You don't risk that the blade "wanders" in the wood. Also on some types of wood (mostly coarse grained wood) the straight blade catches and splinters the wood...

@Uwek: I suppose You do have to square up the notches for the frames in the rising wood?
 
Last edited:
Yesterday I touched the first time the "permanent" timber, so I started the elements of the keel, deadwood and inner post.
It was the first attempt to get familiar with the cnc cut boards

as shown in the kit review the wooden boards are on purpose not cut through the complete thickness - you see this when you hold such a board against the light
View attachment 158451

removing the necessary part from the wooden board I used a new sharp blade cutting more or less in the middle of the slot - easy to do, only to take care not to touch the part during the cut. But the slots are wide enough to do so
View attachment 158441

With this way you get the part easily removed from the board
View attachment 158442

View attachment 158443

Next step was to follow with the knife the edges to remove the thin left over
View attachment 158444

In an e-mail @Trident Model mentioned to me, that with a curved knife it is even easier to do - maybe you can show such a knife here?
But also with a "normal" sharp knife it is easy to do - afterwards some small a careful moves with a fine rasp or sandpaper and you have a clean prepared wooden part in hand
I also think this kind of sharp knife is very easy to use.
 
The 30 deg. blade is extremely good. I've used NT cutter BD100 for 25 +years. The surgical 23 ( and similar)blades are too flexible, blunt quickly and break easily- but excellent for scraping planks etc . Could I suggest that the disposable chisel blades,(6 or 10mm) metal holder and tap of hammer are clean and efficient alternative, except for tight curves
 
So here's something to check out RE: blades. I just bought a sample of ceramic blades from sliceproducts.com. They have no. 11 blades, chisel blades and several others. I have not tried them yet for this type of project but they are supposed to be more durable and hold their edge for a longer period of time than metal blades-I'll let you know if that turns out to be the case. To me ceramic=brittle/fragile BUT their no. 11 blade cuts paper with ease and may be a "kinder/gentler" blade for wood than traditional metal blades- once again I'll let you know.
 
Back
Top