CFShipModel 1/150th Nina

Joined
Jun 20, 2020
Messages
590
Points
353

Location
Elyria, Ohio, USA
Tis the moment no one has been waiting for!! A build log of CFShipModel's Nina ( aka: The Lil Ship That Might But Isnt Entirely Sure ) in astounding and
collosal 1/150th scale.

Our story starts long ago ( about an hour or so ) in a shipyard far far away ( well, just over there, yeah the tv tray in front of the couch ) where a mysterious giant began
building a ship so the wee people of Microscopis could sail across the formidible and dangerous Wirlpool Of DeTub ( bath tub that is ) in search of new lands. The giant
( actually rather short at 5'5 ) procured his bounty of keel, timber, and fittings from the benevolent Gods Of Ebay, eager to build the little folks ship of discovery "Nina".
We now join as the giant ( me really in a goofy disguise as myself ) begins carefully constructing the keel and frames...... ( Camera pans in.... crap, camera person fell asleep )


Hey Guys,

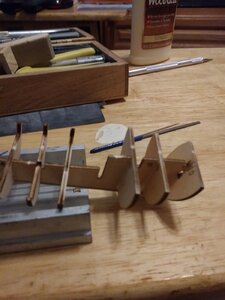
I did it, I finally started and got very little done, but with this size of a model that may be a good bit done. I pretty much worked until I went crosseyed and had to stop.
I cant see well with or without my glasses but bifocals drive me nutty, so I worked without. So far just cut the keel and half of the bulkheads free from their ply sheets,
sanded carefully, and glued them in place. This stuff actually seems smaller to me once it's removed from the ply. They all went together nice and snug except for the
one farthest towards the bow. Lil bugger fell right off and I had a heck of a time getting it back from the floor monster. Im going to let the glue set up, uncross my eyes,
and then return to it later tonight or tomorrow. As for now Im off to cut up some junk wood for a fire tonight to relax by.

To all here from the USA, Happy 4th of July!! And to those not.... Well Happy 4th of July anyhow :)

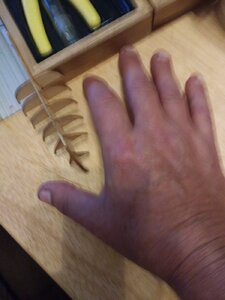
Here's a few quick photo's to show work done and just how silly small this thing is!!! Yes, Im applying glue with a toothpick!

Clair
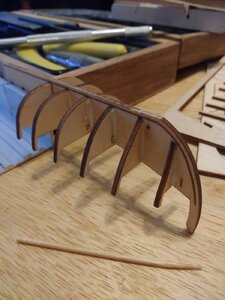
20200704_174447.jpg20200704_174500.jpg20200704_174738.jpg
 
Hey gents,

Well not much to report as it's been one thing after another for me around here. I did manage to get some time in this evening, cutting, installing,
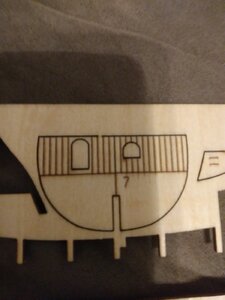
and glueing up 3 more bulkheads ( Yeah me ). I haven't done bulkhead #7 yet as it has lasered in veritical planks to simulate a wall. I'd rather scratch
a real planked wall in it's place, just like I want to replace both decks with actual planking. I was thinking of cutting up an old 2x3 of pine to procure
planking materials. What do you guys think? I also have sheet basswood somewhere.... lol

Ok, a few pics.

20200707_211655_Burst01.jpg

This is part #7

20200707_212035.jpg


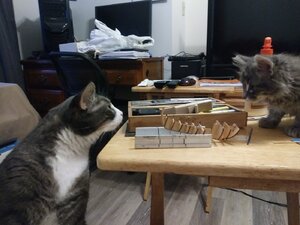
Oh, and a couple of the boys helping me.

20200707_211455.jpg

Leroy Jethro Gibbs left, Hades on the right.


For now Im going to sit back and wait for wifey to get home. I hope I can get some time tomorrow to start messing with part 7.

Clair
 
Last edited by a moderator:
our cat named Kitty
I like that name, my mom had an all black cat named Kitty that passed shortly before she did. He was a stray I found backing into a warehouse in Cleveland,
Ohio. I was watching my trailer tires in the mirror and I seen a small black something. So I stopped the rig and went to look, that cat rode the rest of the day
and went home with me.
 
Howdy pilgrims,

I found some time to work some more on miss Nina here and there this week. I searched high and low for the absolute best, most beautiful
wood to use, with precission cuts that would rival a surgions finast scalpal. Then I looked in my wallet at just how much dust has accumulated and
I would up using:

20200717_191604.jpg

Eh, it'll do with some sanding, stain, and alot of prayers to the gods of planking.

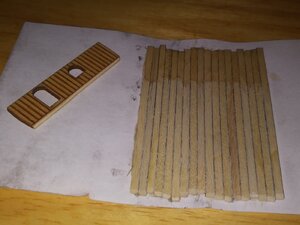
So I started with the wall for part #7 which after sanding came out alright actually. The top in the pic is a test of morning coffee for
the stain. Cafe a'la Wal-Mart is the brand I believe. I'll stain the rest then cut out the door, window, and adjust the size after I complete the decks.
You can see the original wall to the left.
20200717_191527.jpg

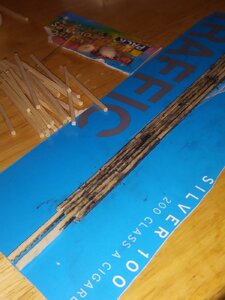
On to horizontal surfaces I have just started the planking that will become the decks today. This time instead of an index card I'm
recycling part of my cigarette carton as a backing. Ah going green feels so good.

20200717_191543.jpg

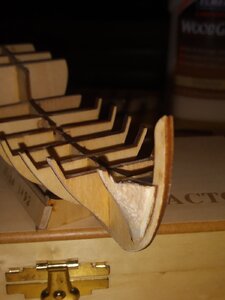
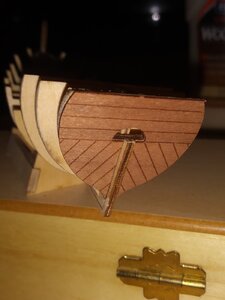
Last but not least for this episode, I finally got the frame faired and added a small amount of balsa on the bow. Also the stern
piece was glued on. I think it looks quite nice for being just one piece.

20200717_191436.jpg

20200717_191456.jpg

Ok guys, back to making up a deck I go :)

Clair
 
Tis the moment no one has been waiting for!! A build log of CFShipModel's Nina ( aka: The Lil Ship That Might But Isnt Entirely Sure ) in astounding and
collosal 1/150th scale.

Our story starts long ago ( about an hour or so ) in a shipyard far far away ( well, just over there, yeah the tv tray in front of the couch ) where a mysterious giant began
building a ship so the wee people of Microscopis could sail across the formidible and dangerous Wirlpool Of DeTub ( bath tub that is ) in search of new lands. The giant
( actually rather short at 5'5 ) procured his bounty of keel, timber, and fittings from the benevolent Gods Of Ebay, eager to build the little folks ship of discovery "Nina".
We now join as the giant ( me really in a goofy disguise as myself ) begins carefully constructing the keel and frames...... ( Camera pans in.... crap, camera person fell asleep )


Hey Guys,

I did it, I finally started and got very little done, but with this size of a model that may be a good bit done. I pretty much worked until I went crosseyed and had to stop.
I cant see well with or without my glasses but bifocals drive me nutty, so I worked without. So far just cut the keel and half of the bulkheads free from their ply sheets,
sanded carefully, and glued them in place. This stuff actually seems smaller to me once it's removed from the ply. They all went together nice and snug except for the
one farthest towards the bow. Lil bugger fell right off and I had a heck of a time getting it back from the floor monster. Im going to let the glue set up, uncross my eyes,
and then return to it later tonight or tomorrow. As for now Im off to cut up some junk wood for a fire tonight to relax by.

To all here from the USA, Happy 4th of July!! And to those not.... Well Happy 4th of July anyhow :)

Here's a few quick photo's to show work done and just how silly small this thing is!!! Yes, Im applying glue with a toothpick!

Clair
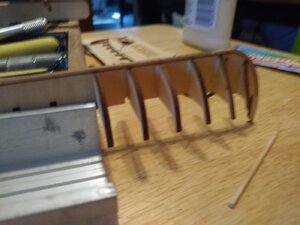
View attachment 162462View attachment 162463View attachment 162464
That's a clever way to square frames.
 
Hey gents,

Well not much to report as it's been one thing after another for me around here. I did manage to get some time in this evening, cutting, installing,
and glueing up 3 more bulkheads ( Yeah me ). I haven't done bulkhead #7 yet as it has lasered in veritical planks to simulate a wall. I'd rather scratch
a real planked wall in it's place, just like I want to replace both decks with actual planking. I was thinking of cutting up an old 2x3 of pine to procure
planking materials. What do you guys think? I also have sheet basswood somewhere.... lol

Ok, a few pics.

View attachment 163315

This is part #7

View attachment 163316


Oh, and a couple of the boys helping me.

View attachment 163317

Leroy Jethro Gibbs left, Hades on the right.


For now Im going to sit back and wait for wifey to get home. I hope I can get some time tomorrow to start messing with part 7.

Clair
Very nice picture
 
Good evening guys,

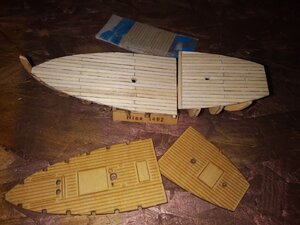
This will be a small update due to the time consuming method of planking a deck on a cigarette carton. After a few hours of
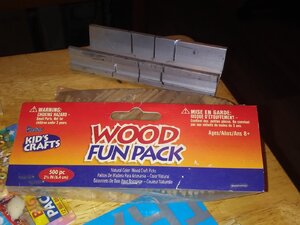
getting graphite and wood glue worked thoroughly into my fingers and some kids "wood fun" strips from Pat Catans years ago
I have produced the 2 decks my lil Nina requires. I also spent a few hours slowly sanding it down to my liking : ie Kinda even lol
Yes, I know my plank lines aren't too straight, in fact I believe blind squirrel could have done better, but thats ok by me as most will
wind up covered anyhow. I mostly just wanted that look where each plank has a slightly different coloring as in real life. Heres the
results on the first test fitment:

20200721_200432.jpg


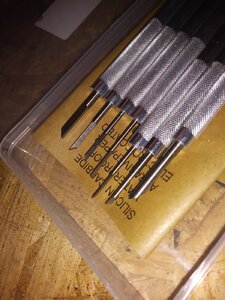
As I know all ya'll love photo's, heres a micro carving set I picked up dirt cheap on Ebay, I haven't sculped any but they look to be pretty decent
for modelling use and are sharp to the touch. Not bad for $13.39 ;)

20200721_200513.jpg

Here's a link if you want a set too:


Ok, thats all I've gotten done so far. Im concidering a tea wash to slightly darken the wood. Thoughts?

Clair
 
Oooo Menz buddy, I like that!!! I bookmarked them and it's giving me idea's for future projects already.
As for the tea I did apply it last night and it had the desired effect, even if the Admiral and kids were making
jokes about the old man T Baggin his ship :p
 
When done with work on deck and back wall, to get good smooth surface try what they call Scrapping the Deck. Use a sharp new single edge blade held near 90 vertical to deck and just draw across deck, it will slowly smooth deck flatter and smoother than any sandpaper I have used.
 
Back
Top