I tried the CV which drew up easily into the syringe compared to Tightbond. With the long needle I could reach tight and small points but there was too much viscosity so more came out than I wanted and then it spread beyond where I wanted it. Tooth picks somehow do not have these problems but I waste more from the drop on the post-it than I actually use of the small drop dispensed. I would have done better using my familiar slow setting and easily adjustable Tightbond than the CV. I'll just have to see how much I can later remove or will blend into the varnish finish. Build and Learn is my mantra. PT-2I use a slower setting which may be the medium viscosity which sets in a couple of minutes but may take a good holding bond in less than a minute. I"ll stick with my drop on a sticky pad and then use the toothpick to spread it around. I did use some direct drops into the hull contact area for the end of some ribs where I was not sure if the applied glue film on the rib would be sufficient. It had mixed results. .. more problems of no adhesion came up along the sheer than at the keel. The sheer separation were an easy toothpick reapplication and clamp fix. PT-2
-

Win a Free Custom Engraved Brass Coin!!!
As a way to introduce our brass coins to the community, we will raffle off a free coin during the month of August. Follow link ABOVE for instructions for entering.
-

PRE-ORDER SHIPS IN SCALE TODAY!
The beloved Ships in Scale Magazine is back and charting a new course for 2026!
Discover new skills, new techniques, and new inspirations in every issue.
NOTE THAT OUR FIRST ISSUE WILL BE JAN/FEB 2026
- Home
- Forums
- Ships of Scale Group Builds and Projects
- Group Build Archives
- Canoe Group Build
- Canoe Build Logs
You are using an out of date browser. It may not display this or other websites correctly.
You should upgrade or use an alternative browser.
You should upgrade or use an alternative browser.
Gilles 17-inch canoe - Pear wood - Canoe #3 [COMPLETED BUILD]
- Thread starter Gilles Korent
- Start date
- Watchers 1
-
- Tags
- completed build
- Joined
- Feb 18, 2019
- Messages
- 717
- Points
- 353

The syringe/needle worked OK that evening but the needle plugged solid the next day while the adhesive in the syringe is still fluid. With the viscosity of my CV being more than what I like for minute applications I'll stick with toothpicks where more localized use is needed, or optionally get a CV with less viscosity. The Instant type is beyond my ability as it is too viscous and glues my fingers or what ever else is holding the pieces in place. ;-((( PT-2Sorry, I do not know and cannot say if it does as I never use a syringe for super glues. For the ribs and such, I normally apply the glue straight from the container: I do not squeeze hard on the the bottle, just enough to get the glue to the nozzle, and then, I just "tap" it lightly to apply. It works quite well for me. If I just need a tiny amount in one particular spot, then the toothpick is used. I did mention that the "CA" glue I use is medium viscosity.
G.
I now see where you intended the two pieces next to the inner keel were to be placed. From the instructions and my understanding, I placed mine immediately adjacent to the inner keel where the ribs were butted, and then placed the 1/4" piece on top of those. Oh, well there is always the next canoe. PT-2Update Aug 28...
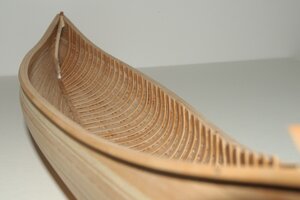
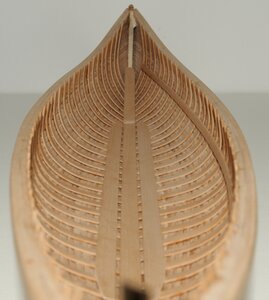
Installation of the ribs: one side at a time
View attachment 175878
Ribs are all in as well as some flooring and side strip:
View attachment 175879
A view of the gunwales and canoe sides (just for fun)...
View attachment 175880
At this point the inner gunwales are being installed (the glue is drying)....
G.
- Joined
- Feb 18, 2019
- Messages
- 717
- Points
- 353

I now see where you intended the two pieces next to the inner keel were to be placed. From the instructions and my understanding, I placed mine immediately adjacent to the inner keel where the ribs were butted, and then placed the 1/4" piece on top of those. Oh, well there is always the next canoe. PT-2
Looking are your log, you did exactly as per the construction guide.
I am just changing that part for this canoe.
G.
The standing rule from my architectural background in construction administration when the contractor says he has a problem the first reply is pull out the specifications and drawings along with the general and special conditions of the contract for issue resolution. . . . so I simply followed your instructions as best as understand them. Thanks. PT-2Looking are your log, you did exactly as per the construction guide.
I am just changing that part for this canoe.
G.
- Joined
- Feb 18, 2019
- Messages
- 717
- Points
- 353

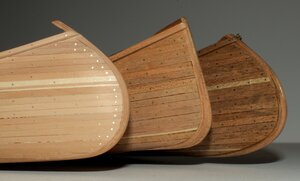
After a total of over 8 hours, the nails have inserted into one side of the canoe.
Here is a photo for fun...
The 17 " pear wood canoe is on the left: obviously still under construction.
The 17" cheery wood in the center. It has been varnish inside and out bu is missing seats and other parts
The 19" cherry wood also varnish and fitted (completed).
Quite a difference...
G
Here is a photo for fun...
The 17 " pear wood canoe is on the left: obviously still under construction.
The 17" cheery wood in the center. It has been varnish inside and out bu is missing seats and other parts
The 19" cherry wood also varnish and fitted (completed).
Quite a difference...

G
It is interesting to see how you vary the stripping for different appearances using your artistic license but as the originator of these that is fully in your domain. Very excellent work and precise touch with the nailing. PT-2After a total of over 8 hours, the nails have inserted into one side of the canoe.
Here is a photo for fun...
The 17 " pear wood canoe is on the left: obviously still under construction.
The 17" cheery wood in the center. It has been varnish inside and out bu is missing seats and other parts
The 19" cherry wood also varnish and fitted (completed).
Quite a difference...
View attachment 176217
G
- Joined
- Feb 18, 2019
- Messages
- 717
- Points
- 353

Update ....
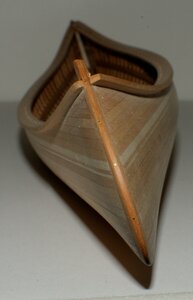
The canoe as of September 2
Nailing is complete throughout the outside of the hull.
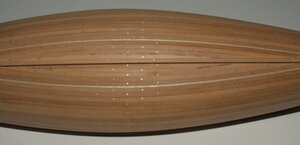
The keel has been installed: an extension of the outer-stem and running through the length of the canoe's underside.
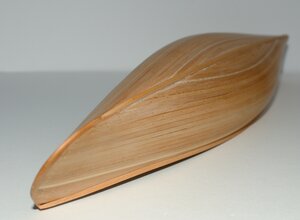
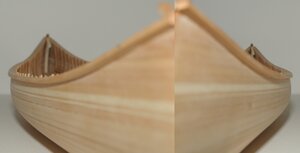
Front view of the fastening on the outer stem.
The gunwale needing some shaping has been looked after since the photo was taken.
The inside of the hull has received its first coat of varnish prior to the installation of the decks, which will be done in the next couple of days.
G
The canoe as of September 2
Nailing is complete throughout the outside of the hull.

The keel has been installed: an extension of the outer-stem and running through the length of the canoe's underside.

Front view of the fastening on the outer stem.
The gunwale needing some shaping has been looked after since the photo was taken.
The inside of the hull has received its first coat of varnish prior to the installation of the decks, which will be done in the next couple of days.

G
I like the double light accent strips with their variation in width. That stands out well from the rest of the upper hull and the subtle lower, waterline? strip. Nails on the stems are a new twist that you have brought forth . Great work as always on your precise part. PT-2Update ....
The canoe as of September 2
Nailing is complete throughout the outside of the hull.
View attachment 176905
The keel has been installed: an extension of the outer-stem and running through the length of the canoe's underside.
View attachment 176906
Front view of the fastening on the outer stem.
The gunwale needing some shaping has been looked after since the photo was taken.
The inside of the hull has received its first coat of varnish prior to the installation of the decks, which will be done in the next couple of days.
View attachment 176907
G
- Joined
- Feb 18, 2019
- Messages
- 717
- Points
- 353

- Joined
- Feb 18, 2019
- Messages
- 717
- Points
- 353

The upper accent strip stands out well with your wood combination. On my own with cherry and basswood it is very subtle and not distinctive as yours which is not what I was anticipating. Your decks with trims and seats look nice. PT-2And an overall view with bow and stern seats dry-fitted.
Almost ready for the application of varnish on the outside...
View attachment 177146
G.
- Joined
- Feb 18, 2019
- Messages
- 717
- Points
- 353

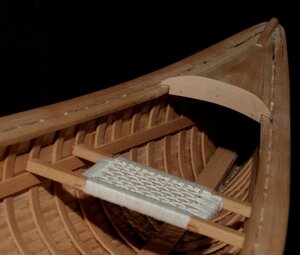
As represented, a canoe such as this one is likely to be on the heavy side to be carried by an average person on his / her own, so I have decided to include a carrying handle on each side in situations where two people would move the canoe.: quite often, the people carrying the canoe use the deck to hold it and that is what I did on my wood strip canoe. Anyways, it adds another element to the overall look. These "handles" can also serve as thwarts to stiffen the hull: although, considering the size of the decks and other features, this cane would hardly need any stiffening.
So here is one of the "handles", carved in a combination of cherry and pear wood.
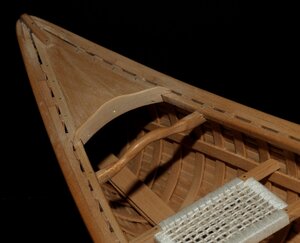
The inside of the canoe has been varnished (2 coats) up to but not including the inner gunwale. I am debating whether to apply another coat so permanent installation of the seat will wait.
I still need to make the yoke and maybe a thwart (as the subject came up in another thread a while back).
G.
So here is one of the "handles", carved in a combination of cherry and pear wood.

The inside of the canoe has been varnished (2 coats) up to but not including the inner gunwale. I am debating whether to apply another coat so permanent installation of the seat will wait.
I still need to make the yoke and maybe a thwart (as the subject came up in another thread a while back).
G.
This carrying with one arm has a potential for lumbar injury if overloaded or repeated but I understand the idea and it is a nice touch for what will be seen as a working canoe and not a mantle show piece. I am sensitive to this type of injury from pinching my L4/L5 years ago and had to have SNRB injection (Spinal Nerve Root Block) Luckily it worked the first time as it was very painful. I still have to be careful how I carry loads. Thanks for the photo. PT-2As represented, a canoe such as this one is likely to be on the heavy side to be carried by an average person on his / her own, so I have decided to include a carrying handle on each side in situations where two people would move the canoe.: quite often, the people carrying the canoe use the deck to hold it and that is what I did on my wood strip canoe. Anyways, it adds another element to the overall look. These "handles" can also serve as thwarts to stiffen the hull: although, considering the size of the decks and other features, this cane would hardly need any stiffening.
So here is one of the "handles", carved in a combination of cherry and pear wood.
View attachment 177158
The inside of the canoe has been varnished (2 coats) up to but not including the inner gunwale. I am debating whether to apply another coat so permanent installation of the seat will wait.
I still need to make the yoke and maybe a thwart (as the subject came up in another thread a while back).
G.
- Joined
- Feb 18, 2019
- Messages
- 717
- Points
- 353

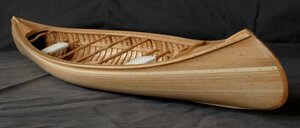
This 17-inch Canoe model is basically complete: with 8 thin coats of varnish applied on the outside.
The paddles will be made in the days to come.
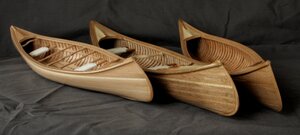
And here is a photo of the 3 canoes I have been working on since the beginning of this group build.
from Left to right:
- 17-inch pear wood
- 19-inch cherry
- 17-inch cherry (this one still needs a few more details to call it complete).
G.
The paddles will be made in the days to come.

And here is a photo of the 3 canoes I have been working on since the beginning of this group build.
from Left to right:
- 17-inch pear wood
- 19-inch cherry
- 17-inch cherry (this one still needs a few more details to call it complete).

G.
Last edited:


