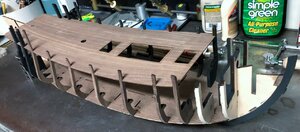
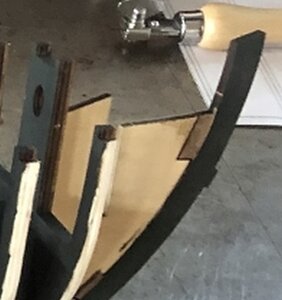
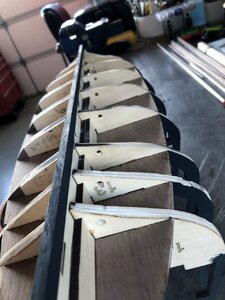
When I decided to get back into ship modeling, I looked around and got really excited about the Black Pearl. Like many I was confused by the vast array of prices and kits that all kind of looked the same but maybe not. At any rate I took a shot at one of the cheaper kits, not really expecting much, and well that’s what I got, was not much.
I’d highly recommend people just go to ZHL if you’re looking for a kit of the Black Pearl. All of those off brand and unbranded kits on ebay etc are junk. Many are missing so many parts I don’t think you could actually produce a ship without adding parts.
After discussing it with the Admiral I decided to buy the ZHL all scenario version. I’m not going to bother with unboxing etc. If you haven’t seen it there’s a video on the ZHL site of what is in the box. This is the kit I received. This is what ZHL calls the "All Scenario Version" They also have the "All Sealed Version" which I beleive is this kit without the interior, and the "Golden Version" which is a smaller scale.
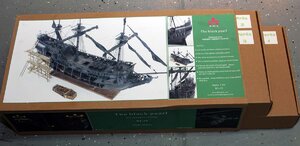
I’m building two ships right now. One is the scratch build of the Danish bomb vessel Den Gloende, and the other is this one. Sometimes scratch building gets to feeling pretty tedious and I just like to build a kit. I learned this about me from my work in the train hobby. This project is also why my bomb vessel isn't moving along very fast.
The Admiral has declared this the priority. I actually started on this a while back and then kind of lost my motivation then picked it up again. I’ll be catching the log up over the next few weeks as I took the photos and notes as I went along. I also wanted to be ahead of the log some on the build because I go astray from the instructions at time and that way I’ll be able to tell people if what I’m doing is a mistake before they get to where I am in the build.
This build log is going to be probably be overly detailed about minor things and boring to the more experienced modelers, but I decided being as a lot of people get excited, and start with a kit like this, I would pretty much do the log step by step.
I’m going to hijack my own thread for minute, so you know where I’m coming from. I’m not one to get offended, and I’m always open to suggestions and constructive criticism. I will probably drive some builders crazy because of not making more of an effort to achieve perfection. My personality is such that I have to get something done. I’m simply not capable of spending 5 years building 1 model. As far as my skill level goes I’m probably average for a wood ship modeler. So if you’re looking for a master to learn from that isn’t me. That’s the explanation for most of the things I will likely skip or take short cuts on.
So, having said that, this isn’t the right way to build this model, it’s just my way. I learned long ago there isn’t a correct way to make something, just preferences and reasons and this build log will show mine and why I did what I did.
I’m also a tool junky, I think that was hereditary from my grand father. I have been building something pretty much all the time since I was around 8 years old. The point of that is I might use a lathe, milling machine, Byrnes table saw etc. for some parts of this build. When I do that I’ll go ahead and throw out how you could do it without all the fancy tools. The fancy tools are nice and often save time, but you can do what you need to for building a kit like this with simple hand tools and some patients. I built my Constitution without any power tools and it came out pretty nice. I often find myself doing things with a hand saw, chisel, or hobby knife instead of my mill for instance because it’s less hassle to just do it by hand.
So back to regularly scheduled programming,
I started going through the manual like normal and there are definitely a lot of pretty pictures, and they seemed like good instructions. So I started working on the model.
Step 1; This is about how long it took me to decide the instructions maybe aren’t exactly all that great. I think the photos pretty well show what needs to be done but I question some of the order of the photos, and have already found some useful notes that they could have added.
The photos in the manual appear to show putting the bulkheads on the keel parts before putting the keel together or maybe taking the keel back apart etc. it’s really all kind of confusing, so here’s what I did.
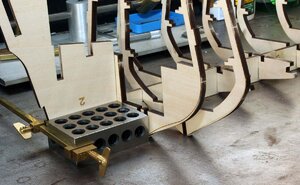
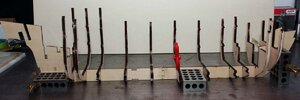
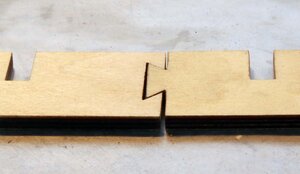
First thing I did was glue the backbone together. The joints on the laser cut sections were pretty loose. You can see that here.
Edit: I cleaned up the joints and glued them tightly together. This resulted in my keel being about 2mm short. This showed up when I tried test fitting the gun deck. I don’t know that I would do anything different if I had to do it over. Just wanted to note that you won’t want to clean it up making it even shorter just glue it together. The length from the front of frame 4 to the very back part I think should be 645mm, mine is 643mm. I had to trim some of the slots at the rear of the gun deck to get it to fit. I quite honestly don’t know if my keel is short or if the other laser cutting is just off a bit.
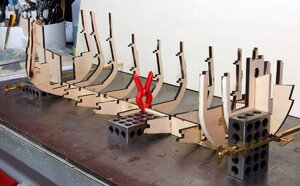
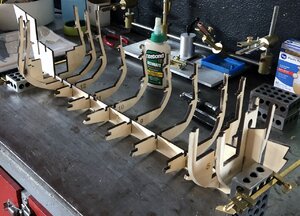
I placed wax paper under the wood to keep the glue from sticking on my steel work bench. I use the steel work bench because it is really flat, and glued the parts together. It’s kind of hard to see but I used the brass clamps to clamp the pieces of the backbone to a steel straight edge, on the far side of the photo, to make the bottom of the backbone straight. Then put weights on it to keep it flat.

More to come tomorrow.
I’d highly recommend people just go to ZHL if you’re looking for a kit of the Black Pearl. All of those off brand and unbranded kits on ebay etc are junk. Many are missing so many parts I don’t think you could actually produce a ship without adding parts.
After discussing it with the Admiral I decided to buy the ZHL all scenario version. I’m not going to bother with unboxing etc. If you haven’t seen it there’s a video on the ZHL site of what is in the box. This is the kit I received. This is what ZHL calls the "All Scenario Version" They also have the "All Sealed Version" which I beleive is this kit without the interior, and the "Golden Version" which is a smaller scale.

I’m building two ships right now. One is the scratch build of the Danish bomb vessel Den Gloende, and the other is this one. Sometimes scratch building gets to feeling pretty tedious and I just like to build a kit. I learned this about me from my work in the train hobby. This project is also why my bomb vessel isn't moving along very fast.
The Admiral has declared this the priority. I actually started on this a while back and then kind of lost my motivation then picked it up again. I’ll be catching the log up over the next few weeks as I took the photos and notes as I went along. I also wanted to be ahead of the log some on the build because I go astray from the instructions at time and that way I’ll be able to tell people if what I’m doing is a mistake before they get to where I am in the build.
This build log is going to be probably be overly detailed about minor things and boring to the more experienced modelers, but I decided being as a lot of people get excited, and start with a kit like this, I would pretty much do the log step by step.
I’m going to hijack my own thread for minute, so you know where I’m coming from. I’m not one to get offended, and I’m always open to suggestions and constructive criticism. I will probably drive some builders crazy because of not making more of an effort to achieve perfection. My personality is such that I have to get something done. I’m simply not capable of spending 5 years building 1 model. As far as my skill level goes I’m probably average for a wood ship modeler. So if you’re looking for a master to learn from that isn’t me. That’s the explanation for most of the things I will likely skip or take short cuts on.
So, having said that, this isn’t the right way to build this model, it’s just my way. I learned long ago there isn’t a correct way to make something, just preferences and reasons and this build log will show mine and why I did what I did.
I’m also a tool junky, I think that was hereditary from my grand father. I have been building something pretty much all the time since I was around 8 years old. The point of that is I might use a lathe, milling machine, Byrnes table saw etc. for some parts of this build. When I do that I’ll go ahead and throw out how you could do it without all the fancy tools. The fancy tools are nice and often save time, but you can do what you need to for building a kit like this with simple hand tools and some patients. I built my Constitution without any power tools and it came out pretty nice. I often find myself doing things with a hand saw, chisel, or hobby knife instead of my mill for instance because it’s less hassle to just do it by hand.
So back to regularly scheduled programming,
I started going through the manual like normal and there are definitely a lot of pretty pictures, and they seemed like good instructions. So I started working on the model.
Step 1; This is about how long it took me to decide the instructions maybe aren’t exactly all that great. I think the photos pretty well show what needs to be done but I question some of the order of the photos, and have already found some useful notes that they could have added.
The photos in the manual appear to show putting the bulkheads on the keel parts before putting the keel together or maybe taking the keel back apart etc. it’s really all kind of confusing, so here’s what I did.
First thing I did was glue the backbone together. The joints on the laser cut sections were pretty loose. You can see that here.
Edit: I cleaned up the joints and glued them tightly together. This resulted in my keel being about 2mm short. This showed up when I tried test fitting the gun deck. I don’t know that I would do anything different if I had to do it over. Just wanted to note that you won’t want to clean it up making it even shorter just glue it together. The length from the front of frame 4 to the very back part I think should be 645mm, mine is 643mm. I had to trim some of the slots at the rear of the gun deck to get it to fit. I quite honestly don’t know if my keel is short or if the other laser cutting is just off a bit.

I placed wax paper under the wood to keep the glue from sticking on my steel work bench. I use the steel work bench because it is really flat, and glued the parts together. It’s kind of hard to see but I used the brass clamps to clamp the pieces of the backbone to a steel straight edge, on the far side of the photo, to make the bottom of the backbone straight. Then put weights on it to keep it flat.

More to come tomorrow.
Last edited:


