This is my first build log and as a novice I 'am a little lost with respect to how much I shall comment on my project - but for now I 'will just go ahead and look forward for any advice.
I went through the manual and the plans a number of times an made (new) notes (and questions) every time realizing that I should definitely not start the actual build before I had at least a good idea of how, I should proceed.
The kit does not contain a base for the model or any indication of where and how to install pedestals which was what I wanted. So I came up with this solution:

I don't know what the proper name is in English (not even in Danish) for the "bolt", but it has an outer diameter of 5 mm and an inside thread of M4 (4 mm) plus some indentations below the bolt-head making a firm grip after gluing. Since the false keel is 5 mm, I just cut a channel for the bolt and and glued and reinforced the construction on both sides of the false keel. For the pedestal body I used a brass towel-knob into which I cut a groove (Dremel) for the real keel (also 5 mm). I' will have to drill a 4 mm hole when the keel is mounted for the threaded rod which connects the upper bolt with a twin mounted on the backside of the wooden base:


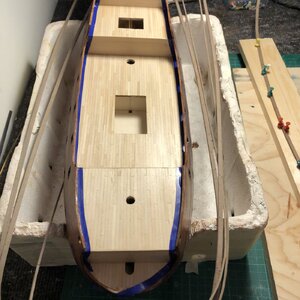
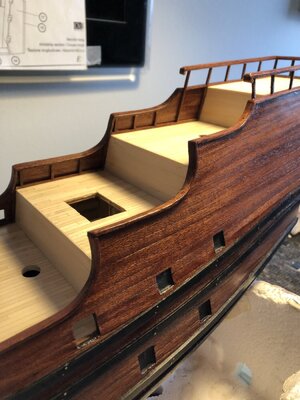
All the bulkheads where first filled and dry fitted together with the false decks utilizing the latter (still dried fitted) to ensure that the bulkheads were glued perpendicular to the false keel and reinforced with square timber on both sides of the false keel for further strength and hull symmetry:

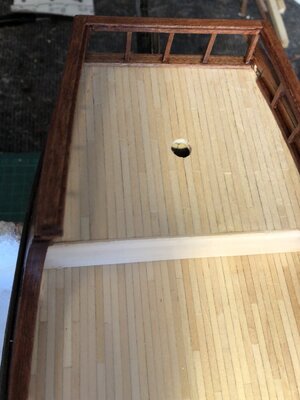
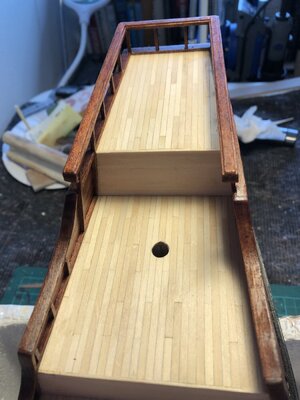
The deck planks are 1x3 mm lime wood. With my (old) eye sight that prevent me from marking the butts with simulated nails, but instead I decided to plank the deck(s) with 6 cm planks (corresponding to a quite realistic length of 3.6 m for real). I wanted a pattern of: 413241... and made a deck-copy out of scratch material as a guide:

According to the manual the deck planks should be glued with contact glue. First of all, I can't stand the smell and worse: no room for mistakes! So I decided on my deck-copy to figure out what was a reasonable opening time for yellow glue while planking if you should take your time to fumble, and found 6 minutes as the maximum.
(Just to make things clear (?): on the deck-copy the bow is to the left -actually the starboard side- and with respect to the centerline the pattern is then: 423142... when the centerline is the origin, and thus the stern to the right - actually the portside - and with respect to the centerline the pattern is: 4132413...).
So I cut "millions" of 6 cm planks and simulated caulking with a pencil on the edges and went on with the deck-planking according to my homemade guide:

The ruler serves as a guide to the first centerline-planks (not to be associated with the pencil-marking). Notice the yellow area underneath the deck-planks! Even with my own homemade planking guide, I succeeded in making errors in the planking pattern!!!! Up with the planks! - remove the glue with a wet towel - and be thankful that you didn't used contact glue....
Since this mistake I have decreased the glue-area when planking, because I am apt to make the same pattern-error ...
By the way: is contact glue the same as contact cement?
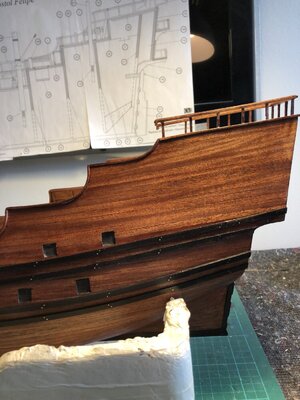
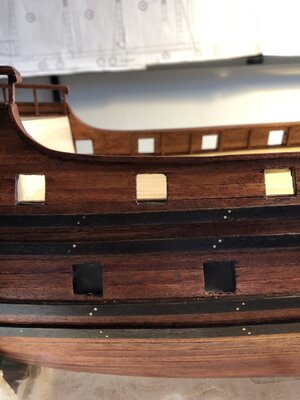
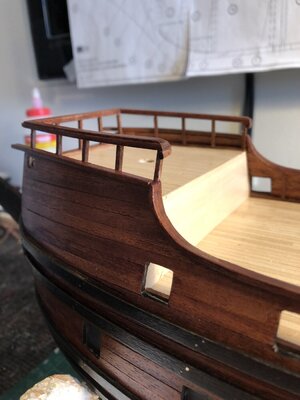
Well - more deck planking, clean cutting, sanding and matt varnish, more sanding, varnish and finally gluing all the decks in place plus lining all areas of the bulkheads above the deck with the 1x3 mm lime wood.
I went through the manual and the plans a number of times an made (new) notes (and questions) every time realizing that I should definitely not start the actual build before I had at least a good idea of how, I should proceed.
The kit does not contain a base for the model or any indication of where and how to install pedestals which was what I wanted. So I came up with this solution:
I don't know what the proper name is in English (not even in Danish) for the "bolt", but it has an outer diameter of 5 mm and an inside thread of M4 (4 mm) plus some indentations below the bolt-head making a firm grip after gluing. Since the false keel is 5 mm, I just cut a channel for the bolt and and glued and reinforced the construction on both sides of the false keel. For the pedestal body I used a brass towel-knob into which I cut a groove (Dremel) for the real keel (also 5 mm). I' will have to drill a 4 mm hole when the keel is mounted for the threaded rod which connects the upper bolt with a twin mounted on the backside of the wooden base:
All the bulkheads where first filled and dry fitted together with the false decks utilizing the latter (still dried fitted) to ensure that the bulkheads were glued perpendicular to the false keel and reinforced with square timber on both sides of the false keel for further strength and hull symmetry:
The deck planks are 1x3 mm lime wood. With my (old) eye sight that prevent me from marking the butts with simulated nails, but instead I decided to plank the deck(s) with 6 cm planks (corresponding to a quite realistic length of 3.6 m for real). I wanted a pattern of: 413241... and made a deck-copy out of scratch material as a guide:
According to the manual the deck planks should be glued with contact glue. First of all, I can't stand the smell and worse: no room for mistakes! So I decided on my deck-copy to figure out what was a reasonable opening time for yellow glue while planking if you should take your time to fumble, and found 6 minutes as the maximum.
(Just to make things clear (?): on the deck-copy the bow is to the left -actually the starboard side- and with respect to the centerline the pattern is then: 423142... when the centerline is the origin, and thus the stern to the right - actually the portside - and with respect to the centerline the pattern is: 4132413...).
So I cut "millions" of 6 cm planks and simulated caulking with a pencil on the edges and went on with the deck-planking according to my homemade guide:
The ruler serves as a guide to the first centerline-planks (not to be associated with the pencil-marking). Notice the yellow area underneath the deck-planks! Even with my own homemade planking guide, I succeeded in making errors in the planking pattern!!!! Up with the planks! - remove the glue with a wet towel - and be thankful that you didn't used contact glue....
Since this mistake I have decreased the glue-area when planking, because I am apt to make the same pattern-error ...
By the way: is contact glue the same as contact cement?
Well - more deck planking, clean cutting, sanding and matt varnish, more sanding, varnish and finally gluing all the decks in place plus lining all areas of the bulkheads above the deck with the 1x3 mm lime wood.