Vasa - 1:65 DeAgostini [COMPLETED BUILD]

Excellent painting work (as ever) Paul. I especially love the detail on your lion under Heracles. Out of interest, what paints are you using - I assume they are acrylics, but they seem to be giving very good coverage? I remember spending HOURS researching the combat and games figure painting videos and tutorials. Some of these are simply works of art. This aspect of the Vasa is very rewarding. It is slow (with SO many figures/statues etc) but the attention to detail makes the model a quality, finished work of art in its own right - It also makes a great break from planking and head railings.
Thank you Peter and Kurt. Mostly I have been using Vallejo Model Color acrylics though my personal standard-bearer when it comes to painting is Marc (@Hubac’s Historian) and I believe he uses mostly Citadel Warhammer. I have added some of their technical paints to my line-up and am practicing with a nice wash medium but by the time I get good at that it will be too late for this model.

Coverage is unpredictable. Flesh tones are fair to poor, yellows are the worst, and oddly dark green is fair at best. The reds are wonderful. Multiple base coats is the only solution on top of a grey primer (most of the time).

I, too, spent countless hours reading and watching. The miniatures world has some amazing artists. We need to remember that they are working at a much larger scale than we are on these ships, however. Otherwise it would all just be too discouraging. And our habit of posting macro images - that's enough to break any man's spirit! Mostly, for me, it's an exercise in patience. Heracles and his furry friends took hours (there's two of them). If I ever figure out how to do faces at 1:65 then I might have accomplished something - until then this is a helpful break from actual ship-building.
 
Hello again Paul, I must admit your log continues to draw me in. I went back and looked at a lot of your meticulous paintings, so well done.
I've used Vallejo paints in the past too but only Model Air colours for my airbrush. I use the grey primer mostly, the white primer I find more difficult to airbrush.
I'll have to take a look at the Model Colour (Color ;) ) range.
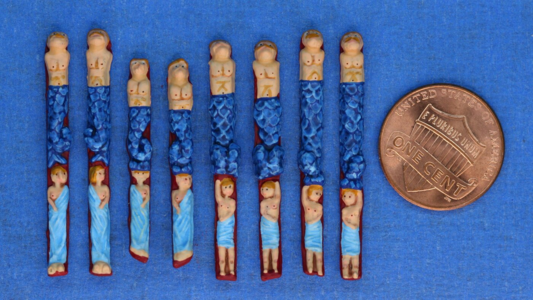
Thank you, Roger. I should confess that I also have used Model Air paints but not in an airbrush. They function as heavily pigmented washes that I find useful when working in darker shades. For example, I used a Model Air paint on these blue tails...

1624986941088.png

Looking at this picture I see that I can now do flesh a bit better - looks like I'm not done with some of these decorative pieces after all...
 
Thank you, Roger. I should confess that I also have used Model Air paints but not in an airbrush. They function as heavily pigmented washes that I find useful when working in darker shades. For example, I used a Model Air paint on these blue tails...

View attachment 241349

Looking at this picture I see that I can now do flesh a bit better - looks like I'm not done with some of these decorative pieces after all...
Paul, the one on the lower right needs a cavity filled…wink wink…and is therefore missing a anatomical dot…lol… I’m certain you can fix that! :p
 
Paul, you are outside your mind, if you don't think you are a master painter. Your work is impeccable. And, yes, you are correct that I use the WarHammer line, but mostly for my metallics and a couple of their washes. Mostly, I like ModelMaster acrylics, but I have also had great success with Vallejo's artist's acrylic for my yellow ocher. One line of popular acrylics that I have had zero success brushing with is Tamaya; these paints seem impossible to condition for good flow off of a brush. I have found some success with a range of tube artist's acrylics that I thin with water, but it is very much an in-exact science. Also, I am just lately re-discovering the joys of the airbrush on broad surfaces, and trying to figure out optimal thinning ratios for the various paints I want to spray.

Well, I've just about given up hope that SOS's update function will send me regular updates. I have unwatched/watched again this page and many others that I follow, and despite updates happening - I'm not getting them. I will just have to get in the habit of manually checking my "watched" lineup to see who's up to what :rolleyes:

As always, Paul, this is such fun to watch your ship take shape. I think, apart from your excellent planking, painting, and really everything - I love your representation of the iron work that holds the whole thing together. That, to me, is an element of detailing that just lends the project a degree of realism that is absent in most models.
 
Hello Fellow Shipbuilders,

Many thanks for all the 'likes' and thoughtful reviews of my recent work. I am humbled that you would take the time to visit my build log.

I had set aside my ship for a bit as I recovered from an Xacto knife injury and turned my attention to painting the seemingly endless supply of decorative metal bits. This endeavor is more than just painting - each of the pieces needs to have flash removed from the casting process, cleaned of grease and human detritus, mounted on a stick so I can hold the piece while I work on it, primed, painted, and sealed. I suppose it's just like painting a wall in your home - half the work is in the preparation...

This weekend I took a break from painting and tested the resiliency of my nearly healed wound (if you don't count the fact that I have lost all feeling in the tip of my index finger) and worked on a few small items left unfinished during my previous work (a model ship punch-list of sorts).

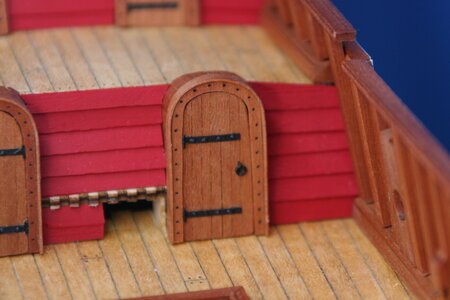
First, as encouraged by Sasha (@Alexander74), I added a few faux nails on the faux metal strapping next to my faux hinges on my faux doors.

IMG_6903.JPG

Sorry about the poor photo quality.

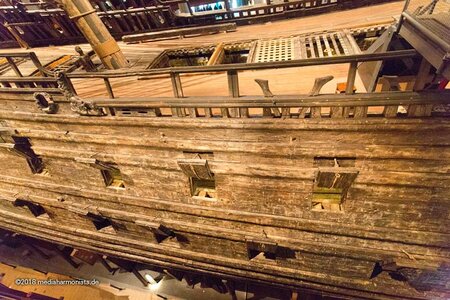
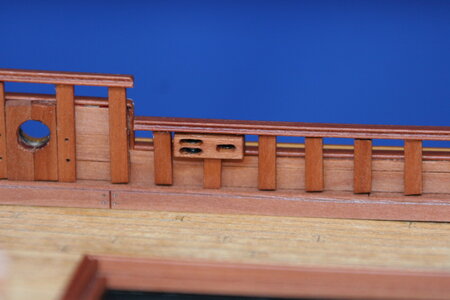
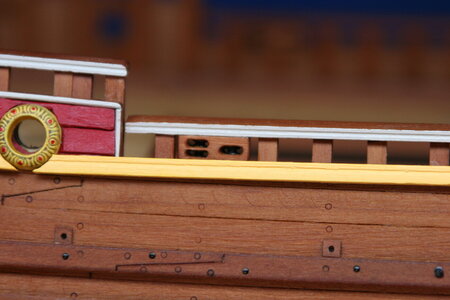
Next I added the pulley/sheave thing you see in this photo just below the waist headrail:

Stockholm-180323_8842.jpg

What I needed to properly fabricate this box block was a shiny new yellow and green Proxxon mill (or at least a drill press) - but I haven't committed to this hobby to that degree quite yet so I made do with a hand drill, my fear-inducing Xacto, and a set of really nice needle files:

IMG_6900.JPG

IMG_6902.JPG

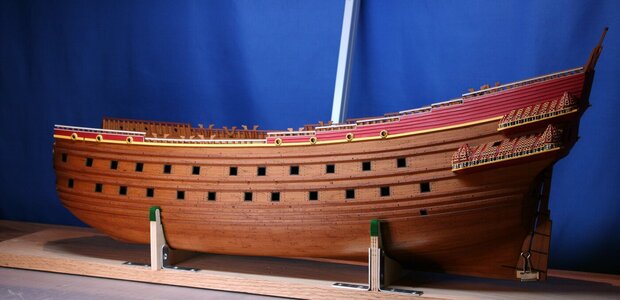
I also added a strip of profiled yellow decorate trim to mark the terminus of the red clinker planked portion of the upper hull...

IMG_6895.JPG

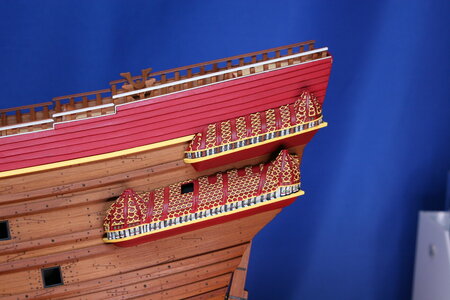
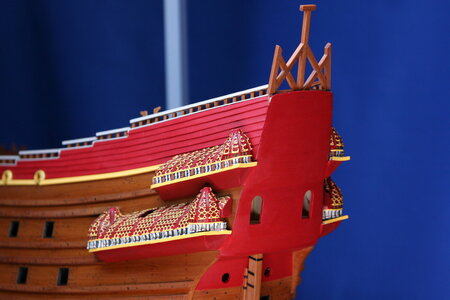
And as you can see in the above image I chose to finally mount the galleries...

IMG_6897.JPG

IMG_6899.JPG

These freakishly ornate galleries have only begun their journey toward ornate freakishness - there are lots of decorative bits to be added, but that will require returning to my painting project...

Anyway, nothing inspirational this posting - but such is the nature of progress. You are kind to stop by...
 
Hello Fellow Shipbuilders,

Many thanks for all the 'likes' and thoughtful reviews of my recent work. I am humbled that you would take the time to visit my build log.

I had set aside my ship for a bit as I recovered from an Xacto knife injury and turned my attention to painting the seemingly endless supply of decorative metal bits. This endeavor is more than just painting - each of the pieces needs to have flash removed from the casting process, cleaned of grease and human detritus, mounted on a stick so I can hold the piece while I work on it, primed, painted, and sealed. I suppose it's just like painting a wall in your home - half the work is in the preparation...

This weekend I took a break from painting and tested the resiliency of my nearly healed wound (if you don't count the fact that I have lost all feeling in the tip of my index finger) and worked on a few small items left unfinished during my previous work (a model ship punch-list of sorts).

First, as encouraged by Sasha (@Alexander74), I added a few faux nails on the faux metal strapping next to my faux hinges on my faux doors.

View attachment 242151

Sorry about the poor photo quality.

Next I added the pulley/sheave thing you see in this photo just below the waist headrail:

View attachment 242158

What I needed to properly fabricate this box block was a shiny new yellow and green Proxxon mill (or at least a drill press) - but I haven't committed to this hobby to that degree quite yet so I made do with a hand drill, my fear-inducing Xacto, and a set of really nice needle files:

View attachment 242155

View attachment 242156

I also added a strip of profiled yellow decorate trim to mark the terminus of the red clinker planked portion of the upper hull...

View attachment 242152

And as you can see in the above image I chose to finally mount the galleries...

View attachment 242153

View attachment 242154

These freakishly ornate galleries have only begun their journey toward ornate freakishness - there are lots of decorative bits to be added, but that will require returning to my painting project...

Anyway, nothing inspirational this posting - but such is the nature of progress. You are kind to stop by...
Looks fantastic Paul!
 
Hello Fellow Shipbuilders,

Many thanks for all the 'likes' and thoughtful reviews of my recent work. I am humbled that you would take the time to visit my build log.

I had set aside my ship for a bit as I recovered from an Xacto knife injury and turned my attention to painting the seemingly endless supply of decorative metal bits. This endeavor is more than just painting - each of the pieces needs to have flash removed from the casting process, cleaned of grease and human detritus, mounted on a stick so I can hold the piece while I work on it, primed, painted, and sealed. I suppose it's just like painting a wall in your home - half the work is in the preparation...

This weekend I took a break from painting and tested the resiliency of my nearly healed wound (if you don't count the fact that I have lost all feeling in the tip of my index finger) and worked on a few small items left unfinished during my previous work (a model ship punch-list of sorts).

First, as encouraged by Sasha (@Alexander74), I added a few faux nails on the faux metal strapping next to my faux hinges on my faux doors.

View attachment 242151

Sorry about the poor photo quality.

Next I added the pulley/sheave thing you see in this photo just below the waist headrail:

View attachment 242158

What I needed to properly fabricate this box block was a shiny new yellow and green Proxxon mill (or at least a drill press) - but I haven't committed to this hobby to that degree quite yet so I made do with a hand drill, my fear-inducing Xacto, and a set of really nice needle files:

View attachment 242155

View attachment 242156

I also added a strip of profiled yellow decorate trim to mark the terminus of the red clinker planked portion of the upper hull...

View attachment 242152

And as you can see in the above image I chose to finally mount the galleries...

View attachment 242153

View attachment 242154

These freakishly ornate galleries have only begun their journey toward ornate freakishness - there are lots of decorative bits to be added, but that will require returning to my painting project...

Anyway, nothing inspirational this posting - but such is the nature of progress. You are kind to stop by...
Dear Paul
great progress, it's looks very beautiful and professional :) Thumbsup :)
 
Hello Fellow Shipbuilders,

Many thanks for all the 'likes' and thoughtful reviews of my recent work. I am humbled that you would take the time to visit my build log.

I had set aside my ship for a bit as I recovered from an Xacto knife injury and turned my attention to painting the seemingly endless supply of decorative metal bits. This endeavor is more than just painting - each of the pieces needs to have flash removed from the casting process, cleaned of grease and human detritus, mounted on a stick so I can hold the piece while I work on it, primed, painted, and sealed. I suppose it's just like painting a wall in your home - half the work is in the preparation...

This weekend I took a break from painting and tested the resiliency of my nearly healed wound (if you don't count the fact that I have lost all feeling in the tip of my index finger) and worked on a few small items left unfinished during my previous work (a model ship punch-list of sorts).

First, as encouraged by Sasha (@Alexander74), I added a few faux nails on the faux metal strapping next to my faux hinges on my faux doors.

View attachment 242151

Sorry about the poor photo quality.

Next I added the pulley/sheave thing you see in this photo just below the waist headrail:

View attachment 242158

What I needed to properly fabricate this box block was a shiny new yellow and green Proxxon mill (or at least a drill press) - but I haven't committed to this hobby to that degree quite yet so I made do with a hand drill, my fear-inducing Xacto, and a set of really nice needle files:

View attachment 242155

View attachment 242156

I also added a strip of profiled yellow decorate trim to mark the terminus of the red clinker planked portion of the upper hull...

View attachment 242152

And as you can see in the above image I chose to finally mount the galleries...

View attachment 242153

View attachment 242154

These freakishly ornate galleries have only begun their journey toward ornate freakishness - there are lots of decorative bits to be added, but that will require returning to my painting project...

Anyway, nothing inspirational this posting - but such is the nature of progress. You are kind to stop by...

Those galleries look pretty awesome on there own. Always a pleasure to see your new posts.
 
Во-первых, по совету Саши (@@ Alexander74) я добавил несколько искусственных гвоздей на искусственную металлическую ленту рядом с искусственными петлями на искусственных дверях.
Пол, это красивее. Дать согласие Недурно
 
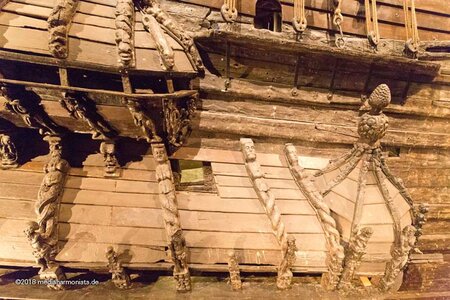
Your galleries are just beautiful Paul. I'm going to have to remember to put the opening in the lower gallery on mine as it does not show up on my ship.
Thanks @Daniel20 . See the following images... It shows up on the mother ship as well as on the 1:10. I have rarely seen it reproduced on a model, however. Function? It would appear to line up with an opening in the hull but I wasn't that committed to it - I simply blacked out the hull...

Stockholm-180323_8852.jpg

gIMG_6290.jpg
 
Back
Top