-

Win a Free Custom Engraved Brass Coin!!!
As a way to introduce our brass coins to the community, we will raffle off a free coin during the month of August. Follow link ABOVE for instructions for entering.
-

PRE-ORDER SHIPS IN SCALE TODAY!
The beloved Ships in Scale Magazine is back and charting a new course for 2026!
Discover new skills, new techniques, and new inspirations in every issue.
NOTE THAT OUR FIRST ISSUE WILL BE JAN/FEB 2026
You are using an out of date browser. It may not display this or other websites correctly.
You should upgrade or use an alternative browser.
You should upgrade or use an alternative browser.
If I ever manage to finish ho ho ho we'll have a feast.Wow!! That's sounded and looked delicious. I am afraid, I cannot make it today...maybe next year, will celebrate your Hailing Hoy completion.
View attachment 291579
Started the daunting task of installing deck clamps. On La Belle I had to unglue the portside clamp three(!) times. Before anything else I had to do some lofting since the complete line of the deck is missing from plans. Once that was done (pure eyeballing - what "looks right"), as per Thomas' suggestion, I used the simple height measuring tool and transferred points from plan at main stations onto the side of the model. To transfer points from outside onto the inside of the hull, I just passed straight battens through frames and placed marks. 1/16" wide tape was used to interpolate points:
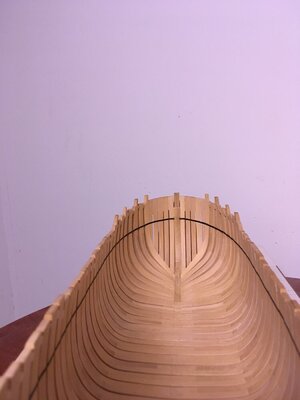
This tape is great, it can be very easily adjusted to what "feels" right. Another advantage is that one can see at this point whether the deck is "right" or not by simply passing battens through frames:
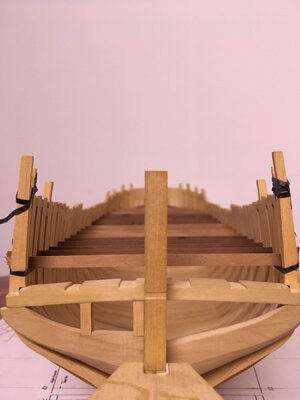
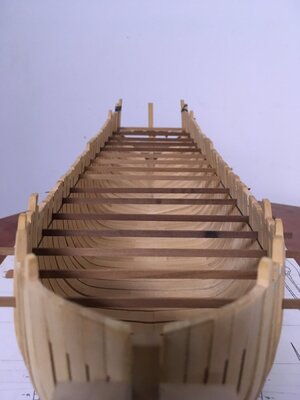
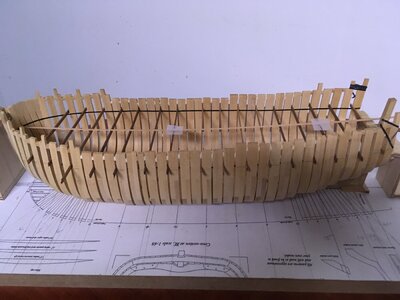
Once satisfied with the run of the deck, upper edge of the tape was used to mark lines and spile the fore plank.
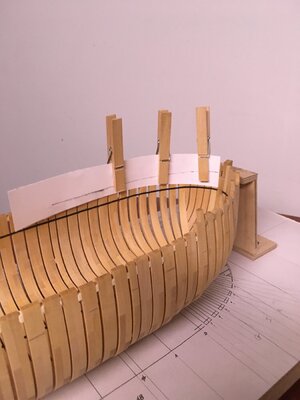
Pattern was cut out of thin cherry and checked that it fits nicely:
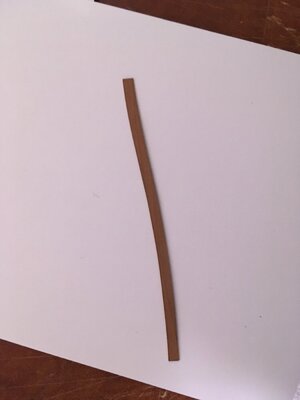
Template was transferred to Castello sheet, cut out and, to my surprise, easily bent to shape with that simple round tip plank bander. Here it is:
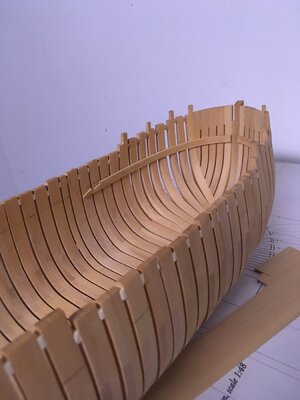
The rest will be easier, I hope. Many thanks for stopping by, all the comments and likes. Happy modelling!

This tape is great, it can be very easily adjusted to what "feels" right. Another advantage is that one can see at this point whether the deck is "right" or not by simply passing battens through frames:


Once satisfied with the run of the deck, upper edge of the tape was used to mark lines and spile the fore plank.

Pattern was cut out of thin cherry and checked that it fits nicely:

Template was transferred to Castello sheet, cut out and, to my surprise, easily bent to shape with that simple round tip plank bander. Here it is:

The rest will be easier, I hope. Many thanks for stopping by, all the comments and likes. Happy modelling!
Hi Gennaro, I am really speechless with your built. To my eyes you are doing a fantastic job there. The tape tip is a very good one. Sometimes, simple things like that one, doesn't pop in my mind. Great trick to see how the beams positions will be.
What measurement tool you used to extrapolate the plan data to the model ?
Thanks !!!
Daniel
What measurement tool you used to extrapolate the plan data to the model ?
Thanks !!!
Daniel
Last edited:
Great idea, looks very good.
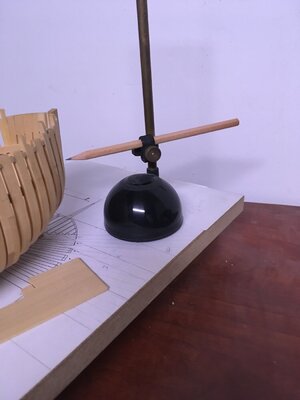
Thanks Daniel! Well, I just wasted $40 on fancy digital height caliper. Inexpensive, true, but estimated delivery date is April 14th. Couldn't wait thet long, so I resorted to something that I bought long time ago to mark the waterline. Here it is:Hi Gennaro, I am really speechless with your built. To my eyes you are doing a fantastic job there. The tape tip is a very good one. Sometimes, simple things like that one, doesn't pop in my mind. Great trick to see how the beams positions will be.
What measurement tool you used to extrapolate the plan data to the model ?
Thanks !!!
Daniel
Thank you Heinrich, I appreciate your words of encouragement, but I have to disagree. There are many mistakes already - here are the two most noticeable ones:Great work Gennaro and I agree 100% with Daniel - incredibly ingenious. I maintain what I have said before - this must be one of the "cleanest" and neatest builds I have ever seen! Well done my friend!
Little wedge bastard at the bow - I knew I screwed it up the second I put it in, but at this point I was saturated with hawse pieces - six attempts. If HMS Blanford was available at that time we would be speaking through a different build log. The result is:
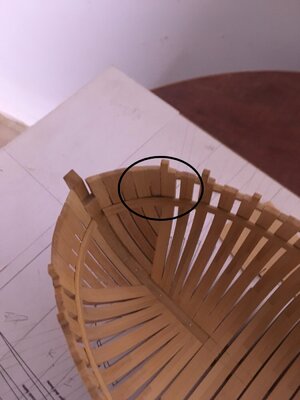
At least, I don't have to make a decision which part of the ship to plank
Another major error is in framing. It's difficult to frame the model using Antscherl's technique. Somehow, frames were leaning forwards, and by the time I noticed it , it was too late. I tapered the offending frame and tried to do better with the rest of them. That's the advantage of having a jig - one would immediately spot an error.
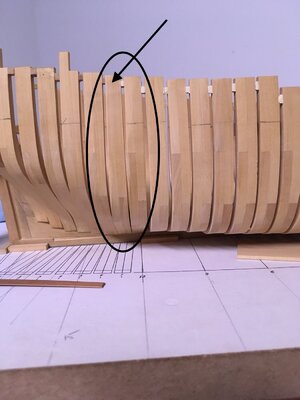
Also, those of you familiar with the subject will notice that frames are of uniform thickness (18" full size). It wouldn't be lot more difficult to manufacture them in different thicknesses (20"-19"-18") for floors and futtocks. Since I already had a stash of 3/16" (18") boards of Castello, I went with it.
Another thing that bothers me slightly is that sanding pads I got from Micromark and used for fairing, are actually not that good for framing POF. They work great on solid surfaces, but there is tendency to sand off edges of the frames and lose clean, sharp look.
That being said, I've learned a lot building Hoy and I'm glad I started with Hoy instead of Man-of-war. Just trying to do the best I can. Thanks again!
You are doing a great job building the HOY, she is a little lady but it is in no way diminished her elegant body lines compared to the Man-of-war hull.That being said, I've learned a lot building Hoy and I'm glad I started with Hoy instead of Man-of-war. Just trying to do the best I can. Thanks again!
I don't know why - but this part is making me nervous. How could the plans omit the deck line? I would not have the experience to say, "that looks about right" and expect it to be right (leading to all kinds of problems downstream and ultimately using my model to toast marshmallows...).Started the daunting task of installing deck clamps. On La Belle I had to unglue the portside clamp three(!) times. Before anything else I had to do some lofting since the complete line of the deck is missing from plans. Once that was done (pure eyeballing - what "looks right"), as per Thomas' suggestion, I used the simple height measuring tool and transferred points from plan at main stations onto the side of the model. To transfer points from outside onto the inside of the hull, I just passed straight battens through frames and placed marks. 1/16" wide tape was used to interpolate points:
View attachment 291992
This tape is great, it can be very easily adjusted to what "feels" right. Another advantage is that one can see at this point whether the deck is "right" or not by simply passing battens through frames:
View attachment 291993
View attachment 291994
View attachment 291995
Once satisfied with the run of the deck, upper edge of the tape was used to mark lines and spile the fore plank.
View attachment 291996
Pattern was cut out of thin cherry and checked that it fits nicely:
View attachment 291997
Template was transferred to Castello sheet, cut out and, to my surprise, easily bent to shape with that simple round tip plank bander. Here it is:
View attachment 291998
The rest will be easier, I hope. Many thanks for stopping by, all the comments and likes. Happy modelling!
Hi Gennaro
Firstly I wish your Wife a speedy recovery.
Very nice work.By your own admittance a couple of minor mistakes, but don't overly obsess about them.I know easier said than done we are our own worst critics.
Interesting approach with the tape, nice bit of lateral thinking I will shock many purists when I get to that stage on my build.Oblique holes in the framing so the beams slot right through to the inside of the outer planking Dimitry Shevelev style.This will give greater strength than the original joint detail and be invisible once the planking is fitted Wale upwards.
Kind Regards
Nigel
Firstly I wish your Wife a speedy recovery.
Very nice work.By your own admittance a couple of minor mistakes, but don't overly obsess about them.I know easier said than done we are our own worst critics.
Interesting approach with the tape, nice bit of lateral thinking
 I will shock many purists when I get to that stage on my build.Oblique holes in the framing so the beams slot right through to the inside of the outer planking Dimitry Shevelev style.This will give greater strength than the original joint detail and be invisible once the planking is fitted Wale upwards.
Kind Regards
Nigel
Eh, how? Hayling Hoy, being a cargo/passenger ship had a very different deck framing from war ships - few heavy beams midship and that's what's indicated in plans. I suppose David Antscherl is the only person to answer this question. The more time I spend with this build the more I realize that it's more about "what looks right" rather than being exact. Fairing is the prime example - bevel lines are also omitted. How much wood to remove? Keep removing until you get "what looks and feels right" without removing all the woodI don't know why - but this part is making me nervous. How could the plans omit the deck line? I would not have the experience to say, "that looks about right" and expect it to be right (leading to all kinds of problems downstream and ultimately using my model to toast marshmallows...).
Many thanks Nigel for your wishes and comments on my work. I've learned to accept mistakes. It's only a nice pastime after all.Hi Gennaro
Firstly I wish your Wife a speedy recovery.
Very nice work.By your own admittance a couple of minor mistakes, but don't overly obsess about them.I know easier said than done we are our own worst critics.
Interesting approach with the tape, nice bit of lateral thinkingI will shock many purists when I get to that stage on my build.Oblique holes in the framing so the beams slot right through to the inside of the outer planking Dimitry Shevelev style.This will give greater strength than the original joint detail and be invisible once the planking is fitted Wale upwards.
Kind Regards
Nigel
....The more time I spend with this build the more I realize that it's more about "what looks right" rather than being exact...
....How much wood to remove? Keep removing until you get "what looks and feels right" without removing all the wood...
Gennaro, quoted is "My daily Karma with my Bounty "
I am not learning model ship building. I am learning "how to hide defects on model ship building". I can write a 2 Volumes book by now... HAHAHA
Nigel said it correctly !!!
Cheers
Daniel
Very good idea with the tape, the complete way of marking the internal height
Many Thanks for showing us the method
Many Thanks for showing us the method
That's some fine work Gennaro. I also like the way you used the battens and tape to mark the internals.
There's always something to learn from others on this site.
There's always something to learn from others on this site.
It's been several weeks now working on longitudinals - keelson, deck/platform clamps and hooks. Surprisingly, clamps were installed without too much trouble except for the aft platform, very difficult to clamp. This worked for me:
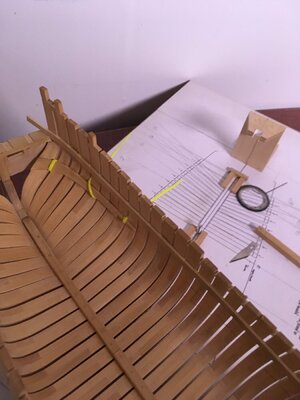
What gave me the hardest time were those two hooks - breast and forecastle one. How Antscherl managed to install them prior to installing clamps is mystery to me. I did the reverse thing - clamps first, than hooks. Breast one sits on an angle and the only way I could figure out to correctly position it was to cut the stemson template from plans:
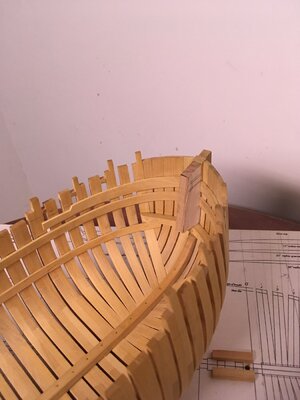
At this point, hull is quite rigid and ready for fairing. Here are some pictures of the current state of the model:
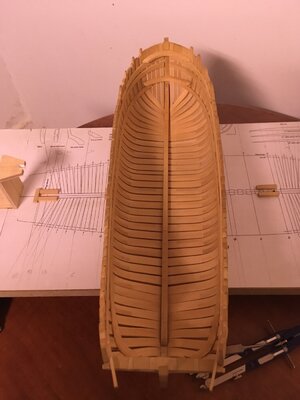
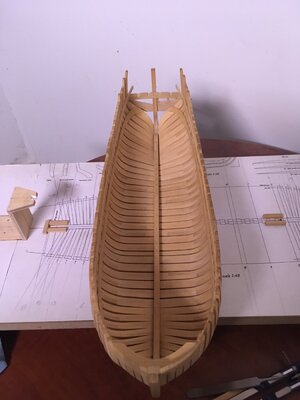
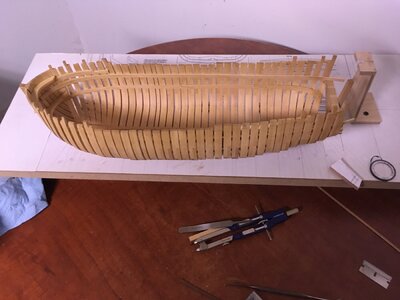
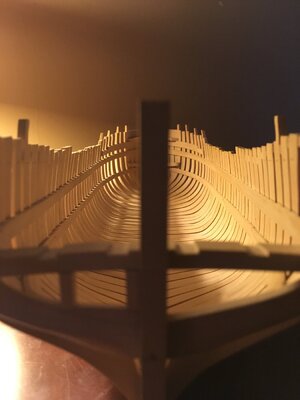
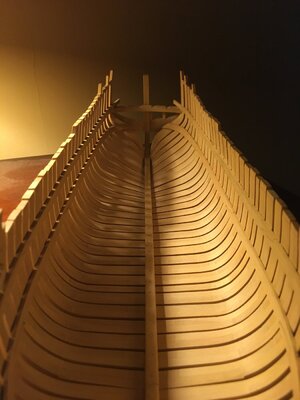
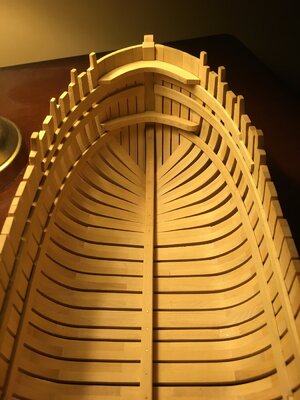
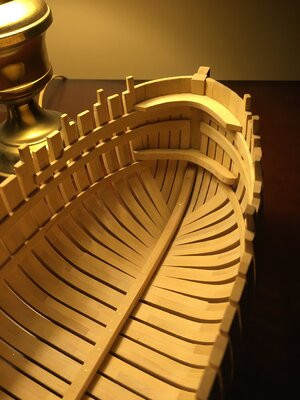
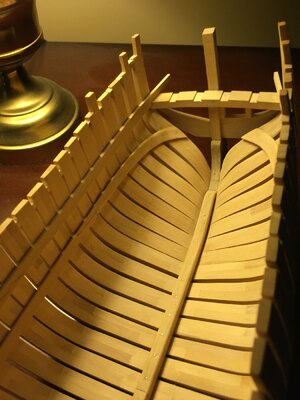
Fairing is going to take some time, got nice stash of Robaxin (mascular pain relief medication). Thanks for stopping by, all the likes and comments. Much appreciated as always. Happy modelling!

What gave me the hardest time were those two hooks - breast and forecastle one. How Antscherl managed to install them prior to installing clamps is mystery to me. I did the reverse thing - clamps first, than hooks. Breast one sits on an angle and the only way I could figure out to correctly position it was to cut the stemson template from plans:

At this point, hull is quite rigid and ready for fairing. Here are some pictures of the current state of the model:


Fairing is going to take some time, got nice stash of Robaxin (mascular pain relief medication). Thanks for stopping by, all the likes and comments. Much appreciated as always. Happy modelling!
Very nice and beautiful photos! The forecastle and breast hooks gave me a ton of work, especially after installing them with wire pins. Even after multiple adjustments I didn’t get it right. I could tell when it came time to plank the forecastle that the end of the hook didn’t protrude as much as Antscherl’s so chiseled the end flush so the margin plank sat on top. I think you know what I mean. You can’t really tell until you place your beams but yours look spot on.
Ian
Ian
Amazing! I love the precision. You are at the top of your game Gennaro!


