• "Thank you for your Donations and Support"
    As we close this Annual Donations Drive, I want to thank you all for your Generosity in Donating to Ships of Scale. It is Greatly Apreciated !!!
    Ships of Scale continues to explore exciting things to offer to the Ship Building Community.

HMS Victory Mantua 1:78 (first build) by Grant Tyler

Good morning guys- I haven’t been too active with The HMS Victory lately. Financial year end and board and shareholders meetings....all that stuffSleep.

Last night and this morning I got to doing a little:
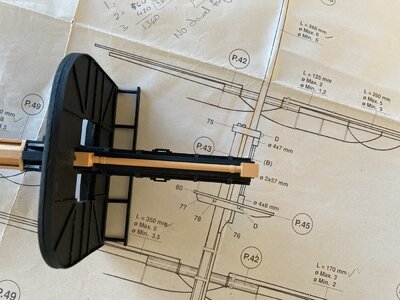
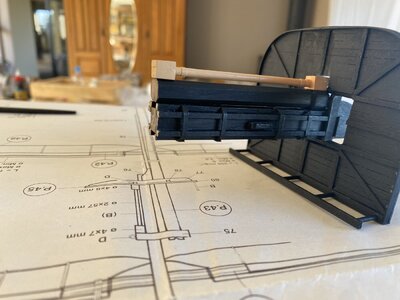
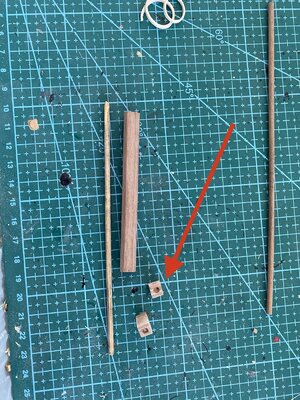
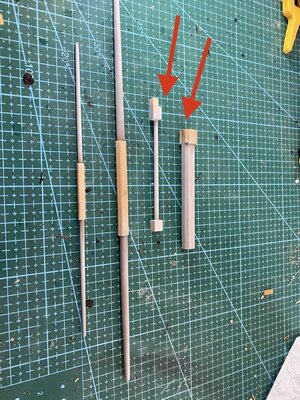
Scratch built the upper mast base for the main mast and the column. As with the Mizzen I cut pieces and glued together to achieve correct sizes. Luckily there was a 8x8 piece so just shape into an octagon. I also found a 3x3 dowel (pine). I’ve had to make some adjustments for it all to fit together- 1:added a small block to fit the column into the crosstree square 2: had to drill the holes for the pillar slightly off center 3: the support on the base I had to leave a rectangle for the column base to fit into. If not this would not fit into the kit design and mast cap. arrows reflect these.

Sanding needle file work and paint will hopefully get these to the quality I would like to achieve.
Let’s see.

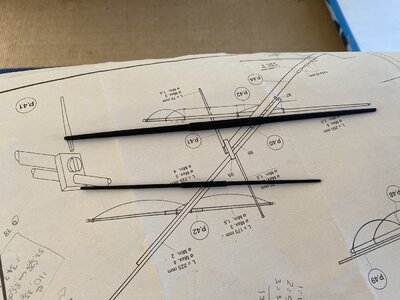
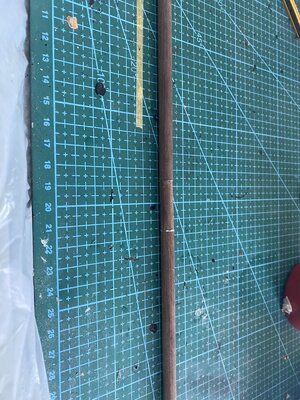
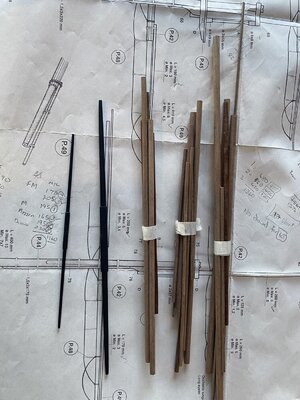
I also hand tapered (using sand paper and exacto blade) the yards for the bowsprit and added the 3x0.5 strips to center. Per instructions. I wrapped an elastic band tightly so the strips curve around each yard. I have primed the wood for paint other than the center strips which I will use Indian ink so the wood grain will be seen. Let’s see as well.
BB04933B-6340-4D81-A599-C22F1E6604F6.jpeg81EC9786-7178-432D-B3EC-CFD7A6B5065E.jpeg
5654CEE7-50EB-4E55-AFAF-78C3E910F39C.jpeg
 
The preparatory work looks good Grant. Good luck with the shareholders' meetings!
 
I also hand tapered (using sand paper and exacto blade) the yards for the bowsprit and added the 3x0.5 strips to center.
Howzit Grant. Well done on the hand-tapering of your spars, they look spot-onThumbsup I notice that electric drills are a popular choice for tapering spars, or even a mini-lathe if you are lucky enough to own one. I had a small hobby plane that I thought I would use to taper my masts, booms and gaffs, but had a bit of a confidence failure when the time came and I opted for the hand-and-sandpaper method instead. It seems to work quite well despite the cramps you might develop in your limbs, and you also get to say that you turned all of your ship's spars 'by hand' :)
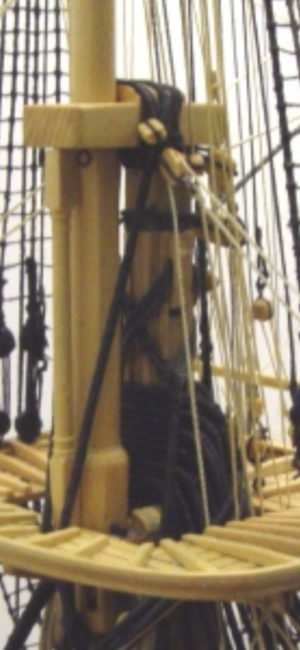
 
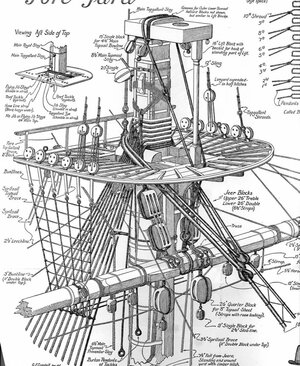
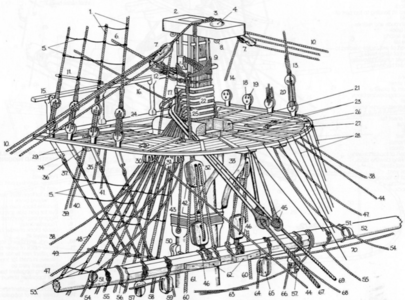
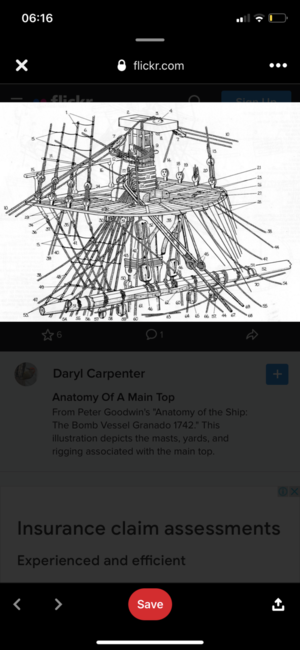
Good morning. The main mast : The base of the upper mast and the support column is done. I still need to make some adjustments so that seized shrouds and stays will fit between the upper mast base and lower mast mast. Loads of work still to be done here. All dry fitted.

This is what I am basing this section on :
E9436D91-A238-4292-927D-C8B2C86AEA7A.png
08A81EFF-67B6-4036-8CCE-E2B4C1637CB8.jpeg42D43E0D-B6E9-4E1E-95DC-C3F15C0E1BDB.jpeg
The bowsprit yards. I made these per instructions however on research they do not have the center block or any cleats etc as do the mast yards. I did like the Mantua way though so just rounded them more and painted:

B77EDDA0-E977-42B6-AD93-8D41B950DEB7.jpeg
 
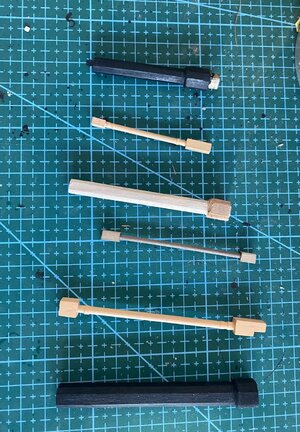
Good morning. I decided to make the top foremast base and the column support. To get to what I showed in previous post, each base and column has slightly different mods to fit theIr respective crosstrees. Once fitted all will look the same and something more authentic.......I hope ROTFI will still have to make faux mast blocks below each crosstree. All three in WIP:
6248AB61-662A-43AB-A91E-FCF6671E6779.jpeg

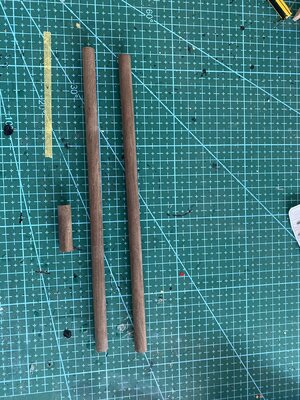
I also decided to make the main mast Main yard. My first problem- no one 8mm dowel was long enough. I then decided to cut all my dowels for each yard on the plans- it was quite a mathematical experience to get enough yards from the dowels provided- short one 5mm for one of the mizzen booms- I wrapped per mast:


D233F739-355C-4F1A-8630-9190AB107133.jpeg

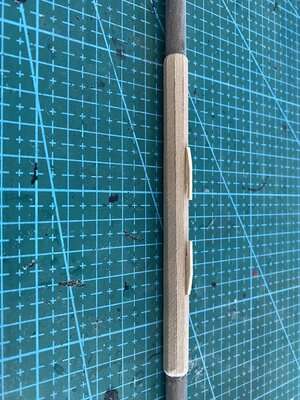
Making the main yard- I had to join two 8mm dowels, add a little bit extra. Wood glue and then made per plan. The only extra I made are the two cleats and beveled the edges as in Goodwins drawing:
1781BE0A-2745-4D87-A7FF-072ED4AA4EDF.png
F4D462F4-271D-455B-82E6-3312DFEB74CF.jpeg102BA3D5-C988-4395-BCFC-DF421741AB5B.jpeg6C40F38A-000F-4ED0-A0D5-C6A91A939757.jpeg
The two cleats I made from 2mm birch and shaped with exacto blade and needle files. Dry fitted. The most difficult thing is getting the scale of the extras correct. Tip- buy reference books if one deviates from kitROTF.Also WIP.
 
Very good work Grant. The beveled surfaces really look very good. As to the size of the cleats I can't say much, but so far you have shown to have a great eye when it comes to these things, so all faith in you!
 
Good morning. I decided to make the top foremast base and the column support. To get to what I showed in previous post, each base and column has slightly different mods to fit theIr respective crosstrees. Once fitted all will look the same and something more authentic.......I hope ROTFI will still have to make faux mast blocks below each crosstree. All three in WIP:
View attachment 294579

I also decided to make the main mast Main yard. My first problem- no one 8mm dowel was long enough. I then decided to cut all my dowels for each yard on the plans- it was quite a mathematical experience to get enough yards from the dowels provided- short one 5mm for one of the mizzen booms- I wrapped per mast:


View attachment 294580

Making the main yard- I had to join two 8mm dowels, add a little bit extra. Wood glue and then made per plan. The only extra I made are the two cleats and beveled the edges as in Goodwins drawing:
View attachment 294581
View attachment 294575View attachment 294574View attachment 294577
The two cleats I made from 2mm birch and shaped with exacto blade and needle files. Dry fitted. The most difficult thing is getting the scale of the extras correct. Tip- buy reference books if one deviates from kitROTF.Also WIP.
I'm really impressed with the way you constructed the yard bevels; wish I had done that on my HMS Fly.
 
Good morning. Worked on my main yard- added some “yard bands” , made the spar brackets, and followed instructions re the stirrups and spars. Tapered the spars and Painted per picture below. Contrary to instructions I set the spars off at an angle from the horizontal As can be seen picture.

68ACA12C-6C4F-4981-8A71-4CFB09FB598B.jpeg
I did not fix the Spars or bind them as this will make adding the blocks etc more difficult.

The result- I still need to lightly brush this with paint and Matt poly so it is uniform in paint shades. I also added the stirrups to the bowsprit yard.
AB74A3E1-EFA9-4372-B773-3A0DE657C9BD.jpeg
 
You seem to be working with a fixed goal in sight and that always make things easier. I am glad to see that you are not second-guessing yourself in an attempt to accommodate the variety of alternatives that are available. Set a course and pursue it!
 
Geez Grant, spaghetti junction!

1646700711698.png

It seems as though you are on the right track though, and staying one step ahead. Steady as she goes I guess, and remember that when eating an elephant, just take one bite at a time :)
I'm getting tangled in the rigging of my Bluenose as we speak, but this is next-level stuff. Good luck! Thumbsup
- Mark
 
You seem to be working with a fixed goal in sight and that always make things easier. I am glad to see that you are not second-guessing yourself in an attempt to accommodate the variety of alternatives that are available. Set a course and pursue it!
Good morning Heinrich. This I attempt to do, however it is a variable plan and not by designROTF. Each section I try and keep with the thread of what I have already done and adapt each to my ability, resources and some research. I must admit I really enjoy making extras and redesign the kit to fit more in line with the real ship.
 
Back
Top