Ahh Thanks Heinrich. Yep Daniel and Paul do outstanding work-use their builds often as a reference of what I would like to achieve one day. Learnt so many lessons building this ship. First and foremost is review the kit. Ropes and blocks make a huge difference and I will never buy a kit where I have to dye the ropes again. It does change the texture and is a mission to do. I will not make ropes however there are some great quality ropes to purchase. Cheers GrantGrant that is excellent work! If those loops and lashings are not perfect, they must be "oh so damn close" that no one will notice a difference. If you had used @Daniel20 Daniel's or @dockattner Paul's rope on that, it would be unbeatable. And on the mast itself, it looks great!
-

Win a Free Custom Engraved Brass Coin!!!
As a way to introduce our brass coins to the community, we will raffle off a free coin during the month of August. Follow link ABOVE for instructions for entering.
-

PRE-ORDER SHIPS IN SCALE TODAY!
The beloved Ships in Scale Magazine is back and charting a new course for 2026!
Discover new skills, new techniques, and new inspirations in every issue.
NOTE THAT OUR FIRST ISSUE WILL BE JAN/FEB 2026
You are using an out of date browser. It may not display this or other websites correctly.
You should upgrade or use an alternative browser.
You should upgrade or use an alternative browser.
HMS Victory Mantua 1:78 (first build) by Grant Tyler [COMPLETED BUILD]
- Thread starter GrantTyler
- Start date
- Watchers 102
Hey Grant! good looking rigging, tight and clean. If you ever do figure out how to trim the rope tails satisfactorily let me know, it's something I still struggle with.
Wow, that will be a fantastic painting. Something to admire for years.OH - my Mom sent me this picture to show me what sort of Victory she will paint for me. She leave to go back to Durban today- was super amazing to spend a week with her.
View attachment 301561
Hey Grant. I think your rigging work looks fantastic. Keep in mind you are taking some really close-up pictures so you are seeing things that are not visible in the 'real' world. What are the 'little tags' you are referring to? Do you mean the end of the rope that sticks out from the seized area? If so, before you try to cut it stiffen the rope end with a bit of CA - let it set - then cut the end with a tiny scissors perpendicular to the rope. Or maybe you mean something else?
Hello Paul- correct those are the “tags”- thanks for this advice. The cutting perpendicular is what I’m not doing. I will give it a go next time. Cheers GrantHey Grant. I think your rigging work looks fantastic. Keep in mind you are taking some really close-up pictures so you are seeing things that are not visible in the 'real' world. What are the 'little tags' you are referring to? Do you mean the end of the rope that sticks out from the seized area? If so, before you try to cut it stiffen the rope end with a bit of CA - let it set - then cut the end with a tiny scissors perpendicular to the rope. Or maybe you mean something else?
Hey Paul- I wish. She is still going to paint it, just sent me that picture as a reference as she will do something similar.Wow, that will be a fantastic painting. Something to admire for years.
Good afternoon. I realized I did not post the fitting of the Mizzen topmast and top gallant. I did this prior to my Moms visit. It is Something I regret doing as it would have been easier to fit all the many blocks and rigging off the ship. Rookie exuberance and enthusiasm.
It was a challenge as I did cut the topMast at the cap (as shown previously) in order make the octagon where it fits into the tressel trees and modifying the kit build to achieve this.
I used a sprit level, plum line (homemade) to get it into line. All came out better than expected other than the 3 degree rear offset. Mine is 2.4 degrees- Not going to really notice it- my uncalibrated eyes (to use @Vfordyce term) tell me .
.
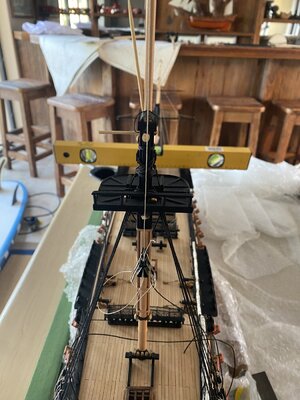
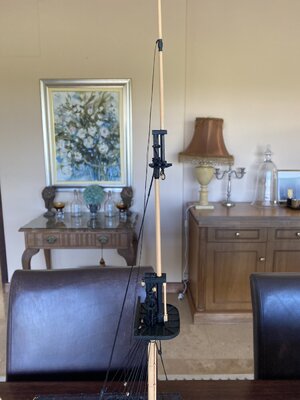
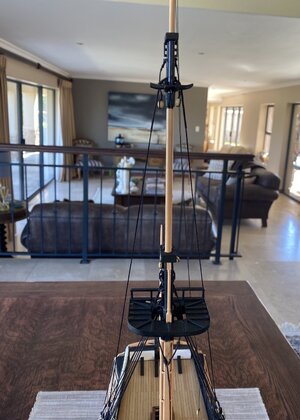
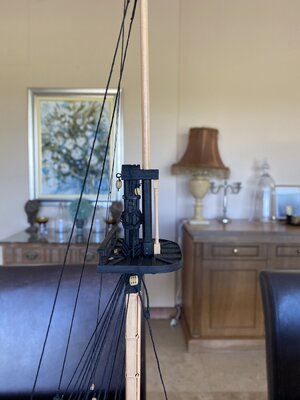
Cheers Grant
It was a challenge as I did cut the topMast at the cap (as shown previously) in order make the octagon where it fits into the tressel trees and modifying the kit build to achieve this.
I used a sprit level, plum line (homemade) to get it into line. All came out better than expected other than the 3 degree rear offset. Mine is 2.4 degrees- Not going to really notice it- my uncalibrated eyes (to use @Vfordyce term) tell me


Cheers Grant
nice!Good afternoon. I realized I did not post the fitting of the Mizzen topmast and top gallant. I did this prior to my Moms visit. It is Something I regret doing as it would have been easier to fit all the many blocks and rigging off the ship. Rookie exuberance and enthusiasm.
It was a challenge as I did cut the topMast at the cap (as shown previously) in order make the octagon where it fits into the tressel trees and modifying the kit build to achieve this.
I used a sprit level, plum line (homemade) to get it into line. All came out better than expected other than the 3 degree rear offset. Mine is 2.4 degrees- Not going to really notice it- my uncalibrated eyes (to use @Vfordyce term) tell me.
View attachment 302699View attachment 302700View attachment 302701View attachment 302702
Cheers Grant
It is Something I regret doing as it would have been easier to fit all the many blocks and rigging off the ship. Rookie exuberance and enthusiasm.
Great pictures Grant, it's all coming together very well indeed. Totally commiserate with you on the sequence of things when it comes to rigging. My Bluenose II instructions were very clear on the sequence of steps to complete the deck and hull but entirely unclear on the rigging sequence. I was largely guided by the advice in Mastini's Ship Modelling Simplified and perhaps lucky to fit all the mast hardware before stepping them into the hull. But there are many ways to skin this cat, and consider how much knowledge and experience you can now take to your next build

Wow
WOWBy the way, I'm sure you've heard about the rain floods that have hit KwaZulu-Natal! My Mom lives on the South Coast and there are shipping containers floating down the N2 motorway
Good morning Mark. Thanks for your comments. The floods are insane- my younger brother lives in Umdloti and they have been evacuated. They had to use alternative transport as their road had collapsed. The new estate above them basically slid off the hill- houses and all.2 bridges on the N2 have been completely washed away, no power in some areas. Yep crazy. All OK tho.Cheers GrantBy the way, I'm sure you've heard about the rain floods that have hit KwaZulu-Natal! My Mom lives on the South Coast and there are shipping containers floating down the N2 motorway
Eish- I saw a video of some of these floating along the freeway....It all happened in 2 days of rain. So many pics of damage and loss- going to take a while to get back to normal in KZN. CheersSorry for hijacking your build pages Grant, but you said your Mom lives in Durbs, I trust she's okay?
Shipping containers floating down a motorway, not something you see every day...
View attachment 302776
Hope your Mom is all Ok Mark.By the way, I'm sure you've heard about the rain floods that have hit KwaZulu-Natal! My Mom lives on the South Coast and there are shipping containers floating down the N2 motorway
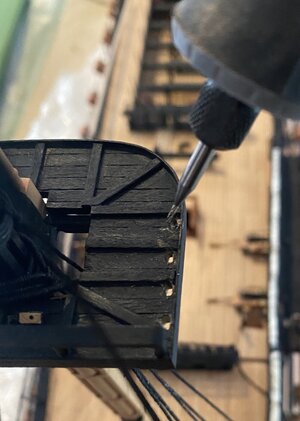
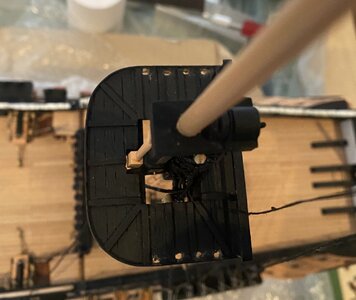
Good morning. When I woke this am, I needed to do something other than blocks and rigging...(and I have just started  ). Decided to make the sleeves for my Mizzen top strops-as with the other masts I had to make these larger and more rectangle in shape to fit the brass blackened strops.
I drilled a larger hole and attempted with needle files as per the main and foremast - was going to break the crows nest. (Tip- never fit a mast until prep work completed) I put my “big girl panties” on and followed @Vfordyce example- used my dremmel tool with a small engraving tip. Came out ok however not as neat or linear as the other masts. Luckily the dead eyes will cover.
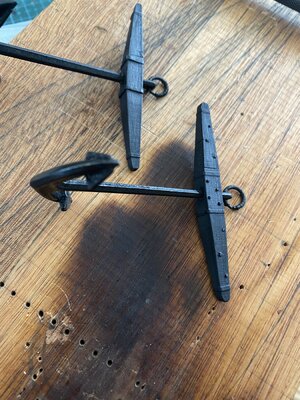
I started adding the “tree nails “ to the anchors. Used 6mm brass and left small amount protruding so they would be visible- painted.
Cheers Grant
I drilled a larger hole and attempted with needle files as per the main and foremast - was going to break the crows nest. (Tip- never fit a mast until prep work completed) I put my “big girl panties” on and followed @Vfordyce example- used my dremmel tool with a small engraving tip. Came out ok however not as neat or linear as the other masts. Luckily the dead eyes will cover.


I started adding the “tree nails “ to the anchors. Used 6mm brass and left small amount protruding so they would be visible- painted.
Cheers Grant

Grant, all good thanks for asking. Her house is built on rock, fortunately, and not sandHope your Mom is all Ok Mark.

And you even wrapped the anchor rings with ropes! Good job! Excellent details.


