Revenge by OcCre [COMPLETED BUILD]

Brynes makes a great draw plate for working dowel and sticks down to size needed.

Check the venders list on the home page.
Not having an engineering background I was not aware of the existence of (or the term) "drawplates" until I read your helpful response. I googled the Byrne drawplate but it seems to be aimed at making treenails and has a max size hole of 1.5mm., It is not available in the UK but there are plenty of others ranging in price from £5 to £145 - now I know what to look for. As I only want it for wood I guess the top end model would be a bit underworked. Noting that the Byrne is $25 over there and is commended on SOS I guess that would be be sort of price I should aim for.
I have clocked one with a range of holes 0.5 - 4.0mm which might be useful for my needs.
 
That's the best part of this forum, if you don't know what you need or what it is called, somebody here normally has the answer or a good source for the items.

Maybe on of the good folks from your side of the pond know of a local vender that sell what is needed.
 
Be thoughtful with your shopping. There are two types of draw plates. One is for metal and it is used by jewelers - this kind thins the wire by compression. The other kind is for wood and it actually shaves down the wood strip. The jewelers version is more common and maybe it would work with wood (or maybe not).
 
Gun Tackles.
The OcCre instructions make no mention of gun tackles. The picture below from the kit simply shows the gun carriage free to roam the deck. A basic remedy to achieve credibility would be just to include a breeching rope but this would not be logical if the model is made with the guns run out. A complete gun tackle includes: A block with a hook at one end and a tail loop at the other, a block with just a hook and two ring bolts.
With available components (not built under a microscope) the total length of these bits would be 16mm. The distance between the bulkhead and point of attachment to the gun carriage is about 20mm leaving a 4mm interval for the run of the rope. I have concluded that the essence of a gun tackle is two blocks and a length of rope so I have left out the other bits. I have passed the ends of the strop tied round the blocks through holes in the bulkhead and gun carriage . Pulled though with a drop of glue attaches the blocks. The ends can be cut off flush. No hooks or ring bolts I'm afraid but the tackle rope acquires a realistic run. The result is a token representation of a gun tackle - better than none at all. I may add breeching ropes later when the barrels are added.
The photo below shows work in progress; extensive trimming required.
GunDeck.jpg Gun tackle.jpg
 
Gun Tackles.
The OcCre instructions make no mention of gun tackles. The picture below from the kit simply shows the gun carriage free to roam the deck. A basic remedy to achieve credibility would be just to include a breeching rope but this would not be logical if the model is made with the guns run out. A complete gun tackle includes: A block with a hook at one end and a tail loop at the other, a block with just a hook and two ring bolts.
With available components (not built under a microscope) the total length of these bits would be 16mm. The distance between the bulkhead and point of attachment to the gun carriage is about 20mm leaving a 4mm interval for the run of the rope. I have concluded that the essence of a gun tackle is two blocks and a length of rope so I have left out the other bits. I have passed the ends of the strop tied round the blocks through holes in the bulkhead and gun carriage . Pulled though with a drop of glue attaches the blocks. The ends can be cut off flush. No hooks or ring bolts I'm afraid but the tackle rope acquires a realistic run. The result is a token representation of a gun tackle - better than none at all. I may add breeching ropes later when the barrels are added.
The photo below shows work in progress; extensive trimming required.
View attachment 352804 View attachment 352805
Something is always better than nothing. It gets very difficult to make small details on a small model. You add what detail you can, and then move on.
 
Brynes makes a great draw plate for working dowel and sticks down to size needed.

Check the venders list on the home page.
I have managed to procure a drawplate. While I was searching the web I noticed that they come with various hole shapes so I also bought one with oval holes. I thought that maybe I could knock the rather square blocks that come with the OcCre kit through one of the holes to round them off a bit. No joy: they disintegrated! However, I was able to pass a 3x2mm strip through one of the oval holes to give a rounded profile from which to slicer my small gun tackle blocks. I might try the same process to make some bigger blocks.
I still need my (t)rusty hinge. I wanted to round off the ends of the 4x4mm strips used on Revenge for gunwale railings. The instructions imply that they are just cut square and glued to the gunwale and rail but I thought they would be a bit vulnerable - I can be a bit clumsy at times. The largest hole in my drawplate is 2mm so I used my hinge to round a short section to 3mm. The railing posts now sit firmly into 3mm holes drilled in the top of the gunwale.
The photo below shows the drawplates, a rail post bashed into my hinge, a length of rounded 3x2 strip and a gun tackle block. The railings on the model are in the background.
Drawplate.jpg
 
Wale Spacing
This model has quite a lot of wales on the upper part of the hull. Their positions and spacings are governed by the upper and lower limits of the gun ports, the width of the decorative strips provided in the kit and the location of stern gallery and beak head. Unfortunately, some of these constraints mutually conflict. In particular, the two aftermost gun ports of the upper gun deck do not lie on a smooth curve with those further forward. This is odd because they were cut in positions consistent with the holes in the plywood formers in the kit that were added in a non-negotiable position on the bulkhead structure.
To sort all this out I temporarily pinned some wales to the hull that I could tweak. I used some spare deck planking of appropriate widths but thinner and more flexible than the 2mm thick walnut strakes that will form the final assembly. The picture below shows the best compromise I could reach. I shall have to lower the bottom edges of two gun ports: a bit tricky as they are backed by an attachment to receive the false cannon. I must make sure I don't dislodge it!
There are two more wales below those in the picture but they are not decorated and the lower gun ports align well - so no problems there.
Wales.jpg
 
I would take a look at the HMS Victory by Victory Models and compare where the gunports and wales should go. Your problem appears to be an incorrect template design for the gun port locations. I can see your gun ports on the upper deck do not flow along a consistent curve, following the position of the deck itself. This is a tough problem to solve, as it requires that you reposition some of the gun ports to create that smooth curve. Luckily, you have not applied final planking yet! You can shim the upper or lower edge of a gun port and remove first planking material at the opposite edge of the gun port to adjust their vertical position. Fixes like this are a pain, but absolutely necessary.

As for the wales, a beginner might assume that they are supposed to be parallel to each other along the hull. Not true. They often diverge as you move aft, usually in a subtle change. Also, they wales do not follow the lines of the decks. They go their own way. On larger three gundeck ships, gun ports will occasionally interrupt the line formed by a wale, and a false wale section is actually attached to the outside that particular gun port cover, so when it's closed, the line of the wale appears uninterrupted.

Also, different kits interpret the same ship differently. You would think that a kit would have all the kinks worked out, but this is often not the case, and you are forced to modify or scratch build certain features and base them on your own research. Kits are frequently wrong on a few features, and part of building in knowing when to depart from the instructions and build based on research. This comes easier with experience, and the new builder is usually terrified to do anything different from the instructions. NEVER be afraid to question the instructions in a kit and improve on details within your skill level.

Victory Models HMS Revenge
1639-9299-HMS-Revenge-Model-Ship-Kit.jpg.webp


OcCre HMS Revenge
hms-revenge-1.jpg
Agree Kurt, I think the Victory model is a nicer kit and I would say more realistic but then again it's twice the price of the Occre kit in Australia at least.
Both kits are a different shape so without some major mods they are always going to look a bit different.

One of the best references I know of to show the lines is this image

Revenge side (2).jpg


And my effort with the Occre kit which wasn't so much to be super realistic but just to finish the build.

Revenge side view.jpg


Short John Bronze try searching "MATHEW BAKER AND THE ART OF THE SHIPWRIGHT" for some info.
 
Agree Kurt, I think the Victory model is a nicer kit and I would say more realistic but then again it's twice the price of the Occre kit in Australia at least.
Both kits are a different shape so without some major mods they are always going to look a bit different.

One of the best references I know of to show the lines is this image

View attachment 354564


And my effort with the Occre kit which wasn't so much to be super realistic but just to finish the build.

View attachment 354571


Short John Bronze try searching "MATHEW BAKER AND THE ART OF THE SHIPWRIGHT" for some info.
Thanks for the image of Revenge. It will go into my archives as a trustworthy reference. Revenge was always been a favorite ship of mine. Both kits look very attractive in appearance. Which features of the Victory kit strike you as more accurate and desirable (besides the colors scheme)? Please be specific, because I'm a nut for historical accuracy, when it can be achieved, and comparing kits is a lot of fun. I love to window shop and dream!
 
Thanks for the image of Revenge. It will go into my archives as a trustworthy reference. Revenge was always been a favorite ship of mine. Both kits look very attractive in appearance. Which features of the Victory kit strike you as more accurate and desirable (besides the colors scheme)? Please be specific, because I'm a nut for historical accuracy, when it can be achieved, and comparing kits is a lot of fun. I love to window shop and dream!
I had not long completed my first build a schooner which was finished in wood tones with no paint and was deciding whats next.

I wanted a Galleon type ship and was looking through Occre catalogue and the Revenge was the one that caught my eye mainly because of the colours so it would be a bit different and price played a part as well, this was well before I knew about the Revenge story which I find fascinating and now I have a more general interest in history of the era.

The Occre kit has simplified rigging to suit the kit level I suspect whereas the Victory kit has more detailed rigging which I believe is based on this image.

Riggiing.png
I am torn between keeping rigging somewhat simplified and trying to replicate something like this but not sure my skill level is up too it with out a step by step guide.

I do like the Victory version which is a larger scale and more detailed and if I ever finish this one am tempted to give it a go one day.

Short John Bronze I would be interested in your approach as well.
 
Wale Spacing
This model has quite a lot of wales on the upper part of the hull. Their positions and spacings are governed by the upper and lower limits of the gun ports, the width of the decorative strips provided in the kit and the location of stern gallery and beak head. Unfortunately, some of these constraints mutually conflict. In particular, the two aftermost gun ports of the upper gun deck do not lie on a smooth curve with those further forward. This is odd because they were cut in positions consistent with the holes in the plywood formers in the kit that were added in a non-negotiable position on the bulkhead structure.
To sort all this out I temporarily pinned some wales to the hull that I could tweak. I used some spare deck planking of appropriate widths but thinner and more flexible than the 2mm thick walnut strakes that will form the final assembly. The picture below shows the best compromise I could reach. I shall have to lower the bottom edges of two gun ports: a bit tricky as they are backed by an attachment to receive the false cannon. I must make sure I don't dislodge it!
There are two more wales below those in the picture but they are not decorated and the lower gun ports align well - so no problems there.
View attachment 354519
Hi to all,
This a typical case of why I always have been hammering " DO NOT INSERT ANY DECKS "be fore the hull, gunports, etc are done. Once the hull is closed with the decks, you will have to make any adjustment -ONLY PROBLEMS- You wind problems with the false gunport and guns, as a bulkhead is in between. I do not have the instruction book, so little more to be said from me, but THINK, RETHING until you find the solution.
when the Lower deck is inserted try to look where the bulkheads are. You may have to cut the bulkhead -giving problem and move it- but only where the gunports are disturbing. the insert a new bulkhead- the seize up the next deck
If I were you, John, I'd remove that first set of planks and place blocks of balsa in the bow and shape them by sanding before you begin planking. As you bend unsupported planked in a sharp curve from the side to the stem, the edges of the planks will often be grossly misaligned. They may be so misaligned that you'll sand right through the hull before the stepped edges disappear. That will really ruin your day.

Also, the planks will assume a hard bend and they pass around Frame #1. That frame will be visible as a vertical bend in the hull. Your hull will look like it has a triangular nosecone instead of one, smooth curve to the stem. WIthout support, any frame that planks curve sharply over will stand out like the ribs on a skeleton after planking and sanding is finished, and you'll have to try disguising that later with many passes of wood filler and sanding. And THAT is a major pain the ass (oh sorry.. Arse! - King's English!). Ask me how I know. I would save you that torment.

Take the time to make filler blocks, and your bow will be glass smooth with little sanding. You'd think by now that all kit instructions would include this basic and important technique. If you want a smooth hull, back the planking in strongly curved areas with balsa blocks. When glued to the blocks as well as the frame edges, the plank edges will be almost perfectly aligned because the curvature of each individual plank will be the same.

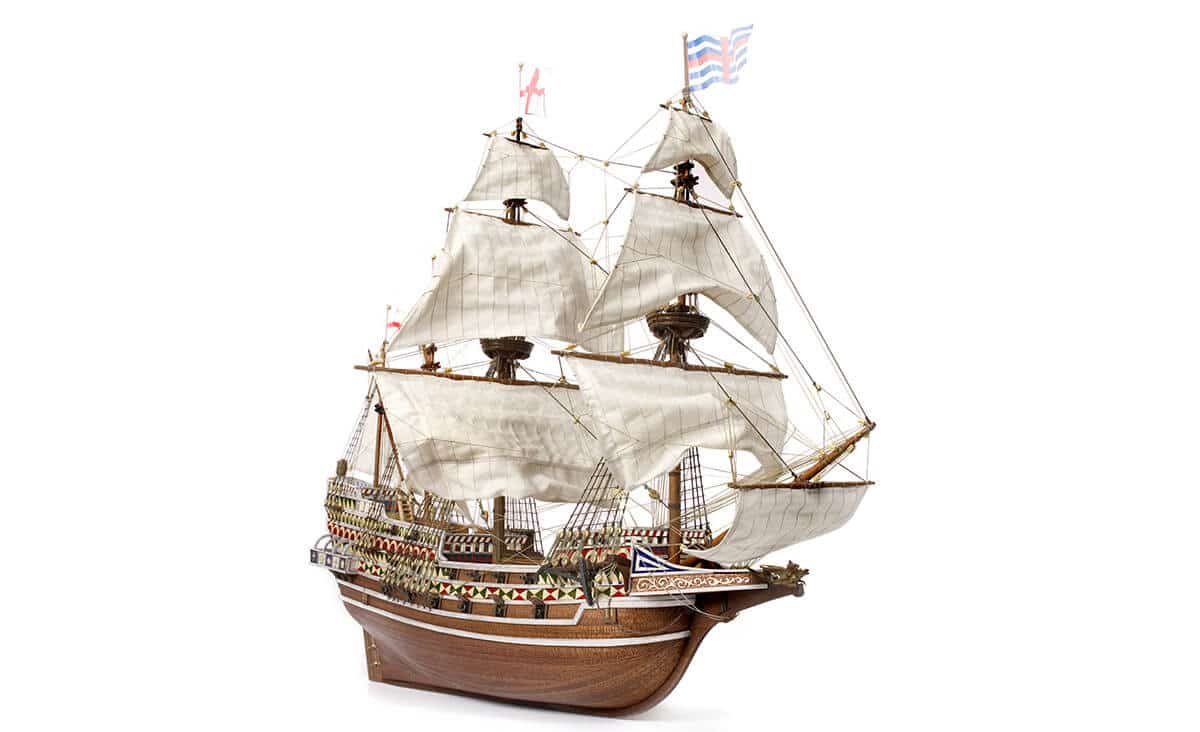
In the example below, the entire hull bottom was fill-blocked and shaped. NOT NECESSARY, but filling the heavily double curved bow area is a must. The OcCre Revenge has ZERO support there, and no two planks will bend the same when you try to bend them to the frames. On the sides you can get away with having less support, but not on the bow.

Invest the time to do it this way. You'll thank me later. ;) Thumbsup
And sorry about the lecture!

From this....
View attachment 340843

to this . . .
View attachment 340846

Required filler to flat spots is MINIMAL.
View attachment 340847

After planking and sanding. Smooth curves!
View attachment 340848
bravo well done. The use of Bowfiller and stern es a MUST. doing it as the images here filing the complete hull, was my way to do perfect planking. The fillers between the bulkhead, I made the up to 2-3 mm below the lower the gundeck. I used another type of filler -some like the daughter others the mother, I like them both. This method make you a lower gundeck, so one can make real gunports and insert full gun and not the dummy gun- do not insert more decks before you are finished with the hull. Then the next deck-insert gunports and guns and other important things to do before it is closed with the next deck. it gives some extra work, but is worse wile.
 
Thanks for the image of Revenge. It will go into my archives as a trustworthy reference. Revenge was always been a favorite ship of mine. Both kits look very attractive in appearance. Which features of the Victory kit strike you as more accurate and desirable (besides the colors scheme)? Please be specific, because I'm a nut for historical accuracy, when it can be achieved, and comparing kits is a lot of fun. I love to window shop and dream!
If it is Revenge, build it as Revenge and not Vitctory
 
I had not long completed my first build a schooner which was finished in wood tones with no paint and was deciding whats next.

I wanted a Galleon type ship and was looking through Occre catalogue and the Revenge was the one that caught my eye mainly because of the colours so it would be a bit different and price played a part as well, this was well before I knew about the Revenge story which I find fascinating and now I have a more general interest in history of the era.

The Occre kit has simplified rigging to suit the kit level I suspect whereas the Victory kit has more detailed rigging which I believe is based on this image.

View attachment 354579
I am torn between keeping rigging somewhat simplified and trying to replicate something like this but not sure my skill level is up too it with out a step by step guide.

I do like the Victory version which is a larger scale and more detailed and if I ever finish this one am tempted to give it a go one day.

Short John Bronze I would be interested in your approach as well.
I too had trouble deciding between the Victory model and the OcCre. I chose the latter mainly because it is a bit smaller and I am fast running out of permitted locations in the house for mooring my fleet. Also, I like and trust OcCre kits - see earlier comments. I was a bit dubious about all the prominent white wales (Moby Dicks?) but having seen the images posted by Richie I decided to press ahead. Having stained the hull rather dark the alternative of painting the wales black (like the Victory model) lost its attraction. I drew the line at painting the gunwale white and have so far left the walnut bare. It seemed a bit illogical to paint a surface that would be constantly scrambled on and have ropes hauled over it. I agree that the colouring and detail on the Victory model is more appealing. Perhaps I may repeat an earlier statement I once posted. My personal enjoyment of ship modelling comes from from the building process: working with wood, acquiring tools and techniques, solving problems etc. Historical accuracy and the the finished models are of secondary interest.
From general interest, previous builds and reference materials I think I understand what all the rigging ropes are for and how they work - I can even name some of them! I think I understand the elaborations shown in that splendid image posted by Richie but I probably won't try to emulate them. I had by fill of those crows feet (the right term?) structures when rigging Vasa: Getting the tension right on all those lines radiating from a single block was tricky.
 
If it is Revenge, build it as Revenge and not Vitctory
Victory in this case is referring to the maker of the other model not the actual ship.
Amati Models - Revenge 1577 - Victory Models by Amati
 
My personal enjoyment of ship modelling comes from from the building process: working with wood, acquiring tools and techniques, solving problems etc. Historical accuracy and the the finished models are of secondary interest.
I think this is the level I am at too.
 
I too had trouble deciding between the Victory model and the OcCre. I chose the latter mainly because it is a bit smaller and I am fast running out of permitted locations in the house for mooring my fleet. Also, I like and trust OcCre kits - see earlier comments. I was a bit dubious about all the prominent white wales (Moby Dicks?) but having seen the images posted by Richie I decided to press ahead. Having stained the hull rather dark the alternative of painting the wales black (like the Victory model) lost its attraction. I drew the line at painting the gunwale white and have so far left the walnut bare. It seemed a bit illogical to paint a surface that would be constantly scrambled on and have ropes hauled over it. I agree that the colouring and detail on the Victory model is more appealing. Perhaps I may repeat an earlier statement I once posted. My personal enjoyment of ship modelling comes from from the building process: working with wood, acquiring tools and techniques, solving problems etc. Historical accuracy and the the finished models are of secondary interest.
From general interest, previous builds and reference materials I think I understand what all the rigging ropes are for and how they work - I can even name some of them! I think I understand the elaborations shown in that splendid image posted by Richie but I probably won't try to emulate them. I had by fill of those crows feet (the right term?) structures when rigging Vasa: Getting the tension right on all those lines radiating from a single block was tricky.
If you work from rigging diagrams and rig one model, and use RC Anderson's book to help you, you'll know the names of all the lines when you're done. Rigging your second model will be much easier to understand.
 
Back
Top