Constructo 1799 Enterprise help

Planking problems:

I’m having difficulty attaching the second planks. I’m thinking that I overdid the “sealing” of the first planking. I’m using Titebond II glue,covering both hull and the plank. The bonding of the two is not going well.
View attachment 36877

I’m going to try to rough up the initial planks with a rasp to see if that improves the glues bonding.

Try washing the hull off with cellulose thinners while scrubbing with a fine wire wool and do that several times. That should cut it back, BUT don't absolutely soak it with thinners or you may affect the gluing of the planks you are working on.
 
Last edited:
Paint Colors:

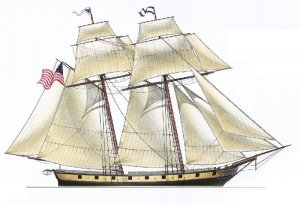
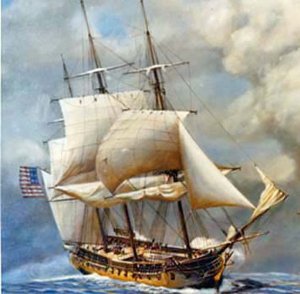
Thinking ahead I'm wondering what the color of the paint was on the Enterprises hull. Was it similar to the USS Constitution and those types of Frigates??
 
Last edited:
Hello Pathfinder,the rudder snd hinges are looking great,are you going to blacken the hinges?

Zoltan

Hi Zoltan,

I’m trying to find out what colors the hull was painted. Those colors would include the rudder. Searching the Internet I’m finding a lot of paintings and engravings, but not much help as far as a paint scheme. The local library here has a lot of information on the battle between the HMS Boxer and the USS Enterprise during the 1812 war. I’m planning on going there next week to see if I can find more information.
 
Last edited:
Argh, Planking:

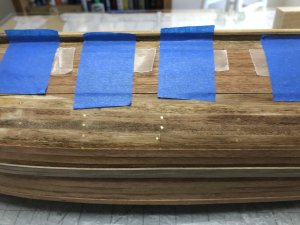
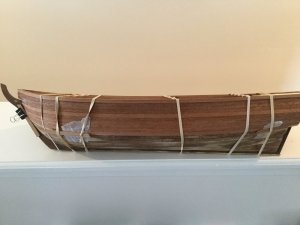
Hmm, getting there one plank at a time. Found another innovative way to hold planks while the glue sets.

4D315744-F3F3-4448-A6F7-9EA0F57638A9.jpeg

I’ve been brushing glue onto the hull and the planks. Waiting five or so minutes, then wiping down the the area with a wet cloth, then placing pieces of wax paper on the plank and holding it all down with 3M painters tape. My method for gluing is to do half of the plank at a time, middle of the hull to the stern and then middle of the hull to the stem.

That method has solved my problem of before, where the planks would not adhere to the hull. I was trying to glue down the planks the entire length of the hull and the glue would dry before I got the plank positioned.
 
As I know it is historical correct, due to the fact that the ships of the US navy with USS had all the yellow painted band(s) at the level of their gunports.
So it would be like your examples of your photos 1 to 3. photo 4 is showing a different color scheme with some lighter wooden color and yellow stripes, is it also a navy ship?

I believe the ship in that photo is a replica. It is the Lady Washington. More Information is available at

https://en.m.wikipedia.org/wiki/Lady_Washington
 
Last edited:
Mike and Uwek thank you for your like.

What have I've learned.

Hull planking.

Have a lot of clamps available.
Have a package of wide thick rubber bands available.
Have a roll of wax paper available.
Have different grit sandpaper handy.
Dry fit the plank.
Measure twice and cut once.
Dry fit the plank again.
Spread glue on the hull as well as the plank. Let the glue set slightly and place plank. Wipe plank from stem to stern with a wet/damp cloth using a bit of pressure. Make sure the new plank buts up against the last one.
Theres no need to hurry, do a couple of planks at a time and find something else to do. Let the glue set and dry.
Wax paper works good between the planks and clamps. It allows for some odd angles to hold planks in place at the stem or the stern as well as where the hull curves down.
Glue slightly diluted and placed on the areas where there are gaps between the planks and then sanding that area fills in the gaps nicely.
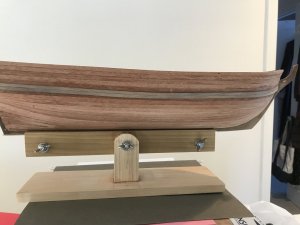
Take pictures of the hull as planking progresses. A good resolution closeup shows where more work is required.
Last but not least, patience and working slowly one plank at a time has its own reward.
 
You have learned already a lot with only one side of the hull planked.
Congratulations for this experience.
And I have to say, that your result is realy good.......Great work
 
I have to tell you, that my first work on planking of a ships hull was realy terrible.....i have it still, my half finished hull......terrible.....but your looks realy good
 
Some great tips on planking, I find it difficult not to rush things, I like to see progress each time I work on any build, so I must learn to slow down with planking,
Cheers Andy
 
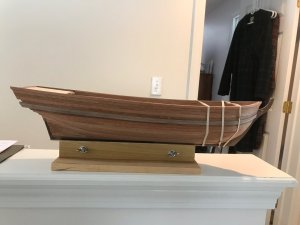
Planking,
Using wax paper between clamps to hold planks while glue sets.

313930D2-762A-473E-BF11-FBD09A5EA37C.jpeg

The wax paper prevents the rubber bands from being glued to hull by any glue squeezed out between planks.

D37EB8F8-2115-451F-BF8C-A5A83D8EC6F1.jpeg

One of several images taken to see where filing, filling and sanding would be required.
 
Back
Top