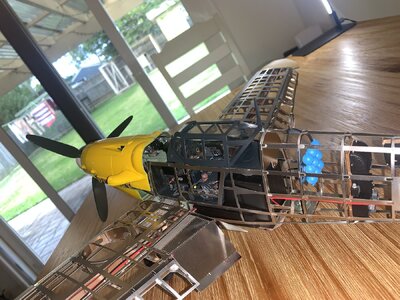
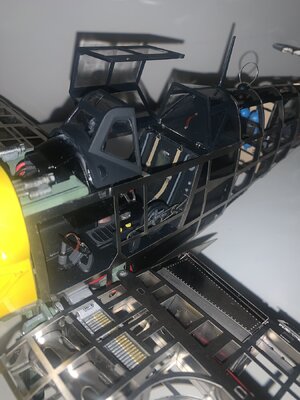
-

Win a Free Custom Engraved Brass Coin!!!
As a way to introduce our brass coins to the community, we will raffle off a free coin during the month of August. Follow link ABOVE for instructions for entering.
-

PRE-ORDER SHIPS IN SCALE TODAY!
The beloved Ships in Scale Magazine is back and charting a new course for 2026!
Discover new skills, new techniques, and new inspirations in every issue.
NOTE THAT OUR FIRST ISSUE WILL BE JAN/FEB 2026
- Home
- Forums
- Ships of Scale Build Logs
- Super Detailing Static Models / Other Genres
- Super Detailing Static Models
You are using an out of date browser. It may not display this or other websites correctly.
You should upgrade or use an alternative browser.
You should upgrade or use an alternative browser.
Artesania Messerschmitt BE 109G [COMPLETED BUILD]
- Thread starter Ken
- Start date
- Watchers 31
-
- Tags
- completed build
Hello Everyone. Again thank you all for the many likes that you’ve given my build, they are all noted.
Yes Ewe, not a single touch of solder has been needed; the design to achieve this is pure genius and has to be experienced to appreciate it.
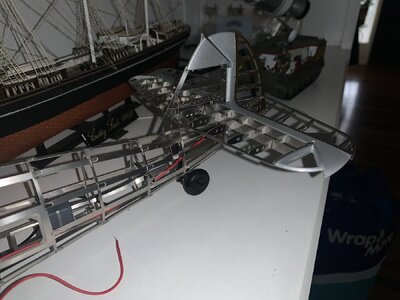
The port wing is on hold at the moment waiting on the wing tip to be delivered. The tip isn’t just added at the end but is an integral part without which you can’t add the upper skins on the ribs. Instead I made up the starboard wing which is now complete; I haven’t shown the progress of this as it’s just a mirror of the port one. The slots/tabs for the top skin all fitted perfectly and no force was needed. Given the large number needed and the fact that they were on a curved surface was quite a feat of design.
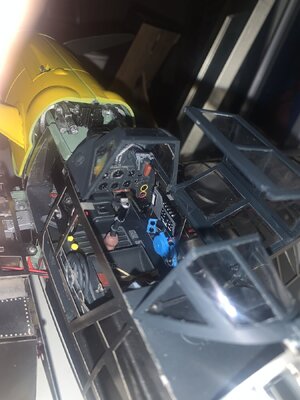
I’ve prepared and painted the canopy, made up the wheels, painted them and added the covers. I put the stand together and I’m very impressed with how aesthetic it looks, it’s very good quality, crystal clear Perspex and is nicely engraved.
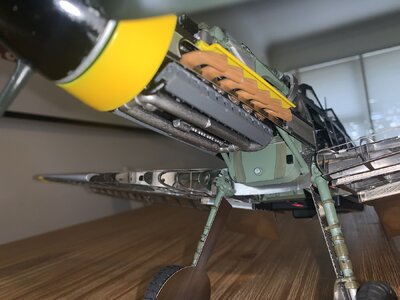
I mentioned that I had a problem with poor paint adherence to the metal surface, almost every time I touched it some would rub or flake off, it was a nightmare. As the engine needs many small painted parts and would need a fair amount of handling I decided it was time to experiment to get it sorted. I knew there had to be a way and it turned out to be not difficult but is time consuming, so the build will now slow down. I found that I first needed to key the surface with about 400 grit, then paint on metal etch primer and leave that untouched for at least 24 hours, previously I’d only been leaving it for about 12 hours. I used Humbrol enamel paints, again leaving 24 hours before the second coat. I am now left with a tough hard surface. I now even find it’s difficult to scrape off where I have over painted areas, so issue solved. I think that water based acrylics must have been too soft for this kind of surface. The picture of the engine is after I had fitted the motor and had just been primed.
View attachment 230138
View attachment 230139
View attachment 230140
View attachment 230141
View attachment 230142
View attachment 230143
View attachment 230144
Hi Ken, I’ve been given the AT 109 for my 60’th bday and am just starting on it. I read all your advice about paint and all the other excellent commentary - thanks so much, inspirational and very useful. I have two questions if you don’t mind. Firstly I’ve never used etch primer, do you have a recommendation for that product? Secondly if you could summarise your experience with the kit in a couple of lines, what would you advise? Richard O.
- Joined
- Dec 16, 2016
- Messages
- 1,211
- Points
- 493

Hi Richard, Congratulations on getting your 109 kit, it’s a unique type of model and I think that you’ll love it, but do get some finger plasters in as you’ll need them. I’m sorry but I can’t help you with advice on the primer, as this was my first metal build and I have no other experience of this type.
Mine was one of the initial kits and it did have one main issue that I believe was common, when complete either the lights or the prop would work but not both at the same time, I had to disconnect one or the other for either to work, so before you seal in the motor connect up everything outside of the build to check that they work. It wasn’t a short circuit, but hopefully that fault has been addressed. The second problem that I had was fitting the circuit board and battery into its housing, check this early as modification will be needed. I can’t remember exactly what I did but I know that the base of the circuit board was cut down and I think that I made modifications to the housing, but It eventually fitted but it was a struggle. Another point to watch out for is to only bend the tabs once, so ensure that they are fully home and correct before you bend as if you straighten and re bend there is a good chance that they will break off, it happened to me often, I kept the tabs and used cyno to stick them in place just for appearance. I ground down a scalpel to the size of a tab and checked that it passed through each slot before I attempted to fit the tabs into place as some were so tight that when you fitted multiple at a time the total resistance caused issues. Be careful when you do the tail wheel area, make sure that you fully understand the instructions beforehand, I made a mistake here and had to re do, my mistake.
You’ll find the fit and the design amazing and a pleasure to build, as I said, a unique model that looks good when built, unlike some models it’s also pretty substantial, I doubt it could ever be broken or attract dust and makes for a nice display.
Enjoy, Ken
Last edited:
Thanks Ken, much appreciated!Hi Richard, Congratulations on getting your 109 kit, it’s a unique type of model and I think that you’ll love it, but do get some finger plasters in as you’ll need them. I’m sorry but I can’t help you with advice on the primer, as this was my first metal build and I have no other experience of this type.
Mine was one of the initial kits and it did have one main issue that I believe was common, when complete either the lights or the prop would work but not both at the same time, I had to disconnect one or the other for either to work, so before you seal in the motor connect up everything outside of the build to check that they work. It wasn’t a short circuit, but hopefully that fault has been addressed. The second problem that I had was fitting the circuit board and battery into its housing, check this early as modification will be needed. I can’t remember exactly what I did but I know that the base of the circuit board was cut down and I think that I made modifications to the housing, but It eventually fitted but it was a struggle. Another point to watch out for is to only bend the tabs once, so ensure that they are fully home and correct before you bend as if you straighten and re bend there is a good chance that they will break off, it happened to me often, I kept the tabs and used cyno to stick them in place just for appearance. I ground down a scalpel to the size of a tab and checked that it passed through each slot before I attempted to fit the tabs into place as some were so tight that when you fitted multiple at a time the total resistance caused issues. Be careful when you do the tail wheel area, make sure that you fully understand the instructions beforehand, I made a mistake here and had to re do, my mistake.
You’ll find the fit and the design amazing and a pleasure to build, as I said, a unique model that looks good when built, unlike some models it’s also pretty substantial, I doubt it could ever be broken or attract dust and makes for a nice display.
Enjoy, Ken
Hi Ken just a quick update - AL must have been listening to you - the tabs and slots fit perfectly so far and they might have burnished the edges of the stainless sheets because I’ve only copped a few cuts. Looks like they fixed a few things. Thanks again for the build log, it’s been useful. Merry Christmas!Hi Richard, Congratulations on getting your 109 kit, it’s a unique type of model and I think that you’ll love it, but do get some finger plasters in as you’ll need them. I’m sorry but I can’t help you with advice on the primer, as this was my first metal build and I have no other experience of this type.
Mine was one of the initial kits and it did have one main issue that I believe was common, when complete either the lights or the prop would work but not both at the same time, I had to disconnect one or the other for either to work, so before you seal in the motor connect up everything outside of the build to check that they work. It wasn’t a short circuit, but hopefully that fault has been addressed. The second problem that I had was fitting the circuit board and battery into its housing, check this early as modification will be needed. I can’t remember exactly what I did but I know that the base of the circuit board was cut down and I think that I made modifications to the housing, but It eventually fitted but it was a struggle. Another point to watch out for is to only bend the tabs once, so ensure that they are fully home and correct before you bend as if you straighten and re bend there is a good chance that they will break off, it happened to me often, I kept the tabs and used cyno to stick them in place just for appearance. I ground down a scalpel to the size of a tab and checked that it passed through each slot before I attempted to fit the tabs into place as some were so tight that when you fitted multiple at a time the total resistance caused issues. Be careful when you do the tail wheel area, make sure that you fully understand the instructions beforehand, I made a mistake here and had to re do, my mistake.
You’ll find the fit and the design amazing and a pleasure to build, as I said, a unique model that looks good when built, unlike some models it’s also pretty substantial, I doubt it could ever be broken or attract dust and makes for a nice display.
Enjoy, Ken
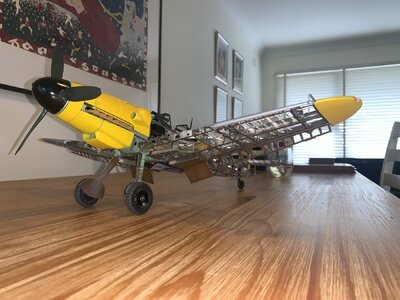
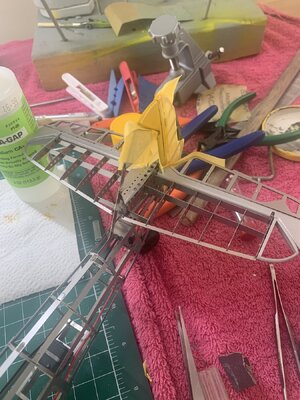
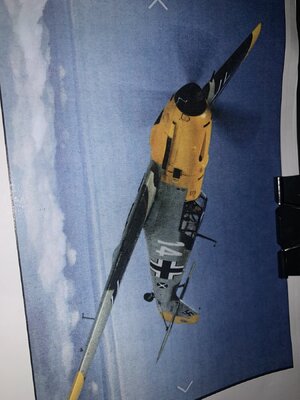
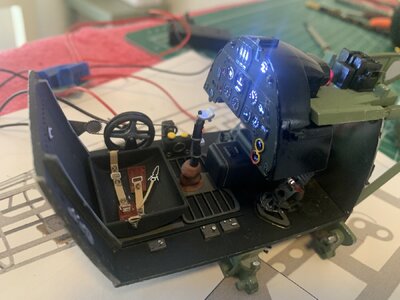
Hi Ken, quick aside - I’ve taken a different twist on this kit. I’m about halfway through and have drawn on your experience with the kit much to my pleasure and benefit. I’ve chosen to model this on the Galland aircraft. I’ve put a picture to show how it’s gone so far.Hello everyone. Thanks again for your likes and comments. It’s officially finished so this will be my final post. I’m delighted with the result, better than I’d expected.
I finished preparing the engine panels ready for painting then had another go at the magnets to get as close a fit as I could. The fit was influenced by the flow of the magnetic field, when in place they moved slightly to align with the natural flow of the field, only a very small amount but enough not to be a tight butt against each other. What I did was remove the magnets from one panel and placed them against the magnets on the other panel and let them find their natural position. I fitted this panel into place, I put a dab of cyno on the opposite panel then fitted that one pressing it onto its magnet holding it tightly into place until the glue set. Now when the panels are put on they settle into the natural pull of the magnets which is tight against each other, I hope you understand that explanation.
The next job was painting. I use an airbrush and for the paint I chose Tamiya acrylic aluminium and for the primer I used Vallejo, again acrylic. I got a good surface but the colour looked wrong, it was light and too bright. I rummaged through my old stash and found a tin of silver Humbrol enamel which must be about 25 years old but after a good stir it looked ok. I’d never sprayed with enamel before, I only ever use it with a brush but thought that I had nothing to loose so I gave it a try. I thinned it with an enamel thinner about 50/50 and gave it two light coats leaving about four hours in between. I was surprised at the result, I ended up with probably the most perfect finish that I’ve ever had, it’s the right shade, not shiny but not matt either, don’t you feel good when you get something exactly right that you hadn’t quite expected.
This has been a very different type of build for me and an enjoyable one. It is a very good kit and Artesania must be congratulated on taking on what must have been a risky and expensive project to give the modeling fraternity something like this.
Anyway this will be my last post, I’m going to now take a short break.
View attachment 233586
View attachment 233587
View attachment 233588
View attachment 233589
View attachment 233590
View attachment 233591
View attachment 233592
My main issue with the kit is that there are a few cast parts that need some management, but this has not detracted from the pure fun of the thing.
Thanks again, next I’ll do a wooden ship, I’ll look forward to drawing on the collective experience of this excellent forum when I start. Anyway here is where I’m at with the AL 109 now.
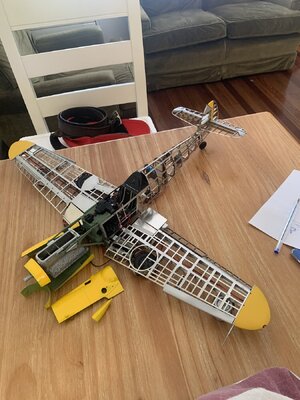
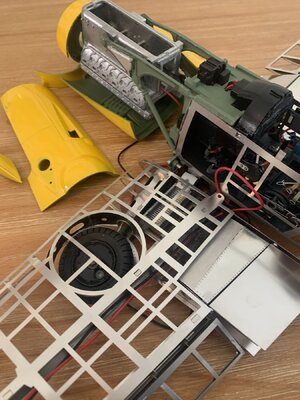
Hello Richard, looks absolutely great. I'm very impressed.
Hallo @Richard OHi Ken, quick aside - I’ve taken a different twist on this kit. I’m about halfway through and have drawn on your experience with the kit much to my pleasure and benefit. I’ve chosen to model this on the Galland aircraft. I’ve put a picture to show how it’s gone so far.
My main issue with the kit is that there are a few cast parts that need some management, but this has not detracted from the pure fun of the thing.
Thanks again, next I’ll do a wooden ship, I’ll look forward to drawing on the collective experience of this excellent forum when I start. Anyway here is where I’m at with the AL 109 now.
we wish you all the BEST and a HAPPY BIRTHDAY

WOW that looks REAL!Hi Ken, quick aside - I’ve taken a different twist on this kit. I’m about halfway through and have drawn on your experience with the kit much to my pleasure and benefit. I’ve chosen to model this on the Galland aircraft. I’ve put a picture to show how it’s gone so far.
My main issue with the kit is that there are a few cast parts that need some management, but this has not detracted from the pure fun of the thing.
Thanks again, next I’ll do a wooden ship, I’ll look forward to drawing on the collective experience of this excellent forum when I start. Anyway here is where I’m at with the AL 109 now.
View attachment 422351
View attachment 422352
View attachment 422353
View attachment 422354
View attachment 422355
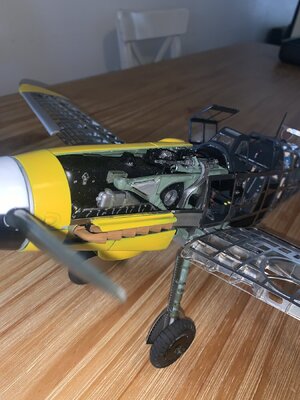
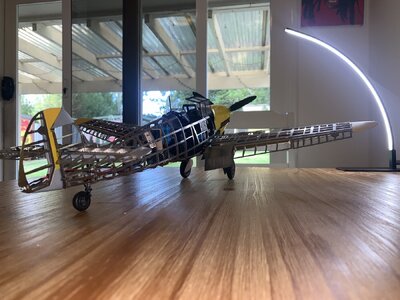
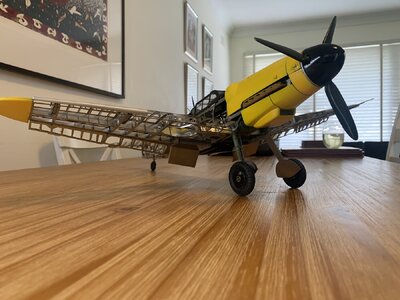
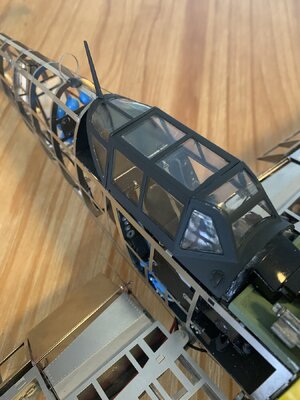
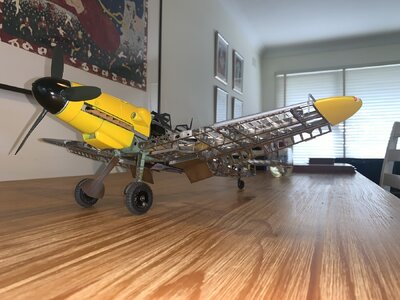
Hi guys, my Galland 109G is done. Best fun as far as modelling goes. The kit generally was spot on but I had to cut and saw a few bits. I suspect they took notes from Ken and straightened out a few bits. Ken, I’ve not got the wiring right yetHi Richard, I like it a lot, it’s got real presence, keep the pictures coming. Ken
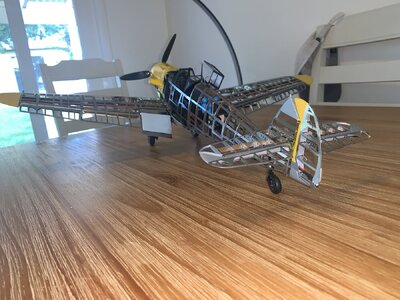
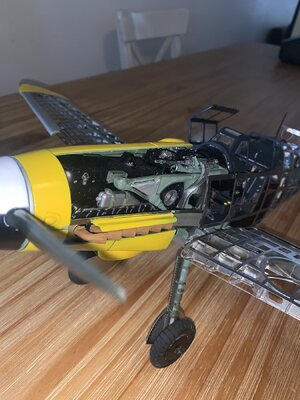
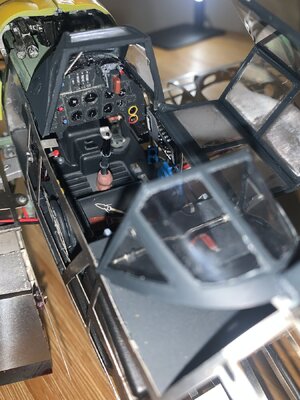
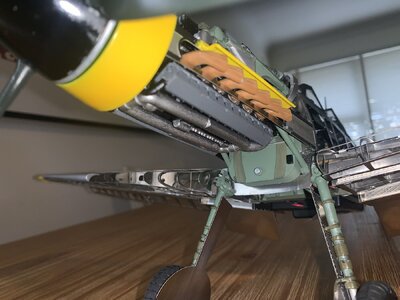
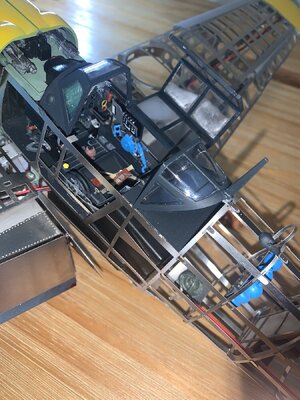
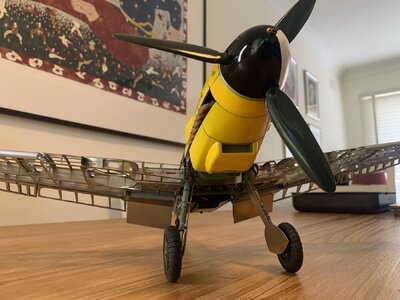
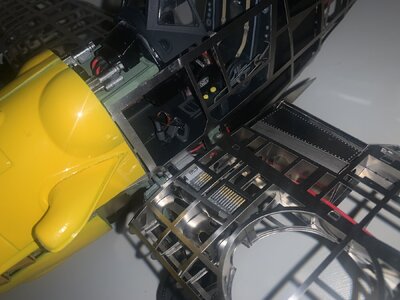
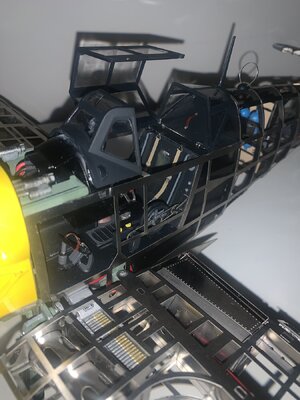
Looks awesome, Richard!
- Joined
- Feb 19, 2023
- Messages
- 168
- Points
- 103

What an interesting kit and building project (build journal)...WOW!Hello. I am about halfway through a build log of a Euromodel kit, HMS Ajax and I’ve decided to take a break from it for a few weeks and do something completely different. I’ve chosen to build the Artesania Messerschmitt BE 109 G, and have been asked to do a build log on it, I was initially reluctant to do so, firstly as this was supposed to be down time and secondly because I have never done anything like this before and at present haven’t a clue about this type of build or fine scaling. You must accept that this build won’t be a very detailed step by step account but rather a sort of progress report on how a complete novice to this type of build manages just following the step by step instructions, all 295 pages of them.
On opening the box I was pleasantly surprised at the superb quality and detail of the photo etch, I have never seen the likes of before. It is made from some sort of steel which I soon learned was like building with razor blades, I need to be very careful and buy some more plasters. The metal cast parts are very good quality with hardly any flash but with good detail. The instructions and part list comes on disc, I’ve printed them out for convenience all 295 pages. I have never seen instructions this detailed before, good for a novice like me, they assume you know nothing and lead you through each part step at a time, even showing you the order of bending the holding tabs when there is a line of them. The whole package instils confidence that you will end up with a successful build.
I had already started before I decided to do this log so the pictures show the early stages of the build. The open frame is held together by tabs on one surface which pass through slots in the part to be joined then bent flat, the accuracy of fit is very impressive. I did have one slight issue and that was some of the slots were a tight fit and as with all photo etch if you use too much force the whole thing buckles and is difficult to get perfectly back into shape again, I did it once on a frame and learned my lesson. To avoid this I slightly opened every slot. The width of a scalpel blade was just right, I filed one to size, covered the handle with heat shrink for grip, to support the thin PE. I cut a slot in a piece of wood laid the PE over the slot and just pushed my scalpel through, it worked a treat and the tabs now pass through easily but are still snug. See photo. The other photos show what’s in the kit and where I’m up to at the moment.
View attachment 225287
View attachment 225288
View attachment 225289
View attachment 225290
View attachment 225292
View attachment 225293
View attachment 225294
View attachment 225295
View attachment 225296
View attachment 225297
View attachment 225291
- Joined
- Feb 19, 2023
- Messages
- 168
- Points
- 103

How much does this model weigh after assembly?Hi - done the Galland version - hope you like it!
View attachment 444046
View attachment 444047
View attachment 444048
View attachment 444049
View attachment 444050
View attachment 444051
View attachment 444052
View attachment 444053
View attachment 444054
Hi! Good question, I'm guessing but I'd say maybe 2KG? Very nose heavy with that lump up front! I'll see if I can measure the weight tonight.How much does this model weigh after assembly?


