Gunboat Philadelphia 1776 POF, Pseudo Admiralty Style... from Smithsonian Plans

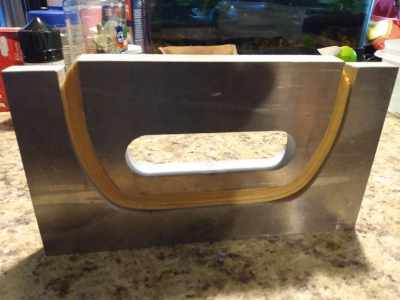
I'm now working on the frames. To simulate the look of hand hewed framing timbers I'm laminating 9 pieces of 1/32" Basswood together and bending the frame components to a rough shape. I start by bundling 9 pieces of 1/32" strips together and soaking them in hot water for 15 minutes.
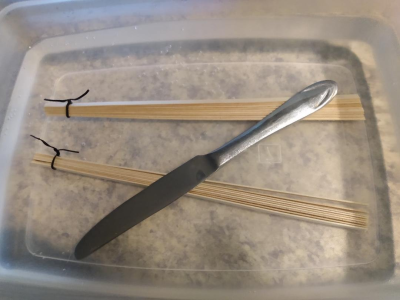
1744565734748.png

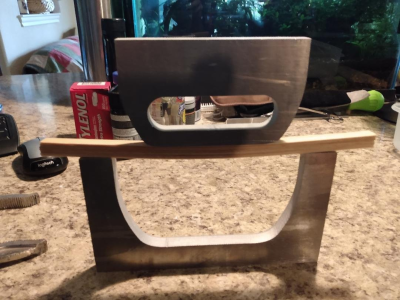
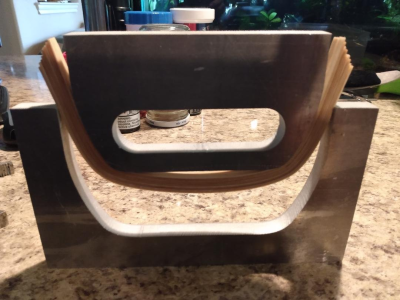
I then remove the wire ties and lay the strips atop my form, centering them via eyeball. The strips are well oversized so there is room for error when centering. The fixture will hold two sets of frames at one time. No glue has been added to the strips. That comes later. I'm bending nothing but loose, wet wood.
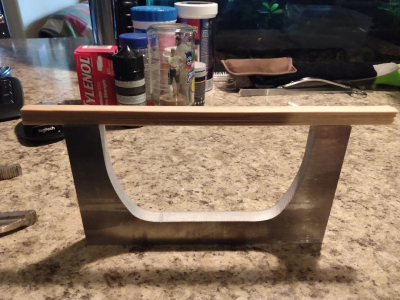
1744565879627.png

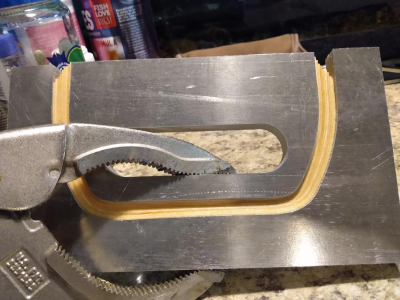
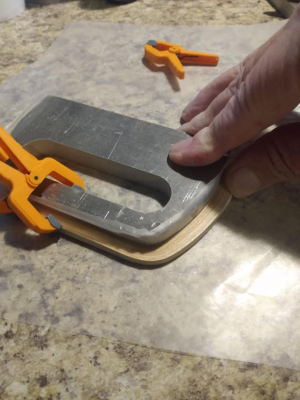
I then add the follower atop the strip bundles and center it up via eyeball. With everything centered, I start working the follower down by hand until I can't move it any further... then I use a vise grip to finish the job and compress the strips tightly between the two forms.
1744565922746.png
1744565951646.png
1744565970363.png
1744566021805.png

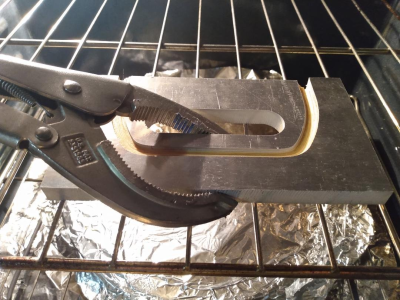
I then bake the form and wood in the oven @ 210 degrees for a while, until mostly dry, then let everything come down to room temperature.
1744566080449.png

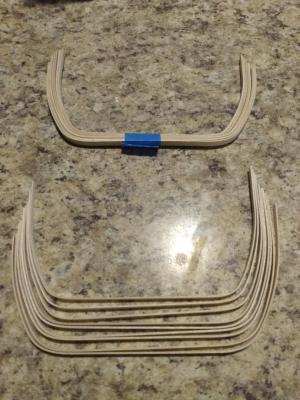
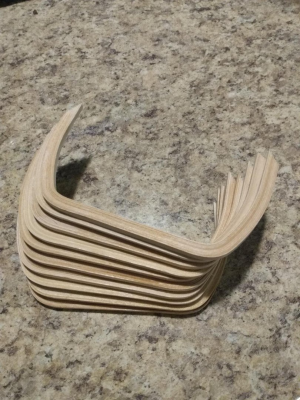
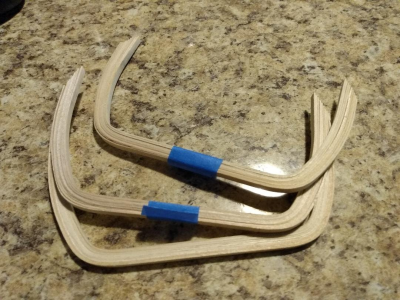
When cool, this is what I have. I tape the bundles together and put them aside. I won't do anything else to them until I have all of the boat's mid-sections of 18 sets of frames bent. I'll then return these bent frames to the form and start gluing them up.
1744566136776.png
 
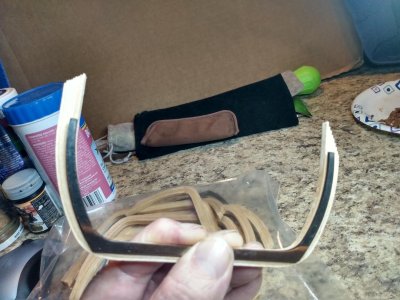
Here are the 9 ply frames after being bent around a form. The individual components hold their shape really well, however. There is about 1/16" of spring back on each vertical leg. I keep the bent frames in their respective bundles until time to glue them together.

1744566251800.png
 
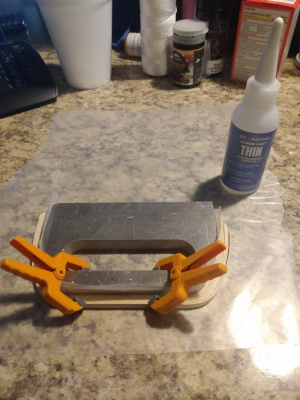
I start by gluing the flat bottoms together. I clamp the pieces in place around the bending form and then simply squirt CA over the laminations letting the resin soak in.
1744566352141.png

I then pull the laminations around the form and glue the rest.

1744566388578.png

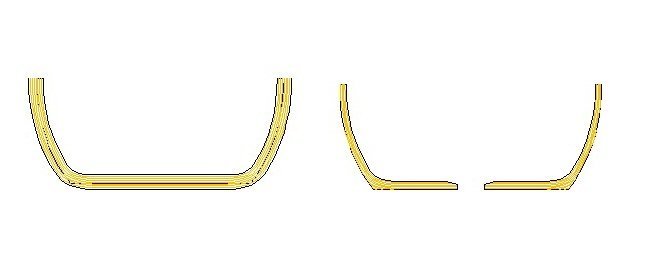
This is what I have after the frames are glued together. They are quite solid! Each one of these pieces will make two frame members. I'll need 36 individual frames for the mid-section of the gunboat. that will be 18 of the laminated pieces shown below.

1744566611754.png
 
Those laminated "U"-channel shapes will be cut and sanded to their final shapes as shown below. I currently have 10 of the "U"-channels glued up and I need 8 more to complete the mid-section. I'll then need to cut the bottoms flat on a table-saw and make a sanding fixture for finishing the sides. The 'inside' geometry of these frames will not change. It's only the outer geometry that I have to whittle away to final shape.

Finished Frame 13~30.jpg
 
My fingers have a hard time making the Love Button work but I LOVE everything about this project! I have been fascinated by the Valcour Island/ Saratoga Campaign ever since reading Kenneth Robert’s great book Rabble in Arms as a teenager. Later, when stationed at Main Navy on Constitution Avenue near the Smithsonian Museum of American History I enjoyed visiting the actual Philadelphia during time off.

Your workmanship is to a high standard and it’s great that your replicating the vessel’s actual construction. The Model Shipways kit does not.

A couple of questions:

First, what scale?

Second, Do the Smithsonian drawings include such details as the location of butt blocks and limber holes?

I’m looking forward to following your progress.

Roger
 
VERY nice to see something a bit different, thanks for sharing. FWIW there was a step and recessed area of the deck on the Philadelphia deck, so the planks did not run from bow to stern. The recess is in the area of the mast. Not sure if you have studied it, but the Smithsonian National Museum of American History has a digitized viewing of the actual boat that shows this that you might find useful.

Allan
 
First, what scale?

Second, Do the Smithsonian drawings include such details as the location of butt blocks and limber holes?
Hello Roger!
The scale is 1:24 and yes. The Smithsonian drawings are very detailed and complete. I took the size 'and' the location of the limber holes 'and' the dimensions and locations of the butt blocks from those drawings (thickness of the butt-blocks is there too). The drawings go so far as to show the actual dimensions of the planking strake widths and those of the framing members. You may not be able to notice by the naked eye, but the flooring timbers and frames both maintain the same height, however. They vary in thickness. I'm going to great pains to mill those individual members to the same scale dimensions. Very time consuming but what the heck. If anyone from the Smithsonian ever wants to put their calipers on my models' components, I want the numbers to be correct as per their drawings, lol.
 
FWIW there was a step and recessed area of the deck on the Philadelphia deck, so the planks did not run from bow to stern.
Hello Allen, and thanks for chiming in.
What you are looking at in my build log is not the deck. It is the flat bottom of the boat. I have a long way to go before I get to working on the deck(s).
Yes, I have a link to the 3D boat and lots of other museum related 'things' to use for reference.
 
Philadelphia is the best documented ship I have ever seen. The Smithsonian plans will set you back, but there are no missed details what so ever. I've been meaning to build a 1/48 scale from scratch to get me past the complications of all the different lumber sizes at 1/24". Best of luck! I will watch with interest, looks like you are off to a good start. I was wondering about the best way to build the bottom. I think I have the frames drawn up in Illustrator somewhere to load into a laser cutter if you want to cheat.
 
Armed with a few books, a good set of drawings from the Smithsonian, a set of calipers, a calculator and a brand-new box full of wood sheets and misc. sized strips of wood desperately wanting to become something of interest... I hereby declare this new build log as being ready and "Go for Launch!"

Please be forewarned. The Gunboat Philadelphia was hastily built, and in such... a lot of traditional practices typically observed in Navel Architecture were not utilized in the construction processes of this vessel, nor in the construction of her seven sisters. Haste was the "Order of the day" and 'time was of the essence'! Corners had to be cut, and 'cut they were'! If you see something that does not seem quite right in my build, well... you are probably correct! I'll be building this model just as its real life counterpart was 'actually' built, not how such a boat really 'should have' been built back in 1776. These gunboats simply were not built in tradition ways, nor were they built to last. They were built solely for a specific and temporary military purpose... and nothing else!

I'll be building this as a 'Navy-Board' style model. It will have full masting and rigging with furled sails. I'll also be leaving her sides open to expose the framing, interior structures, etc. Likewise with the decking. I'll be leaving parts of the deck planking off to expose the internals, with exception to the areas supporting the cannons, of course. I don't yet have a clear image as to where this model will actually wind up. I only have a mental concept of the effect that I wish to achieve once all is finally said and done.

Below is the current state of my CAD file showing the layout of the bottom of this vessel and the size of the strakes, number of planks per strake, and the positioning of the floor timbers. The red lines on the strakes denote where planks were actually joined to make up the individual strakes. These planks were not joined in the middle of the floor timbers. The floor timbers were too narrow for that due to the 1" diameter treenails used to attach the planks. Instead, the planks were joined together via 1.5" thick 'Butt-Block Splices' located 'between' floor timbers and/or wherever the joints landed, and butt-blocks could be effectively placed. If you look closely, you will also note that the bottom planking strakes are of various widths. Not a lot of consistency at all. I suppose that the builders were just using whatever widths of lumber that they had on hand in order to simply fill in the bottom of the boat. Last but not least... the floor timbers, themselves, 'also' vary in 'their' widths too! Not a lot of consistency there, either.
Even though these 'oddities' might look a bit 'off-putting' to some folks, I'm going to do my best to reflect them as they truly are/were in this scale build.

View attachment 513424
What scale are you building her in?
 
I think I have the frames drawn up in Illustrator somewhere to load into a laser cutter if you want to cheat.
Hello Glenn,
I'm building at 1:24 scale.
I thought about cheating with a CNC router but decided not to because a lot of my framing is going to be left exposed, thus showing the grain of the wood. That being said, the framing components need to appear as though they were hand hewn from naturally curved timbers, just as were the frames of the actual vessel. CNC or laser would have the grain all going in one direction, or force me to make two-piece frames, for proper grain orientation, which would also be incorrect. Laminating and forming my frames is a lot more work... but it will be well worth the extra effort in the long run! ;)
 
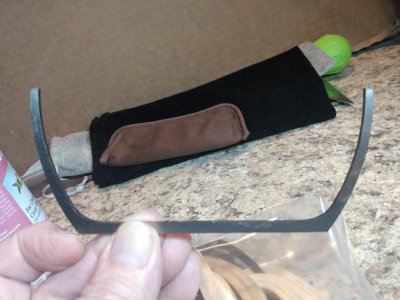
Progress has been slow due to the laser breaking and preventing me from cutting my finished frame sanding templates, but all is well now. I cut 4 templates yesterday. There will be 18 sets of frames to sand, so I cut 4 templates to prevent me from sanding away the edges of any one template and creating inaccurately shaped parts. I used stainless steel to make sure my templates don't rust should it take me a while to sand all of the frames. I'll attach the template to the laminated frames with either 2-sided tape, or rubber cement if the tape doesn't hold well enough.

Here's one of the sanding templates.

Sanding Template.jpg


Here's a sanding template laid atop a laminated frame set. There's quite a lot of meat to lose, but that was necessary in order to produce the effect of longitudinal grain inside a hand hewn 'bent' timber. They are also taller than needed. As mentioned earlier, these laminated pieces will each make two frames once split in two.

Sanding Template and Rough Frame.jpg


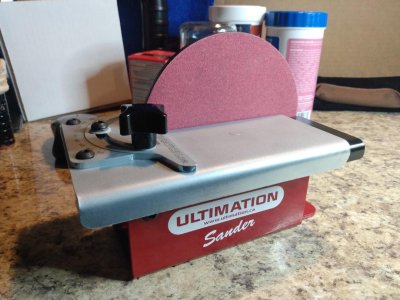
I'll rough cut with a bandsaw, then sand the frames to the template shape using my new Ultimate sander. No mess, no noise... I'll be able to sand frames while sitting at the island watching TV! There should be no noise coming from the Mrs. either! *Fingers Crossed*

04 April 2025.jpg
 
Progress has been slow due to the laser breaking and preventing me from cutting my finished frame sanding templates, but all is well now. I cut 4 templates yesterday. There will be 18 sets of frames to sand, so I cut 4 templates to prevent me from sanding away the edges of any one template and creating inaccurately shaped parts. I used stainless steel to make sure my templates don't rust should it take me a while to sand all of the frames. I'll attach the template to the laminated frames with either 2-sided tape, or rubber cement if the tape doesn't hold well enough.

Here's one of the sanding templates.

View attachment 514631


Here's a sanding template laid atop a laminated frame set. There's quite a lot of meat to lose, but that was necessary in order to produce the effect of longitudinal grain inside a hand hewn 'bent' timber. They are also taller than needed. As mentioned earlier, these laminated pieces will each make two frames once split in two.

View attachment 514633


I'll rough cut with a bandsaw, then sand the frames to the template shape using my new Ultimate sander. No mess, no noise... I'll be able to sand frames while sitting at the island watching TV! There should be no noise coming from the Mrs. either! *Fingers Crossed*

View attachment 514637
You'll need to mount that sander to a base or give it some rubber feet... it will slide all over the island granite...

I use mine almost every day :).
 
Using black thread to imitate caulking always gets my instant respect. To then use toothpicks (correctly) to imitate treenails. Awesome!!!
 
Back
Top