HMS Enterprise 1774 POF 1:48.

Good morning Gentlemen.
Eish I have relapsed into a terrible period of addiction…,Redface. The Admiral has been away for a 5 day hike, no kids anymore and I have not been to the office (I think the directors are going to fire me ). Paul’s sirens came up , sang and I gleefully plunged in. How many hrs - who knows….. but it has been badROTF.

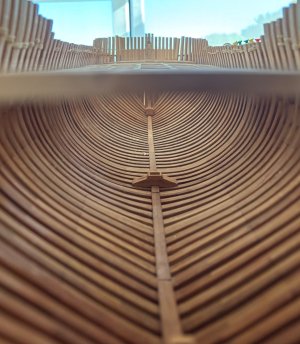
Deck beams and carlings. Many initial errors while I found out the best sequence of installation. The fore section I actually had to do a total redo. Gave up on the kit instructions (which are more like guess work) and went with “Grants logic” - we shall see if this works:cool:.

My hand cut notches while ok are not perfect and did create a little joinery issue once in a while….just a little one.

Still I’m very chuffed how it is going. I have left myself a lot of sanding, scraping and a little filling so hopefully it will pull together beautifully :p.
View attachment 516905View attachment 516907View attachment 516904View attachment 516903
….and the inside. You cannot really see into here, so it did not get too much attention. Still I was rather pleasantly surprised with the outcome:
View attachment 516908View attachment 516909
Ok time for rehab….
Cheers Grant

View attachment 516906
I like your idea of using thumbtacks and elastics to hold the frames while the glue dries.
 
Hello,
I have a question as I have the 1:96 version of this model. What is the glue that you use for glueing the frames? Is it a PVA glue? Do you have any issues with warping of the frames?
 
Grant,
I remember breaking ALL of those timbers during my build, especially when I was trying to insert some horizontal frames to join the vertical timbers; they break so easily...I'm going to look at Goodwin's book and others to see how the stern vertical timbers were done in the full-size ships and also see how the MD kit differs from the CAF kit in the stern construction. I like the three vertical timbers on either side of the sternpost in the CAF kit; the MD doesn't show that construction seems more flimsy - I may end up doing some kit bashing looking for more stern rigidity. The MD kit's instructions regarding the stern have no written directions or order of assembly, but the 3-D drawings are really good. part of the fun ? I guess Victor assumes we are big boys and can figure this out on our own. Didn't it take around 20 years apprenticeship to become a Master shipbuilder ?
BTW, at the rate you are going, you will be finished with the CAF kit, way before me and can start on the MD kit- and still beat me to the finish ! (of course, I never really "finish" anything ).....LOL

Cheers Mate

Alex R
Good morning Alex

The CAf is Leo inaccurate on the stern timbers. I remember looking at @Iosto
 
…build and seeing some bashing at the stern. I don’t have Goodwins book but seeing the structure of English ships from Sutherland this is different.

ROTF - I think one Enterprise is enough for me. I am going to start a lot of changes to the kit once the internal structures are done. From my main deck down will be as the kit has it, however going up with the detail, I am going to try get a little more accuracy coming in…..we shall see. Cheers Grant
 
Good afternoon
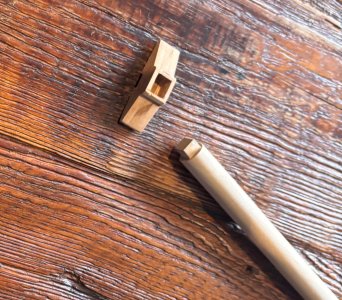
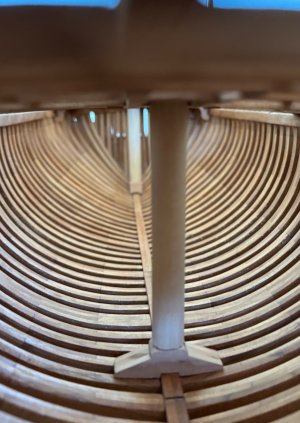
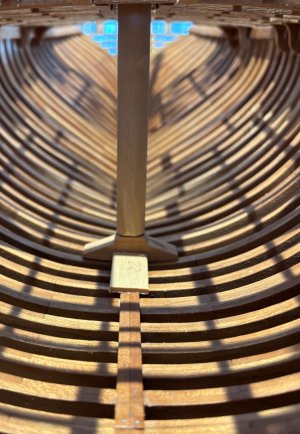
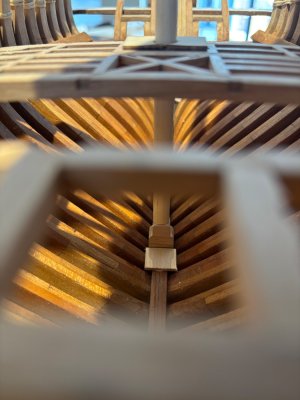
I decided to include the mast steps in case I want to have “stub” masts on this build. These will hardly be visible so I’m sticking with the kit and not including any upgrades or modifications.
IMG_5340.jpegIMG_5374.jpegIMG_5383.jpeg
IMG_5397.jpeg
The little block of wood is used to measure accurately. To get a ruler in there was a mission.
With a bit of poly;
IMG_5432.jpeg
Cheers Grant
 
Good afternoon
I decided to include the mast steps in case I want to have “stub” masts on this build. These will hardly be visible so I’m sticking with the kit and not including any upgrades or modifications.
View attachment 518463View attachment 518464View attachment 518465
View attachment 518466
The little block of wood is used to measure accurately. To get a ruler in there was a mission.
With a bit of poly;
View attachment 518467
Cheers Grant
it's coming along beautiful Grant.
Your progress is remarkable
 
Your mast step looks like a great alternative to making it from one piece and cutting the hole for anyone without appropriate chisels. Super trick of the trade.
Allan
Good evening Allan. I agree. Unfortunately I cannot take any credit for this - CAF designed it like this.
it's coming along beautiful Grant.
Your progress is remarkable
Thank you kindly Shota.
Great progress. The mast steps are perfectly fine in my opinion.
Good Job Grant
Good evening Tobias. Thank you very much. They are pretty good as kit versions go. I was debating making them with the crutches and a section of the limber strakes. It Would have been a lot of work for no or little effect tho.
Better to have it and not need it as the saying goes.
True story Daniel. I have not yet worked out how I am presenting this model yet, so definitely rather be safe than sorry later.
Thanks everyone, I appreciate the responses. Knew it had to be something simple.
I couldn’t have said it better…. ;) . I think you posted this in the wrong log. :D.

Cheers Grant
 
Good afternoon
I decided to include the mast steps in case I want to have “stub” masts on this build. These will hardly be visible so I’m sticking with the kit and not including any upgrades or modifications.
View attachment 518463View attachment 518464View attachment 518465
View attachment 518466
The little block of wood is used to measure accurately. To get a ruler in there was a mission.
With a bit of poly;
View attachment 518467
Cheers Grant
A good option, Grant. And it’s fun, playing with the light and shadows on and between the frames.
Regards, Perer
 
Hello Grant,
beautiful work and really well executed. It's fun to watch you. Dreamlike!

Best regards
Günther Ship-1
 
Back
Top