Thanks Paul. she's been gathering dust for the last two months, great to be working on her again.She's a beauty, Jan!
-

Win a Free Custom Engraved Brass Coin!!!
As a way to introduce our brass coins to the community, we will raffle off a free coin during the month of August. Follow link ABOVE for instructions for entering.
-

PRE-ORDER SHIPS IN SCALE TODAY!
The beloved Ships in Scale Magazine is back and charting a new course for 2026!
Discover new skills, new techniques, and new inspirations in every issue.
NOTE THAT OUR FIRST ISSUE WILL BE JAN/FEB 2026
You are using an out of date browser. It may not display this or other websites correctly.
You should upgrade or use an alternative browser.
You should upgrade or use an alternative browser.
Pavel Nikitin Oseberg #3 kit #61
- Thread starter Pathfinder65
- Start date
- Watchers 32
I saw also Pavel’s video about the deck planking: a intens job. It’s going to look very nice, Jan. I can imagine that it took you ‘some time’ to figure out what the best practice is.A small update.
I decided to add planks #10 through #13 (the Oar Plank) to get an idea of how the decks fit.
View attachment 538736
View attachment 538737
After inserting the decks I can now see how the extension end pieces supplied in the kit will fit against the inner hull.
Jan
Regards, Peter
- Joined
- Sep 10, 2024
- Messages
- 1,025
- Points
- 393

It's really coming along Jan - looks fantastic. I was trying to figure out what's going on just forward of the rudder block, but zooming in, it just looks like a weird camera artifact.
The yard and garden work are beginning to wind down, so I'll be getting back to my own soon - I hope!
The yard and garden work are beginning to wind down, so I'll be getting back to my own soon - I hope!
Hi Peter. There is a big difference between the kit plans and Pavels video for the building the deck planking. The build plans show the assembly steps for the deck planking. Pavels video shows how he added addional end pieces to eliminate any gaps between thr hull and the ends of the decks. It makes that part of the build a wee bit more complicated.I saw also Pavel’s video about the deck planking: a intens job. It’s going to look very nice, Jan. I can imagine that it took you ‘some time’ to figure out what the best practice is.
Regards, Peter
Jan
Hi Russ. Hmm, don't know what to tell you, in the photo it looks like some thing is missing in that area but physically all the hull is there.It's really coming along Jan - looks fantastic. I was trying to figure out what's going on just forward of the rudder block, but zooming in, it just looks like a weird camera artifact.
The yard and garden work are beginning to wind down, so I'll be getting back to my own soon - I hope!
Jan
- Joined
- Sep 10, 2024
- Messages
- 1,025
- Points
- 393

Hi Peter. There is a big difference between the kit plans and Pavels video for the building the deck planking. The build plans show the assembly steps for the deck planking. Pavels video shows how he added addional end pieces to eliminate any gaps between thr hull and the ends of the decks. It makes that part of the build a wee bit more complicated.
Jan
Yes, those extra pieces are on a separate sheet included in the kit. They are not listed in the assembly manual. They will make your deck fit much better.
- Joined
- Sep 10, 2024
- Messages
- 1,025
- Points
- 393

Hi Jan, did you get the email from Pavel announcing his new mast step retrofit kit for the Oseberg? It is much closer to the original and it even appears from the photo that he has moved the mast forward one frame to where it is supposed to be. It also appears to have new deck planks so that they can form the "hump" up to the elevated mast partner biti. Looks pretty good. If I hadn't already done all of that on my own, I probably would order it. 

Hi Russ,Hi Jan, did you get the email from Pavel announcing his new mast step retrofit kit for the Oseberg? It is much closer to the original and it even appears from the photo that he has moved the mast forward one frame to where it is supposed to be. It also appears to have new deck planks so that they can form the "hump" up to the elevated mast partner biti. Looks pretty good. If I hadn't already done all of that on my own, I probably would order it.
I did get the e-mail and ordered the mast step upgrade as well as the oar upgrade. I'm just starting to square away the decks so I'll be a bit before I get to the mast step. I didn't notice the mast move in his photo, I don't think I'll try that. I had enough of a problem adding the oar panks.
I noticed yesterday morning that I had the rudder oar plank on the wrong end of the hull. I wound up with a "BIG" Re-DO. I used Heinz White Vinegar to unglue the PVA, rinsed the planks with warm water and then clamped them between two old book shelves overnight.
You do need to test the vinegar on a scrap piece, if left on to long it might add some blemishes.
Jan
Last edited:
- Joined
- Sep 10, 2024
- Messages
- 1,025
- Points
- 393

Hi Russ,
I did get the e-mail and ordered the mast step upgrade as well as the oar upgrade. I'm just starting to square away the decks so I'll be a bit before I get to the mast step. I didn't notice the mast move in his photo, I don't think I'll try that. I had enough of a problem adding the oar panks.
I noticed yesterday morning that I had the rudder oar plank on the wrong end of the hull. I wound up with a "BIG" Re-DO. I used Heinz White Vinegar to unglue the PVA, rinsed the planks with warm water and then clamped them between two old book shelves overnight.
You do need to test the vinegar on a scrap piece, if left on to long it might add some blemishes.
Jan
You'll have to see what it looks like when you get the kit. It may be easier than you think to move the mast forward.
I noticed yesterday morning that I had the rudder oar plank on the wrong end of the hull.
I hate it when that happens! Sounds like you took care of it though. Good ol' PVA - gotta love it.
I think I'm a hopeless case. I've been watching Pavels Santa Maria YouTube videos. Yup, caught the bug 


Now on my X-mas list.
Jan
Now on my X-mas list.
Jan
I managd some time in the shipyard and started working on the small bits while waiting for the mast step upgrade.
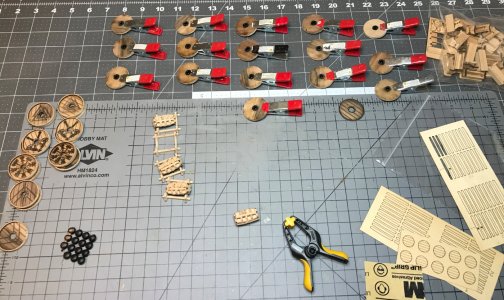
The 28 oar benches (upper right corner) are complete and ready for painting.
The barrels (in the middle) are proving to be a challenge for my bumbly fingers.
The Viking shields are a bit of work. The shied rim was cut off center by the Laser.
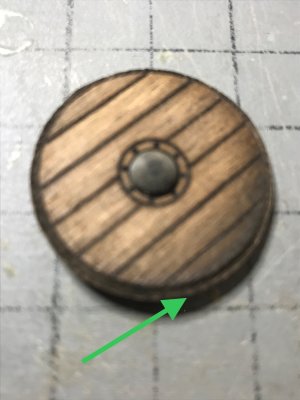
A little bit of sanding needs to done once the rim hoop is added
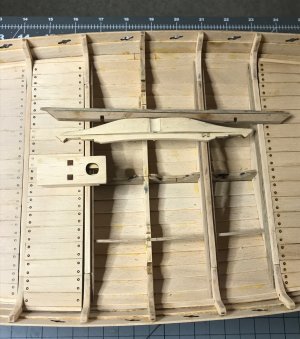
The mast step "carefully" removed ready for the ordered update.
Jan

The 28 oar benches (upper right corner) are complete and ready for painting.
The barrels (in the middle) are proving to be a challenge for my bumbly fingers.
The Viking shields are a bit of work. The shied rim was cut off center by the Laser.

A little bit of sanding needs to done once the rim hoop is added

The mast step "carefully" removed ready for the ordered update.
Jan
Last edited:
The more I see your build the more I'm wanting to get one.
I think you would like the challenge. There are now two scale versions 1/25 and 1/32.The more I see your build the more I'm wanting to get one.
Jan
Always a good idea to do some 'in-between steps'. Jan.I managd some time in the shipyard and started working on the small bits while waiting for the mast step upgrade.
View attachment 540722
The 28 oar benches (upper right corner) are complete and ready for painting.
The barrels (in the middle) are proving to be a challenge for my bumbly fingers.
The Viking shields are a bit of work. The shied rim was cut off center by the Laser.
View attachment 540724
A little bit of sanding needs to done once the rim hoop is added
View attachment 540725
The mast step "carefully" removed ready for the ordered update.
Jan
Regards, Peter
- Joined
- Sep 10, 2024
- Messages
- 1,025
- Points
- 393

The more I see your build the more I'm wanting to get one.
Just do it!

Hi Jan,I managd some time in the shipyard and started working on the small bits while waiting for the mast step upgrade.
View attachment 540722
The 28 oar benches (upper right corner) are complete and ready for painting.
The barrels (in the middle) are proving to be a challenge for my bumbly fingers.
The Viking shields are a bit of work. The shied rim was cut off center by the Laser.
View attachment 540724
A little bit of sanding needs to done once the rim hoop is added
View attachment 540725
The mast step "carefully" removed ready for the ordered update.
Jan
How did you remove the mast step without hurting the frame?
Steve
My go to glue for shipbuilding is "Titebond II". I've become the Master of "Do-Overs". Somewhere I read about using vinegar to loosen glued parts versus using a heat gun or hot water. So.....Hi Jan,
How did you remove the mast step without hurting the frame?
Steve
I applied a thin bead of vinegar along the glue seams, waited a few minutes and carefully pried the parts apart.
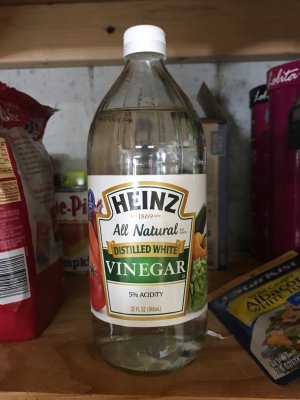
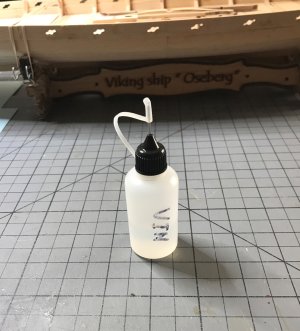
You should test the vinegar on a piece of scrap to see if there is any reaction.
Jan
Excellent!!!!!!!I did!


