I need to check on mine. I'm really not in a big hurry though, I have at least 6mos time to completion on my Le Requin or longer. That way I'll have Jan's and yours for reference builds.
-

Win a Free Custom Engraved Brass Coin!!!
As a way to introduce our brass coins to the community, we will raffle off a free coin during the month of August. Follow link ABOVE for instructions for entering.
-

PRE-ORDER SHIPS IN SCALE TODAY!
The beloved Ships in Scale Magazine is back and charting a new course for 2026!
Discover new skills, new techniques, and new inspirations in every issue.
NOTE THAT OUR FIRST ISSUE WILL BE JAN/FEB 2026
You are using an out of date browser. It may not display this or other websites correctly.
You should upgrade or use an alternative browser.
You should upgrade or use an alternative browser.
Pavel Nikitin Oseberg #3 kit #61
- Thread starter Pathfinder65
- Start date
- Watchers 32
Daniel --- Well Jan's for sure - mine who knows I'm the slowest builder known to "man" - but yes we will both have Jan's superb log as a greatI need to check on mine. I'm really not in a big hurry though, I have at least 6mos time to completion on my Le Requin or longer. That way I'll have Jan's and yours for reference builds.
guide.
Jan thanks for your great log.......
Thanks for the Kudos, but I just bumble along, make a lot of mistakes but eventually get something done.Daniel --- Well Jan's for sure - mine who knows I'm the slowest builder known to "man" - but yes we will both have Jan's superb log as a great
guide.
Jan thanks for your great log.......
Jan
Hello Nevsnamor, try this website ( https://shipsofpavelnikitin.com).
Hi, welome SOS. If you scroll down the right side of the home menu you'll see a link to Pavel's website.Hello
I am a new member and i Will like to buy a model. Kit of osberg Viking skip version 3
I saw on youtoube a model that Pavel Nikitin was building.
Wher can i buy a model kit
Best regards Sven
or
You can click on this Ships of Pavel Nikitin to get to his website.
Jan
- Joined
- Sep 10, 2024
- Messages
- 1,025
- Points
- 393

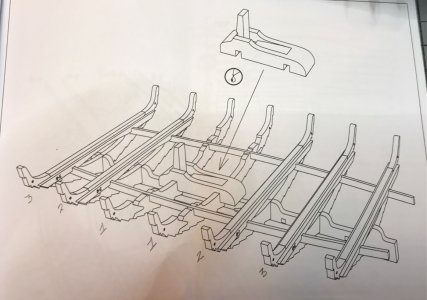
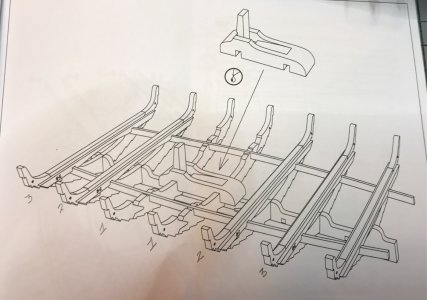
Okie Dokie, I've looked at the upgrade and it appears to me that the instructions show the Mast step being installed between the two #1 decks as per the kit plan. I think I have that right?????
View attachment 543517
View attachment 543516
What do you guys think???
Jan
Hmmm, how is that possible, since there is a #0 frame in between the two #1's?
Congrats on receiving your upgrade kit! I'm still waiting on mine, USPS alerted me that it arrived in Buffalo, NY. today...I'll probably have it in a couple of weeks.View attachment 543476
Upgrade and oars arrived yesterday afternoon. Now need to find time to work on the build.
Jan
I'm looking forward watching you get this installed!
Steve
Those frame numbers on Pavel's plans/prints has to be a mistake, it needs to go between frame 0 and frame 1 towards the bow. At least that's how I think it should work.Hmmm, how is that possible, since there is a #0 frame in between the two #1's?
Steve
I'm scratching my head trying to figure out where to start. I checked to see if there was a video to scan.Congrats on receiving your upgrade kit! I'm still waiting on mine, USPS alerted me that it arrived in Buffalo, NY. today...I'll probably have it in a couple of weeks.
I'm looking forward watching you get this installed!
Steve
Yup, head scratcher.Hmmm, how is that possible, since there is a #0 frame in between the two #1's?
I did a screen dump of one of Pavel's videos.Those frame numbers on Pavel's plans/prints has to be a mistake, it needs to go between frame 0 and frame 1 towards the bow. At least that's how I think it should work.
Steve
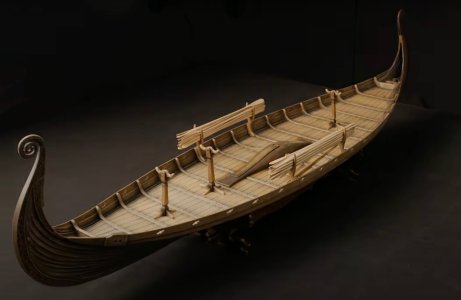
This is the old installation which by the way is a bit longer than the new one. Even so I think the short end goes toward the bow and the long toward the stern. I'ts theplacement of the piece underneath that I'm having trouble visualizing.
Jan
@RussF, my bad. You are right, I looked at the drawing wrong.
Fixed the rib labels." 0 " in the center and " 1-1" on each side.
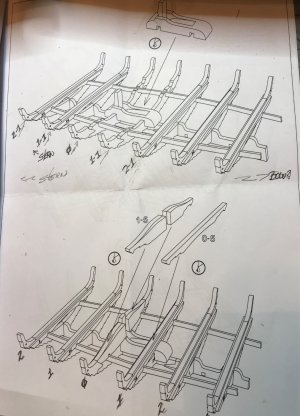
That brings me to this quick fit
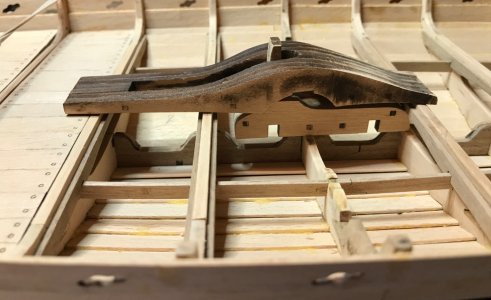
The bottom has to slot in to the " 0 " rib and the right " 1-1 " rib.
I need to remove some more material on there. I think I've got this figured out.
Jan
Fixed the rib labels." 0 " in the center and " 1-1" on each side.

That brings me to this quick fit

The bottom has to slot in to the " 0 " rib and the right " 1-1 " rib.
I need to remove some more material on there. I think I've got this figured out.
Jan
- Joined
- Sep 10, 2024
- Messages
- 1,025
- Points
- 393

@RussF, my bad. You are right, I looked at the drawing wrong.
Fixed the rib labels." 0 " in the center and " 1-1" on each side.
View attachment 543618
That brings me to this quick fit
View attachment 543619
The bottom has to slot in to the " 0 " rib and the right " 1-1 " rib.
I need to remove some more material on there. I think I've got this figured out.
Jan
I think you're still off, my friend. I think I had mentioned before that it looks like Pavel has moved the mast forward one frame as it is in the real thing.
Notice the biti numbering in the drawing. The thick biti used to be on frame 0, now it is labeled as 1 and the new frame 0 biti is a standard thin one.
I'm assuming the upgrade kit has replacements for the bitis? The new (thicker) biti 1 should go on the #1 frame that is forward of frame 0 (toward the bow).
All this will then effectively move the mast forward one frame and put it where it is supposed to go.
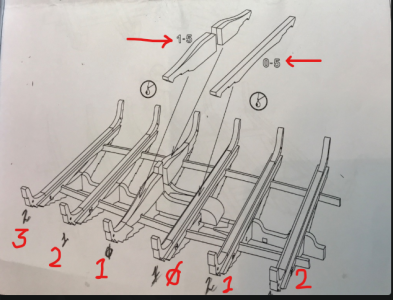
OK, thanks Russ. I think I understand how to proceed.I think you're still off, my friend. I think I had mentioned before that it looks like Pavel has moved the mast forward one frame as it is in the real thing.
Notice the biti numbering in the drawing. The thick biti used to be on frame 0, now it is labeled as 1 and the new frame 0 biti is a standard thin one.
I'm assuming the upgrade kit has replacements for the bitis? The new (thicker) biti 1 should go on the #1 frame that is forward of frame 0 (toward the bow).
All this will then effectively move the mast forward one frame and put it where it is supposed to go.
View attachment 543739
Jan
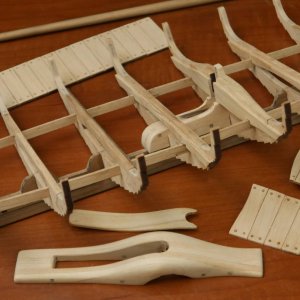
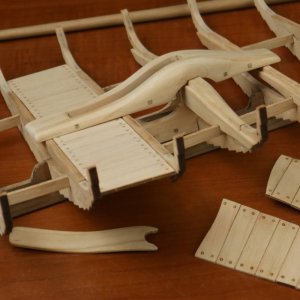
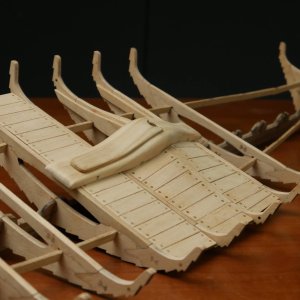
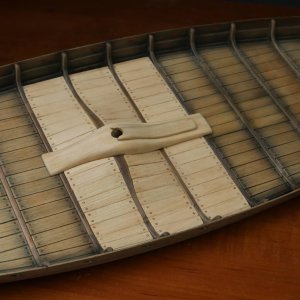
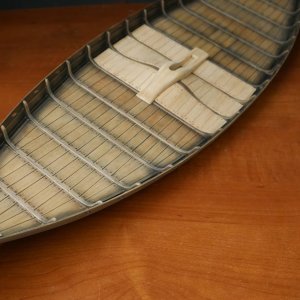
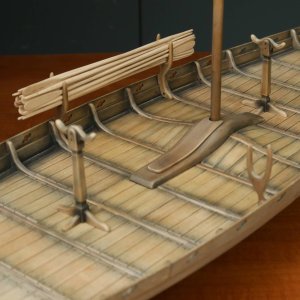
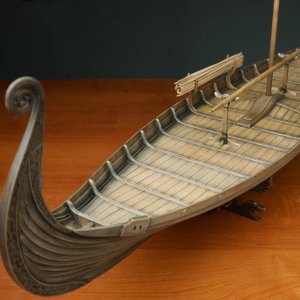
The upgraded mast step:
It took a bit to remove the bitis that were in the way (used vinegar to loosen the glue).
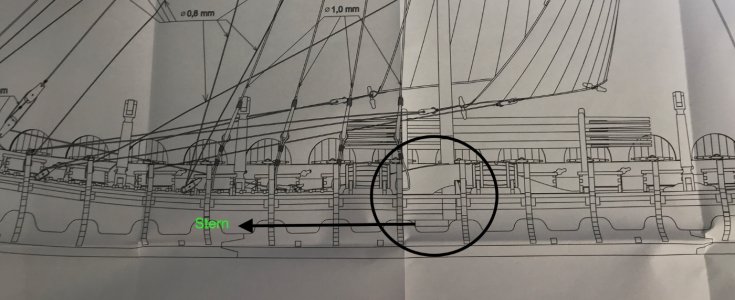
Then I couldn't figure out which direction the long portion of the mast step shpuld face, toward the bow, toward the stern???
The Pavel Plan. The mast step is in the circle is pointing toward the stern.
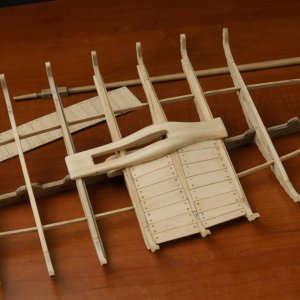
The modification dry fitted.
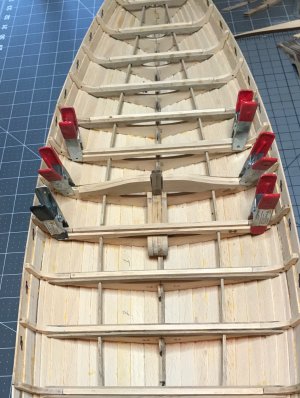
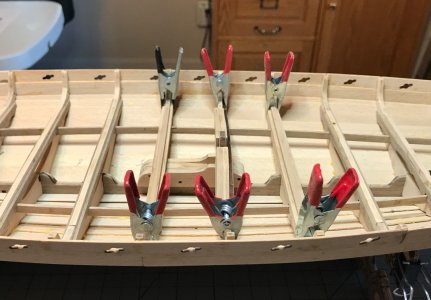
There is still a bit of snding involved before the final glue down.
Jan
It took a bit to remove the bitis that were in the way (used vinegar to loosen the glue).
Then I couldn't figure out which direction the long portion of the mast step shpuld face, toward the bow, toward the stern???
The Pavel Plan. The mast step is in the circle is pointing toward the stern.

The modification dry fitted.


There is still a bit of snding involved before the final glue down.
Jan
- Joined
- Sep 10, 2024
- Messages
- 1,025
- Points
- 393

The upgraded mast step:
It took a bit to remove the bitis that were in the way (used vinegar to loosen the glue).
Then I couldn't figure out which direction the long portion of the mast step shpuld face, toward the bow, toward the stern???
The Pavel Plan. The mast step is in the circle is pointing toward the stern.
View attachment 543821
The modification dry fitted.
View attachment 543819
View attachment 543820
There is still a bit of snding involved before the final glue down.
Jan
If you're moving the mast forward one frame, then the mast will abut the forward frame 1 on the aft side of the frame. Place your step however that can be accomplished.
I did move the mast forward to the forward frame 1, the rest of the supplied update parts fit very nicely (After char removal).If you're moving the mast forward one frame, then the mast will abut the forward frame 1 on the aft side of the frame. Place your step however that can be accomplished.
Jan
Jan,
Getting there! - Your log will be a "must go to" when I get there - Thanks for sharing your log including so many details
Getting there! - Your log will be a "must go to" when I get there - Thanks for sharing your log including so many details

Yes Jan I have already bookmarked a few of your post too. Thanks a million!Jan,
Getting there! - Your log will be a "must go to" when I get there - Thanks for sharing your log including so many details


