• Win a Free Custom Engraved Brass Coin!!!
    As a way to introduce our brass coins to the community, we will raffle off a free coin during the month of August. Follow link ABOVE for instructions for entering.

Bluenose I - YuanQuin 1:72 - Loracs (in progress)

Joined
Jul 11, 2023
Messages
208
Points
113

Greeting all, I can finally get around building the magnificent Bluenose. This will be a first for me in many areas. First, POF kit with focus on the ribs and internal structures. Second, as partial build of the more detailed cabin and Fish-hold. You get it Peter Voogt' log will be a great inspiration. If I can achieve 1/2 of what (and many others) have done, I will be happy. Lastly, I still thinking on how to modify the kit to display those details. Still don't really know what I will do... but one thing first: get the build going.

Let me first start with an introduction.

I don't know in many already have discovered it but there is a virtual tour of the Bluenose II available online. You can visit and virtually walk around above and below deck, as well as the wharf area. Nice to have... here the link

Bluenose II virtual tour

Lastly the Bluenose II by LB Jenson (1994). I have seen it referred quite a few times. It was a little bit difficult to find in the US... but a used book is underway (still in transit).
1758308305057.png
 
Last edited:
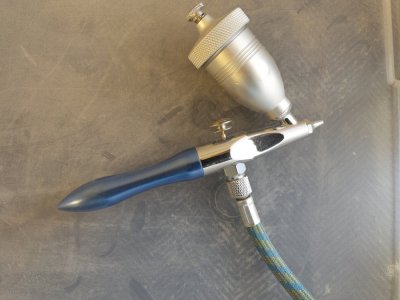
Getting Ready (pre-build): As you all know too well, charring is always an issue with laser-cut parts. It's just something we need to deal with. In past builds, I started using Paashe air eraser as a means to clean up carbon on the edge of parts. It has advantages but also inconveniences.

Advantages
- You can clean laser burn quite easily and efficiently without affecting the underlying wood. This is because aluminum oxide used in the airbrush simply bounces back once it hits soft/hard wood. There is just no real risk of "over air brushing". NOTE: you need to get really close, 5mm or so of the wood. The spray is narrow also at that distance.

- Next, because of the above, edges remain extra sharp and no risk of beveling.
- Finally, you can reach difficult "hard to reach" areas without any problem.

Drawbacks
- First, the cost. If you start from scratch... the costs start to add up. You will need a compressor (which I had for painting), the air eraser brush itself and blasting compound. I tried baking powder, but the results were ok with soft wood but less so with hardwood such as pear. For me, aluminum oxide from Badger (grit 220) worked best. Hardware store blasting compound is just too coarse (grit 70) and may damage the airbrush.

- Second, be ready to reload frequently. You go through the stuff really fast. It is possible to recycle it but in a limited fashion before it loses its bite. It just fragments into smaller particles and likely gets "rounded". I recycle it 2-3x max. Note: with recycling you run an increasing risk of clothing the brush.

- Lastly, safety. This will create dust... a lot of it. You really need to contain this. In addition, I only use it in the garage. Finally, I HIGHLY recommend eye protection and a respirator. Aluminum oxide is not toxic (inert like sand) but breathing in dust particles is not something I want to play around with.

With all this out of the way, let me show you my setup and the results in a few pictures.

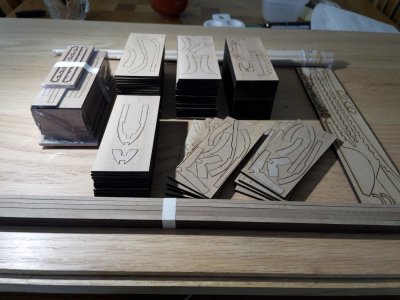
There is quite a few plates of laser cut materials
IMG_3394.jpeg

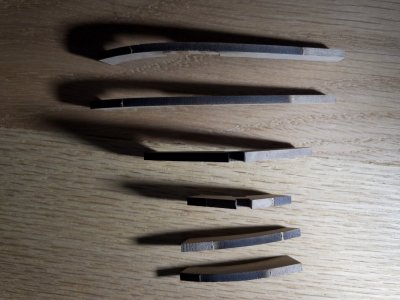
I airbrushed a number of parts partially - roughly 1/5th at the edge so you have an idea how it compared to untouched areas.
IMG_3378.jpeg

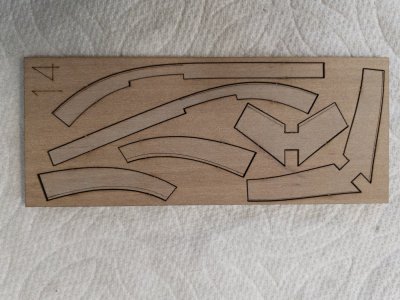
After I complete, the various parts are put back the original plate to show that only very little material is blasted away. THe bevel lines lines are still intact.
IMG_3382.jpeg

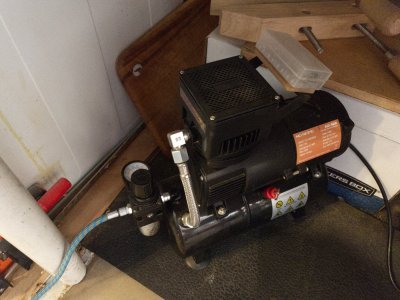
Compressor and airbrush
IMG_3386.jpegIMG_3387.jpeg


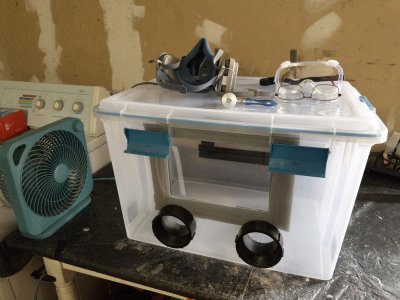
And finally, a DIY containment box. A standard large size storage box with cover seal (foam). Openings are drilled for the hands - plumber hardware at local hardware store. Finally, two cutouts for small 8x10 glass are simply taped in place. The last is to improve visibility. LASTLY AND MORE IMPORTANT: Glass, eye protection and respirator mask.IMG_3397.jpeg

I like getting rid of the clean-up up front. I still have couple weeks of work before starting the build.
 
Last edited:
I also have the eraser air brush, but have yet to use it, need a hose fitting adapter to my compressor.

I like you blast box, keeps things confined.

I did a lot of media blasting while working on restoration of 1945 A-26 Invader few years back, getting old paint of parts for new painting and install on airframe.

Hearing protection is advisable when doing this a long time, not so loud, but long exposure is a risk to consider.
 
Hi Loracs. It’s great to see that you started the build-log for your Bluenose build.
And I feel honored that my log is inspiring you. You are very welcome in the Bluenose Area with many other logs and the ‘Main Support Page’ with many information.
I will ad you build-log to the BN-list. And hopefully there is a chair in one of the rows to follow your build.
Regards, Peter
 
@Peter Voogt, and mostly... will I get the courage to cut it? I do have a couple of ideas in mind thought, as alternative. The real question: will they be viable. I just can't say right now. BTW, your log is indeed inspirational... as, I must say many, many others.
 
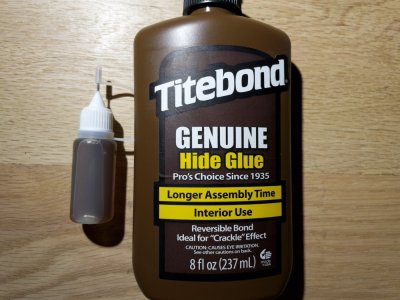
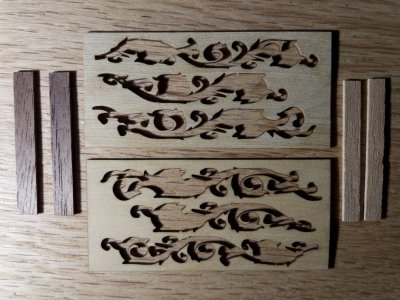
Testing Glue: It has been a while since I wanted to use Titebond Hide Glue for a ship model. This is a liquid version sold by Tidebond, unlike the pallets that you warm up and keep hot. This is for convenience, since many report it works pretty much the same.

Why Hide Glue when plenty of other choices are available? For me, it is several folds:

a) It contains very little water. Therefore, there is no "swelling"/deformation of the wood while gluing.
b) It dries as a crystal, very hard and with filling properties. Unlike PVA, it does not stretch (or creep).
c) It is fully reversible with water/heat... to fix potential problems down the road.
d) It cleans up well with hot water, without staining the wood.
e) Finally, its "grabs" into position rapidly (sticky) but is open for quite a while for adjustment.

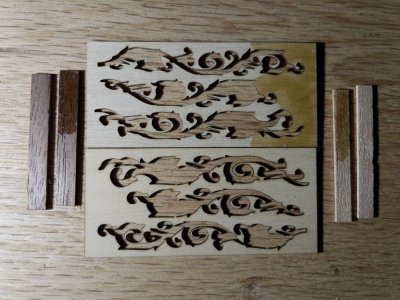
Since this is the first time I'm using it, I did some quick tests. Hide Glue was added generously to different woods (boxwood, walnut and something else from a kit) and allowed to dry fully (second pictures). After that, it is wiped away with a rag soaked with hot water. Once dry, the wood is finished with poly (last pictures). Overall, exactly as expected, no mess, no discoloration of the wood. It is a go...

Final Note: Since the glue does not penetrate the wood, it won't be as strong than CA or PVA. However, keep in mind that if it is good for Furnitures and Guitars... it is more than likely to be good for model. I noticed that when you put a lot of pressure on two overlapping sticks glued that way, it will split at the glue join rather than the wood. Could be good in not damaging parts in accident!

IMG_3404.jpegIMG_3401.jpegIMG_3405.jpeg
 
Last edited:
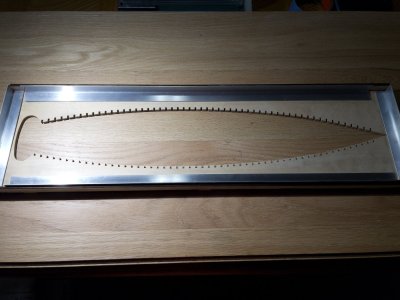
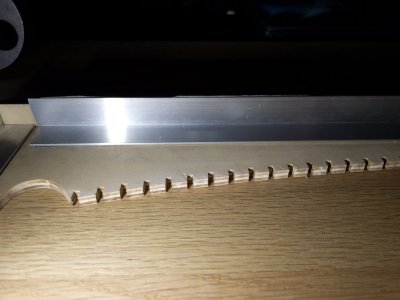
Bluenose Rig: A simple rig with little assembly. The board was a little bit warped as many observed before. I just chose to add aluminum angles for now. If necessary I can add a particle board as backing. The jig internal was sand blasted since it will be glued to the frame later on. It took less than 30 min and, as you can see, can easily reach the small nook and cranny.

I'm almost 3/4 of the way sanding the frames... soon assembly.
IMG_3412.jpegIMG_3410.jpeg
 
Getting Ready (pre-build): As you all know too well, charring is always an issue with laser-cut parts. It's just something we need to deal with. In past builds, I started using Paashe air eraser as a means to clean up carbon on the edge of parts. It has advantages but also inconveniences.

Advantages
- You can clean laser burn quite easily and efficiently without affecting the underlying wood. This is because aluminum oxide used in the airbrush simply bounces back once it hits soft/hard wood. There is just no real risk of "over air brushing". NOTE: you need to get really close, 5mm or so of the wood. The spray is narrow also at that distance.

- Next, because of the above, edges remain extra sharp and no risk of beveling.
- Finally, you can reach difficult "hard to reach" areas without any problem.

Drawbacks
- First, the cost. If you start from scratch... the costs start to add up. You will need a compressor (which I had for painting), the air eraser brush itself and blasting compound. I tried baking powder, but the results were ok with soft wood but less so with hardwood such as pear. For me, aluminum oxide from Badger (grit 220) worked best. Hardware store blasting compound is just too coarse (grit 70) and may damage the airbrush.

- Second, be ready to reload frequently. You go through the stuff really fast. It is possible to recycle it but in a limited fashion before it loses its bite. It just fragments into smaller particles and likely gets "rounded". I recycle it 2-3x max. Note: with recycling you run an increasing risk of clothing the brush.

- Lastly, safety. This will create dust... a lot of it. You really need to contain this. In addition, I only use it in the garage. Finally, I HIGHLY recommend eye protection and a respirator. Aluminum oxide is not toxic (inert like sand) but breathing in dust particles is not something I want to play around with.

With all this out of the way, let me show you my setup and the results in a few pictures.

There is quite a few plates of laser cut materials
View attachment 545549

I airbrushed a number of parts partially - roughly 1/5th at the edge so you have an idea how it compared to untouched areas.
View attachment 545550

After I complete, the various parts are put back the original plate to show that only very little material is blasted away. THe bevel lines lines are still intact.
View attachment 545551

Compressor and airbrush
View attachment 545552View attachment 545565


And finally, a DIY containment box. A standard large size storage box with cover seal (foam). Openings are drilled for the hands - plumber hardware at local hardware store. Finally, two cutouts for small 8x10 glass are simply taped in place. The last is to improve visibility. LASTLY AND MORE IMPORTANT: Glass, eye protection and respirator mask.View attachment 545554

I like getting rid of the clean-up up front. I still have couple weeks of work before starting the build.
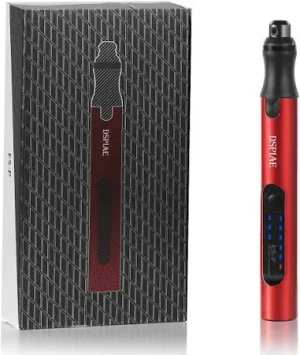
I look forward to watching you with the Bluenose! If I may suggest an alternative to the sandblasting for the char, I have been using a nail drill with a rotary drum. It is powered by a USB brick (think cell phone charger) You can buy rechargeable ones for more. It comes with some shaping tools and a small replaceable drum sander that you can get different grit drums for very cheaply. As opposed to a Dremel it only weights in at a few ounces and has decent torque. it is compact and light weight and fits easily in your hands. The one down side it that the shaft size is different than a Dremel so it can not use the array of Dremel tools. However Arrowmax makes a nice set of inexpensive drill that fit. For quick and very accurate sanding though it is excellent! Very easy to control and a joy to use.

https://www.amazon.com/dp/B0DBKQVJHB?ref=ppx_yo2ov_dt_b_fed_asin_title&th=1
 
@Rob444 Absolutely, any ways that can be used to deal with charring is very welcome. I'm sure many will appreciate your input. This remind me that I do have a rotary similar to that from DSPIAE (see below). I did not though about it... will look into it too. I was using it with plastic model. May still be difficult in hard-to-reach areas with sharp corners.... but a file can complement it. We just cannot get enough options; this allows us to find what good for each of us and/or better deal with the unforeseen.
shopping.webp
 
Last edited:
Bluenose Rig: A simple rig with little assembly. The board was a little bit warped as many observed before. I just chose to add aluminum angles for now. If necessary I can add a particle board as backing. The jig internal was sand blasted since it will be glued to the frame later on. It took less than 30 min and, as you can see, can easily reach the small nook and cranny.

I'm almost 3/4 of the way sanding the frames... soon assembly.
View attachment 546665View attachment 546666
That sand blazing is looking very promising. Looking forward to the outcome on the frames.
Regards, Peter
 
Last edited:
@Peter Voogt, so far, I like it. The key is relatively fresh Aluminum Oxide. I recycle mostly only once now. I difference in speed and ease is significant. I got a 2.2 Kg (5 lbs.) pack recently... enough for a while. One day, I may get 180 grits (rather than 220, if I can find a cheap source), it may help a tad more. I'm reading that silicon carbide and zirconia can be more durable alternative but more aggressive (so far this is not an issue) ... again, it is a matter of sourcing it on the cheap. I'm looking forward to the fun parts of the build though.
Cheers,
 
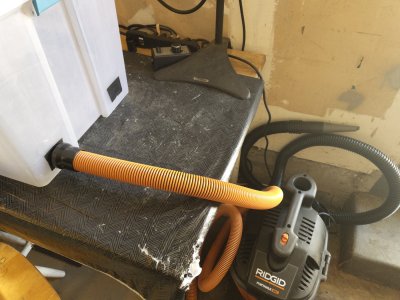
Air sanding: so far so good. The frame and heel parts are completed. Even though the sanding was done within a closed container, dust was everywhere in the garage. After a 1/2 day of vacuuming, I will modify the box with a port for a 4 liter car vacuum with filter. Recycling 1-2 times the aluminium oxide is not worth the trouble.
 
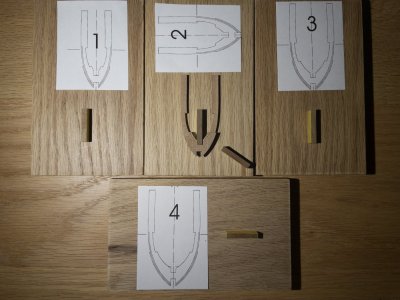
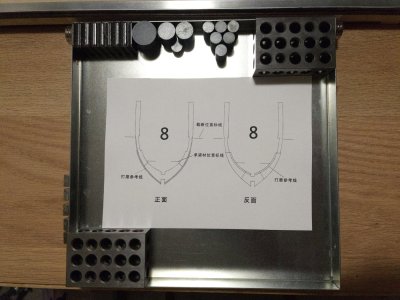
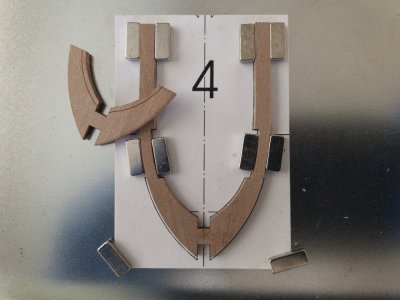
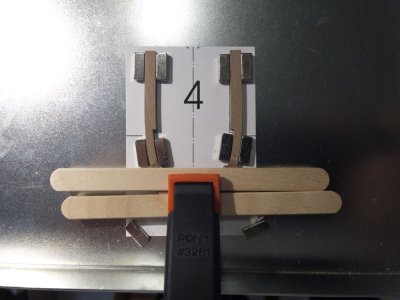
Simple Jigs: Time to get started with the frames. Simple jigs were made to help with the initial steps of assembly. After the initial steps (gluing the bottom v-shaped parts) x 4, I will move them to another setup for precise assembly of the remaining parts with each plan. Not sure if the magnets will be of any use... but I have this steel plate available, as well as the blocks. Time will tell...

Will be using @Peter Voogt's approach for assembly (see his build log). Far more reasonable than trying to join small parts head-to-tail.

IMG_3424.jpegIMG_3418.jpeg
 
Simple Jigs: Time to get started with the frames. Simple jigs were made to help with the initial steps of assembly. After the initial steps (gluing the bottom v-shaped parts) x 4, I will move them to another setup for precise assembly of the remaining parts with each plan. Not sure if the magnets will be of any use... but I have this steel plate available, as well as the blocks. Time will tell...

Will be using @Peter Voogt's approach for assembly (see his build log). Far more reasonable than trying to join small parts head-to-tail.

View attachment 548073View attachment 548074
That jig for the bottom parts looks very useful. Also the use of the magnets for your next steps. Then you are flexible by pointing then in any wanted position by fixing the parts.
Never to late to see another workaround.
Regards, Peter
 
Back
Top