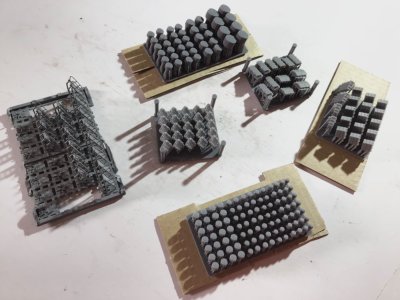
David, heres a video on the ultrasonic cutter. My deck thickness is around 2mm.
-

Win a Free Custom Engraved Brass Coin!!!
As a way to introduce our brass coins to the community, we will raffle off a free coin during the month of August. Follow link ABOVE for instructions for entering.
-

PRE-ORDER SHIPS IN SCALE TODAY!
The beloved Ships in Scale Magazine is back and charting a new course for 2026!
Discover new skills, new techniques, and new inspirations in every issue.
NOTE THAT OUR FIRST ISSUE WILL BE JAN/FEB 2026
You are using an out of date browser. It may not display this or other websites correctly.
You should upgrade or use an alternative browser.
You should upgrade or use an alternative browser.
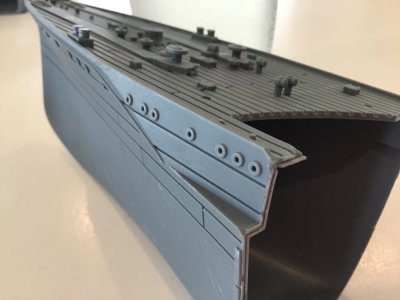
Despite the imperfections and inaccuracies, I think this model has a good basis for adding my own scratch building modifications.
Here’s another issue. The segmented hull pieces are just butt glued together and this could cause alignment issues. My previous experience with the pink 3D kits is that the hull parts were easy to insert with a telescopic action of sliding together ( if you follow what I’m trying to say)
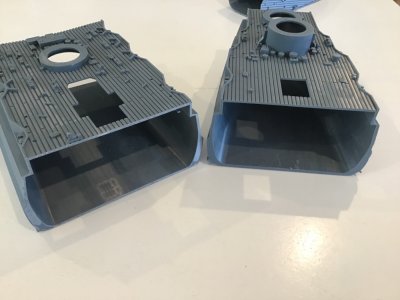
Here’s another issue. The segmented hull pieces are just butt glued together and this could cause alignment issues. My previous experience with the pink 3D kits is that the hull parts were easy to insert with a telescopic action of sliding together ( if you follow what I’m trying to say)

Last edited:
- Joined
- Jan 21, 2023
- Messages
- 372
- Points
- 138

i use a chisel blade on my 1/429 scale Arizona's to remove the port holes, i think it is easier than sanding them down.
when splicing hull sections together when i am either lengthening or shortening hulls, i glue pieces of plastic to the inside of one hull piece that extends out enough that the next hull piece covers the pieces of plastic when the hull pieces are butted together.
when splicing hull sections together when i am either lengthening or shortening hulls, i glue pieces of plastic to the inside of one hull piece that extends out enough that the next hull piece covers the pieces of plastic when the hull pieces are butted together.
i use a chisel blade on my 1/429 scale Arizona's to remove the port holes, i think it is easier than sanding them down.
when splicing hull sections together when i am either lengthening or shortening hulls, i glue pieces of plastic to the inside of one hull piece that extends out enough that the next hull piece covers the pieces of plastic when the hull pieces are butted together.
Yes , I will use some plastic pieces to help with alignment.
Last edited:
Good luck with this ultrasonic cutter. I bought it, and found there was almost nothing I could cut more easily than with an Exacto blade. Thicker pieces were impossible, and thinner pieces got so hot I couldn't hold them. Sent it back.I cant help myself. Just purchased an ultrasonic cutter so I can remove all the deck fittings from the model. I intend to fill the deck and laminate a timber veneer strip deck in the proper scale.
May the Lord bless you and grant you tons of patience. You are definitely not faint of heart to tackle this project.
As the saying goes "to each his own". I truly wish you the best and will watch with great interest.
As the saying goes "to each his own". I truly wish you the best and will watch with great interest.
My goodness, that’s not what I wanted to hear, but thank you for the feedback.Good luck with this ultrasonic cutter. I bought it, and found there was almost nothing I could cut more easily than with an Exacto blade. Thicker pieces were impossible, and thinner pieces got so hot I couldn't hold them. Sent it back.
Hi Brian,
The hull sections look less that ideal with no positive location adding tabs on the inside should be a good thing, hopefully the fit will be good.
Looks like there is a fair bit of work ahead.
Cheers,
Stephen.
The hull sections look less that ideal with no positive location adding tabs on the inside should be a good thing, hopefully the fit will be good.
Looks like there is a fair bit of work ahead.
Cheers,
Stephen.
I'm very sorry. That ultrasonic cutter is not the one I purchased. Mine was from MicroMark, and cost $430. Very possibly the one you got will do a better job. Plus, I got mine only for wood, so it, and yours, may work much better with resin. Sorry if I upset you unnecessarily. In any event, good luck with it.My goodness, that’s not what I wanted to hear, but thank you for the feedback.
Hello friends,
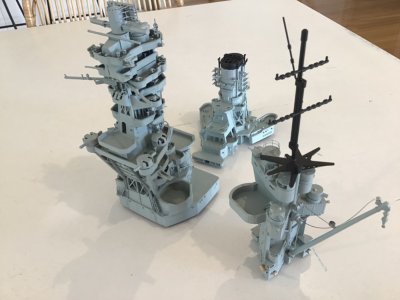
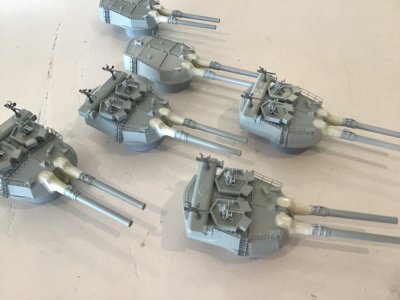
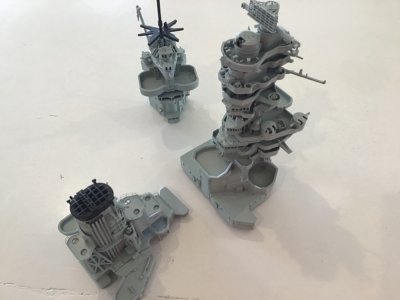
Been at my hobby bench this week and working on the model. I have cleaned up and assembled the superstructure and turrets. The quality of the 3d printed parts are superb, showing all fine details including rivets.
I have applied a grey plastic primer to the pieces so I can see if any fine sanding or filler is required. Here’s a few photos of some assemblies in grey primer.
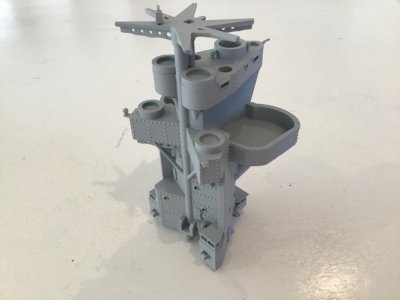
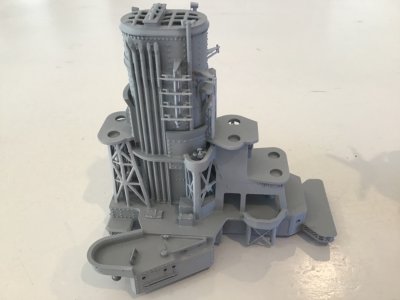
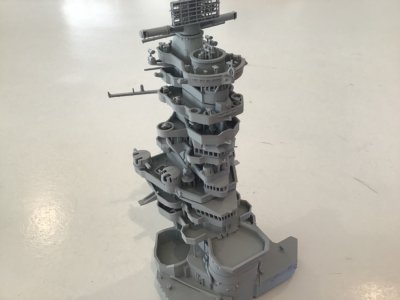
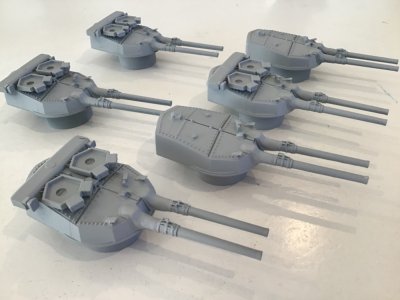


Hello Bryan,Despite the imperfections and inaccuracies, I think this model has a good basis for adding my own scratch building modifications.
Here’s another issue. The segmented hull pieces are just butt glued together and this could cause alignment issues. My previous experience with the pink 3D kits is that the hull parts were easy to insert with a telescopic action of sliding together ( if you follow what I’m trying to say)
View attachment 552284
are you going to add some (brass?) square rods inside to strengthen the construction in it's hole length? So the danger of breaking the brittle resine may go away.
To be honest I am shocked to see an US $500 model being detailled that bulky in it's hull. The rest seams to come in an decent quality - looking foreward your progress.
Hope this helps,
CH
Last edited:
Hello Bryan,
are you going to add some (brass?) square rods inside to strengthen the construction in it's hole length? So the danger of breaking the brittle resine may go away.
To be honest I am shocked to see an US $500 model being detailled that bulky in it's hull. The rest seams to come in an decent quality - looking foreward your progress.
Hope this helps,
CH
Hi Chris, yes I used popsicle sticks and a 2 part epoxy glue to join the hull sections together.
I will update some progress pics soon.
Hi guys,
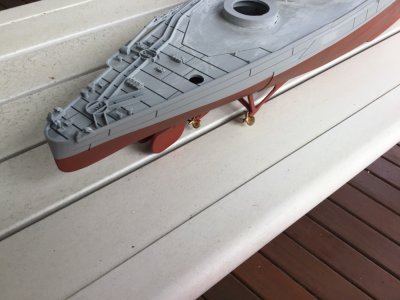
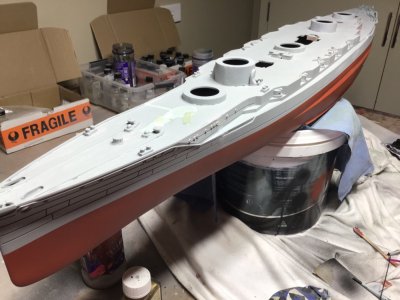
I have achieved quite a lot this week. I managed to glue the hull sections together with a strong 2 pack epoxy glue and utilised popsicle sticks to ensure the sections slid into each other without issues.
I then used a 2 part filler for filling the joins in the hull and after sanding, I sprayed a grey plastic primer base coat.
I then removed almost all the deck fittings with my new ultrasonic knife and blade filled the deck smooth with a 2 part automotive filler. Its my intention to laminate a timber deck over the top in the correct scale. I have sprayed the hull anti fouling red, but the upper sections of the hull above the waterline is still in primer.
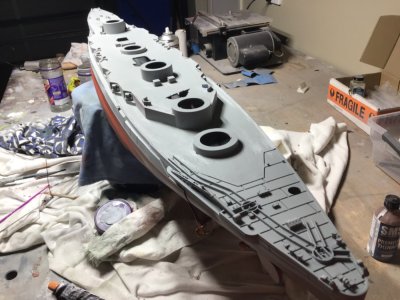
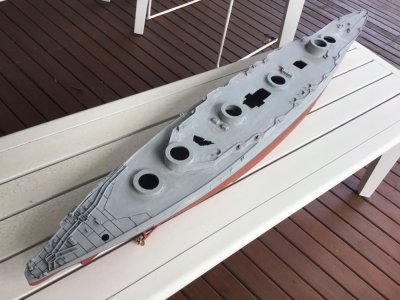


One of the recommended uses for the ultrasonic cutter is removing 3D printed parts from their supports. Have you tried that on these small parts?When I removed the deck fittings, some of the pieces broke apart, so I have purchased replacement fittings from MicroMark.
One of the recommended uses for the ultrasonic cutter is removing 3D printed parts from their supports. Have you tried that on these small parts?
Yes it works great for that. The fittings I removed from the deck were solidly molded onto the deck and difficult to cut through.


