COPPER PLATING. Galvanizing.
*I duplicated this article on the topic of Alert
So, my galvanizing experiments have finally come to an end. In this article, I'll explain in detail how to copper-plat plastic (SLA, 3D printed), where and how to avoid mistakes, and how to make this process repeatable and, most importantly, effective. Let's get started.
I'll reiterate, this isn't a guide, and I can't guarantee you'll get it right the first time. I'll simply show you how I achieved the result, which is as close as possible to what I originally wanted. (Naturally, based on the trial and error I've made while building my experience.)
0. Safety!
Always wear gloves! This applies to both plastic, to avoid leaving hand marks on the parts, and copper, to prevent it from oxidizing during all stages of the process, including blackening and beyond.
1. Cathode. Details to be copper-plated.
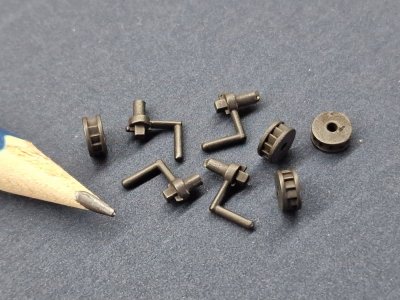
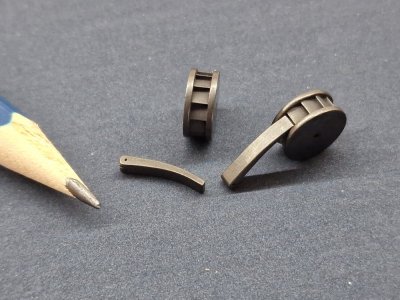
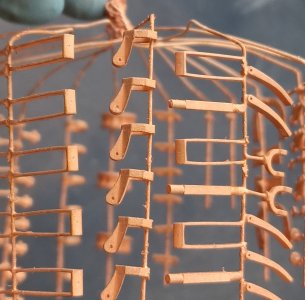
These parts were modeled in Blender 3D. Incidentally, you can also use it to find the exact area of each part. This is necessary to set the correct current (amperes). This is important, as the result depends on it! Don't confuse volume and area; we need area!
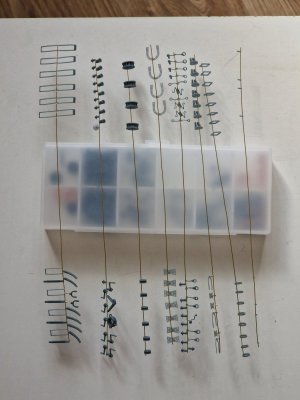
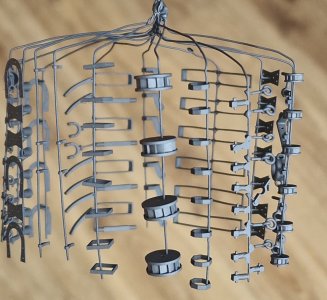
See point 7 for the dimensions and shape of the wood with holders!
2. Graphite.
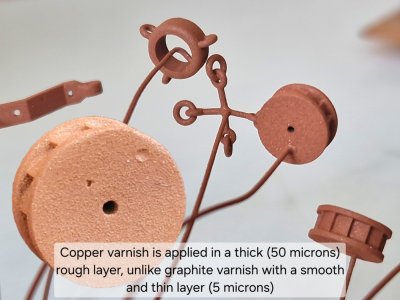
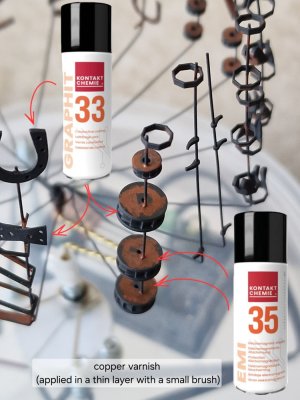
Since plastic doesn't conduct electricity, we need to create a conductive coating using graphite varnish. Apply three very thin layers. Then, use a brush to touch up the connection points between the part and the holders. This will speed up the bonding process between the graphite and the copper and prevent any gaps between the part and the holders.
3. Anode. Copper plates.
Ideally, you can find special copper for anodes with phosphorus. Regular copper will do, but a filter is a must!
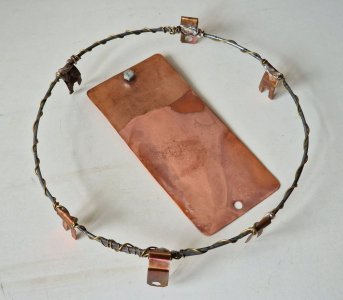
The anode area (copper plates on both sides!) should be twice the area of the parts with the holders. However, the copper ratio shouldn't be too high, no more than 2.5:1. It's best to make the plates narrow (2-3 cm) and they should be above the liquid level (but only the area in the solution is taken into account!) Before use, be sure to remove the oxide layer on the copper. This can be done with steel wool, sandpaper, or a drill attachment.
4. Filters. Non-woven material.
You need to sew covers from four layers. And be sure to wet them with water and wring them out before use. This material doesn't absorb water well and will stay dry for a long time in the bath.
5. Location and quantity.
The anodes should be positioned either opposite each other (2) in long, narrow baths, or in a square (4) in round baths. The terminals should be designed so that the wires do not come into contact with the solution. It's best to use screw-type terminals with quick-release (dovetail) connections.
6. Electronics. Power supplies and step-down control unit.
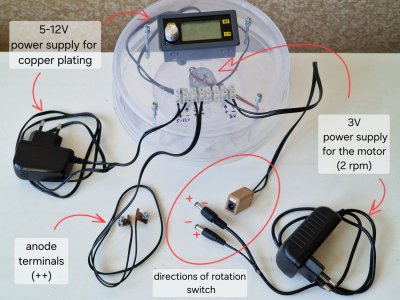
For galvanic applications, you need a step-down converter that can be used to set the current (amps) and volts (volts are set between 2-3V and the converter will automatically control this value depending on the amps). We're only interested in amps; that's the most important thing! This unit, the XY-SK35H, can be purchased on AliExpress. It's inexpensive.
This converter connects the positive terminal (Plus) to the anode (copper plates). I connected it to a terminal inside the case.
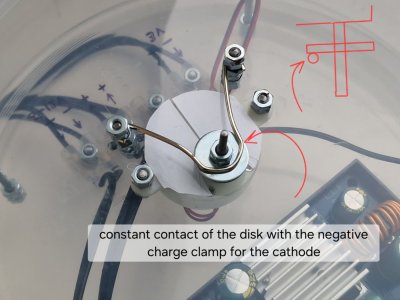
And the negative contact (Minus) - to the Cathode (parts).
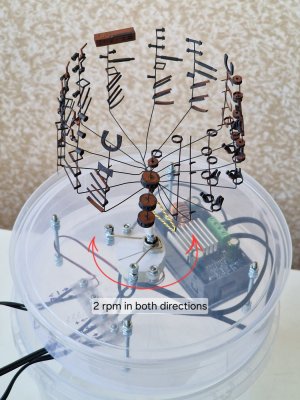
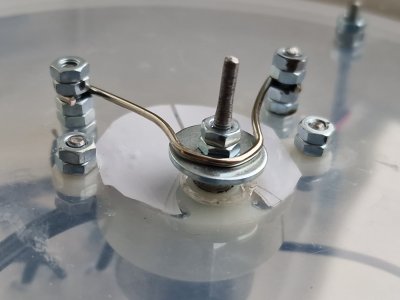
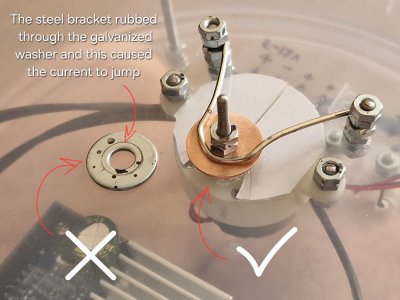
I connected this contact to the motor's rotation axis. I also bought the motor on AliExpress. It's powered by a 3V power supply, which gives it 2 revolutions per minute. In the first versions, I used a bearing in the sliding contact area (a big mistake, as there were huge voltage surges due to uneven ball contact. Then I used a washer, which turned out to be zinc-coated, and when the steel bracket gnawed a groove in it, the contact also began to fail). So I replaced the washer with a copper one and lubricated the contact with sewing machine oil, and the voltage surges have been gone!
The circuit is simple. I connected the negative terminal to a steel clamp. It rubs against a copper washer, which is screwed to the motor's axis of rotation. A regular wire clamp is screwed to this axis. One side of this clamp holds the axis, and the other side holds the wood components.
7. Distances, dimensions, and shape.
The photo shows the minimum acceptable values. However, it's better to either use a larger tank and liquid, or make the tree smaller. The recommended distance from the bottom is 4.5-5 cm (this is the most important, by the way). From the parts to the plates, 4-5 cm, and between rows and tiers, 2.5-3 cm. However, with these values, I end up with a very small tree and very few parts. I found the minimum value through trial and error. But it's still best to leave at least 4-4.5 cm from the bottom!
So... the tree of parts is installed, the copper plates are polished, washed, dried, and put on damp covers! The tank is washed with soap, dried, clean, and free of streaks and dust. Everything is ready; you just need to add the solution and set the correct voltage.
8. Solution. Ready-made liquid for bright copper plating (acidic).
As I've said many times, it's better to buy a ready-made copper plating solution. Making your own is both difficult and expensive, and there's a high risk of getting the proportions wrong and ruining everything. Not to mention, there are many chemicals on the market, and they're not always good or suitable for our purposes. And considering that 2 liters of solution cost 12 euros, I don't see the point in risking making it myself. I bought it at a specialty galvanizing store, and I recommend you look for similar ones. How to store the solution is described below, in section 10.
9. Settings. Current (Amps).
This is perhaps the most important thing after the solution itself.
A few words about the motor and
rotation. To ensure the copper lays flat and avoids shielding, the wood must rotate. This is achieved with a motor running at two revolutions per minute. Reverse is crucial. Ideally, it should have automatic reverse, but I was only able to make two plugs with different contact polarities, so I reconnect the other contact every 10-15 minutes, thus changing the direction of rotation.
Calculating area and current.
To accurately determine the area of the parts, you can find this value when modeling in Blender, and be sure to add the area of all holders! If the parts weren't modeled, you need to calculate them as accurately as possible using AI.
You need
0.007 A per 1 cm². (The value 0.01 A/cm² is often quoted everywhere, but lower current means denser and stronger copper, longer process times, and less stress on the solution. That's why I derived this value for myself.)
In this case, with an area of 70 cm² (all parts and holders), I set the copper flow rate to 0.5 A/cm², and the copper coated parts up to 1 cm thick in 40 minutes and parts 1.5 cm long in 80 minutes. The copper layer continued to build up for about another 3 hours. The total copper plating time was exactly 4 hours.
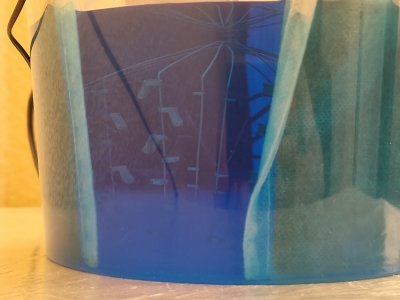
If you shine a flashlight through the solution, the graphite will appear dark, and the areas where copper has formed will be shiny. The area between the graphite and copper (1.5 mm) will be less shiny, as the copper layer there is still minimal.
It is not recommended to remove the parts from the solution. One-time, very brief inspections are permitted. The main thing is to prevent the solution from drying on the parts, otherwise oxidation will occur!
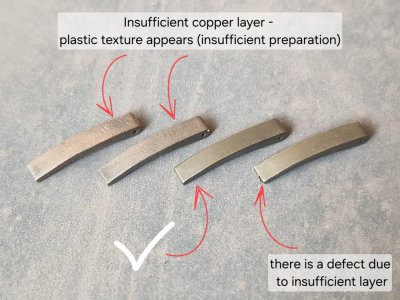
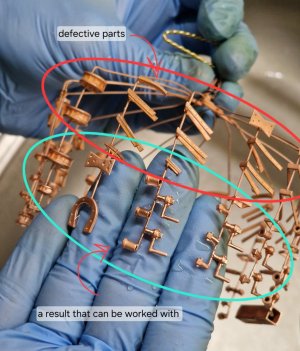
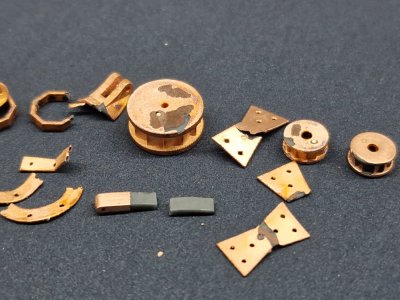
The copper shouldn't be too dull (matte), and it shouldn't have any dark spots or roughness. There also shouldn't be any threads, spikes, or "pimples."
Also, don't partially remove the wood while the unit is running, otherwise the entire stress will fall only on the parts submerged in the liquid!
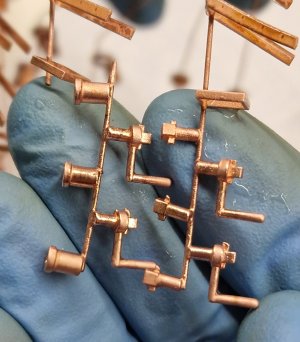
Copper grows stronger and faster on the lower tiers. Therefore, it's necessary to arrange parts of the same shape on the same holder (vertically), and as the layer increases on the lower tiers, you can cut off the lower parts, leaving the upper ones to continue to be coated with copper.
10. Cleaning and storage.
This is a crucial step, as the subsequent results will depend on it.
As you can see, the 4-layer filters worked and prevented the bathtub from becoming dirty. The filter plates should be removed from the solution very slowly and carefully.
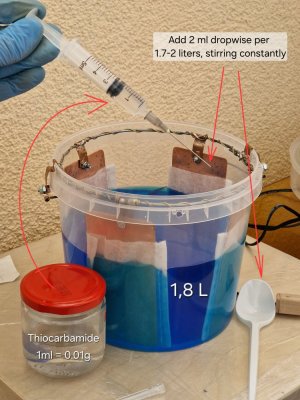
Do not disturb the container containing the liquid during the entire process and after its completion. After removing the parts, seal the container tightly and allow the sediment to settle for 12-24 hours.
The filters can be washed, but I recommend making new ones and disposing of the old ones!
Die Kupferplatten sollten mit Seife und einer Bürste gewaschen und getrocknet werden. Die Oxidschicht sollte erst vor dem nächsten Gebrauch, nicht aber vor der Lagerung entfernt werden!
Am nächsten Tag die oberen drei Viertel der Flüssigkeit mit einer großen Spritze oder einem Schlauch absaugen, ohne das Gefäß zu kippen oder zu bewegen. Den Rest in ein Einmachglas füllen und 3–4 Tage stehen lassen. Während dieser Zeit setzt sich der Bodensatz weiter ab. Anschließend die oberen vier Fünftel der Lösung erneut mit einer Spritze oder einem Schlauch absaugen, ohne das Gefäß zu bewegen. Die Bodenreste entsorgen.
Dieses Sediment enthält die verbrauchten organischen Bestandteile des Glanzmittels und, noch wichtiger, große Kupferpartikel (Kupferstaub). Gelangt dieser Staub auf das Werkstück, verursacht er eine unebene Oberfläche, wodurch das Kupfer rau und spröde wird. Haushaltsfilter können solch kleine Partikel nicht zurückhalten, daher ist es einfacher, sie sich absetzen zu lassen und zu entsorgen.
Und hier das
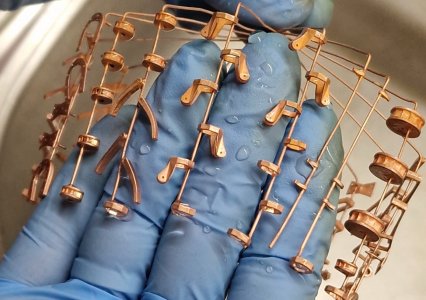
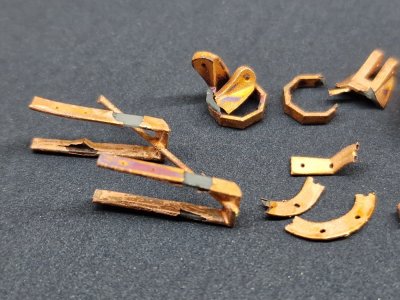
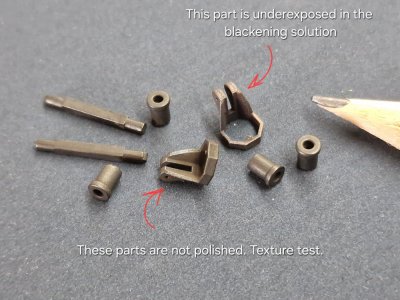
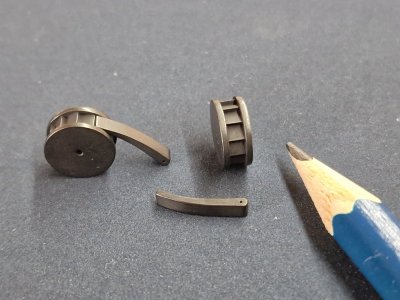
Ergebnis direkt nach der Kupferplattierung. Dies ist vor jeglicher Nachbearbeitung wie Schleifen und Polieren. Auf dem ersten Foto ist die unterste Ebene zu sehen (es handelt sich um eine Testebene, die aber ebenfalls sehr gut werden wird).
Dieses Kupfer ist extrem widerstandsfähig, leicht zu verarbeiten und lässt sich perfekt ziehen. Vor allem aber können Sie mit galvanischer Bearbeitung Metallteile jeder Komplexität und in jeder Menge mit hoher Wiederholgenauigkeit herstellen!













 But I understand, practise makes the master driller.