

• SUBSCRIBE TO SHIPS IN SCALE TODAY!

    The beloved Ships in Scale Magazine is back and charting a new course for 2026!
    Discover new skills, new techniques, and new inspirations in every issue.

    NOTE THAT OUR NEXT ISSUE WILL BE July/August 2026
  • Win a Free Custom Engraved Brass Coin!!!
    As a way to introduce our brass coins to the community, we will raffle off a free coin during the month of August. Follow link ABOVE for instructions for entering.

HM Cutter Lady Nelson 1:64 - Build Log

Hey, starting a build log here.
I decided to go with HM Cutter Lady Nelson 1:64 from Amati as per recommendation in this forum. I ordered it on Amati website and after a week or so, it has arrived.
I wasn't sure if I want to start doing 3 things in parallel, an actual build, videos and build log. Long story short, I am writing this new post in the new thread under build logs forum with other like minded folks :).

My goal is to share progress and mistakes, get an advise from seasoned builders. I am new to this, so would be great to have some support.
I’ve got this sitting on a shelf of ‘to-do’ projects so really happy to follow your lead. Bon chance. :-)
 
I’ve got this sitting on a shelf of ‘to-do’ projects so really happy to follow your lead. Bon chance. :-)
Welcome, Pog and happy reading you here.
That's nice that you have Lady Nelson waiting, as after watching other 2 build logs of Lady Nelson, and starting this one I was under the impression that no one is interested in this build or Lady Nelson :).
 
Hi Max, judging from the work you've done so far and the problem you're having with shaping and forming of planks, it appears to be that you need to do some reading on techniques for fitting planks to the hull, specifically:

1) beveling plank edges such that they meet adjacent edges without gaps
2) fitting, such as tapering of plank near the bow, and use of drop planks and stealer planks at areas where hull surface narrows or expands (at bow or stern)
3) pre-forming planks to contain the proper twist as they approach the bow
4) spiling planks (creating edge-on curvature so they follow the vertical shear curve of the hull)
5) glueing plank to the frames AND adjacent planks ONLY after they are test fit, and fit almost perfectly, with LITTLE bending force needed for them to conform to the frames

I think you're forging ahead too early, without fully knowing the basics of hull planking. Please read the docs I attached below. Then, read them again. Practice techniques on strips of scrap wood first to get a feel for how the wood will behave. Save the kit planks for when you are truly ready. Each of the docs below describes techniques mentioned above, many directly specifically for the type of hull you are planking. Learn how to pre-bend planks by soaking in water and using a hot iron tool. Buy one of those HERE. If you study these things, you will feel more confident in dealing with the problems of plank fitting and learn an essential skill in wooden hull modeling.

The first planking layer can have mistakes because you can correct them and they won't be visible when the ship is finished, being covered by the final (second) planking. The first layer DOES need to be smooth and shaped properly, but the seams don't matter much.

You will have specific questions on planking as your research, so ask them here in your build log. We are here to help.
 

Attachments

Last edited:
Hi Max, judging from the work you've done so far and the problem you're having with shaping and forming of planks, it appears to be that you need to do some reading on techniques for fitting planks to the hull, specifically:

1) beveling plank edges such that they meet adjacent edges without gaps
2) fitting, such as tapering of plank near the bow, and use of drop planks and stealer planks at areas where hull surface narrows or expands (at bow or stern)
3) pre-forming planks to contain the proper twist as they approach the bow
4) spiling planks (creating edge-on curvature so they follow the vertical shear curve of the hull)
5) glueing plank to the frames AND adjacent planks ONLY after they are test fit, and fit almost perfectly, with LITTLE bending force needed for them to conform to the frames

I think you're forging ahead too early, without fully knowing the basics of hull planking. Please read the docs I attached below. Then, read them again. Practice techniques on strips of scrap wood first to get a feel for how the wood will behave. Save the kit planks for when you are truly ready. Each of the docs below describes techniques mentioned above, many directly specifically for the type of hull you are planking. Learn how to pre-bend planks by soaking in water and using a hot iron tool. Buy one of those HERE. If you study these things, you will feel more confident in dealing with the problems of plank fitting and learn an essential skill in wooden hull modeling.

The first planking layer can have mistakes because you can correct them and they won't be visible when the ship is finished, being covered by the final (second) planking. The first layer DOES need to be smooth and shaped properly, but the seams don't matter much.

You will have specific questions on planking as your research, so ask them here in your build log. We are here to help.
Hi Kurt,

Thank you so much for sharing documents. Looking through them it seems like it is really valuable information. I haven't got a chance to study theory of planking before, and the information you shared is exactly what I need.
 
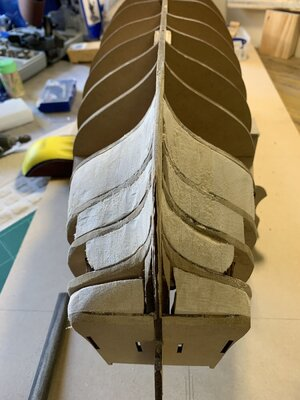
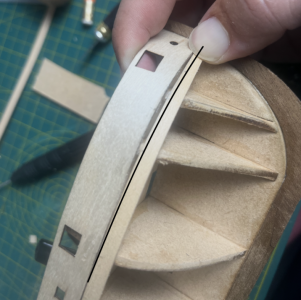
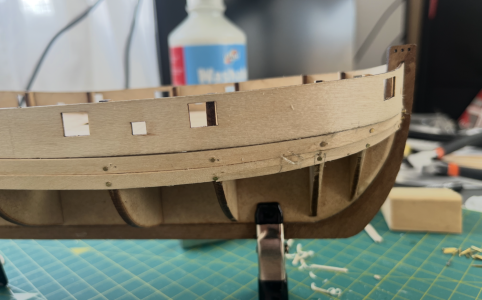
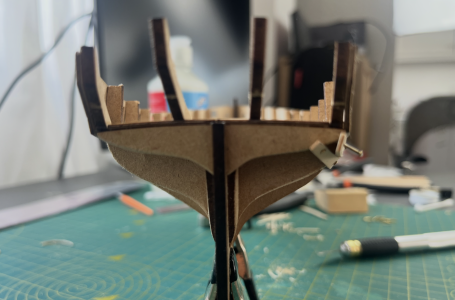
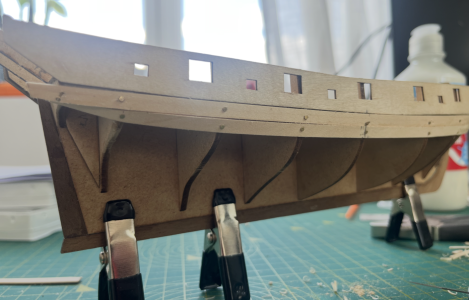
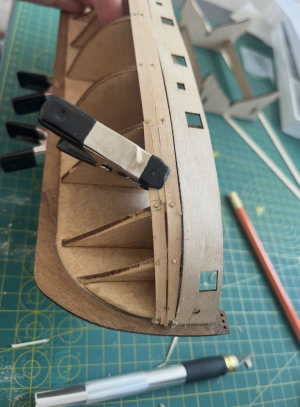
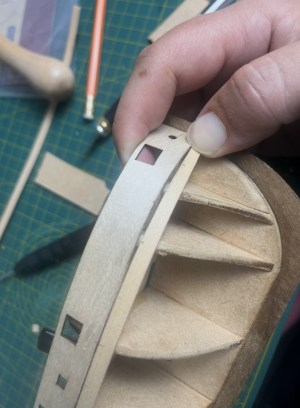
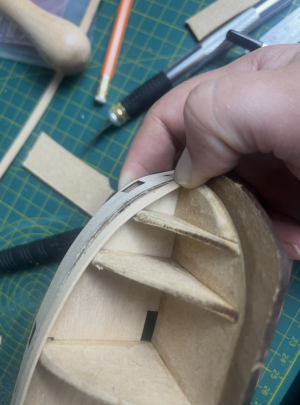
Redoing planking. Dry fit of the first plan, the 1 bulkhead gives me a gap between plank and bulwalk as per the photo. The instructions tell to tapper starting from the first plank, and "How To Plank The Hull of a Bluff Bow Model Ship" PDF says to never taper first plank. All other builds also taper.

Screenshot 2026-07-10 at 00.20.11.png
Screenshot 2026-07-10 at 00.20.05.png

I know that it is not ideal, but should I fix the first bulkhead by adding hardwood to fill the gap between 1,2 and 3 and increase the height of the 1st bulkhead?
 
If the gap is at the top edge of the plank, then the material you remove to taper the plank should be at the top edge only. Before you cut wood, make a stiff paper or tagboard model of the plank itself. Bend the paper strip over the hull and mark where you need to remove wood with a pencil. Cut the paper until it fits the hull. The paper is now your pattern for making the wood plank.

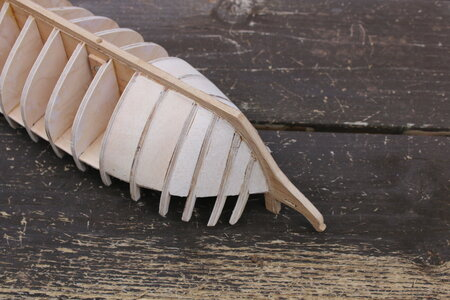
Now the plank's upper edge is not in line with the garboard strake plywood above it. Let's fix that BEFORE you make your paper pattern. You will need to will the space between the frames nearest the bow with a block of balsa wood, and then cut and sand that down to the shape of the bow on both port and starboard sides. They don't tell you these tricks in kit instructions, BUT THEY SHOULD. Filler blocks do two things. 1) they provide proper shape to the planks that are laid over them, and 2) they provide a strong surface to glue the planks to.

Wherever you have planks that bend over a hard curve or twist a lot, balsa filler blocks are your friend. They make planking SO much easier and guarantee proper hull shape. They are often used at the bow and at the stern only. You will have to ensure that where the filler block material approaches the plywood garboard strip that you already have on your hull, the surface of the block is 1) below the surface level of the plywood equal to the thickness of a plank, and 2) the surface angle of the block equals the angle of the garboard strake without a hard bend at the joint where the plank will touch the garboard strake, producing a smooth curvature. The surfaces of garboard strake and plank just beneath it should flow smoothly without a forming a hard edge, so little sanding will be needed to blend the joint smooth.

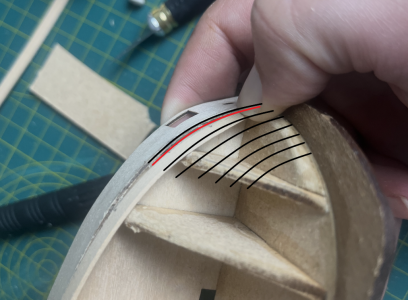
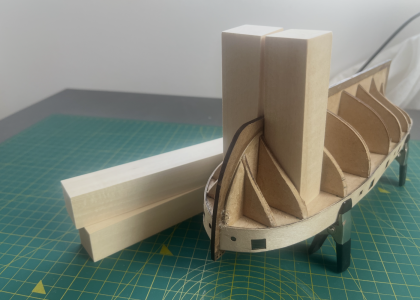
A plank must be cut to a specific shape and/or bent in order to lay flat on the frames. The top edge of the filler block should touch the inside edge of the garboard strake (red line), so when you place plywood planks over the filler block, the plank's surface is level with the plywood above it (black line). The other black lines below these help you visualize the shape of the filler block. The filler block surface is at the same level of depth as the adjacent frames, fore and aft. All you should need is one filler block between the stem/keel and the first frame, and that will provide enough support and shape to the planks you lay on top.
1783651656933.png

And you thought all you needed to to was buy a kit and glue it together... No! You have to be a craftsman and employ many techniques never found in the instructions to get the best results. This is one technique all beginning scratch builders use to guarantee their hull have smooth curves with no sharp bends, flat spots, depressions, or lumps. With more experience, you can plank a hull without filler blocks, but it is definitely harder to align the planks at the bow without them. As a beginner, you may be disapppointed to learn it takes more work than the instructions said. Get used to that! Often the instructions ASSUME you know all the steps and methods to build a wooden ship as a modeler, just as plastic model kits assume you know how to paint and weather a plastic model. Take the time to obtain some balsa blocks at a local hobby store, and make filler blocks.

1783649050132.png

1783648914206.png

On my current model, in order to make darn sure my hull curves came out smooth, I completely filled the hull frames. You really need filler blocks only at the bow, but they help a lot at the stern, especially at the "deadwood" area just forward of the rudder.

Sanding filler blocks smooth to match the frames.
083 Begin Rough Sanding of Hull.jpg

Use wood filler in the low spots.
144 Planking Continues.jpg

First layer of planking comes out smooth at the frame lines, with no hard bends visible, especially at the bow, which is what you want.
177 Start Planking up the Sides.jpg

Now, after you have the filler block glue in place and shaped using rasps and sanding block, you can make the firt plank under the garboard strake. Trim the strip's the top edge at the black line as shown below to it meets the edge of the plywood AND lays flat on the filler block and frames. Your paper pattern will show the line to cut in a similar position as the black line below.
1783652446168.png

Learning to plank is a process that takes time, study of how each plank lays, AND PATIENCE. Once you make one hull, the second model is MUCH easier.
 
Last edited:
If the gap is at the top edge of the plank, then the material you remove to taper the plank should be at the top edge only. Before you cut wood, make a stiff paper or tagboard model of the plank itself. Bend the paper strip over the hull and mark where you need to remove wood with a pencil. Cut the paper until it fits the hull. The paper is now your pattern for making the wood plank.
Hey Kurt,

Everything makes sense to me, but practically, there are questions. Thank you for talking the time to explain it to me.

If the gap is at the top edge of the plank, then the material you remove to taper the plank should be at the top edge only. Before you cut wood, make a stiff paper or tagboard model of the plank itself. Bend the paper strip over the hull and mark where you need to remove wood with a pencil. Cut the paper until it fits the hull. The paper is now your pattern for making the wood plank.
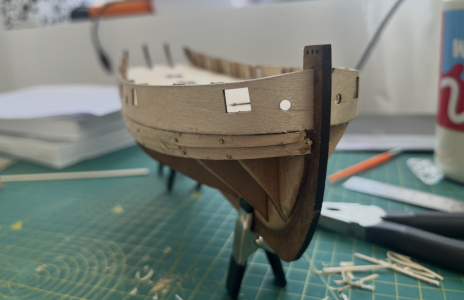
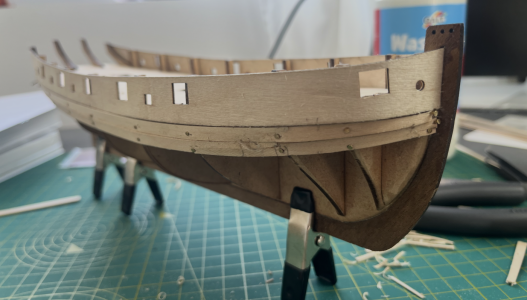
I tried a few ways to cut the first plank. First time, and I posted photos, I cut on the top edge only, the problem appeared to me visually, when I came with the second plank and realised that it shouldn't be the way it is done, that is why I posted a question here in this thread. I tried fixing both planks, but again, it wasn't the best way as I understand that moving forward I would have even more issues with the way I would have those planks.

The second time, I decided to go with the method of calculating planks size for Lady Nelson, 12 planks, and each should be 3.1mm on the keel. But again, I see that it doesn't work. My issue is that no matter what I do with the first plank, it appears to be way below the entire width of the bulwalk. And it is definitely going to be a problem. I came to a conclusion that without fixing bulkhead size, there is no (visible to me as of now) way to prepare and install even first plank without this weird misallignment.

Now the plank's upper edge is not in line with the garboard strake plywood above it. Let's fix that BEFORE you make your paper pattern. You will need to will the space between the frames nearest the bow with a block of balsa wood, and then cut and sand that down to the shape of the bow on both port and starboard sides. They don't tell you these tricks in kit instructions, BUT THEY SHOULD. Filler blocks do two things. 1) they provide proper shape to the planks that are laid over them, and 2) they provide a strong surface to glue the planks to.

Now the plank's upper edge is not in line with the garboard strake plywood above it. Let's fix that BEFORE you make your paper pattern. You will need to will the space between the frames nearest the bow with a block of balsa wood, and then cut and sand that down to the shape of the bow on both port and starboard sides. They don't tell you these tricks in kit instructions, BUT THEY SHOULD. Filler blocks do two things. 1) they provide proper shape to the planks that are laid over them, and 2) they provide a strong surface to glue the planks to.
I absolutely agree on this one. It makes my progress being slower as I will have to find and order balsawood and proper sanding blocks to make the shape comfortably quick for my build. What I see here is that the 1 and 2 bulkheads may be 1-1.3mm down the balsawood and my planks would be installed on balsawood (I hope) and the issue with bulkhead/first plank is fixed.

I kind of start getting why I saw 3 build logs of the Lady Nelson and no one used balsawood. As they all have experience, and they likely haven't build this as the first one. I may be wrong, but it feels like balsa wood is a definite next step for me here.

Instructions don't tell about this stuff, and the expectation is that a modeler should somehow know all this. But not everyone who buys ship model kits is experienced in this.

You will have to ensure that where the filler block material approaches the plywood garboard strip that you already have on your hull, the surface of the block is 1) below the surface level of the plywood equal to the thickness of a plank, and 2) the surface angle of the block equals the angle of the garboard strake without a hard bend at the joint where the plank will touch the garboard strake, producing a smooth curvature. The surfaces of garboard strake and plank just beneath it should flow smoothly without a forming a hard edge, so little sanding will be needed to blend the joint smooth.
I am not sure about the surface angle of the block and how to achieve this, but I would have to find out once I have balsawood and start block dry fitting.
A plank must be cut to a specific shape and/or bent in order to lay flat on the frames. The top edge of the filler block should touch the inside edge of the garboard strake (red line), so when you place plywood planks over the filler block, the plank's surface is level with the plywood above it (black line).
It makes sense to me, thank you for the detailed explanation.
And you thought all you needed to to was buy a kit and glue it together... No!
I never said that and never thought so... haha.
This is one technique all beginning scratch builders use to guarantee their hull have smooth curves with no sharp bends, flat spots, depressions, or lumps.
I am pretty much sure that beginning scratch builders have absolutely no idea about blocks, balsawood, extra support for planks etc. But I agree with you, that is makes sooo much more sense now as I try and fail every attempt to follow instructions and videos.

As a beginner, you may be disapppointed to learn it takes more work than the instructions said. Get used to that!
I am not disappointed about this one, I've got used to it while doing my other hobbies and understand that everything takes way more time than planned/expected.:)

Thank you again for explaining to me all these, I really appreciate it, Kurt.
 
Last edited:
Trimming the upper edge on the first plank will work if the gap is not to wide and the curve of the bottom edge of the garboard strake is not too deep. The amount of material you are allowed to trim off is limited by the width of the plank. A plank should never be tapered to less that half of its full width. It this is the sutuation, here is what you do.

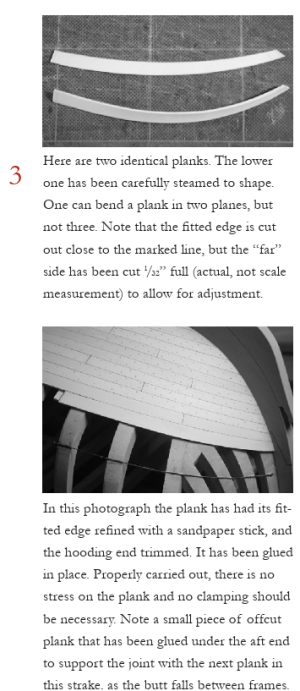
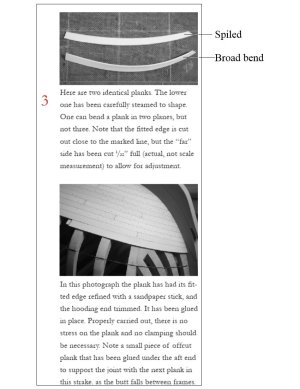
In order for the first plank's top edge to lay alongside the garboard strake, one of two things must occur. 1) the plank will twist, which is unacceptable, because it will not lay flat on the frames. 2) the plank must be BENT sideways, as if it were cut in a curve from a larger sheet of thin wood. This can be done in one of two ways. Spiling, which is the soaking of the plank, and forcing it to bend on it's long axis using a jig that prevents the plank from twisting as it is bent. As long as the curve is not too tight, it can be done carefully without splintering the wood. The third option is to cut a custom shaped, curved plank from a sheet of wood, using the paper pattern taken from the lower edge of the garboard strake (mentioned earlier) as a template.

Remember that in planking, the planks should be trimmed, bent, and fitted so that there is littel to no stress of force applied when they are fit to the frames on the hull. You shoul not rely on glue and clamps to hold springy planks in position. First, struggling to force a plank into place will leave gaps between the planks, no matter how hard you pin or clamp it down. A plank could also pull away from the edge of the frame before the glue sets, creating a gap underneath that you cannot see, but will affect the shape and strength of the hull at that spot. If you properly trim and pre-shape planks, and bevel the edges to prevent gaps, installing them on the hull is super easy. You will actually save time, and the joints between planks will have tight seams. Also, you will not be frustrated by uncooperating planks, which is a major reason why beginners give early when trying to build wooden model ships. It's all about patience and proper technique.

1783840178139.png

Read about spiling in the article attached.
 

Attachments

Last edited:
At first glance, I’d initially suspect that the frames haven’t been sanded down properly.
To my mind, there are still too many sharp edges.
 
Back
Top