• Ships of Scale has incorportated an extra level of security when you log In. Please follow on-screen prompts to acknowledge that you are not a robot via a "Check Box" or a "Pictorial Check Box Puzzle". This is needed due to higher level of AI Activity Security.
  • SUBSCRIBE TO SHIPS IN SCALE TODAY!

    The beloved Ships in Scale Magazine is back and charting a new course for 2026!
    Discover new skills, new techniques, and new inspirations in every issue.

    NOTE THAT OUR NEXT ISSUE WILL BE July/August 2026
  • Win a Free Custom Engraved Brass Coin!!!
    As a way to introduce our brass coins to the community, we will raffle off a free coin during the month of August. Follow link ABOVE for instructions for entering.

La Renommee 1744 1:48. (CAF) by Salty

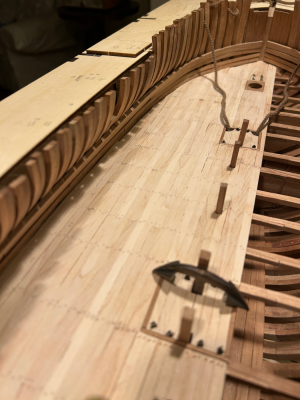
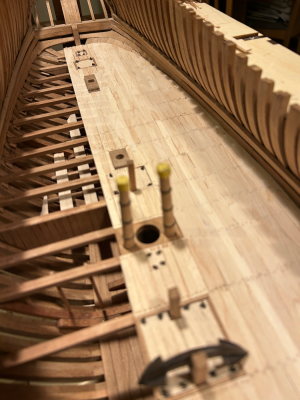
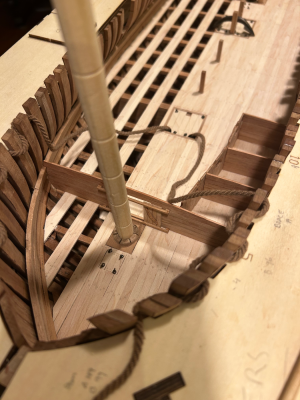
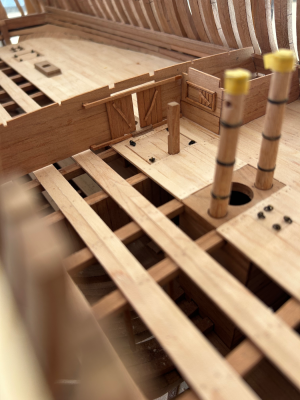
I’ve finished most of the port side now:
IMG_4708.jpeg

IMG_4709.jpeg

As you can see, I have also started the trunnels and I think they’ll look OK after I sand them back. I have some new HSS twist drill bits which make things so much easier as well.

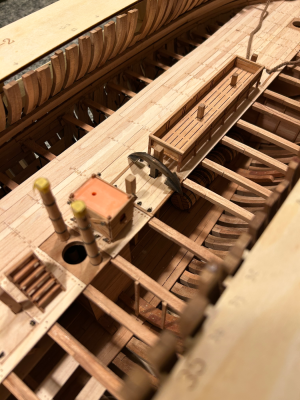
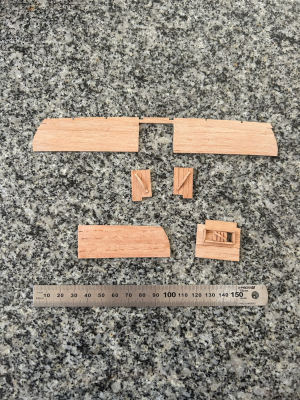
I’ve also finished a livestock pen which sits just forward of the spare anchor:

IMG_4706.jpeg


IMG_4710.jpeg

It was quite fiddly, lots of pieces - about 60 or so! - and delicate sanding. Some parts I didn’t even try because they were so thin I knew they’d splinter into pieces. A really amazing amount of detail for such a small item.

Kind regards

Salty
 
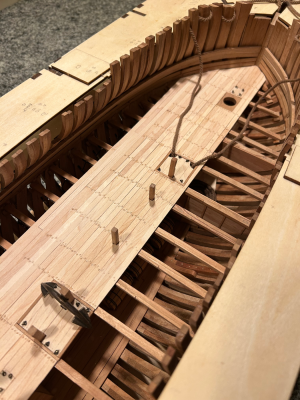
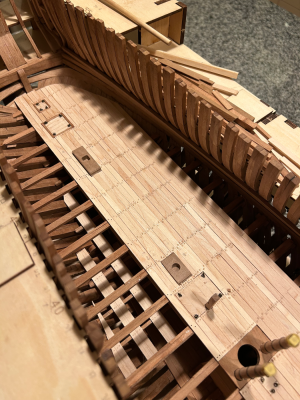
I’ve finished most of the port side now:
View attachment 622893

View attachment 622894

As you can see, I have also started the trunnels and I think they’ll look OK after I sand them back. I have some new HSS twist drill bits which make things so much easier as well.

I’ve also finished a livestock pen which sits just forward of the spare anchor:
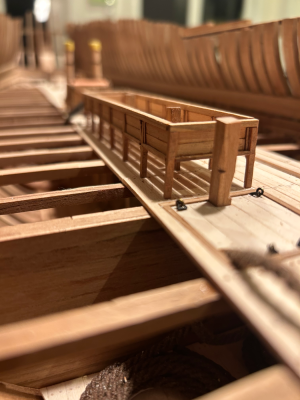
View attachment 622895


View attachment 622896

It was quite fiddly, lots of pieces - about 60 or so! - and delicate sanding. Some parts I didn’t even try because they were so thin I knew they’d splinter into pieces. A really amazing amount of detail for such a small item.

Kind regards

Salty
beautiful!!
 
Thanks to everyone who had been following my progress. It’s also good to see that Paul has restarted his Renommee log and is making wonderful progress.

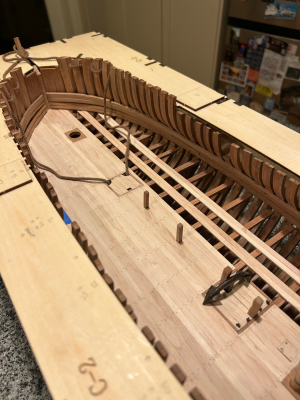
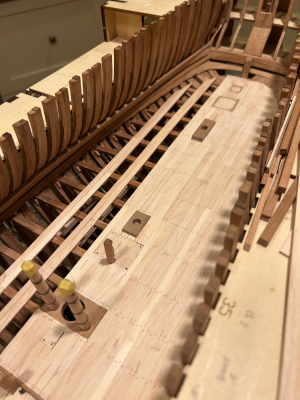
I have just finished the port side of the planking and inserting the trunnels.

IMG_4723.jpeg

IMG_4724.jpeg

I still have to properly sand off the trunnels and give the whole deck a final smooth and scrape, but I’ll do it a bit at a time while I am planking the starboard side. It’s partly because it’s a bit monotonous, but partly because I do want to rush and spoil what I have done.

Kind regards

Salty
 
Thanks to everyone who had been following my progress. It’s also good to see that Paul has restarted his Renommee log and is making wonderful progress.

I have just finished the port side of the planking and inserting the trunnels.

View attachment 623779

View attachment 623780

I still have to properly sand off the trunnels and give the whole deck a final smooth and scrape, but I’ll do it a bit at a time while I am planking the starboard side. It’s partly because it’s a bit monotonous, but partly because I do want to rush and spoil what I have done.

Kind regards

Salty
Beautiful work!
 
Paul, yes, as you can see below, the planking for the lower deck is the same as the decks below. I chose this pattern because it will more or less match the gun deck above where I will lay only the thicker planks which are notched into the beams.

IMG_4805.jpeg

I have made a start on planking the starboard side of the lower deck. As I mentioned earlier, it will only be partially planked - miss two, plank two.

IMG_4732.jpeg


IMG_4733.jpeg

This side is easier because there aren’t any partitions running under the beams, so you can clamp just about anywhere you need to.

Finishing the trunnels is going better than expected. The vast majority just need a sand with 120 and 400 grit. There were a few spots where the planks were uneven, so I’ve had to shave the edge with a bevel down chisel to get a level surface.

Kind regards

Salty
 
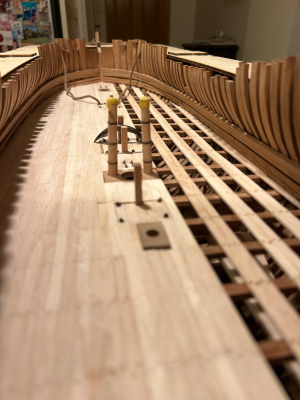
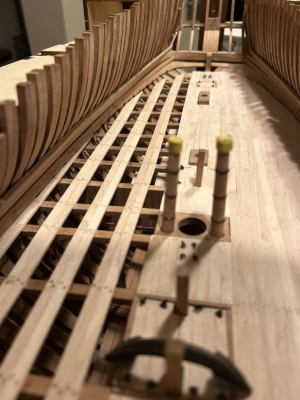
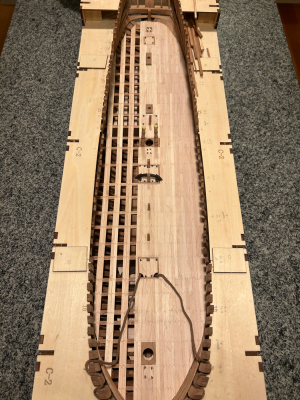
The planking is finished:

IMG_4738.jpeg

1786334217321.png

IMG_4739.jpeg

There’s still a little work to do cleaning up the trunnels on the starboard side, but that won’t take long.

I’m pretty happy with it, despite finding it quite difficult. It’s a huge space and imperfections seem to really stand out (or at least I think they do). Fortunately, there are only a couple of spots that are a little below par and I think they will get covered somewhat by the cabin walls.

Kind regards

Salty
 
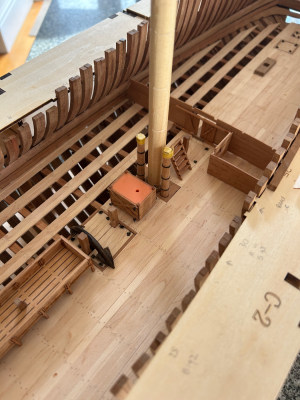
The planking is finished:

View attachment 625388

View attachment 625389

View attachment 625387

There’s still a little work to do cleaning up the trunnels on the starboard side, but that won’t take long.

I’m pretty happy with it, despite finding it quite difficult. It’s a huge space and imperfections seem to really stand out (or at least I think they do). Fortunately, there are only a couple of spots that are a little below par and I think they will get covered somewhat by the cabin walls.

Kind regards

Salty

Well Done!!!
 
Bryian, Grant, Paul 1 and Paul 2, thank you for your kind words. It really feels like a milestone finishing this deck, but not getting too carried away as there’s still a mountain to climb in terms of actually finishing.

The last section in this part of the kit is making the cabins and lockers for the lower deck.

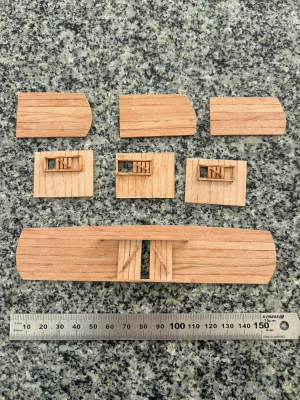
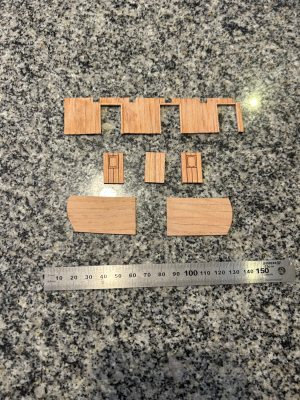
Here are the walls for the lockers in the bow:

IMG_4740.jpeg

The hatches and doors all slide as they should. There no mention of this in the instructions, but it only takes a little extra work to do it. I had a few problems with the hatches, snapping a few frames, but there is plenty of extras as I’m only building half the fittings.

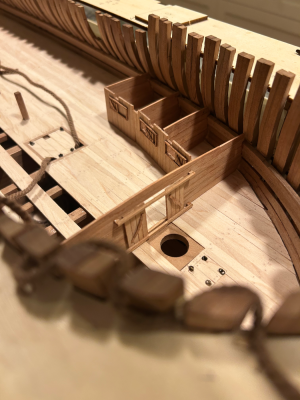
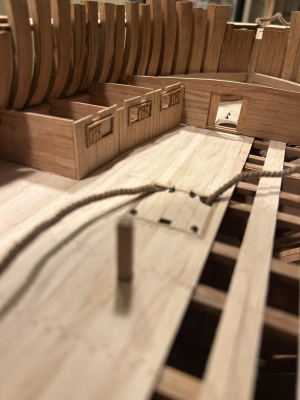
Here they are in place:

IMG_4749.jpeg

1786605306475.png

IMG_4751.jpeg

The kit comes with plywood templates which were handy when gluing, however they were even more use when fitting the panelling. I used them for the trial fit so there are no worries about mistakes ruining your finished parts.

As you can see, there are a few beams which pass through the partitions and I hope I have got things right because it’s going to be very difficult to fix later. I had a few issues with the partitions in the stern on the deck below and I don’t want a repeat here.

Kind regards

Salty
 
Bryian, Grant, Paul 1 and Paul 2, thank you for your kind words. It really feels like a milestone finishing this deck, but not getting too carried away as there’s still a mountain to climb in terms of actually finishing.

The last section in this part of the kit is making the cabins and lockers for the lower deck.

Here are the walls for the lockers in the bow:

View attachment 626149

The hatches and doors all slide as they should. There no mention of this in the instructions, but it only takes a little extra work to do it. I had a few problems with the hatches, snapping a few frames, but there is plenty of extras as I’m only building half the fittings.

Here they are in place:

View attachment 626150

View attachment 626152

View attachment 626151

The kit comes with plywood templates which were handy when gluing, however they were even more use when fitting the panelling. I used them for the trial fit so there are no worries about mistakes ruining your finished parts.

As you can see, there are a few beams which pass through the partitions and I hope I have got things right because it’s going to be very difficult to fix later. I had a few issues with the partitions in the stern on the deck below and I don’t want a repeat here.

Kind regards

Salty
AWESOME JOB!!
 
The next set of partitions just aft of the main mast:

IMG_4744.jpeg

No, it’s not a mistake in the doors. They are notched to fit over the capstan step which sits above the deck.

Here are the partitions fitted:

IMG_4752.jpeg

IMG_4753.jpeg

The doors slide. The instructions are little ambiguous about whether this is right. They seem to show the bottom rail holding securing the foot of the door, but don’t specify what to use to build it. There’s no rail shown at the top. The deck plan seems to show the top rail. I thought that since I have gone to the trouble of making the hatches work, I should have a go at making these doors work as well.

Kind regards

Salty
 
The next set of partitions just aft of the main mast:

View attachment 627164

No, it’s not a mistake in the doors. They are notched to fit over the capstan step which sits above the deck.

Here are the partitions fitted:

View attachment 627165

View attachment 627166

The doors slide. The instructions are little ambiguous about whether this is right. They seem to show the bottom rail holding securing the foot of the door, but don’t specify what to use to build it. There’s no rail shown at the top. The deck plan seems to show the top rail. I thought that since I have gone to the trouble of making the hatches work, I should have a go at making these doors work as well.

Kind regards

Salty
Tom, I love the sliding doors! Nicely done, Magic Mike
 
Paul, the doors lead to the sail locker. The aft wall in the locker divides the lower deck in half. It must have been difficult to get the sails in and out with the capstan step and capstan post in the way.

Mike, I am enjoying all the details in this kit. Of course, you don’t have to build everything so that it works, but I think of it as part of the fun, even if no one else will notice in the end.

The aft section of the lower deck contained the officers’ cabins. Here is the start:

IMG_4756.jpeg

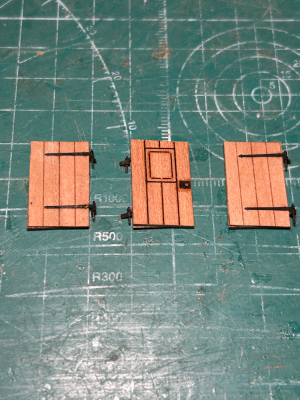
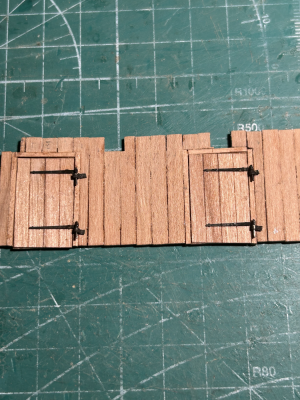
The partition has a definite slope from stern downwards, so I had to make sure I had the pieces oriented the right way as I am only building the port side. It’s the same with the doors. The kit comes with six doors, but only three will fit in the port side partition.

The doors are made of two parts - a 1 mm front piece with laser etched panels and a window and a 0.25 mm back piece.

IMG_4759.jpeg

1787105746376.png

There is no mention of making the doors swing on the hinges, but I decided to have a go anyway. The top part of the hinge is photo etch which comes with the kit and was a good start. I made the bottom part out of some brass shim from the local hobby store. They are connected by 0.5 mm brass wire which is glued to the top part.

While the doors did work, I have just glued them to the frame and the partition as the whole assembly is very fragile and I’m scared it will break later.

Kind regards

Salty
 
The next set of partitions just aft of the main mast:

View attachment 627164

No, it’s not a mistake in the doors. They are notched to fit over the capstan step which sits above the deck.

Here are the partitions fitted:

View attachment 627165

View attachment 627166

The doors slide. The instructions are little ambiguous about whether this is right. They seem to show the bottom rail holding securing the foot of the door, but don’t specify what to use to build it. There’s no rail shown at the top. The deck plan seems to show the top rail. I thought that since I have gone to the trouble of making the hatches work, I should have a go at making these doors work as well.

Kind regards

Salty
Good morning Tom. I whole heartedly agree with Paul- you are doing this kit justice. Stunning details. Cheers Grant
 
Grant, thank you for your kind words. As you know, getting these small details right becomes pretty important to the builder even if they are lost on the vast majority of other people. I admire your work on Enterprize. She will make a real talking point wherever you display her. Any thoughts on the next project?

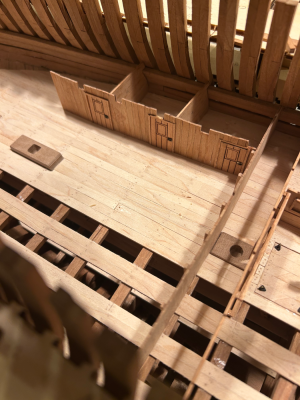
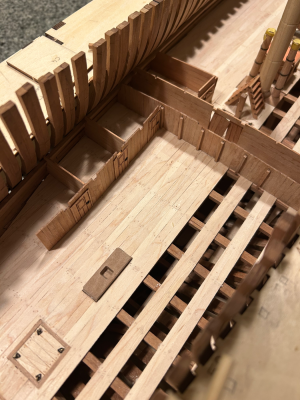
I have now finished the cabins in the aft section:

IMG_4762.jpeg

IMG_4763.jpeg

I hope I have the notches in the panels in the right spot for the gun deckk beams. I have been treating each part of the kit separately during construction and in fact I haven’t looked at the next start which contains the beams. Perhaps that’s a bit of a mistake, but time will tell. On the other hand, it would be easy to get a bit overwhelmed!!

There still one panel left to do which runs across the whole deck to create the gun room in the stern.

Kind regards

Tom
 
Last edited:
Back
Top