• Ships of Scale has incorportated an extra level of security when you log In. Please follow on-screen prompts to acknowledge that you are not a robot via a "Check Box" or a "Pictorial Check Box Puzzle". This is needed due to higher level of AI Activity Security.
  • SUBSCRIBE TO SHIPS IN SCALE TODAY!

    The beloved Ships in Scale Magazine is back and charting a new course for 2026!
    Discover new skills, new techniques, and new inspirations in every issue.

    NOTE THAT OUR NEXT ISSUE WILL BE July/August 2026
  • Win a Free Custom Engraved Brass Coin!!!
    As a way to introduce our brass coins to the community, we will raffle off a free coin during the month of August. Follow link ABOVE for instructions for entering.

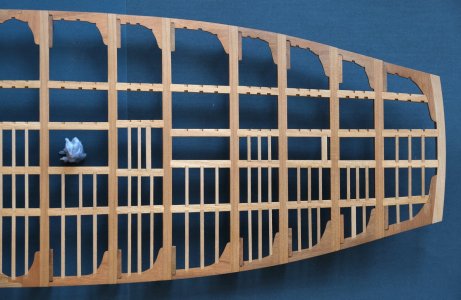
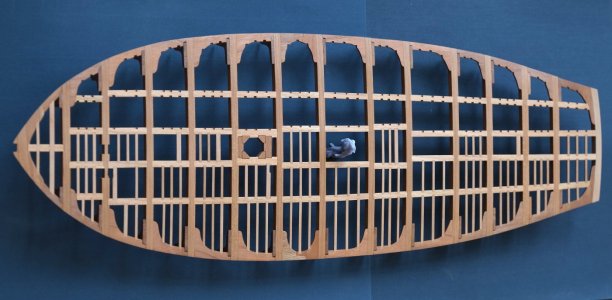
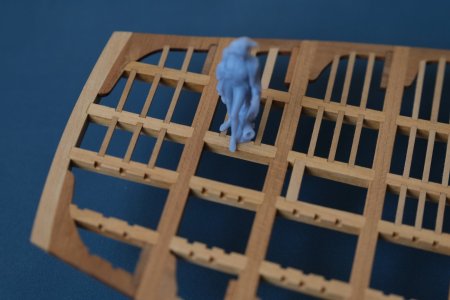
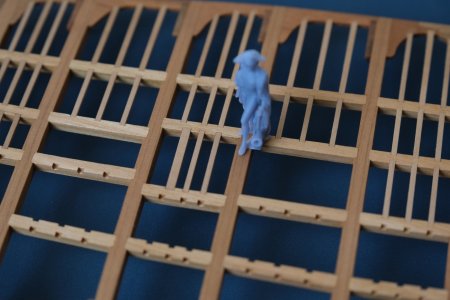
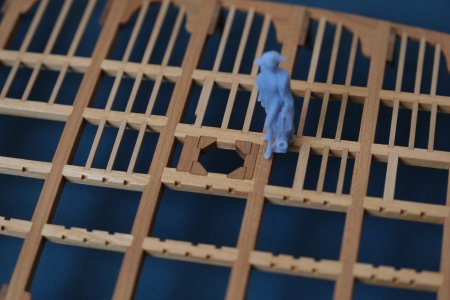
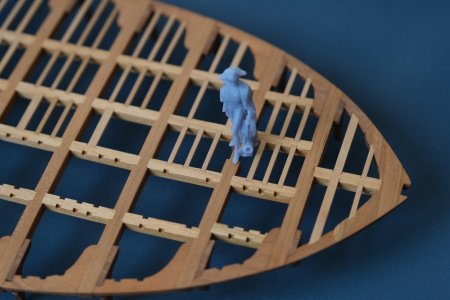
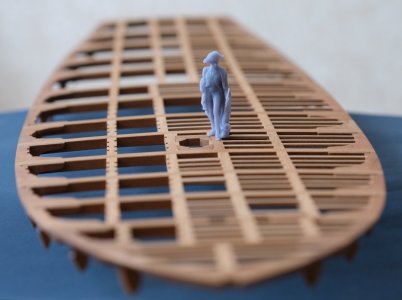
HMS Alert [1777] 1:48 POF by serikoff. (Two hulls: skeleton and fully rigged)

The perfection continues !
Thank you for your rating.

That free deck looks very special, Sergey. Nicely done and with a beautiful fit.
Regards, Peter
Thank you. It's very convenient when the deck remains removable until the very end; it will come in handy very soon.

Die Oberflächenbearbeitung ist perfekt. Die Luken und Rahmen sind absolut stimmig. Wird das Öl verdünnt oder mehrfach aufgetragen?
Thank you for the high rating. I apply oil in different ways (sometimes I dilute it 1:1 with oil paint thinner), but this time I applied it neat. I apply it with a cloth or paper towel and immediately wipe it dry. I always apply one layer.

Vielen Dank für die gute Bewertung. Ich trage Ölfarbe auf verschiedene Arten auf (manchmal verdünne ich sie 1:1 mit Ölverdünner), aber dieses Mal habe ich sie unverdünnt aufgetragen. Ich trage sie mit einem Tuch oder Papiertuch auf und wische sie sofort trocken. Ich trage immer nur eine Schicht auf.
 
Sill rails.
Alert 2720а.jpg

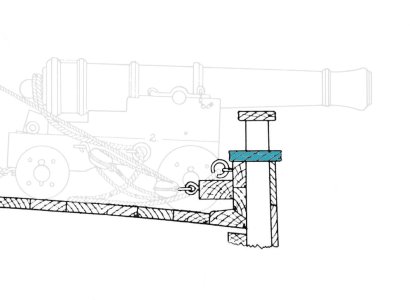
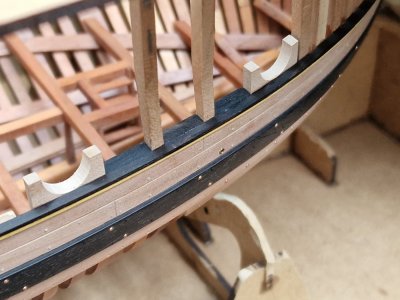
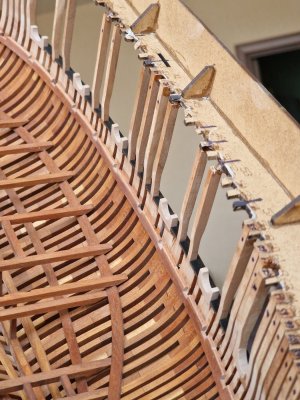
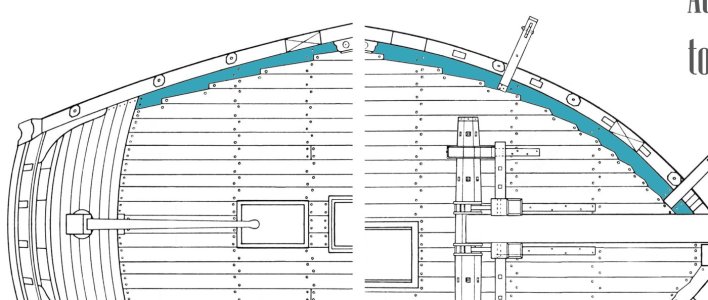
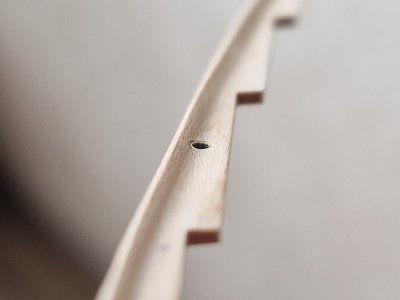
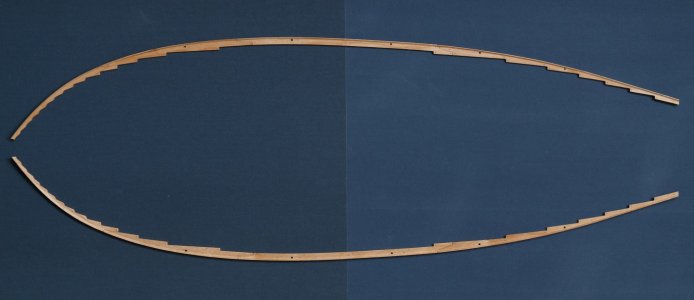
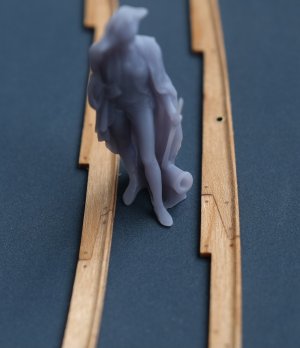
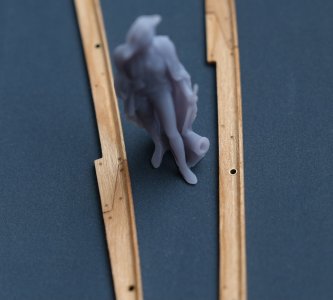
At first glance, this doesn't seem like a difficult element, but I spent weeks, if not months, thinking about it! My implementation on the two models is slightly different, but very similar. On the first hull, the pillars are all identical, while on the second hull, the gun ports are arched. But the idea is the same: there are sills between these elements. I really don't like the way this component was implemented in the kit (with all due respect). The pillars are often misplaced, vary in thickness, and the sills are very bulky (it's difficult to give them the correct longitudinal overall curve), with huge gaps between them and the pillars. This didn't suit me, so I decided to complicate the design, but make it as close to the anatomy as possible.

Alert 2721.jpg

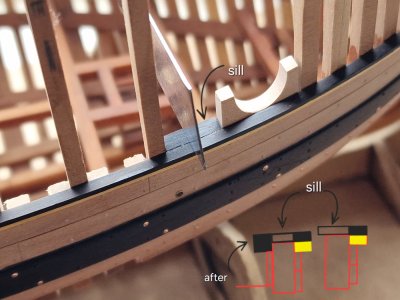
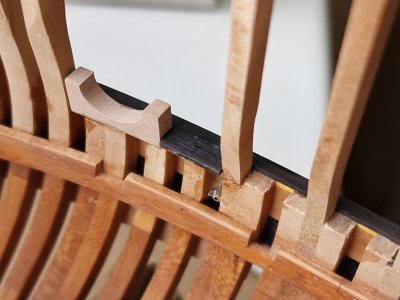
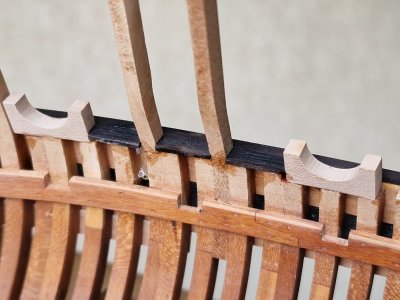
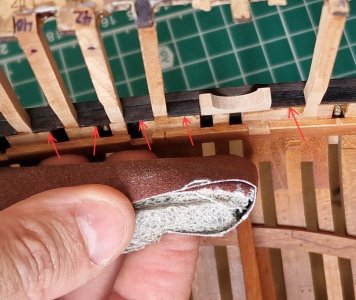
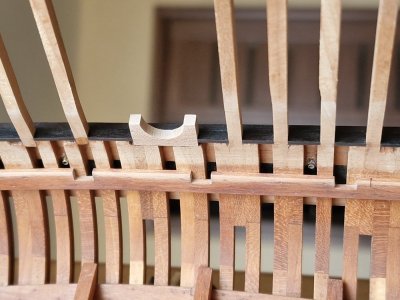
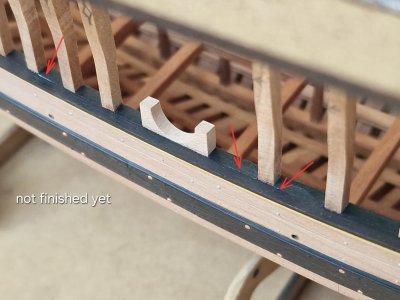
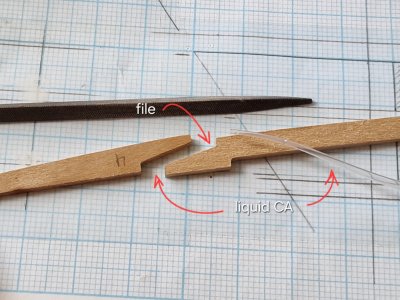
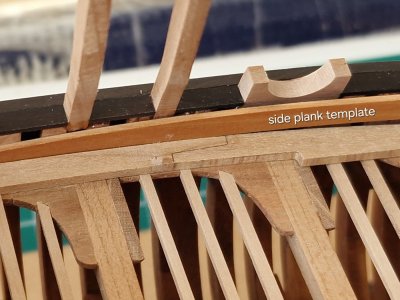
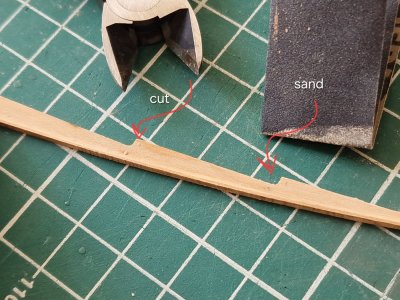
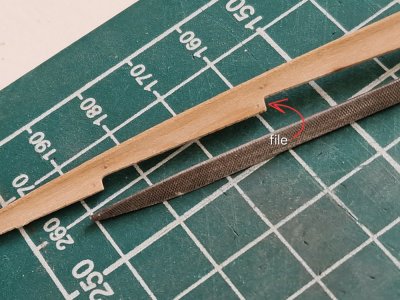
As you've noticed, I made the outer section of the sill (rail) first. It's two-toned (yellow on the bottom and black on the top). The steps were different for the two models, but the idea was the same: to set the desired curvature and level. Now I'm making the intermediate section (between the posts). I use a ruler to ensure this section is completely flush with the outer section. These intermediate sections will then be sanded inside the frame, and the inner sections of the sill/rail will be glued to them (leveled). Since this is black hornbeam, I'll fill all the seams with CA and then use a scraper to smooth them out to a uniform plane. This will all blend into one solid piece, making it virtually invisible that it's not a single piece.

Alert 2722.jpg

Alert 2723.jpg

Alert 2724.jpg

Alert 2725.jpg

Alert 2726.jpg

Alert 2727.jpg

Alert 2728.jpg

The inner part will be fixed later, since the upper deck needs to be glued in first, otherwise it will be impossible.
 
Sill rails.
View attachment 621999


At first glance, this doesn't seem like a difficult element, but I spent weeks, if not months, thinking about it! My implementation on the two models is slightly different, but very similar. On the first hull, the pillars are all identical, while on the second hull, the gun ports are arched. But the idea is the same: there are sills between these elements. I really don't like the way this component was implemented in the kit (with all due respect). The pillars are often misplaced, vary in thickness, and the sills are very bulky (it's difficult to give them the correct longitudinal overall curve), with huge gaps between them and the pillars. This didn't suit me, so I decided to complicate the design, but make it as close to the anatomy as possible.

View attachment 622004

As you've noticed, I made the outer section of the sill (rail) first. It's two-toned (yellow on the bottom and black on the top). The steps were different for the two models, but the idea was the same: to set the desired curvature and level. Now I'm making the intermediate section (between the posts). I use a ruler to ensure this section is completely flush with the outer section. These intermediate sections will then be sanded inside the frame, and the inner sections of the sill/rail will be glued to them (leveled). Since this is black hornbeam, I'll fill all the seams with CA and then use a scraper to smooth them out to a uniform plane. This will all blend into one solid piece, making it virtually invisible that it's not a single piece.

View attachment 622006

View attachment 622007

View attachment 622008

View attachment 622009

View attachment 622010

View attachment 622011

View attachment 622012

The inner part will be fixed later, since the upper deck needs to be glued in first, otherwise it will be impossible.
A nice, clean filling of all the openings, Sergey. A lot of work but the result reflects that.
Regards, Peter
 
Schwellerleisten.
View attachment 621999


Auf den ersten Blick wirkt das nicht schwierig, aber ich habe wochen-, wenn nicht monatelang darüber nachgedacht! Meine Umsetzung an den beiden Modellen ist etwas anders, aber im Grunde sehr ähnlich. Beim ersten Rumpf sind alle Stützen identisch, beim zweiten sind die Geschützpforten bogenförmig. Das Prinzip ist jedoch dasselbe: Zwischen diesen Elementen befinden sich Schwellen. Mir gefällt die Umsetzung dieses Bauteils im Bausatz überhaupt nicht (bei allem Respekt). Die Stützen sind oft falsch positioniert, haben unterschiedliche Stärken, und die Schwellen sind sehr klobig (es ist schwierig, ihnen die korrekte Längskrümmung zu geben), mit großen Lücken zwischen ihnen und den Stützen. Das gefiel mir nicht, deshalb habe ich mich entschieden, die Konstruktion zu verkomplizieren, sie aber so nah wie möglich an die anatomische Form anzupassen.

View attachment 622004

Wie Sie bemerkt haben, habe ich zuerst den äußeren Teil der Schwelle (des Geländers) gefertigt. Er ist zweifarbig (unten gelb, oben schwarz). Die Arbeitsschritte unterschieden sich zwar bei den beiden Modellen, aber das Ziel war dasselbe: die gewünschte Krümmung und Ausrichtung zu erreichen. Jetzt fertige ich den Mittelteil (zwischen den Pfosten) an. Mithilfe eines Lineals achte ich darauf, dass dieser Teil bündig mit dem äußeren abschließt. Diese Mittelteile werden dann innerhalb des Rahmens geschliffen, und die inneren Teile der Schwelle/des Geländers werden darauf geklebt (und ausgerichtet). Da es sich um schwarzes Hainbuchenholz handelt, fülle ich alle Fugen mit Sekundenkleber und glätte sie anschließend mit einem Spachtel zu einer gleichmäßigen Fläche. So entsteht ein einheitliches Gesamtbild, sodass der Unterschied zwischen den einzelnen Teilen praktisch unsichtbar ist.

View attachment 622006

View attachment 622007

View attachment 622008

View attachment 622009

View attachment 622010

View attachment 622011

View attachment 622012

Der innere Teil wird später befestigt, da zuerst das Oberdeck eingeklebt werden muss, sonst ist das unmöglich.
Sehr interessante und clevere Lösung. Tolles Ergebnis. Absolut sauber ausgeführt. Sehr stimmig.
 
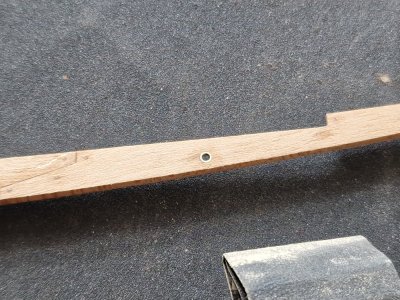
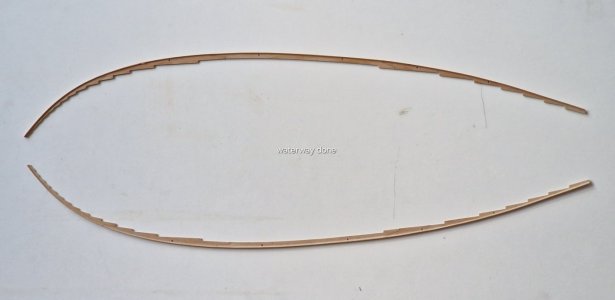
Waterways.

Alert 2729.jpg

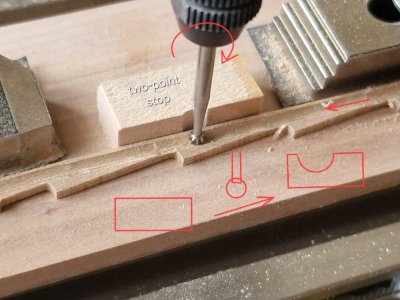
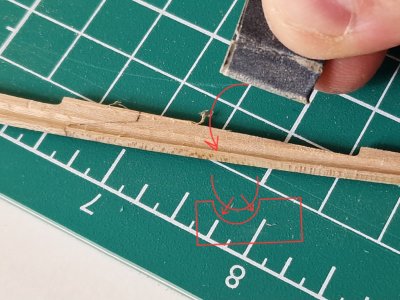
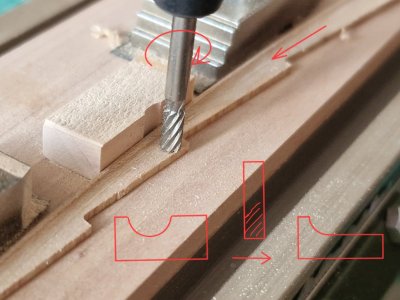
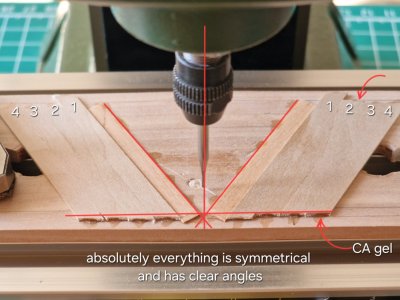
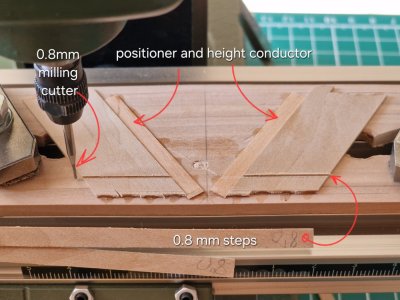
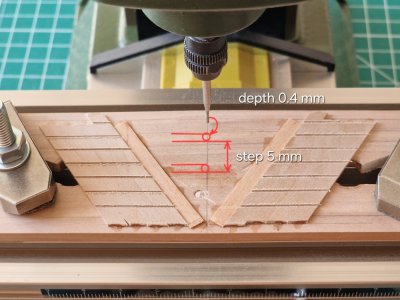
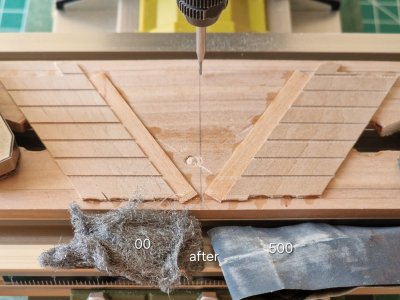
I decided to take a risk and make the design a little more complex (mill it) and took the blanks from the set for this in case something goes wrong... in this case, I would have made new ones... but everything worked out.

Alert 2730.jpg

Alert 2731.jpg

Alert 2732.jpg

Alert 2733.jpg

Alert 2734.jpg

Alert 2735.jpg

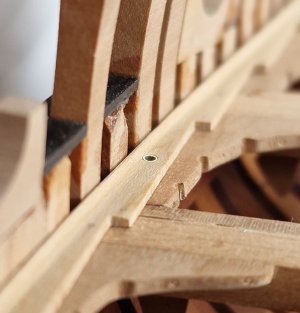
Nails.

Alert 2736.jpg

Alert 2737.jpg

Alert 2738.jpg

Alert 2739.jpg

Alert 2740.jpg

Alert 2741.jpg

Scuppers.

Alert 2742.jpg

Alert 2743.jpg

Alert 2744.jpg

Alert 2745.jpg

Alert 2746.jpg

Alert 2747.jpg

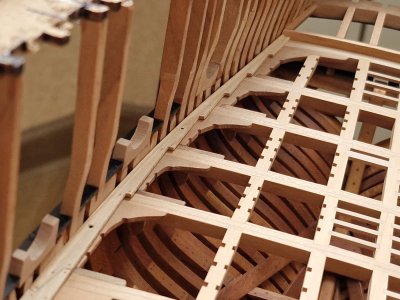
The waterways are ready, but they will not be glued in yet, since the deck itself still needs to be glued, then the rails, the inner side boards, and only then the waterways.

Alert 2748.jpg

Alert 2749.jpg

Alert 2750.jpg

Alert 2751.jpg
 
Display case 2.0

1/3


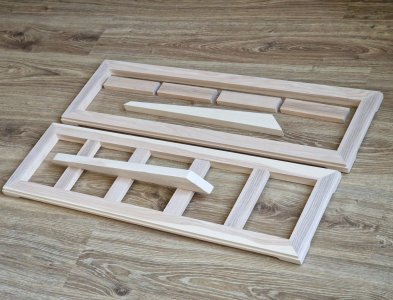
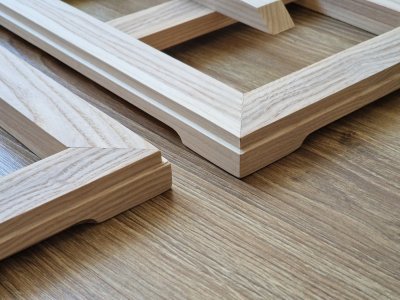
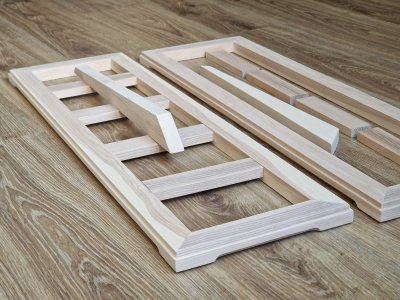
My first attempt to order bases (boards) for the display cases to protect them from dust ended in failure. I got my money back and for a long time couldn't bring myself to order again from other carpenters. But now the products have arrived, and they're a whole new level. Naturally, I'll still be finishing the interior, making plexiglass boxes to protect them from dust, and laying a board and felt on top of the base, but the fact that I already have something is already very encouraging.

Box 01.jpg

Ash wood will likely yellow significantly over time under oil, so I'll be staining the surface with a dark pear stain and then applying several coats of teak oil and maybe even bitumen. I'm aiming for a glossy, mirror-like finish with teak oil, but I'll have to experiment with that, as it's not pear wood, and the porosity of ash may not produce that result.

Box 02.jpg

Box 03.jpg

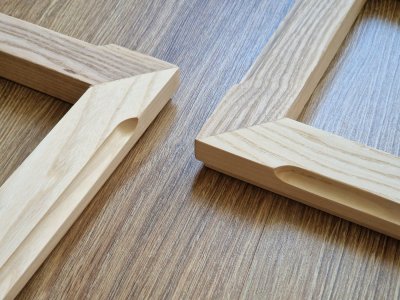
The design turned out to be as practical as planned. Finger grooves on the bottom surface make it easy for one or two people to grip the stove.

Box 04.jpg

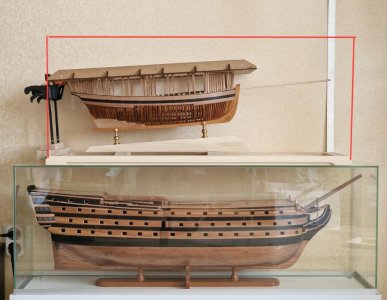
The models inside will be positioned off-center.
The first hull will be mastless (it will rest on a plate next to the hull), but a bowsprit will be installed.

Box 05.jpg

Therefore, the height of the plexiglass box will be 30 cm, and the length and width: 84 x 25 cm.

Box 06.jpg

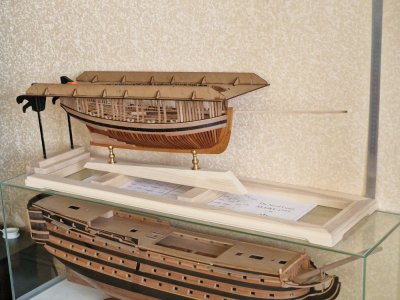
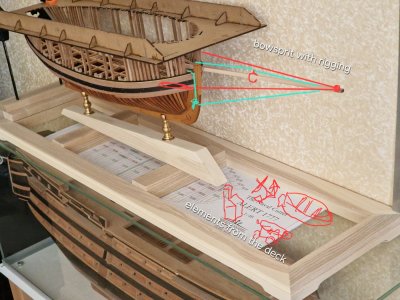
Since the first hull (pictured) is essentially a skeleton, some parts will be located on a plate in front of the model. These will include a stove, several cannons and falconets, a few anchors, and maybe a boat and other items. The bowsprit will have partial rigging. This fragment will show the main joints, blocks, and ropes and will continue the main idea of this model—to show all the details from the inside, at least in one example, but everything related to this ship. So, in fact, the entire rigging won't be there, but some will be for clarity. The cannons won't be on the deck, so as not to obscure them, but they will still be part of the composition, albeit not 12, but a couple, and on a plate.

Box 07.jpg

The second hull will be located in the same way, but with one significant difference. It will remain in this state until the entire hull, including all the mast and rigging components, is completed, and only then will I move this model to a new display case, which will be much larger. In the meantime, this small display case will protect it from dust. So, essentially, the current display case for the second hull will be temporary.
 
Last edited:
I'm aiming for a glossy, mirror-like finish with teak oil, but I'll have to experiment with that, as it's not pear wood, and the porosity of ash may not produce that result.

The bases look great Sergey, and you are correct. In order to achieve a mirror-like finish, you will need to use a paste filler to seal the open pores. It would take many, many, many ... coats of oil to seal ash. Some experimentation is in order (I know you're not a stranger to that ROTF ) because the filler will usually not accept stain the same as the surrounding wood. You will probably need to use a filler that is very close to the final color you want to achieve.
 
Wasserwege .

View attachment 622523

Ich beschloss, ein Risiko einzugehen und das Design etwas komplexer zu gestalten (es zu fräsen) und nahm dafür die Rohlinge aus dem Set, falls etwas schiefgehen sollte... in diesem Fall hätte ich neue angefertigt... aber alles hat geklappt.

View attachment 622524

View attachment 622525

View attachment 622526

View attachment 622527

View attachment 622528

View attachment 622529

Nägel.

View attachment 622530

View attachment 622531

View attachment 622532

View attachment 622533

View attachment 622534

View attachment 622535

Speigatten.

View attachment 622536

View attachment 622537

View attachment 622538

View attachment 622539

View attachment 622540

View attachment 622541

Die Wasserwege sind fertig, werden aber noch nicht eingeklebt, da zuerst das Deck selbst, dann die Reling, die inneren Seitenbretter und erst dann die Wasserwege verklebt werden müssen.

View attachment 622553

View attachment 622554

View attachment 622555

View attachment 622556
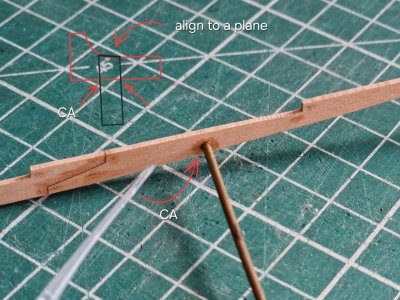
Klasse Vogehensweise und Ergebnis. Die Speigatteinläufe sind klasse dargestellt.
 
Vitrine 2.0

Mein erster Versuch, Untergründe (Platten) für die Vitrinen zu bestellen, um sie vor Staub zu schützen, scheiterte. Ich bekam mein Geld zurück und konnte mich lange Zeit nicht dazu durchringen, wieder bei anderen Schreinern zu bestellen. Doch nun sind die Produkte angekommen, und sie sind deutlich besser. Natürlich werde ich den Innenraum noch fertigstellen, Plexiglasboxen zum Schutz vor Staub anfertigen und eine Platte mit Filz auf die Untergründe legen, aber allein die Tatsache, dass ich schon etwas habe, ist sehr ermutigend.

View attachment 622580

Eschenholz vergilbt mit der Zeit unter Öl wahrscheinlich deutlich, daher werde ich die Oberfläche mit einer dunklen Birnenbeize behandeln und anschließend mehrere Schichten Teaköl und eventuell sogar Bitumen auftragen. Ich strebe mit Teaköl eine glänzende, spiegelähnliche Oberfläche an, muss aber damit experimentieren, da es sich nicht um Birnenholz handelt und die Porosität der Esche dieses Ergebnis möglicherweise nicht ermöglicht.

View attachment 622581

View attachment 622582

Das Design erwies sich als so praktisch wie geplant. Fingermulden an der Unterseite erleichtern es einer oder zwei Personen, den Kocher festzuhalten.

View attachment 622583

Die Modelle im Inneren werden außermittig positioniert sein.
Der erste Rumpf wird mastlos sein (er ruht auf einer Platte neben dem Rumpf), aber ein Bugspriet wird installiert.

View attachment 622584

Daher beträgt die Höhe der Plexiglasbox 30 cm und die Länge und Breite 84 x 25 cm.

View attachment 622585

Da der erste Rumpf (siehe Abbildung) im Wesentlichen ein Gerüst ist, werden einige Teile auf einer Platte vor dem Modell platziert. Dazu gehören ein Ofen, mehrere Kanonen und Falkonette, einige Anker und möglicherweise ein Beiboot und weitere Ausrüstungsgegenstände. Der Bugspriet wird teilweise getakelt sein. Dieses Fragment zeigt die wichtigsten Verbindungen, Blöcke und Taue und führt die Hauptidee des Modells fort: alle Details von innen zu zeigen, zumindest an einem Beispiel, aber alles, was mit diesem Schiff zusammenhängt. Daher wird nicht die gesamte Takelage dargestellt sein, sondern nur Teile davon zur Verdeutlichung. Die Kanonen befinden sich nicht an Deck, um sie nicht zu verdecken, sind aber dennoch Teil der Komposition – wenn auch nicht zwölf, sondern nur einige wenige, und auf einer Platte.

View attachment 622586

Der zweite Rumpf wird an derselben Stelle platziert, jedoch mit einem wichtigen Unterschied: Er bleibt so lange in diesem Zustand, bis der gesamte Rumpf inklusive aller Mast- und Takelagekomponenten fertiggestellt ist. Erst dann werde ich dieses Modell in eine neue, deutlich größere Vitrine umsetzen. Bis dahin schützt die kleine Vitrine es vor Staub. Die jetzige Vitrine für den zweiten Rumpf ist also nur eine Übergangslösung.

Die Vitrine wird absolut stimmig. Esche ist eine sehr gute Wahl. Poren füllen, Oberfläche optimieren. Ich bin mir sicher, daß das Ergebnis wieder absolut nach deinem Stil sein wird.
 
A nice, clean filling of all the openings, Sergey. A lot of work but the result reflects that.
Regards, Peter
Thank you for your interest and feedback. I don't often comment on your thread, but I do keep an eye on its updates, and it's fascinating.
Klasse Vogehensweise und Ergebnis. Die Speigatteinläufe sind klasse dargestellt.
Die Vitrine wird absolut stimmig. Esche ist eine sehr gute Wahl. Poren füllen, Oberfläche optimieren. Ich bin mir sicher, daß das Ergebnis wieder absolut nach deinem Stil sein wird.
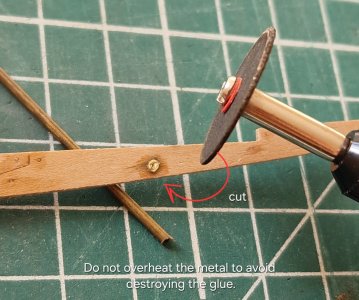
Danke, Freund! Ja, ich muss noch einige Tests mit der Beschichtung durchführen, aber ich denke, wir werden etwas dabei herausholen. :cool:

your work with the waterways is absolutely amazing !
I'm very glad you received bases that are much more fitting for your project. :)
Thank you. Yes, the quality is much higher this time, but it still requires a lot of work.

The bases look great Sergey, and you are correct. In order to achieve a mirror-like finish, you will need to use a paste filler to seal the open pores. It would take many, many, many ... coats of oil to seal ash. Some experimentation is in order (I know you're not a stranger to that ROTF ) because the filler will usually not accept stain the same as the surrounding wood. You will probably need to use a filler that is very close to the final color you want to achieve.
I'm not sure I'll get a good mirror finish; ash isn't quite suitable for that, but I don't think I'll waste time on filler. I'll smooth the surface and just coat it with teak oil. It's like a varnish, and with several coats it will achieve a glossy finish, and I'll be fine with it remaining on the pores. Overall, I don't have high expectations, but I'll try to create something good.ROTF
 
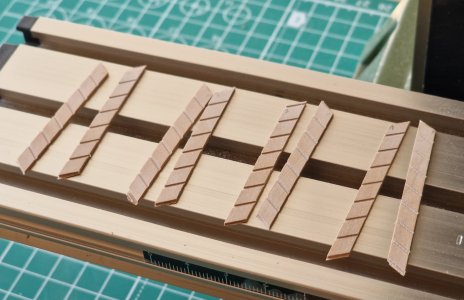
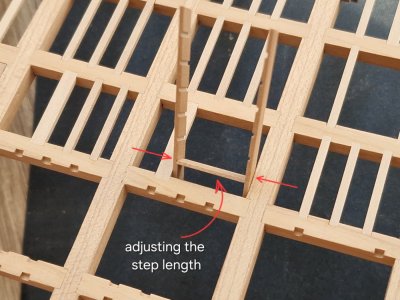
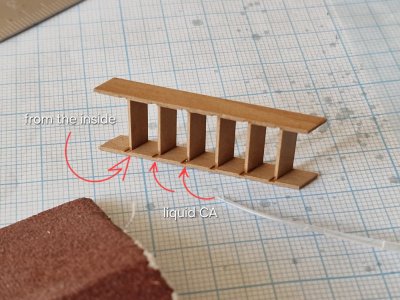
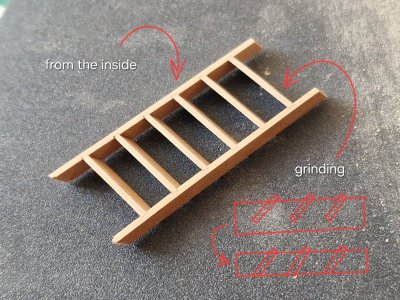
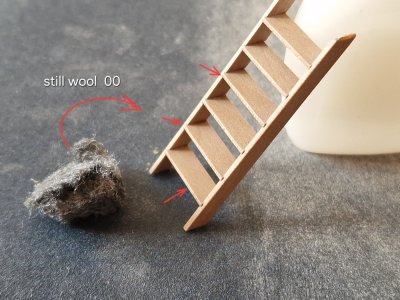
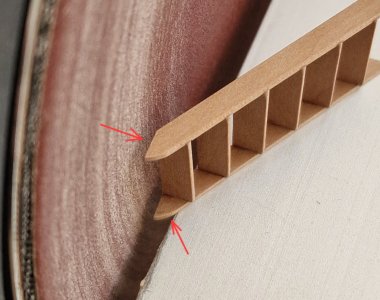
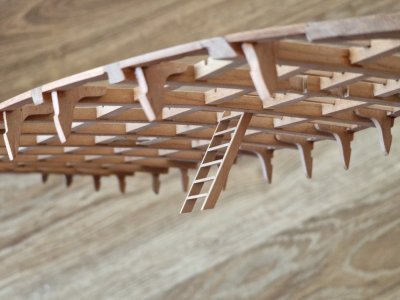
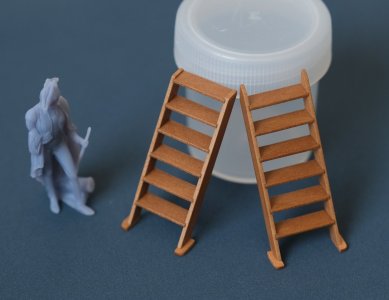
Ladder (gangway).

Alert 2752.jpg


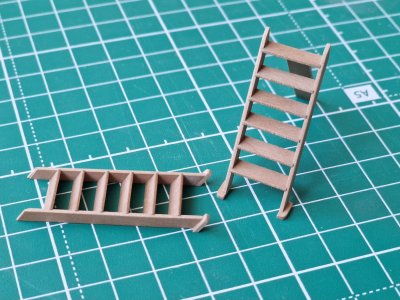
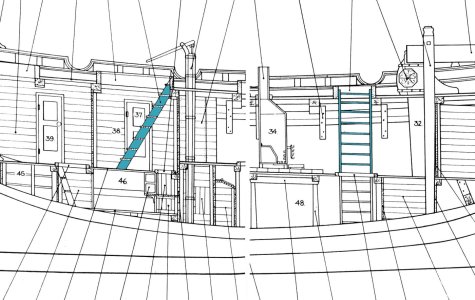
As I mentioned earlier, I changed the direction of the rear ladder (not from the pumps and the dinghy, where there's physically no room to move), but from the skylight, where there's plenty of room to enter.

I made the ladders for two models at the same time, but I'll be assembling them for the first hull this time.

Alert 2753.jpg

Alert 2754.jpg

Alert 2755.jpg

Alert 2756.jpg

Alert 2757.jpg

Alert 2758.jpg

Alert 2759.jpg

Alert 2760.jpg

Alert 2761.jpg

Alert 2762.jpg

Alert 2763.jpg

Alert 2764.jpg

Well, here is the result (dry fitting), but still missing one detail...
Alert 2765.jpg

Alert 2766.jpg

Alert 2767.jpg

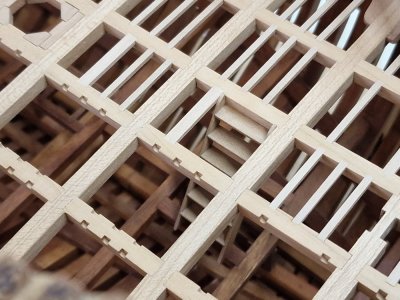
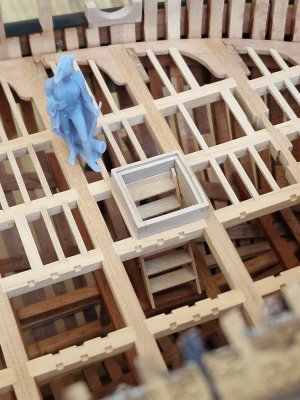
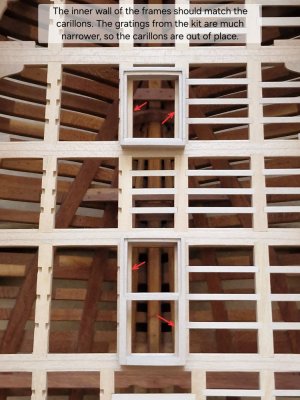
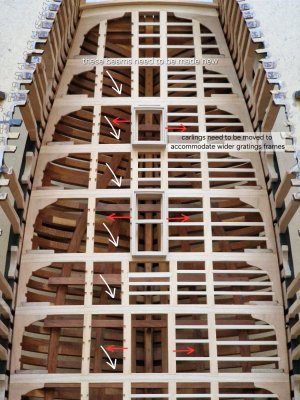
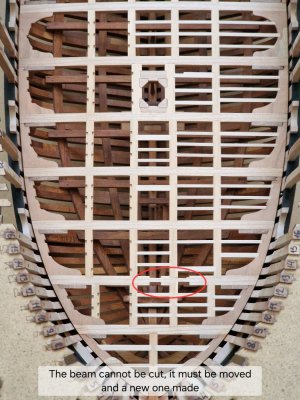
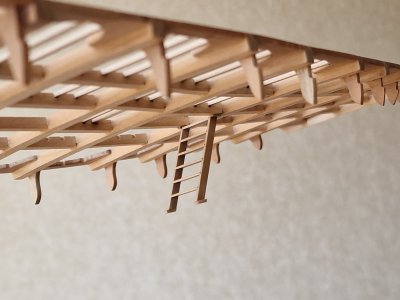
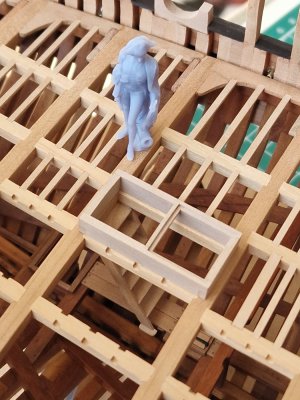
Before making the second ladder, I wanted to clarify something. The kit's aft ladder and skylight, as well as the bilge mainsail hatch, are significantly narrower than the model's. Unfortunately, I noticed this after I'd completely finished the deck of the first hull. I'd made everything correctly for the second hull, but I had no desire to redo the first hull's deck. Since I made the grates and ladders at the same time, I already had them made to the correct dimensions. The problem is that the openings for these parts on the kit's deck are smaller, resulting in this...

Alert 2768.jpg

The carlings protrude from under the gangway frames. BECAUSE who wants to do everything right from the start? You need to download my drawings, calculate the width of each grating and gangway, and fabricate new beams with slots for the carlings in the right places. I would have done exactly that, but unfortunately, it's too late. So, I made the gangway a little wider (as it should be) and placed it under the carlings instead of between them. Unfortunately, all this is a "cheat," but I don't want to redo the entire deck and I also didn't want to knowingly fabricate the wrong frames for the gangways and gratings. Let's hope no one notices this mistake.

Alert 2769.jpg

Alert 2770.jpg

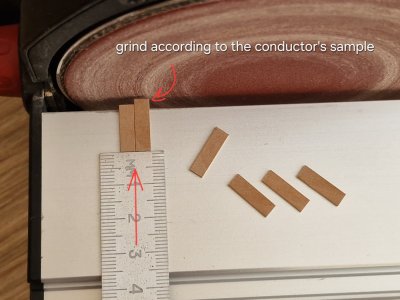
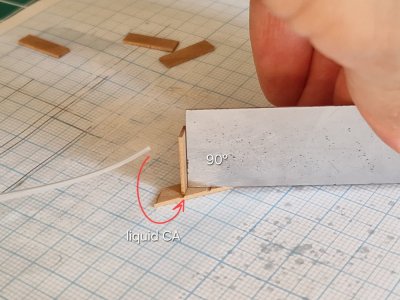
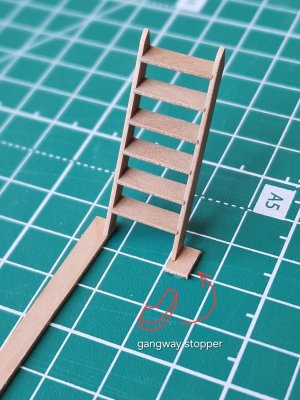
On small and medium-sized vessels, the ladders were not permanently installed (meaning they could be removed as needed). To ensure the ladder was securely fastened at the bottom, it was inserted between stoppers, which held it securely in place.

Alert 2771.jpg

Alert 2772.jpg

In this case, they'll be practically invisible, because I simplified them a bit. And here's the dry result.

Alert 2773.jpg

Alert 2774.jpg

Since there won't be any flooring on the lower (or upper) deck other than these two planks, the ladders are essentially floating. This is all for the sake of maximum transparency.

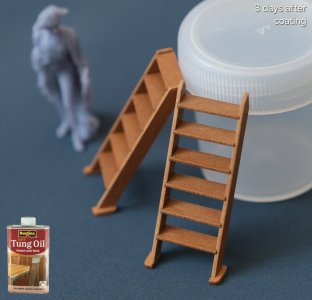
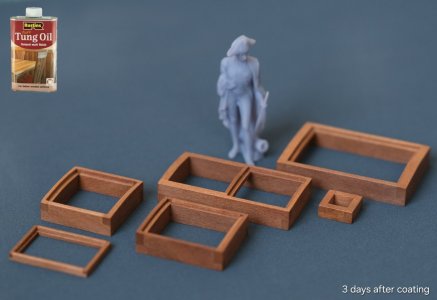
Today, I coated all the grate frames and ladders with Tung Oil, and the entire deck and waterways with Danish Oil. Now they should dry quickly, as it's 45°C (a good time for drying) here. I'll tell you how I did it and show you the results soon.
 
Leiter (Gangway).

View attachment 623680


Wie ich bereits erwähnt habe, habe ich die Richtung der hinteren Leiter geändert (nicht von den Pumpen und dem Beiboot aus, wo physisch kein Platz zum Bewegen ist), sondern vom Dachfenster aus, wo genügend Platz zum Einsteigen vorhanden ist.

Ich habe die Leitern für zwei Modelle gleichzeitig angefertigt, aber diesmal werde ich sie für den ersten Rumpf zusammenbauen.

View attachment 623681

View attachment 623683

View attachment 623684

View attachment 623685

View attachment 623686

View attachment 623687

View attachment 623688

View attachment 623689

View attachment 623690

View attachment 623691

View attachment 623693

View attachment 623694

Nun, hier ist das Ergebnis (Trockenanprobe), aber ein Detail fehlt noch...

View attachment 623695

View attachment 623696

View attachment 623697

Bevor ich den zweiten Leiter baue, möchte ich etwas klarstellen. Die Achterleiter und das Oberlicht des Bausatzes sowie die Großsegelluke im Bilgenbereich sind deutlich schmaler als beim Modell. Leider fiel mir das erst auf, nachdem ich das Deck des ersten Rumpfes fertiggestellt hatte. Ich hatte zwar alles für den zweiten Rumpf korrekt angefertigt, wollte aber das Deck des ersten Rumpfes nicht noch einmal überarbeiten. Da ich die Roste und Leitern gleichzeitig gebaut hatte, lagen sie bereits in den richtigen Maßen vor. Das Problem ist, dass die Öffnungen für diese Teile im Deck des Bausatzes kleiner sind, was zu folgendem Ergebnis führt…

View attachment 623698

Die Kehlbalken ragen unter dem Stegrahmen hervor. Denn wer will schon von Anfang an alles richtig machen? Man müsste meine Zeichnungen herunterladen, die Breite jedes Gitterrosts und Stegs berechnen und neue Träger mit Aussparungen für die Kehlbalken an den richtigen Stellen anfertigen. Genau das hätte ich getan, aber leider ist es zu spät. Außerdem habe ich den Steg etwas breiter gemacht (wie er sein sollte) und ihn stattdessen unter den Kehlbalken platziert. Das ist zwar alles etwas umständlich, aber ich werde nicht das ganze Deck neu machen und auch nicht absichtlich den falschen Rahmen für die Stege und Gitterroste anfertigen. Hoffentlich bemerkte niemand diesen Fehler.

View attachment 623699

View attachment 623700

Auf kleinen und mittelgroßen Schiffen waren die Leitern nicht fest installiert (sie konnten bei Bedarf auch entfernt werden). Um sicherzustellen, dass die Leiter unten sicher befestigt war, wurde sie zwischen Stopper eingesetzt, die sie fest fixierten.

View attachment 623701

View attachment 623702

In diesem Fall sind sie praktisch unsichtbar, da ich sie etwas vereinfacht habe. Und hier ist das Endergebnis.

View attachment 623703

View attachment 623704

Da es auf dem unteren (oder oberen) Deck außer diesen beiden Planken keinen weiteren Bodenbelag geben wird, schweben die Leitern quasi. Dies dient der größtmöglichen Transparenz.

Heute habe ich alle Rostrahmen und Leitern mit Tungöl und die gesamte Terrasse sowie die Wasserläufe mit dänischem Öl behandelt. Bei 45 °C (ideal zum Trocknen) sollten Sie jetzt schnell trocknen. Ich erkläre euch bald, wie ich es gemacht habe und zeige euch das Ergebnis.
Hallo Sergey, sehr schlüssig das Ganze. Präzise und sauber ausgeführt. Schön die Erklärung der Arbeitsschritte. Auch der Kompromiss um das Thema Leiter herum. Man muss dabei im Hinterkopf behalten, dass die Basis ein gegebener Bausatz ist. Der Alleinstehende hat schon so viele Kompromisse ( Fehler ) in sich. Für mich ist es eine absolute Meisterleistung, was DU aus dem Bausatz heraus holst und ihn zu einem erstklassigen Modell machst. Deine Oberflächenbearbeitung sucht seine Gleichen. Ich kenne nur noch einen weiteren Modellbauer der das so fantastisch umsetzt (Dubz) Ich ziehe den Hut. Es motiviert ungemein deinen Baubericht mit all den kleinen Anleitungen zu studieren. Jeder der beabsichtigt die Alert zu bauen, hat mit deinem Bericht die Möglichkeit aus dem nicht ganz günstigen Bausatz ein absolutes Spitzenmodell zu bauen! Ich stelle mir gerade das Ergebnis vor, wenn Du das Modell eigenständig ( ohne Bausatzbasis ) bauen würdest. Danke fürs Zeigen.
Ich freue mich schon auf volle Spannung auf die nächsten Schritte.
 
Last edited:
Oil.

To create a contrast in color, I previously coated the lower deck of the first hull with Tung Oil. (I used Belinka Oil back then, but it thickened and I didn't really like it, so I switched to Rustins.)

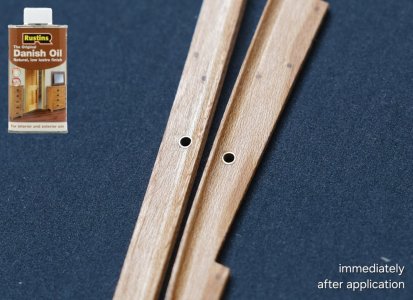
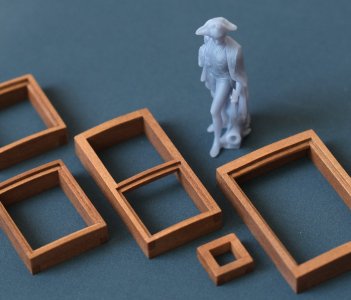
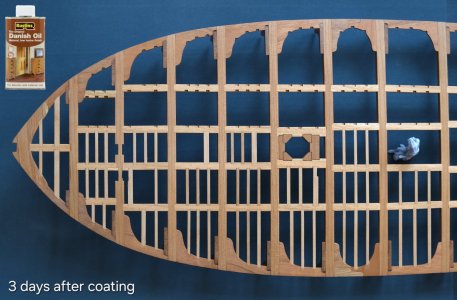
This time, I coated the upper deck and waterways with Rustins Danish Oil. I coated the grates and ladders with Rustins Tung Oil, and I was very pleased with the results on both sides.

I should point out that this time, I did NOT thin any of the oils with solvent. I applied them with a cloth, but a semi-damp brush will do just fine. The main thing is to wipe them dry after 10-20 minutes.

This time, I almost lost the boat with the deck and pure Danish Oil! It was 45 degrees on the balcony, and the oil started to harden faster than I could apply it... Honestly, at one point, I thought I was done for, because it started to stick. But I took a cloth, soaked it in oil paint thinner, and started wiping all the surfaces, immediately drying them with napkins, and I was pleased with the result.

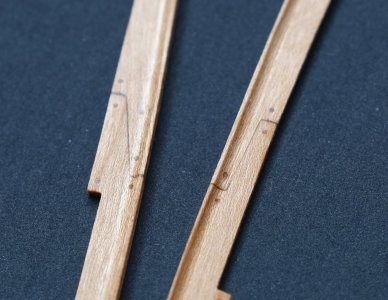
I'll repeat: this time, I didn't dilute the oil with thinner right away because I noticed that as it dried, shiny dots-stripes, the size of a hair but 1 mm long, sometimes formed on the surface. I realized through experimentation that this was due to the thinner. Now I don't dilute the oil at all. I apply it with a semi-damp brush or cloth and rub it in well, then after 10-15 minutes, wipe it dry with a paper towel. Yes, it's more difficult than when it's liquid, but the result is more important to me.

A little later, I'll show you some more experiments with oils that I've been monitoring for several months, but that's for next time. For now, here's the result after applying the oil:

Alert 2775.JPG

Alert 2776.JPG

Alert 2777.JPG

Alert 2778.JPG

Alert 2779.JPG

Alert 2780.JPG

Alert 2781.JPG

Alert 2782.JPG

Alert 2783.JPG

Alert 2784.JPG

Alert 2785.JPG

Alert 2786.JPG

Alert 2787.JPG

Alert 2788.JPG

Alert 2789.JPG

Alert 2790.JPG

Alert 2791.JPG

Alert 2792.JPG


Friends, thank you all for your support, comments, and likes. It really encourages me to continue sharing everything with you in detail!

Thank you all so much! ;)

Alert 2784.JPG
 
Last edited:
Oil.

To create a contrast in color, I previously coated the lower deck of the first hull with Tung Oil. (I used Belinka Oil back then, but it thickened and I didn't really like it, so I switched to Rustins.)

This time, I coated the upper deck and waterways with Rustins Danish Oil. I coated the grates and ladders with Rustins Tung Oil, and I was very pleased with the results on both sides.

I should point out that this time, I did NOT thin any of the oils with solvent. I applied them with a cloth, but a semi-damp brush will do just fine. The main thing is to wipe them dry after 10-20 minutes.

This time, I almost lost the boat with the deck and pure Danish Oil! It was 45 degrees on the balcony, and the oil started to harden faster than I could apply it... Honestly, at one point, I thought I was done for, because it started to stick. But I took a cloth, soaked it in oil paint thinner, and started wiping all the surfaces, immediately drying them with napkins, and I was pleased with the result.

I'll repeat: this time, I didn't dilute the oil with thinner right away because I noticed that as it dried, shiny dots-stripes, the size of a hair but 1 mm long, sometimes formed on the surface. I realized through experimentation that this was due to the thinner. Now I don't dilute the oil at all. I apply it with a semi-damp brush or cloth and rub it in well, then after 10-15 minutes, wipe it dry with a paper towel. Yes, it's more difficult than when it's liquid, but the result is more important to me.

A little later, I'll show you some more experiments with oils that I've been monitoring for several months, but that's for next time. For now, here's the result after applying the oil:

View attachment 624210

View attachment 624211

View attachment 624212

View attachment 624213

View attachment 624214

View attachment 624215

View attachment 624216

View attachment 624217

View attachment 624218

View attachment 624228

View attachment 624219

View attachment 624220

View attachment 624221

View attachment 624222

View attachment 624223

View attachment 624224

View attachment 624225

View attachment 624226


Friends, thank you all for your support, comments, and likes. It really encourages me to continue sharing everything with you in detail!

Thank you all so much! ;)
It gives a nice, not to dark, warm color, Sergey.
Looking very nice!
Regards, Peter
 
Öl.

Um einen Farbkontrast zu erzeugen, hatte ich zuvor das Unterdeck des ersten Rumpfes mit Tungöl behandelt. (Damals benutzte ich Belinka-Öl, aber es wurde zu dickflüssig und gefiel mir nicht wirklich, deshalb bin ich auf Rustins umgestiegen.)

Dieses Mal habe ich das Oberdeck und die Wasserwege mit Rustins Danish Oil behandelt. Die Gitter und Leitern habe ich mit Rustins Tung Oil behandelt und war mit dem Ergebnis auf beiden Seiten sehr zufrieden.

Ich möchte betonen, dass ich dieses Mal keins der Öle mit Lösungsmittel verdünnt habe. Ich habe sie mit einem Tuch aufgetragen, aber ein leicht angefeuchteter Pinsel tut es genauso gut. Wichtig ist nur, sie nach 10–20 Minuten abzuwischen.

Diesmal wäre mir das Boot mit dem Deck und dem reinen dänischen Öl beinahe entglitten! Es waren 45 Grad auf dem Balkon, und das Öl härtete schneller aus, als ich es auftragen konnte… Ehrlich gesagt, dachte ich zwischenzeitlich, es sei vorbei, weil es anfing zu kleben. Aber dann nahm ich ein Tuch, tränkte es mit Ölverdünner und wischte alle Oberflächen ab, trocknete sie sofort mit Servietten ab und war mit dem Ergebnis zufrieden.

Ich wiederhole es: Diesmal habe ich das Öl nicht sofort mit Verdünner verdünnt, weil ich bemerkte, dass sich beim Trocknen manchmal glänzende, haardünne, aber 1 mm lange Punkte oder Streifen auf der Oberfläche bilden. Durch Ausprobieren fand ich heraus, dass dies am Verdünner liegt. Jetzt verdünne ich das Öl gar nicht mehr. Ich trage es mit einem leicht angefeuchteten Pinsel oder Tuch auf und verreibe es gut. Nach 10–15 Minuten möchte ich es mit einem Papiertuch trocknen. Ja, es ist etwas schwierig als mit flüssigem Öl, aber das Ergebnis ist mir wichtiger.

Etwas später zeige ich euch weitere Experimente mit Ölen, die ich seit einigen Monaten beobachte, aber das ist ein anderes Thema. Hier ist erst einmal das Ergebnis nach dem Auftragen des Öls:

View attachment 624210

View attachment 624211

View attachment 624212

View attachment 624213

View attachment 624214

View attachment 624215

View attachment 624216

View attachment 624217

View attachment 624218

View attachment 624228

View attachment 624219

View attachment 624220

View attachment 624221

View attachment 624222

View attachment 624223

View attachment 624224

View attachment 624225

View attachment 624226


Liebe Freunde, vielen Dank für eure Unterstützung, Kommentare und Likes. Das motiviert mich sehr, weiterhin alles detailliert mit euch zu teilen!

Vielen Dank an alle! ;)
Ein wunderbares Farbenspiel. Die Maserung kommt durch das Öl wunderschön zum Vorschein, hat einen fantastischen Farbton. Sehr schön. Erlaube mir eine Frage dazu. Wenn das Öl eingezogen und abgetrocknet ist, wie fühlt es sich an? Trocken ?..leicht ölig? Oder behält es eine gewisse „Restfeuchte“?
 
Back
Top