Why? I am still around.you sent a reminder to the wrong person…

 |
The beloved Ships in Scale Magazine is back and charting a new course for 2026! Discover new skills, new techniques, and new inspirations in every issue. NOTE THAT OUR NEXT ISSUE WILL BE July/August 2026 |
|
 |
As a way to introduce our brass coins to the community, we will raffle off a free coin during the month of August. Follow link ABOVE for instructions for entering. |
|
Why? I am still around.you sent a reminder to the wrong person…


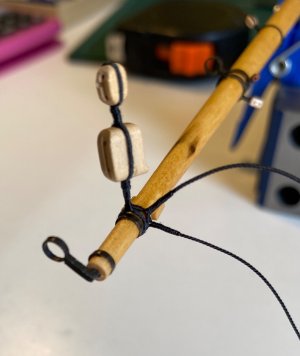
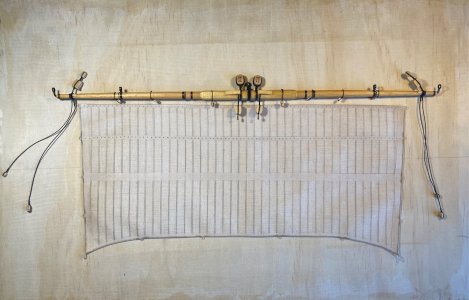
Hi Y.T,Hi, Eduardo! Thank you so much for a friendly reminder. You are my most devoted follower.thank you again.I was not posting anything because there was not too much to post.I was thinking that the work that I’m doing currently would not be that much interesting because it is very repetitive. Most of it was dedicated to preparing the yards with attaching all kinds of blocks to them. For that I had to make some many different sizes of different kinds of blocks, including the blocks for the clew lines with a shoulder, parral ribs and trucks. I also had to attach many different kinds of blocks to the rigging and the body of the hull. For the yards, I still have to do the bracing blocks attached. Desperately thinking, how would be the best way to do it. Next would be attaching the foot ropes and this stirrups on the yards.
Here are some pictures of what I had done so far.
View attachment 622640
View attachment 622641
View attachment 622642
View attachment 622643
View attachment 622644
View attachment 622645
View attachment 622646
View attachment 622647
View attachment 622648
View attachment 622649
View attachment 622650
View attachment 622651
View attachment 622652
View attachment 622653
View attachment 622654
View attachment 622655
View attachment 622656
View attachment 622657
View attachment 622658
View attachment 622659
Did you purchase this from Amazon? I wonder if there would be some useful information to help me with my VASA.....What a lovely book. Got mine yesterday. Not because I plan to build a Victory. But because I want to understand why they used what they used ... so that I have a better idea how to rig something that is not shown in the instructions.
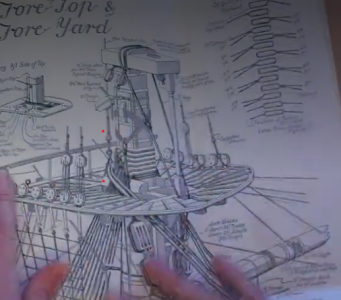


Yes. I purchased mine from Amazon (USA). The Victory was of a much later date than the VASA, and the work in the book shows the standing rigging, the running rigging but not the rigging of the sails themselves (edited in Y.T. correction). So not sure what help it might be for the VASA.Did you purchase this from Amazon? I wonder if there would be some useful information to help me with my VASA.....
Not true. Book covers all rigging: Standing and Running and even some extras.the work in the book shows the standing rigging, not the running rigging.
Yes, "running rigging" I should have phrased it differently, and fixed it above ... to quote from the book on page 7 ...Not true. Book covers all rigging: Standing and Running and even some extras.

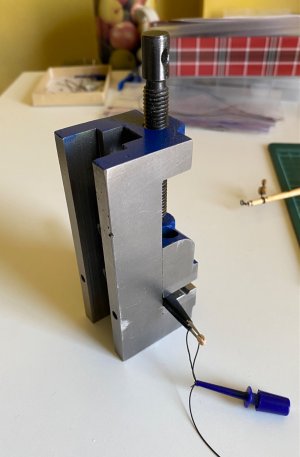
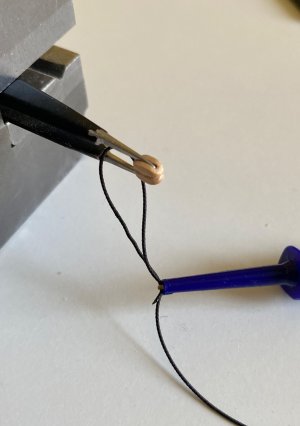
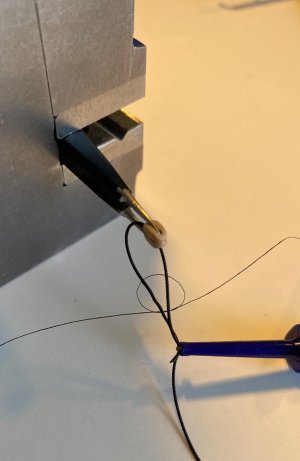
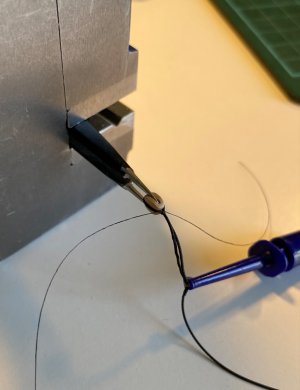
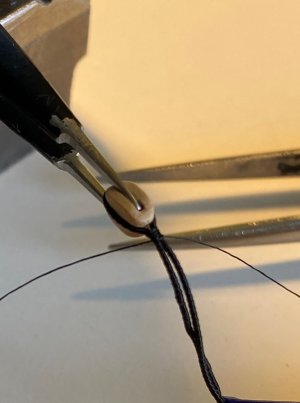
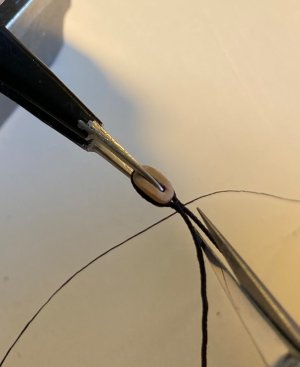
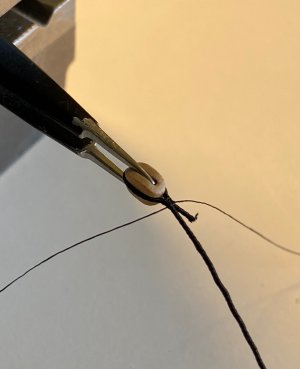
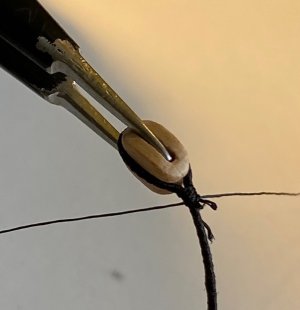
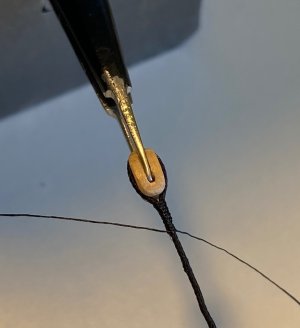
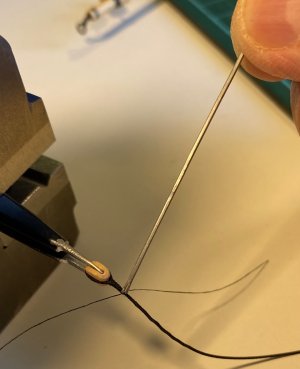
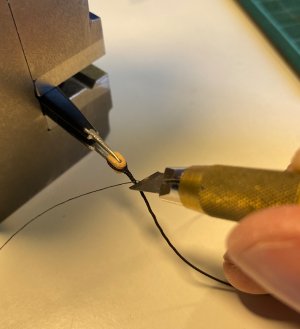
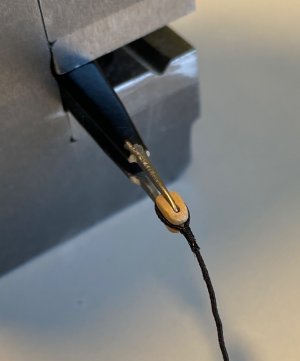
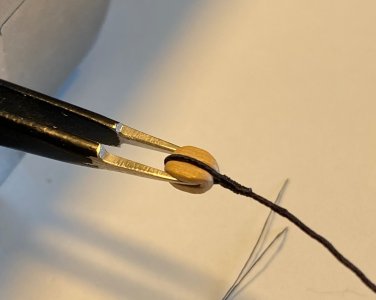
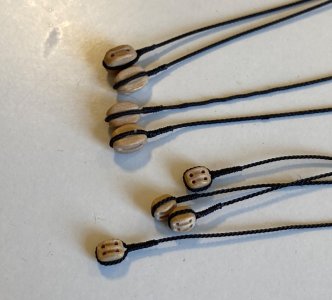
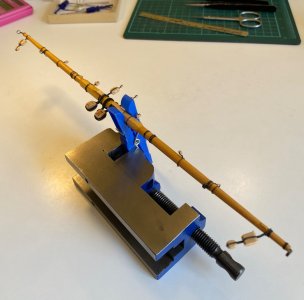
Good idea Y.T.Example shows how eye splice is done around the block. First I found good method to hold the block. Then took a piece of preserved rope and wrapped it around the block as shown and clamp the ends with some holder. It is a blue colour holder on the picture.
Then I tied an overhand knot as close to block as possible.
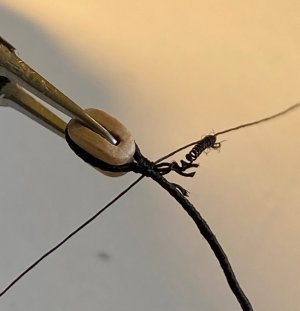
Several more of overhand knots were applied. each next time they were done on the other side of rope loop to avoid bad appearance.
Then the blue holder is removed.
the shorter end of the rope is snapped off a few millimetres close off the tie.
Then the serving yarn was undone up to the tie and snapped off too.
Then three threads of the rope got unwinded.
One of those three threads I snap right off up to the tie.
the second one I snapped halfway to the length of the last one.
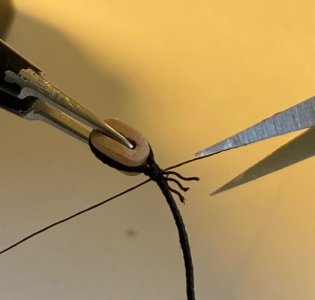
Then I continued to make my overhand ties till all three rope threads are totally covered.
Then I apply a very small portion of CA glue.
Then I snapped off the tie ends.
View attachment 623097
View attachment 623098
View attachment 623099
View attachment 623100
View attachment 623101
View attachment 623102
View attachment 623103
View attachment 623104
View attachment 623105
View attachment 623106
View attachment 623107
View attachment 623108
View attachment 623109
View attachment 623110
View attachment 623111
Thanks. I see in general, not too many people give a damn of how their rigging looks like. I do. I sometimes cannot go ahead for months because what I do with rigging looks ugly.Good idea Y.T.