


Looking very good, Tom. Thanks for the tip on the sanding sponges as I now have some in my Amazon cart. I'm awaiting some of the small eyebolts and the 0.2 and 0.4 brown rigging line from Model Expo/Shipways as ran out of these parts based on my eyebolt and rigging line charts I previously posted on my build log.

-

SUBSCRIBE TO SHIPS IN SCALE TODAY!
The beloved Ships in Scale Magazine is back and charting a new course for 2026!
Discover new skills, new techniques, and new inspirations in every issue.
NOTE THAT OUR NEXT ISSUE WILL BE July/August 2026 -

Win a Free Custom Engraved Brass Coin!!!
As a way to introduce our brass coins to the community, we will raffle off a free coin during the month of August. Follow link ABOVE for instructions for entering.
You are using an out of date browser. It may not display this or other websites correctly.
You should upgrade or use an alternative browser.
You should upgrade or use an alternative browser.


Post 24 - Keel and Trimmed Bulkhead Extensions
I added the stem (which in retrospect I should have done before sanding the bow section - see below) and the keel. The instructions imply the keel is glued in pieces, but I wasn't sure. I cut the two pieces of 1/8" dowel used for the stand and inserted them in the holes. That made it obvious I needed three sections of keel. I initially tried drilling a hole in the 1/8" x 1/8" strip, with a plan to cut it in half, but that didn't work. Ended up marking the centerline of the strip and then using a triangular riffler to make a groove as a guide for a round file
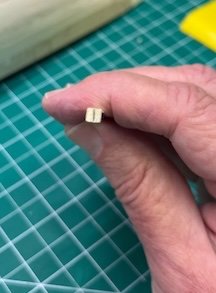
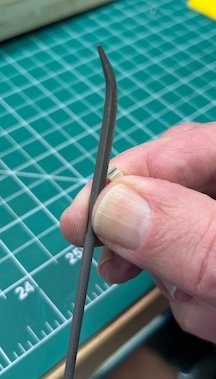
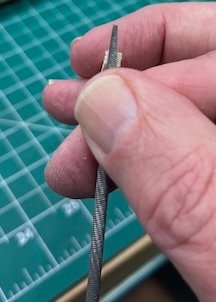
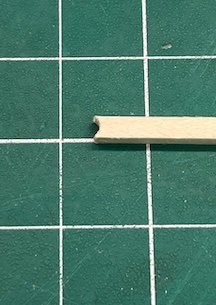
That fit well with the dowels
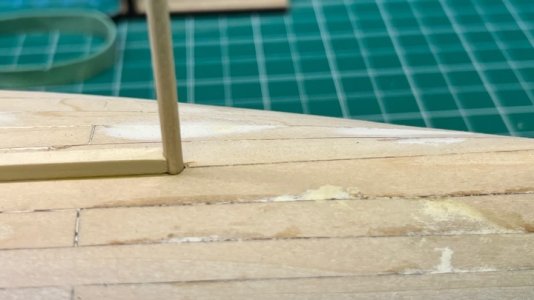
I then glued the strips (avoiding glue near the dowels)
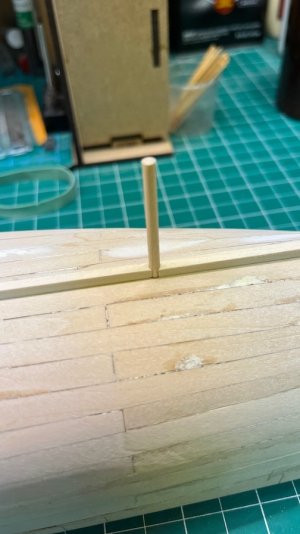
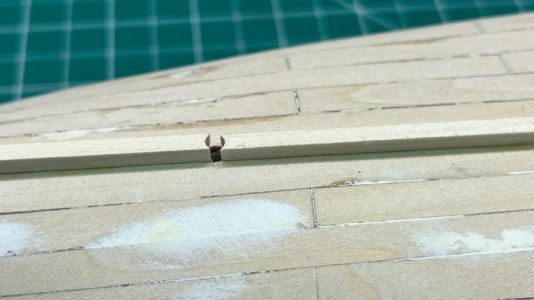
and it came out pretty well:
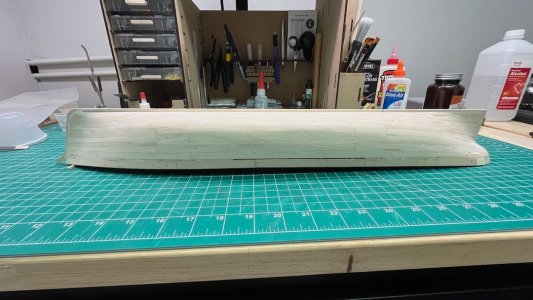
One issue (and why I should have glued the stem on before sanding the bow area), is that I ended up sanding the stem too thin to get it flush with the bow planks
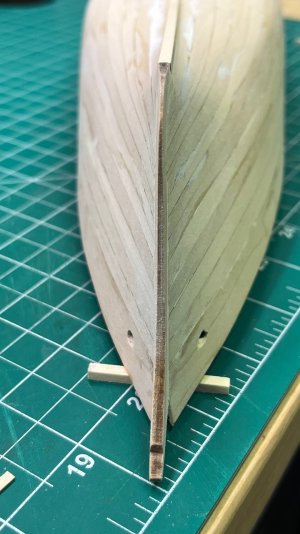
I need to ponder how I will fix that. I plan to copper plate the lower hull, so it doesn't have to be pretty, just even.
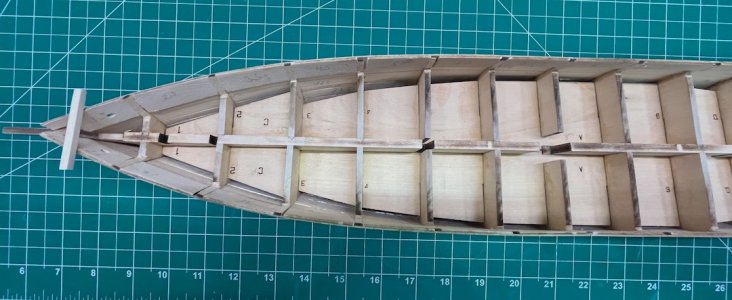
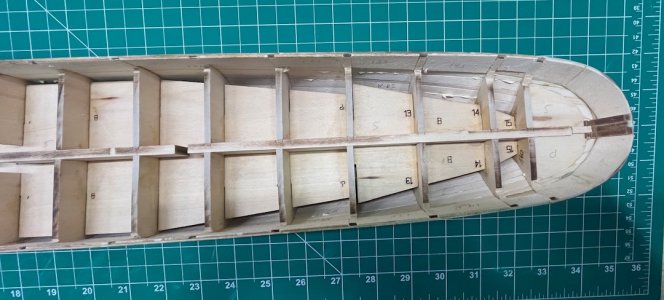
Yesterday and today I trimmed back the bulkhead extensions. The instructions have you do this before planking the hull, but I'm very glad I followed @The Gavel's advice and waited until after sanding and filling the hull. That gave the bulwarks more sturdiness during the manhandling of the sanding process. I thought this was going to be a chore, trimming 30 individual bulkheads, but it went very easily. I used an X-Acto chisel blade, followed by sanding to smooth it out. I only had one bulkhead (13, starboard) that seemed to have grain in the wrong direction for the chisel, so I sanded that one after only removing about 1/2 of the wood.
I used the chisel blade to mark the start of the angle on bulkheads 14 & 15, and first trimmed them down to that.
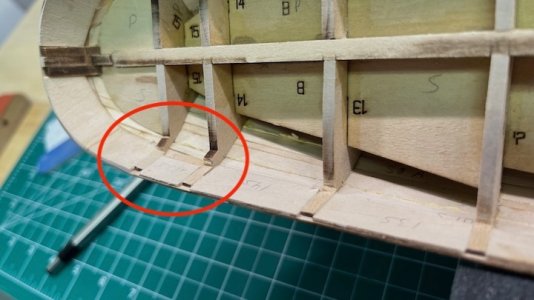
I made a "small sanding stick" as per instructions by cutting a 45º angle on a piece of scrap wood and supergluing some 100 grit sandpaper to it.
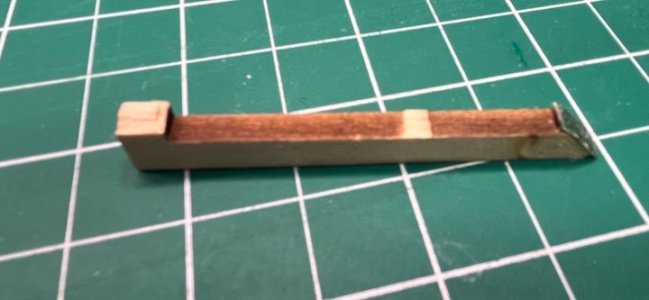
That dealt with the angles
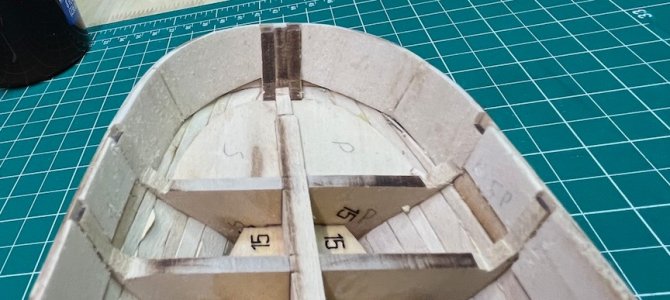
The rest of them:
The rudder is up next.
I added the stem (which in retrospect I should have done before sanding the bow section - see below) and the keel. The instructions imply the keel is glued in pieces, but I wasn't sure. I cut the two pieces of 1/8" dowel used for the stand and inserted them in the holes. That made it obvious I needed three sections of keel. I initially tried drilling a hole in the 1/8" x 1/8" strip, with a plan to cut it in half, but that didn't work. Ended up marking the centerline of the strip and then using a triangular riffler to make a groove as a guide for a round file
That fit well with the dowels
I then glued the strips (avoiding glue near the dowels)
and it came out pretty well:
One issue (and why I should have glued the stem on before sanding the bow area), is that I ended up sanding the stem too thin to get it flush with the bow planks
I need to ponder how I will fix that. I plan to copper plate the lower hull, so it doesn't have to be pretty, just even.
Yesterday and today I trimmed back the bulkhead extensions. The instructions have you do this before planking the hull, but I'm very glad I followed @The Gavel's advice and waited until after sanding and filling the hull. That gave the bulwarks more sturdiness during the manhandling of the sanding process. I thought this was going to be a chore, trimming 30 individual bulkheads, but it went very easily. I used an X-Acto chisel blade, followed by sanding to smooth it out. I only had one bulkhead (13, starboard) that seemed to have grain in the wrong direction for the chisel, so I sanded that one after only removing about 1/2 of the wood.
I used the chisel blade to mark the start of the angle on bulkheads 14 & 15, and first trimmed them down to that.
I made a "small sanding stick" as per instructions by cutting a 45º angle on a piece of scrap wood and supergluing some 100 grit sandpaper to it.
That dealt with the angles
The rest of them:
The rudder is up next.
Last edited:
Post 25 - Rudder and Inner Bulwarks
It's been too nice and too busy around here to spend much time in the shipyard, but I managed to make the rudder. My first attempt at fitting didn't go well:
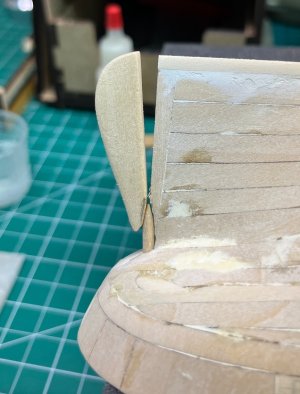
A little sanding and filing of the hole for the post got it to fit. It all seemed very tight, so I did an experiment with some of the cheesy copper plates I bought from China, to see if there was enough clearance for the copper tape. There seems to be:
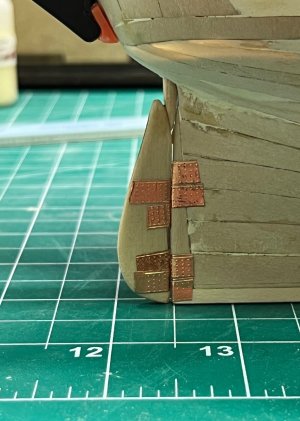
My experience doing that made me start to wonder if I should just paint the lower hull copper, rather than plating it. David Antscherl mentions in the instructions that at 1:96 the plating "would look out of scale." Not sure what that means, as you can get tape that is 4 mm (scale 15" - not too bad) but the idea may be right. It may look too fussy, and be a pain to install. I will continue to mull this over.
After the rudder I added the inner bulwarks. That went easily. The instructions don't specifically mention that you need to trim the stern bulkhead extension flush with the fillers, but I did. The two stern pieces bent very easily after soaking and some heat - much easier than I had feared. As I had raised the bulwarks by 3/32" to make the guns sit properly in the gun ports, I didn't need to worry about leaving space for the deck. I trimmed everything flush:
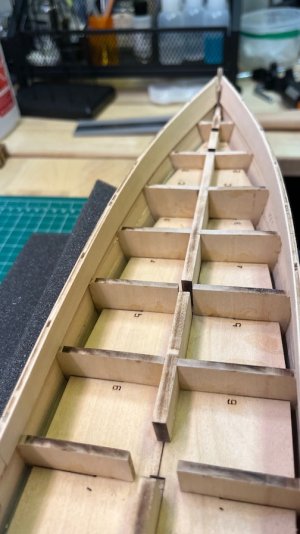
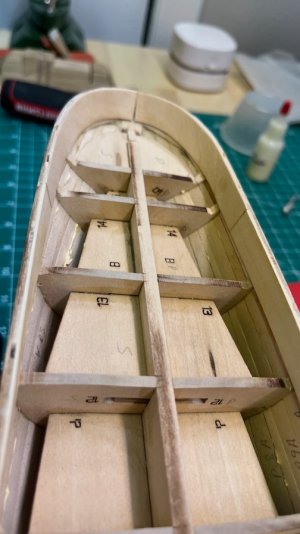
I also managed to cut one gun port.
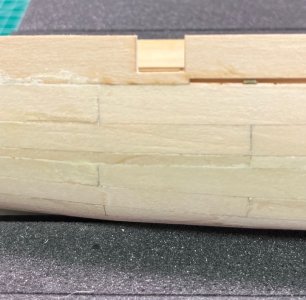
Only 11 left to go! Not sure why there are so many gun ports for so few guns.
It's been too nice and too busy around here to spend much time in the shipyard, but I managed to make the rudder. My first attempt at fitting didn't go well:
A little sanding and filing of the hole for the post got it to fit. It all seemed very tight, so I did an experiment with some of the cheesy copper plates I bought from China, to see if there was enough clearance for the copper tape. There seems to be:
My experience doing that made me start to wonder if I should just paint the lower hull copper, rather than plating it. David Antscherl mentions in the instructions that at 1:96 the plating "would look out of scale." Not sure what that means, as you can get tape that is 4 mm (scale 15" - not too bad) but the idea may be right. It may look too fussy, and be a pain to install. I will continue to mull this over.
After the rudder I added the inner bulwarks. That went easily. The instructions don't specifically mention that you need to trim the stern bulkhead extension flush with the fillers, but I did. The two stern pieces bent very easily after soaking and some heat - much easier than I had feared. As I had raised the bulwarks by 3/32" to make the guns sit properly in the gun ports, I didn't need to worry about leaving space for the deck. I trimmed everything flush:
I also managed to cut one gun port.
Only 11 left to go! Not sure why there are so many gun ports for so few guns.
- Joined
- Jun 29, 2024
- Messages
- 2,104
- Points
- 488

I have not ever done this BUT!
If you don’t plate the hull below the waterline you’ll have to somehow hide the planking and hope that it doesn’t reappear sometime later.
Instead of dealing with copper tape and the uncertainties of pressure sensitive adhesive why not plate the hull with paper. I would use high quality paper first coated with shellac. Plates are then glued to the hull with PVA adhesive. You can then paint the hull and even try some weathering techniques if you wish.
Roger
If you don’t plate the hull below the waterline you’ll have to somehow hide the planking and hope that it doesn’t reappear sometime later.
Instead of dealing with copper tape and the uncertainties of pressure sensitive adhesive why not plate the hull with paper. I would use high quality paper first coated with shellac. Plates are then glued to the hull with PVA adhesive. You can then paint the hull and even try some weathering techniques if you wish.
Roger


Tom, the inner bulwarks and rudder look great! Nicely done, Magic Mike
Post 26 - Quick Update
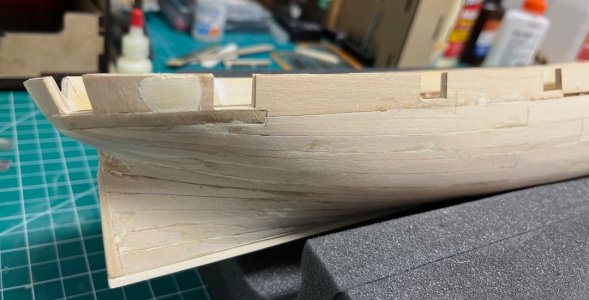
House guests and an upcoming family wedding have limited my modeling time, but I've managed to cut the starboard gun ports. I heeded the instructions and paid extra attention to the aft-most port. I cut the vertical lines and then cut out a V, which I could then saw into to work toward the sides.
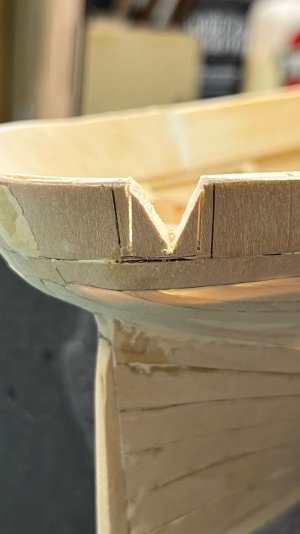
Some sanding finished them all up.
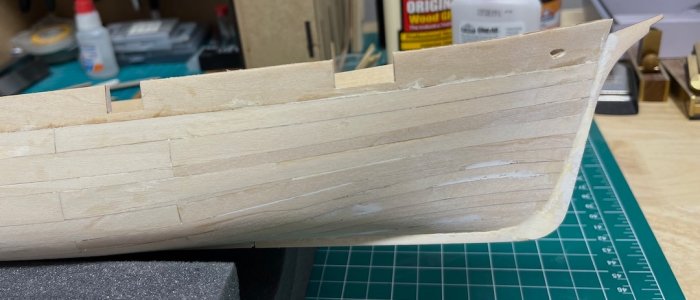
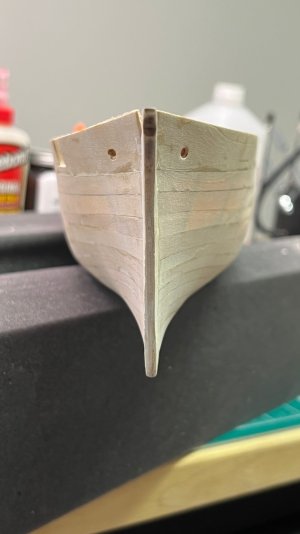
I also managed to get the over-sanded stem almost back to the proper width with a combination of glue, sawdust and Durham's putty.
That's it for now.
House guests and an upcoming family wedding have limited my modeling time, but I've managed to cut the starboard gun ports. I heeded the instructions and paid extra attention to the aft-most port. I cut the vertical lines and then cut out a V, which I could then saw into to work toward the sides.
Some sanding finished them all up.
I also managed to get the over-sanded stem almost back to the proper width with a combination of glue, sawdust and Durham's putty.
That's it for now.
Last edited:
Post 27 - Back in the Shipyard
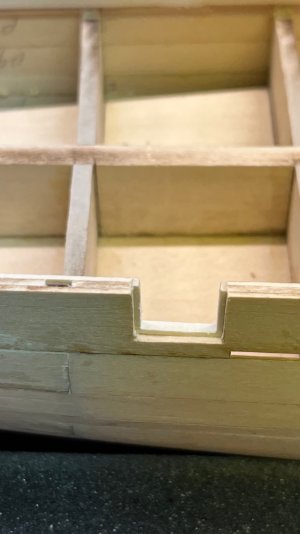
I have recovered sufficiently from 8 days of houseguests and my nephew's wedding to spend some quality time with Harriet Lane. I finished cutting the gun ports (much easier than it sounded) and added the port stops. The aft-most and longer forward ports do not have port covers included in the kit, and the pictures in the instructions look like they don't have port stops, so I left them off. Maybe they are not gun ports?
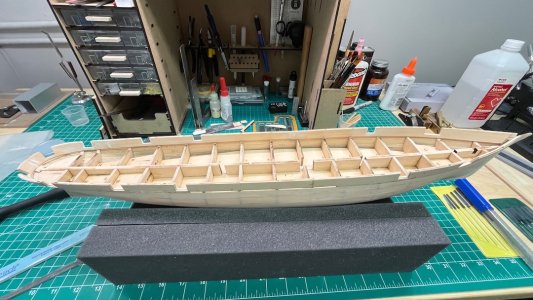
I then worked on the spirketting, which ChatGPT tells me may have been used instead of a waterway. If so, that will make planking the deck easier! I did it in three sections, as recommended. The fore and midships sections were a breeze, although I had to add a 1/32 x 1/32 strip below the aft inner bulwark to give enough wood for the spirketting to grip. Another unintended consequence of raising the bulkheads to accommodate the guns.
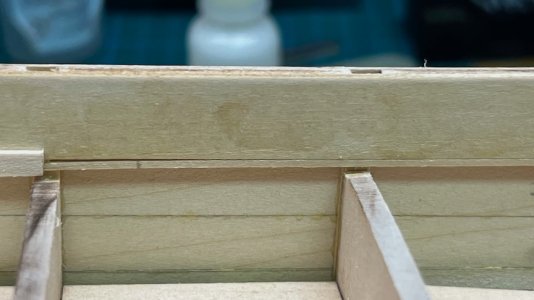
I made spacers by gluing a couple of strips of my extremely thin planking on pieces of extra wood from the sheet with the decks.
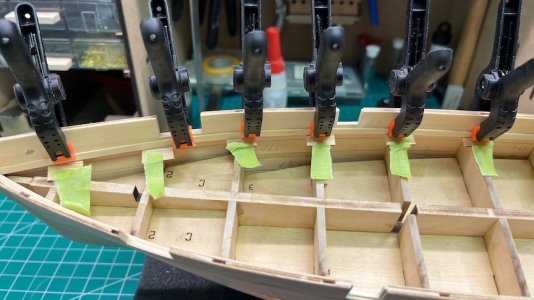
The starboard stern section went on easily, but the port side was really a bear for some reason. It just didn't want to bend as easily as the other piece, but finally succumbed.
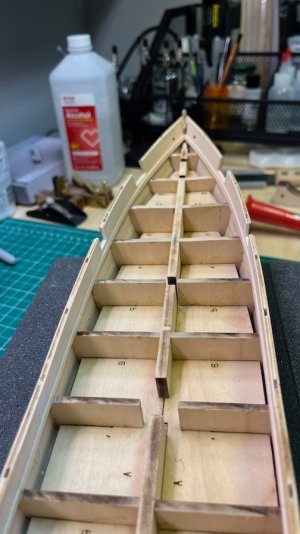
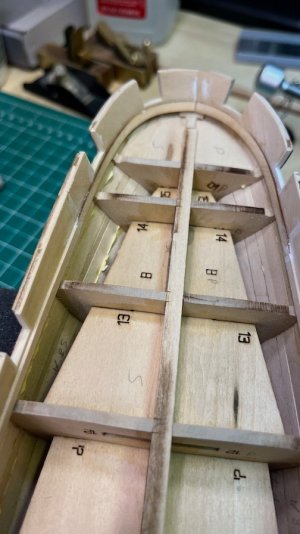
I used the two deck pieces to make sure everything was properly aligned. Couldn't resist a sneak peak of the deck in place.
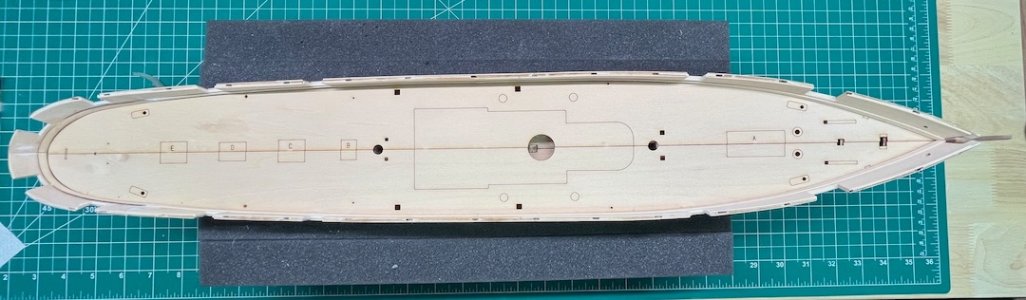
My initial plan was to plank the two halves of the deck before I installed them, but I now realize I will have to do it after they are in place, so I can cover the crack in the middle. A question for Chat GPT and the experts here: did US ships of this era have king planks?
Almost finished with the basic hull!
I have recovered sufficiently from 8 days of houseguests and my nephew's wedding to spend some quality time with Harriet Lane. I finished cutting the gun ports (much easier than it sounded) and added the port stops. The aft-most and longer forward ports do not have port covers included in the kit, and the pictures in the instructions look like they don't have port stops, so I left them off. Maybe they are not gun ports?
I then worked on the spirketting, which ChatGPT tells me may have been used instead of a waterway. If so, that will make planking the deck easier! I did it in three sections, as recommended. The fore and midships sections were a breeze, although I had to add a 1/32 x 1/32 strip below the aft inner bulwark to give enough wood for the spirketting to grip. Another unintended consequence of raising the bulkheads to accommodate the guns.
I made spacers by gluing a couple of strips of my extremely thin planking on pieces of extra wood from the sheet with the decks.
The starboard stern section went on easily, but the port side was really a bear for some reason. It just didn't want to bend as easily as the other piece, but finally succumbed.
I used the two deck pieces to make sure everything was properly aligned. Couldn't resist a sneak peak of the deck in place.
My initial plan was to plank the two halves of the deck before I installed them, but I now realize I will have to do it after they are in place, so I can cover the crack in the middle. A question for Chat GPT and the experts here: did US ships of this era have king planks?
Almost finished with the basic hull!
Post 28 - Port Holes
Before attaching the port holes, I flattened one of them to make a hawse hole trim, as per the instructions. It was too small for my hawse hole, so I made my own by bending some steel wire around the oval shape of my flat needle nose pliers. I thought the hawse holes should be a little more prominent, so I used thicker wire than what was provided for the port holes.
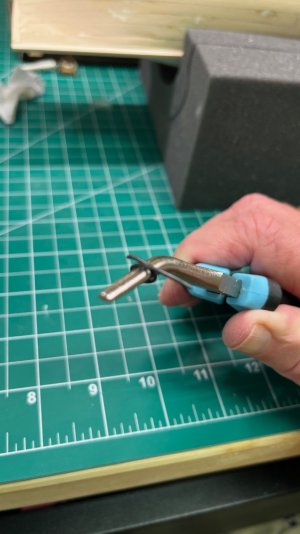
After cutting at the crossover, and a little manipulating, they looked pretty good.
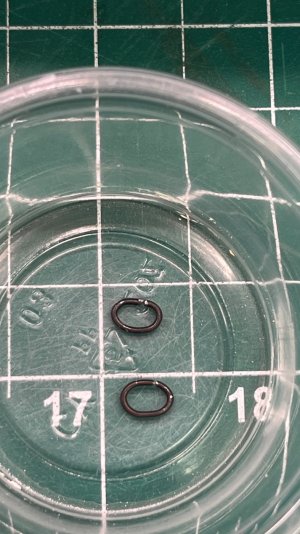
I used the template to mark the location of the port holes, and made a simple jig by taping a piece of scrap wood strip along the bottom of the circles to ascertain that the port holes would be in a striaght line.
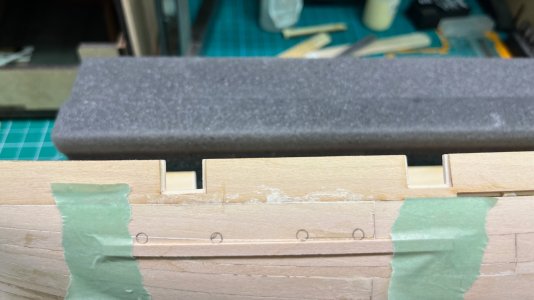
I used 5 minute epoxy to attach them, which gavee me time to adjust the location. The result:
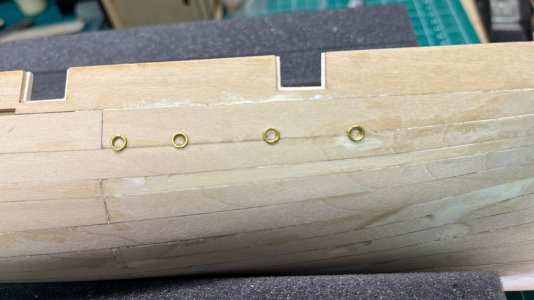
Here is my first attempt at the hawse holes
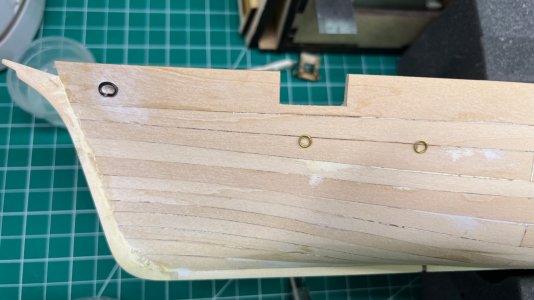
When I dry fitted the rub rails I realized my hawse holes were too thick - they interfered with the rub rails. Off they came, and I made a new set by the same method using thinner wire.
The instructions say the rub rails are 5/16th inch below the top of the bulkheads. That woould put them in the lower third of the gun ports, and in the middle of the hawse holes. Mine needed to be 6/16th inch below the top of the bulkheads to line up with the bottom edge of the gun ports. I glued the two fore portions, and then glued on the new hawse hole trims.
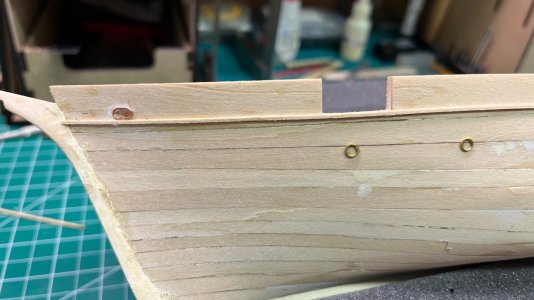
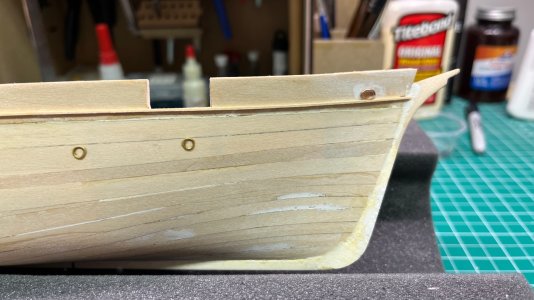
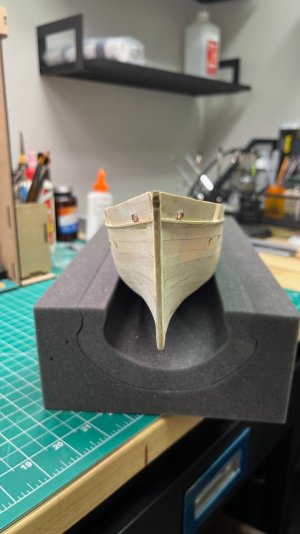
I will attempt to bend and attach the aft rub rail as one long piece tomorrow. The it's on to priming and painting.
Before attaching the port holes, I flattened one of them to make a hawse hole trim, as per the instructions. It was too small for my hawse hole, so I made my own by bending some steel wire around the oval shape of my flat needle nose pliers. I thought the hawse holes should be a little more prominent, so I used thicker wire than what was provided for the port holes.
After cutting at the crossover, and a little manipulating, they looked pretty good.
I used the template to mark the location of the port holes, and made a simple jig by taping a piece of scrap wood strip along the bottom of the circles to ascertain that the port holes would be in a striaght line.
I used 5 minute epoxy to attach them, which gavee me time to adjust the location. The result:
Here is my first attempt at the hawse holes
When I dry fitted the rub rails I realized my hawse holes were too thick - they interfered with the rub rails. Off they came, and I made a new set by the same method using thinner wire.
The instructions say the rub rails are 5/16th inch below the top of the bulkheads. That woould put them in the lower third of the gun ports, and in the middle of the hawse holes. Mine needed to be 6/16th inch below the top of the bulkheads to line up with the bottom edge of the gun ports. I glued the two fore portions, and then glued on the new hawse hole trims.
I will attempt to bend and attach the aft rub rail as one long piece tomorrow. The it's on to priming and painting.
Last edited:


Hi Tom, I don’t visit your log as often as I should but Miss Harriet looks great and I respect your perseverance with what seems to be a challenging kit. Well done!
Hi TomDavid Antscherl mentions in the instructions that at 1:96 the plating "would look out of scale." Not sure what that means, as you can get tape that is 4 mm (scale 15" - not too bad) but the idea may be right. It may look too fussy, and be a pain to install. I will continue to mull this over.
I think David's comment relates more to the "typical" individual plates that are available and sold in sheets. These are much too thick and have holes to represent the nails, which indeed is not representative of the real thing and very much out of scale. The pre-indented foil tape that you have looks very much like what I did manually and I believe gives a very good representation of the real thing, which is nails pounded in (not holes). At a foot or so away, these little dimples are not very visible, but definitely give the impression that the surface is not perfectly smooth. To add to that, the foil tape is incredibly thin and again is more to scale than the individual plates available out there.
As for the adhesive, I can vouch for it based on experience and you can certainly test for yourself. Just try to peel one off after you have firmly rubbed it into place. You'll find that they do not want to let go very easily and by the time you do get it off, you will have destroyed it.
Model is looking great by the way. Keep up the good work
Post 29 - Primed and Ready
Over the long weekend I managed to:
Add the stern part of the rub rail as one long piece
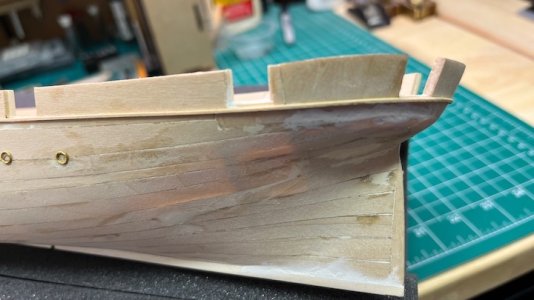
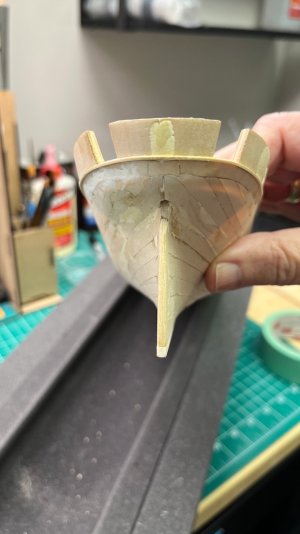
Apply the first coat of primer, which revealed lots of cracks between planks, but not a whole lot of lumpy-bumpies (a medical term) or depressions
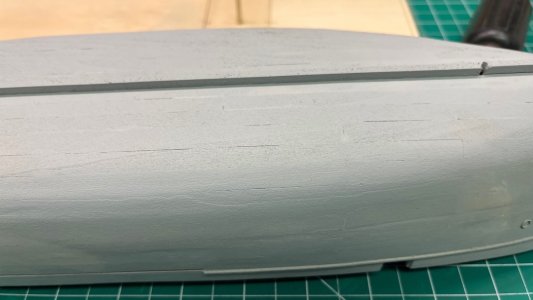
Fill with Durham's Putty
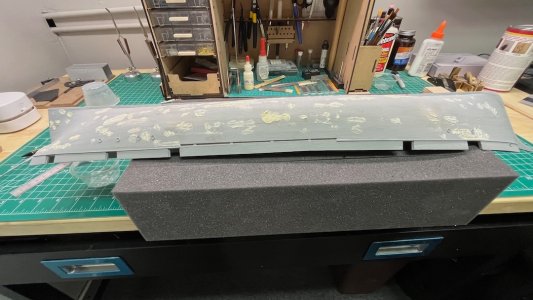
Re-sand and apply a second round of filler
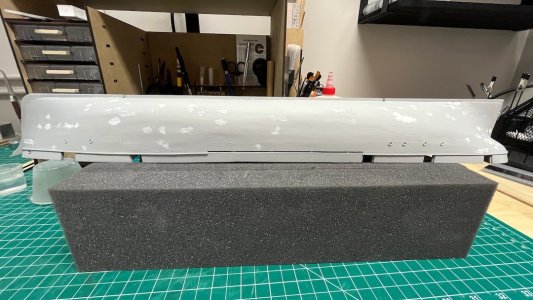
Then resand, apply a third round of filler, and sand again.
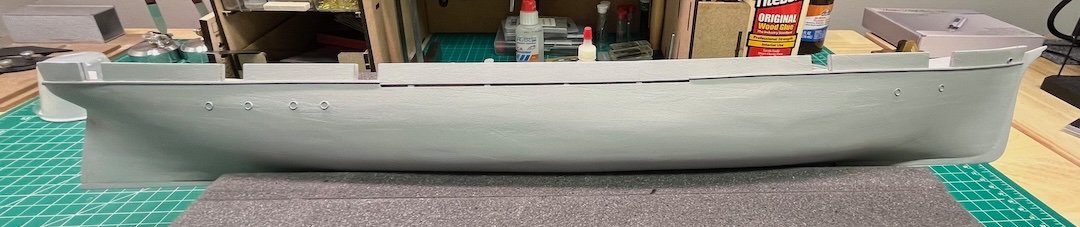

It's not perfect, but I think I'm done. I will look at it again tomorrow morning and decide if I want to do any more.
As the primer dried I worked on the stand. Model Expo-itis struck again, as keeping all the pieces symmetrical meant ignoring the marks you were supposed to line up:
The stand is not a thing of beauty, and I may replace it, but it somehow fits the model.
I think Harriet was a fan of The Mikado. Although she looks good from the side
She's "Got a Little List"
I'll need to fix that before I scribe the waterline!
Over the long weekend I managed to:
Add the stern part of the rub rail as one long piece
Apply the first coat of primer, which revealed lots of cracks between planks, but not a whole lot of lumpy-bumpies (a medical term) or depressions
Fill with Durham's Putty
Re-sand and apply a second round of filler
Then resand, apply a third round of filler, and sand again.
It's not perfect, but I think I'm done. I will look at it again tomorrow morning and decide if I want to do any more.
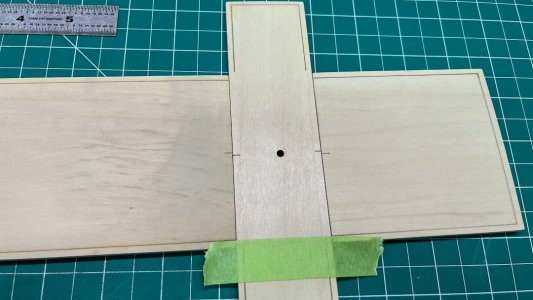
As the primer dried I worked on the stand. Model Expo-itis struck again, as keeping all the pieces symmetrical meant ignoring the marks you were supposed to line up:
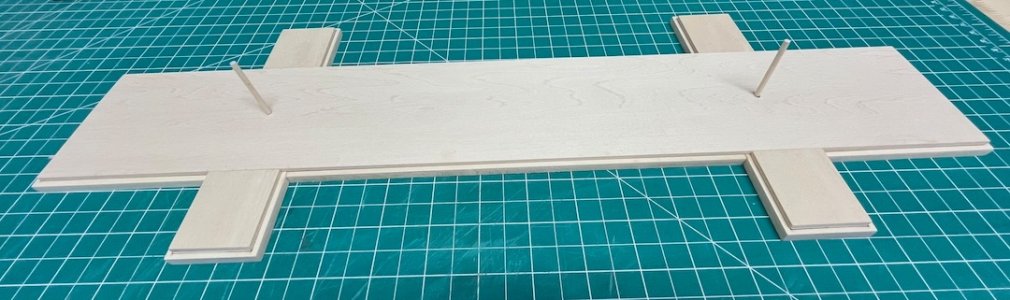
The stand is not a thing of beauty, and I may replace it, but it somehow fits the model.
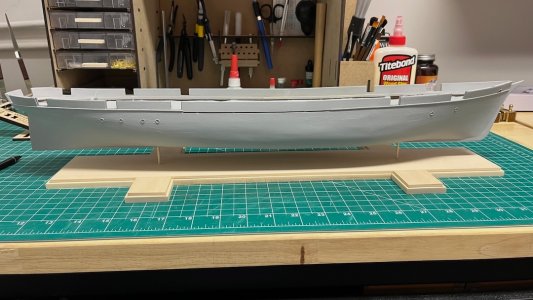
I think Harriet was a fan of The Mikado. Although she looks good from the side
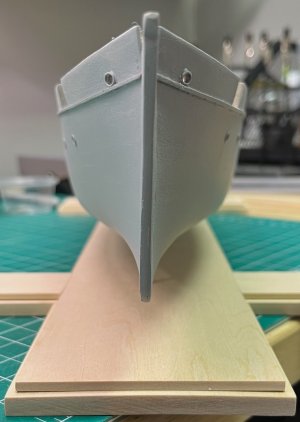
She's "Got a Little List"
I'll need to fix that before I scribe the waterline!
Nicely done Tom! Magic MikePost 29 - Primed and Ready
Over the long weekend I managed to:
Add the stern part of the rub rail as one long piece
View attachment 632855
View attachment 632856
Apply the first coat of primer, which revealed lots of cracks between planks, but not a whole lot of lumpy-bumpies (a medical term) or depressions
View attachment 632858
Fill with Durham's Putty
View attachment 632859
Re-sand and apply a second round of filler
View attachment 632860
Then resand, apply a third round of filler, and sand again.
View attachment 632863
View attachment 632864
It's not perfect, but I think I'm done. I will look at it again tomorrow morning and decide if I want to do any more.
As the primer dried I worked on the stand. Model Expo-itis struck again, as keeping all the pieces symmetrical meant ignoring the marks you were supposed to line up:
View attachment 632857
The stand is not a thing of beauty, and I may replace it, but it somehow fits the model.
View attachment 632861
I think Harriet was a fan of The Mikado. Although she looks good from the side
View attachment 632862
She's "Got a Little List"
View attachment 632865
I'll need to fix that before I scribe the waterline!
- Joined
- Jun 29, 2024
- Messages
- 2,104
- Points
- 488
Very nice
Thanks! I used Zinsser 1-2-3 oil-based primer in a rattle can from my local hardware store.Yes a very proffessional job, I envy your talent
I like your undercoat - what did you use ??
Post 30 - Third Time's the Charm
When I looked at the hull in the morning, I decided Harriet could use another round of filling and sanding, mainly around the port holes. I'm glad I did it, because I'm much happier with how she looked after a little more model-ship botox to smooth out her wrinkles.
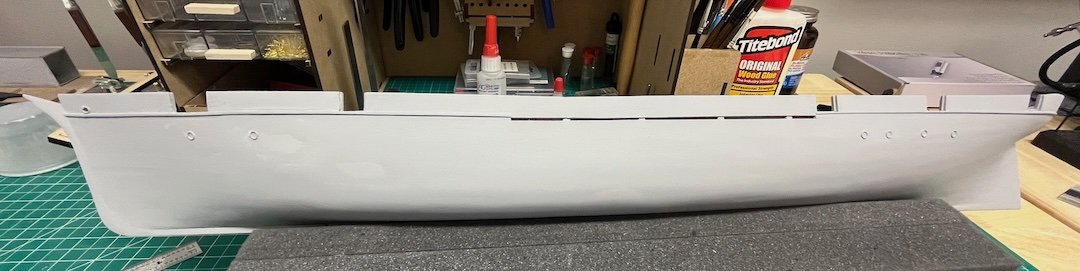
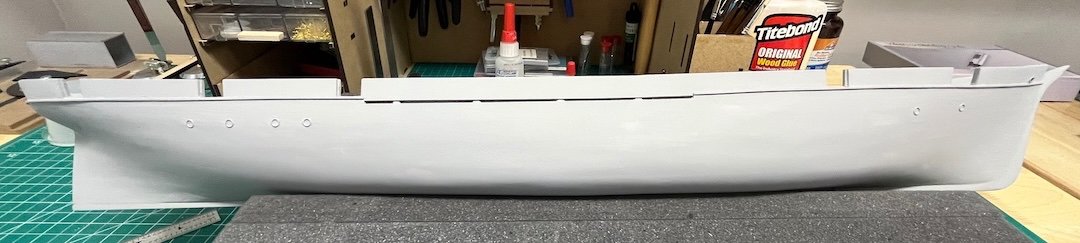
To any future readers who are building the Harriet Lane, I would add the port holes after finishing the sanding, filling and priming. It will make the whole process much easier. Sanding around those port holes was a challenge!
I hadn't yet glued the hull to the uprights, or the uprights to the base, so I dealt with her list by slightly enlarging the fore hole in the base, and shimming the upright.
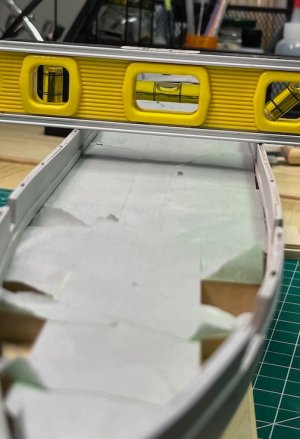
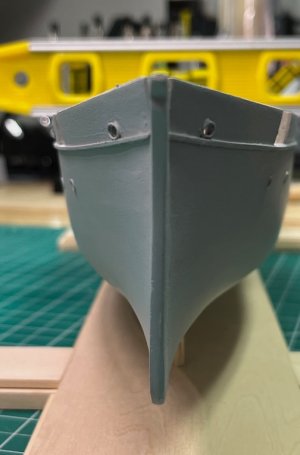
When I finally glue it all together I'll use 5 minute epoxy so I can fill the hole in the base and have time to get her level.
I used the waterline tool from my Lobster Smack kit to scribe the waterline. The first time I somehow mismeasured and made it 1/8" too high. The second time I got it exactly at the recommended 1.25" below the top of the bulwarks at midships.
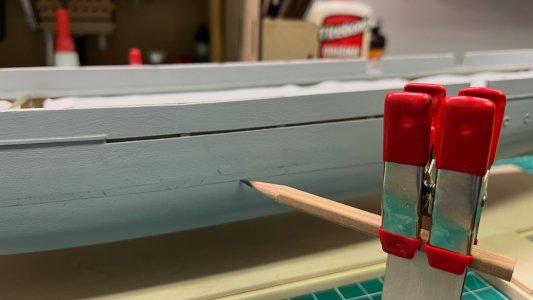
It looked a little high, compared to the instruction manual. It then dawned on me that I didn't account for the 3/32" that I had raised the bulwarks to deal with the gun issue. So the third time I scribed it 1&11/32 below the top of the bulwarks, and marked it with tape. The waterline is at the lower edge of the tape.
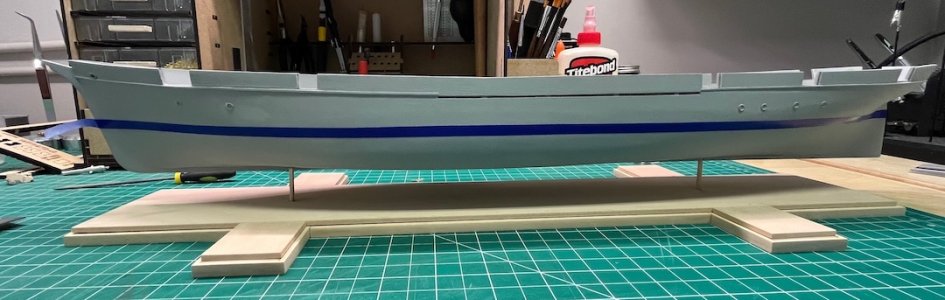
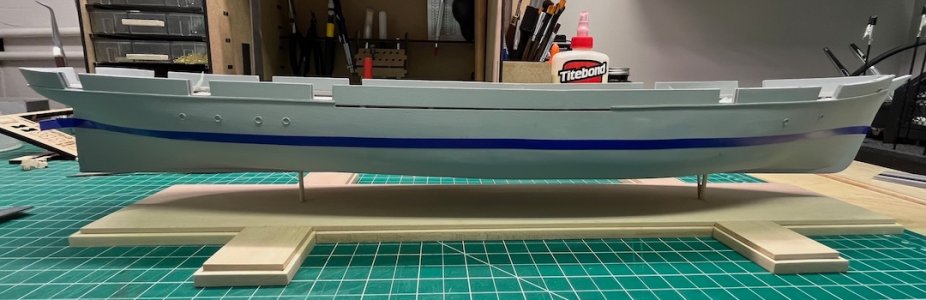
I raised the bow and stern slightly to overcome the perceived droop, starting where they both begin curving. I gave it a final check at viewing level where I might display the model.
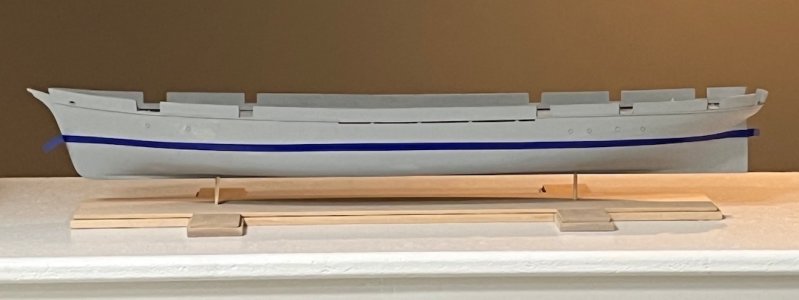
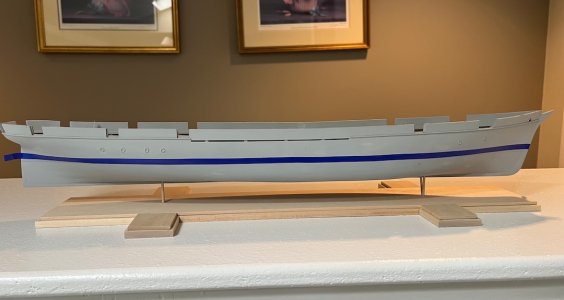
Now to decide on how to paint. I think I will start with the inner bulwarks, then paint the lower hull copper (to hide mistakes when I plate it) and then the topsides.
When I looked at the hull in the morning, I decided Harriet could use another round of filling and sanding, mainly around the port holes. I'm glad I did it, because I'm much happier with how she looked after a little more model-ship botox to smooth out her wrinkles.
To any future readers who are building the Harriet Lane, I would add the port holes after finishing the sanding, filling and priming. It will make the whole process much easier. Sanding around those port holes was a challenge!
I hadn't yet glued the hull to the uprights, or the uprights to the base, so I dealt with her list by slightly enlarging the fore hole in the base, and shimming the upright.
When I finally glue it all together I'll use 5 minute epoxy so I can fill the hole in the base and have time to get her level.
I used the waterline tool from my Lobster Smack kit to scribe the waterline. The first time I somehow mismeasured and made it 1/8" too high. The second time I got it exactly at the recommended 1.25" below the top of the bulwarks at midships.
It looked a little high, compared to the instruction manual. It then dawned on me that I didn't account for the 3/32" that I had raised the bulwarks to deal with the gun issue. So the third time I scribed it 1&11/32 below the top of the bulwarks, and marked it with tape. The waterline is at the lower edge of the tape.
I raised the bow and stern slightly to overcome the perceived droop, starting where they both begin curving. I gave it a final check at viewing level where I might display the model.
Now to decide on how to paint. I think I will start with the inner bulwarks, then paint the lower hull copper (to hide mistakes when I plate it) and then the topsides.
Post 31 - Bulwarks Painted
I painted the inner bulwarks by hand, using the recommended Model Expo white paint, thinned out with water.
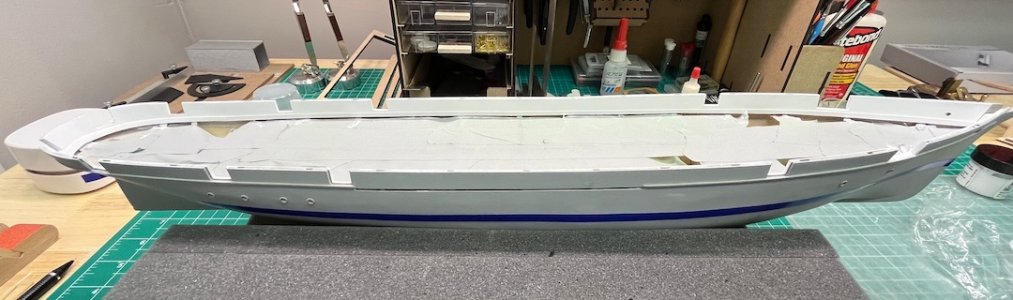
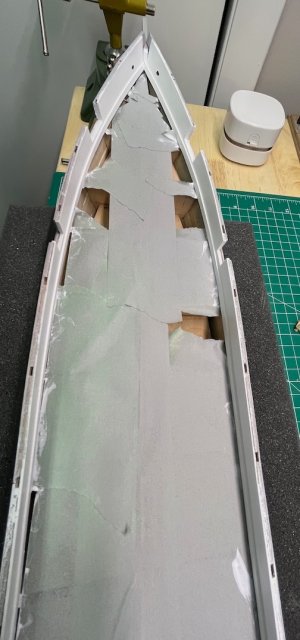
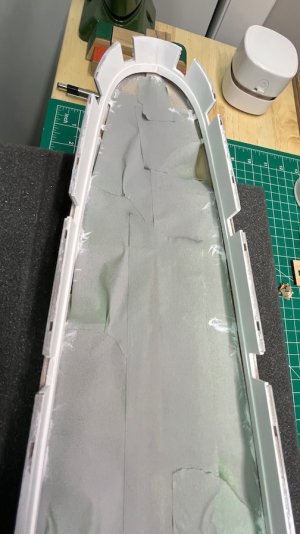
We're off on vacation for 2 weeks, so I'll post again at the end of the month, hopefully with a copper and black hull.
I painted the inner bulwarks by hand, using the recommended Model Expo white paint, thinned out with water.
We're off on vacation for 2 weeks, so I'll post again at the end of the month, hopefully with a copper and black hull.