
-

SUBSCRIBE TO SHIPS IN SCALE TODAY!
The beloved Ships in Scale Magazine is back and charting a new course for 2026!
Discover new skills, new techniques, and new inspirations in every issue.
NOTE THAT OUR NEXT ISSUE WILL BE July/August 2026 -

Win a Free Custom Engraved Brass Coin!!!
As a way to introduce our brass coins to the community, we will raffle off a free coin during the month of August. Follow link ABOVE for instructions for entering.


You are using an out of date browser. It may not display this or other websites correctly.
You should upgrade or use an alternative browser.
You should upgrade or use an alternative browser.
HMS Victory 1:72 - Caldercraft by Gilbertm
- Thread starter Gilbertm
- Start date
- Watchers 48
-
- Tags
- caldercraft jotika victory




Happy Birthday Gilbert!


A very happy birthday Gilbert.

Happy birthday, Gilbert! All the best to you on your special day!


THanks you PeterI want to wish you a Happy Birthday, Gilbert. enjoy this day!
Regards, Peter
I appreciate it
Cheers
A very happy birthday Gilbert.
Happy birthday, Gilbert! All the best to you on your special day!
Roger, Paul
Thanks to both of you
It does seem odd that the anchor and the anchor stock are parallel.
I thought the anchor stock was supposed to be attached at a 90-degree angle to the anchor.
If it’s according to the manual, then it’s probably fine.
It’s not really my place to say anything.
My apologies.
Many thanks to Mellpapa for noticing that I did not position correctlly the anchor stocks (90 degrees to the anchor)
I have now corrected this mistake.
Thanks again Mellpapa
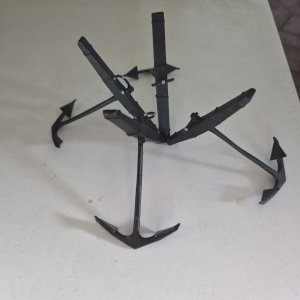
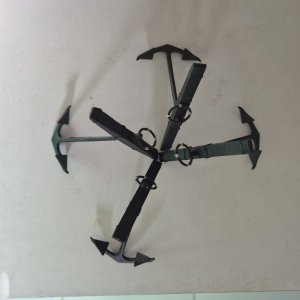
Cheers




Thanks MellpapaHello, Gilbertmd.
I fixed the position of the anchor stock, and it looks much better now.
When I first started building model sailboats, I made the same mistake.
Mistakes happen all the time.
Once again, happy birthday.
Cheers

Good morning Gilbert. Happy Birthday from a Sunny Cape Town. Cheers Grant
Thank you Grant from sunny Cote d'AzurGood morning Gilbert. Happy Birthday from a Sunny Cape Town. Cheers Grant

Cheers
Hello friends
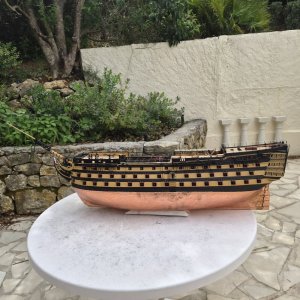
During the last I worked on the bowsprit.
First I have to say that the guidelines in the Caldercraft documentation and plans are very limited and not super helpful.
Luckily I leveraged several of the build logs on SoS (in particular Brian and Chris (Bri62 and Team118). Thanks to them.
I finally managed to assemble the bowsprit and Jibboom; pictures below
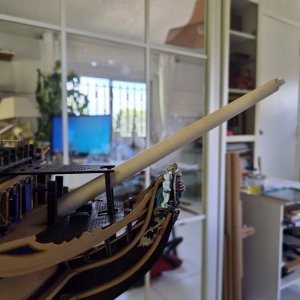
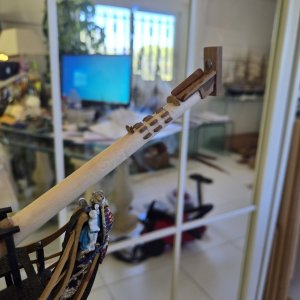
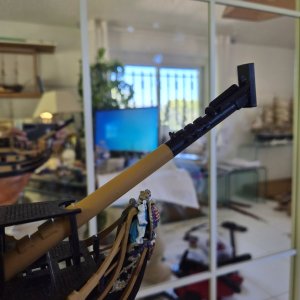
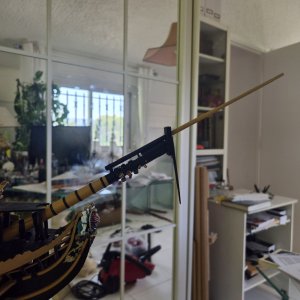
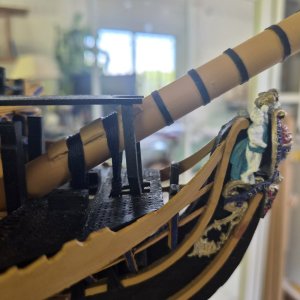
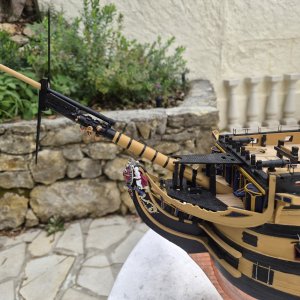
I am now going to start on the fore mast.
Cheers
During the last I worked on the bowsprit.
First I have to say that the guidelines in the Caldercraft documentation and plans are very limited and not super helpful.
Luckily I leveraged several of the build logs on SoS (in particular Brian and Chris (Bri62 and Team118). Thanks to them.
I finally managed to assemble the bowsprit and Jibboom; pictures below
I am now going to start on the fore mast.
Cheers

- Joined
- Oct 21, 2022
- Messages
- 323
- Points
- 278

Good Morning Gilbert and Happy Belated Birthday!
Been a minute since I've been on the site and you've been moving right along!!! VERY nice job so far.
Funny that I did the exact same thing with my anchors when I built them. I had to have someone on line point out they were backwards. I was so proud of how they looked...only to have to figure out a way to break them to turn the stocks! Thankfully it worked out ok!
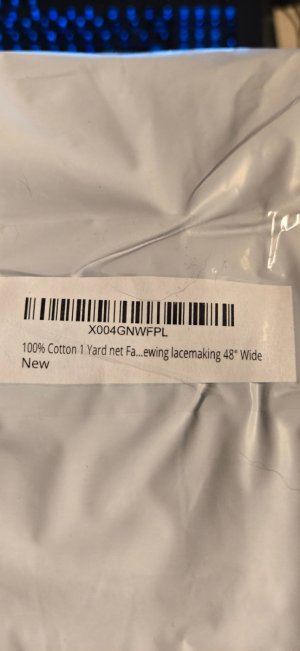
You mentioned starting the hammock netting. I had purchased several different types of lace/tuelle and found the item below that seemed to work perfectly.
If you cut it right, you can 'sew' it onto the horizontal ropes that are connected to the hammock brackets.
This took some time and do it now BEFORE you install any of the masts. As it is, you'll have to be carefule around the catheads, your lanterns and cannon lids. I knocked both catheads off twice.
It is tedious work, but worth it!
You've done a lot since March, great job.
Chris
![20241222_205427[1].jpg](https://shipsofscale.com/sosforums/data/attachments/618/618134-87c5d3879983c3ed909038019f6eb7ef.jpg?hash=Y-b4JhSYid "20241222_205427[1].jpg")
Been a minute since I've been on the site and you've been moving right along!!! VERY nice job so far.
Funny that I did the exact same thing with my anchors when I built them. I had to have someone on line point out they were backwards. I was so proud of how they looked...only to have to figure out a way to break them to turn the stocks! Thankfully it worked out ok!
You mentioned starting the hammock netting. I had purchased several different types of lace/tuelle and found the item below that seemed to work perfectly.
If you cut it right, you can 'sew' it onto the horizontal ropes that are connected to the hammock brackets.
This took some time and do it now BEFORE you install any of the masts. As it is, you'll have to be carefule around the catheads, your lanterns and cannon lids. I knocked both catheads off twice.
It is tedious work, but worth it!
You've done a lot since March, great job.
Chris
Hi ChrisGood Morning Gilbert and Happy Belated Birthday!
Been a minute since I've been on the site and you've been moving right along!!! VERY nice job so far.
Funny that I did the exact same thing with my anchors when I built them. I had to have someone on line point out they were backwards. I was so proud of how they looked...only to have to figure out a way to break them to turn the stocks! Thankfully it worked out ok!
You mentioned starting the hammock netting. I had purchased several different types of lace/tuelle and found the item below that seemed to work perfectly.
If you cut it right, you can 'sew' it onto the horizontal ropes that are connected to the hammock brackets.
This took some time and do it now BEFORE you install any of the masts. As it is, you'll have to be carefule around the catheads, your lanterns and cannon lids. I knocked both catheads off twice.
It is tedious work, but worth it!
You've done a lot since March, great job.
Chris
View attachment 634355
View attachment 634356
Thanks for your feedback and for your birthday wish
I have slightly postponed the netting and have started on the fore mast.
I have found several options for the netting and shall try as soon as I have completed the fore mast. But I'll definitely follow your advice and shall install the netting before installing the mast.
The picture you show for the netting is indeed quite nice. Where did you get this material? Amazon? Aliexpress? Can you please send me the link
Cheers
Last edited:
- Joined
- Oct 21, 2022
- Messages
- 323
- Points
- 278
Amazon.com: 100% Cotton 1 Yard net Fabric for Sewing lacemaking 48" Wide : Arts, Crafts & Sewing
Amazon.com: 100% Cotton 1 Yard net Fabric for Sewing lacemaking 48" Wide : Arts, Crafts & Sewing
www.amazon.com
Here is the link for where I bought the lace netting. It is cotton so you can also dye it to suit your ideal color.
Thanks ChrisAmazon.com: 100% Cotton 1 Yard net Fabric for Sewing lacemaking 48" Wide : Arts, Crafts & Sewing
Amazon.com: 100% Cotton 1 Yard net Fabric for Sewing lacemaking 48" Wide : Arts, Crafts & Sewingwww.amazon.com
Here is the link for where I bought the lace netting. It is cotton so you can also dye it to suit your ideal color.
I'll give it a try
Hello friends
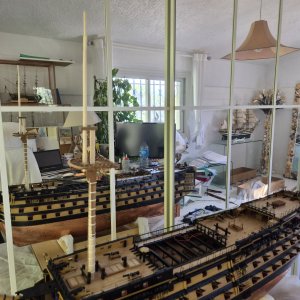
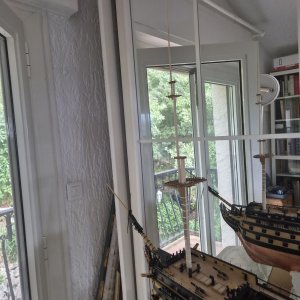
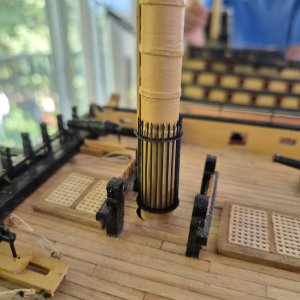
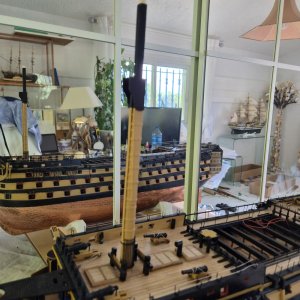
I have not been very active posting my progress during the last 2 weeks.
I was busy building the foremast and wanted to wait for its completion before showing the results.
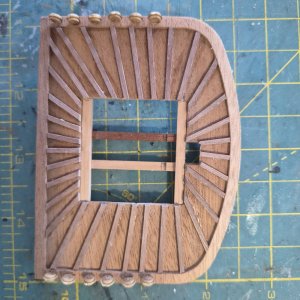
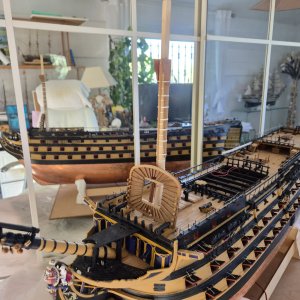
This is now achieved and I have just finished the foremast (it took me about 2 weeks elapse time).
A couple of points worth mentioning:
- I did not use the blocks provided by Caldercraft but used pearwood/walnut blocks from either drydocks or from HIS (based in Czech Republic)' I felt that the Calderfraft blocks were not high quality. However, I used the Caldercraft deadeyes.
- I did not use 3mm blocks as mentioned in the plans but rather 4mm blocks, By the way, the 3mm blocks that Caldercraft included were in fact 4mm.
- I have mounted the 3 parts of the fore mast (lower mast, topmast and Topgallant mast) but did not glue them yet. This allows me to make adjustments if required later on.
Below some pictures:
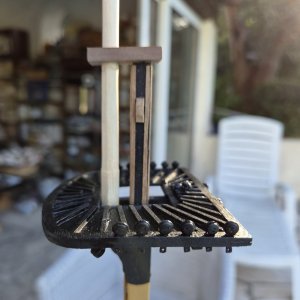
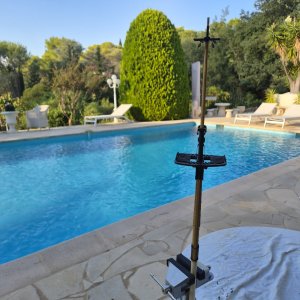
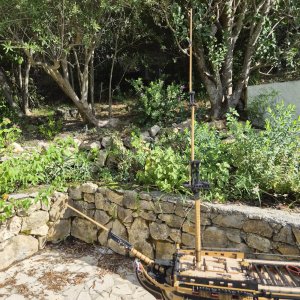
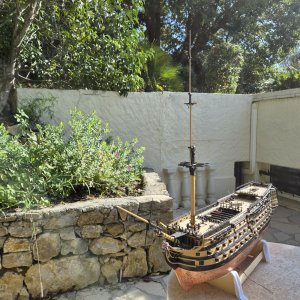
Let me know get started with the main mast, which I expect to be very much the same
Cheers
I have not been very active posting my progress during the last 2 weeks.
I was busy building the foremast and wanted to wait for its completion before showing the results.
This is now achieved and I have just finished the foremast (it took me about 2 weeks elapse time).
A couple of points worth mentioning:
- I did not use the blocks provided by Caldercraft but used pearwood/walnut blocks from either drydocks or from HIS (based in Czech Republic)' I felt that the Calderfraft blocks were not high quality. However, I used the Caldercraft deadeyes.
- I did not use 3mm blocks as mentioned in the plans but rather 4mm blocks, By the way, the 3mm blocks that Caldercraft included were in fact 4mm.
- I have mounted the 3 parts of the fore mast (lower mast, topmast and Topgallant mast) but did not glue them yet. This allows me to make adjustments if required later on.
Below some pictures:
Let me know get started with the main mast, which I expect to be very much the same
Cheers